One of the most exciting additions to iOS 12 for iPhones is called Shortcuts, a tool integrated with Siri to help you get things done faster. While there are a few recommended shortcuts available to you in Siri's settings in iOS 12, the Shortcuts app brings the functionality of Workflow to Siri so you can build your own custom actions or select from the gallery of available shortcuts.
By default, the Shortcuts app is not installed automatically after updating to iOS 12 unless you already had the Workflow app, which would be taken over. If you didn't already have Workflow on your iPhone, you can install Shortcuts from the iOS App Store for free from Apple.
- Don't Miss: 200+ Exciting New iOS 13 Features for iPhone
If you want to jump to a particular section, you can do so right here:
- Starting with the Shortcuts App
- Choosing a Shortcut from the Gallery
- Granting Access (If Necessary)
- Configuring the Shortcut
- Using Your New Shortcut
- Adding & Using the Shortcuts Widget (Optional)
- Customizing Your Shortcut (Optional)
- Changing Your Shortcut's Settings (Optional)
- Adding a Shortcut to Your Home Screen (Optional)
- Changing Your Shortcut's Name & Icon (Optional)
- Creating a Custom Siri Phrase for Your Shortcut (Optional)
- Adding a Share Sheet Shortcut (Optional)
Step 1: Start with the Shortcuts App
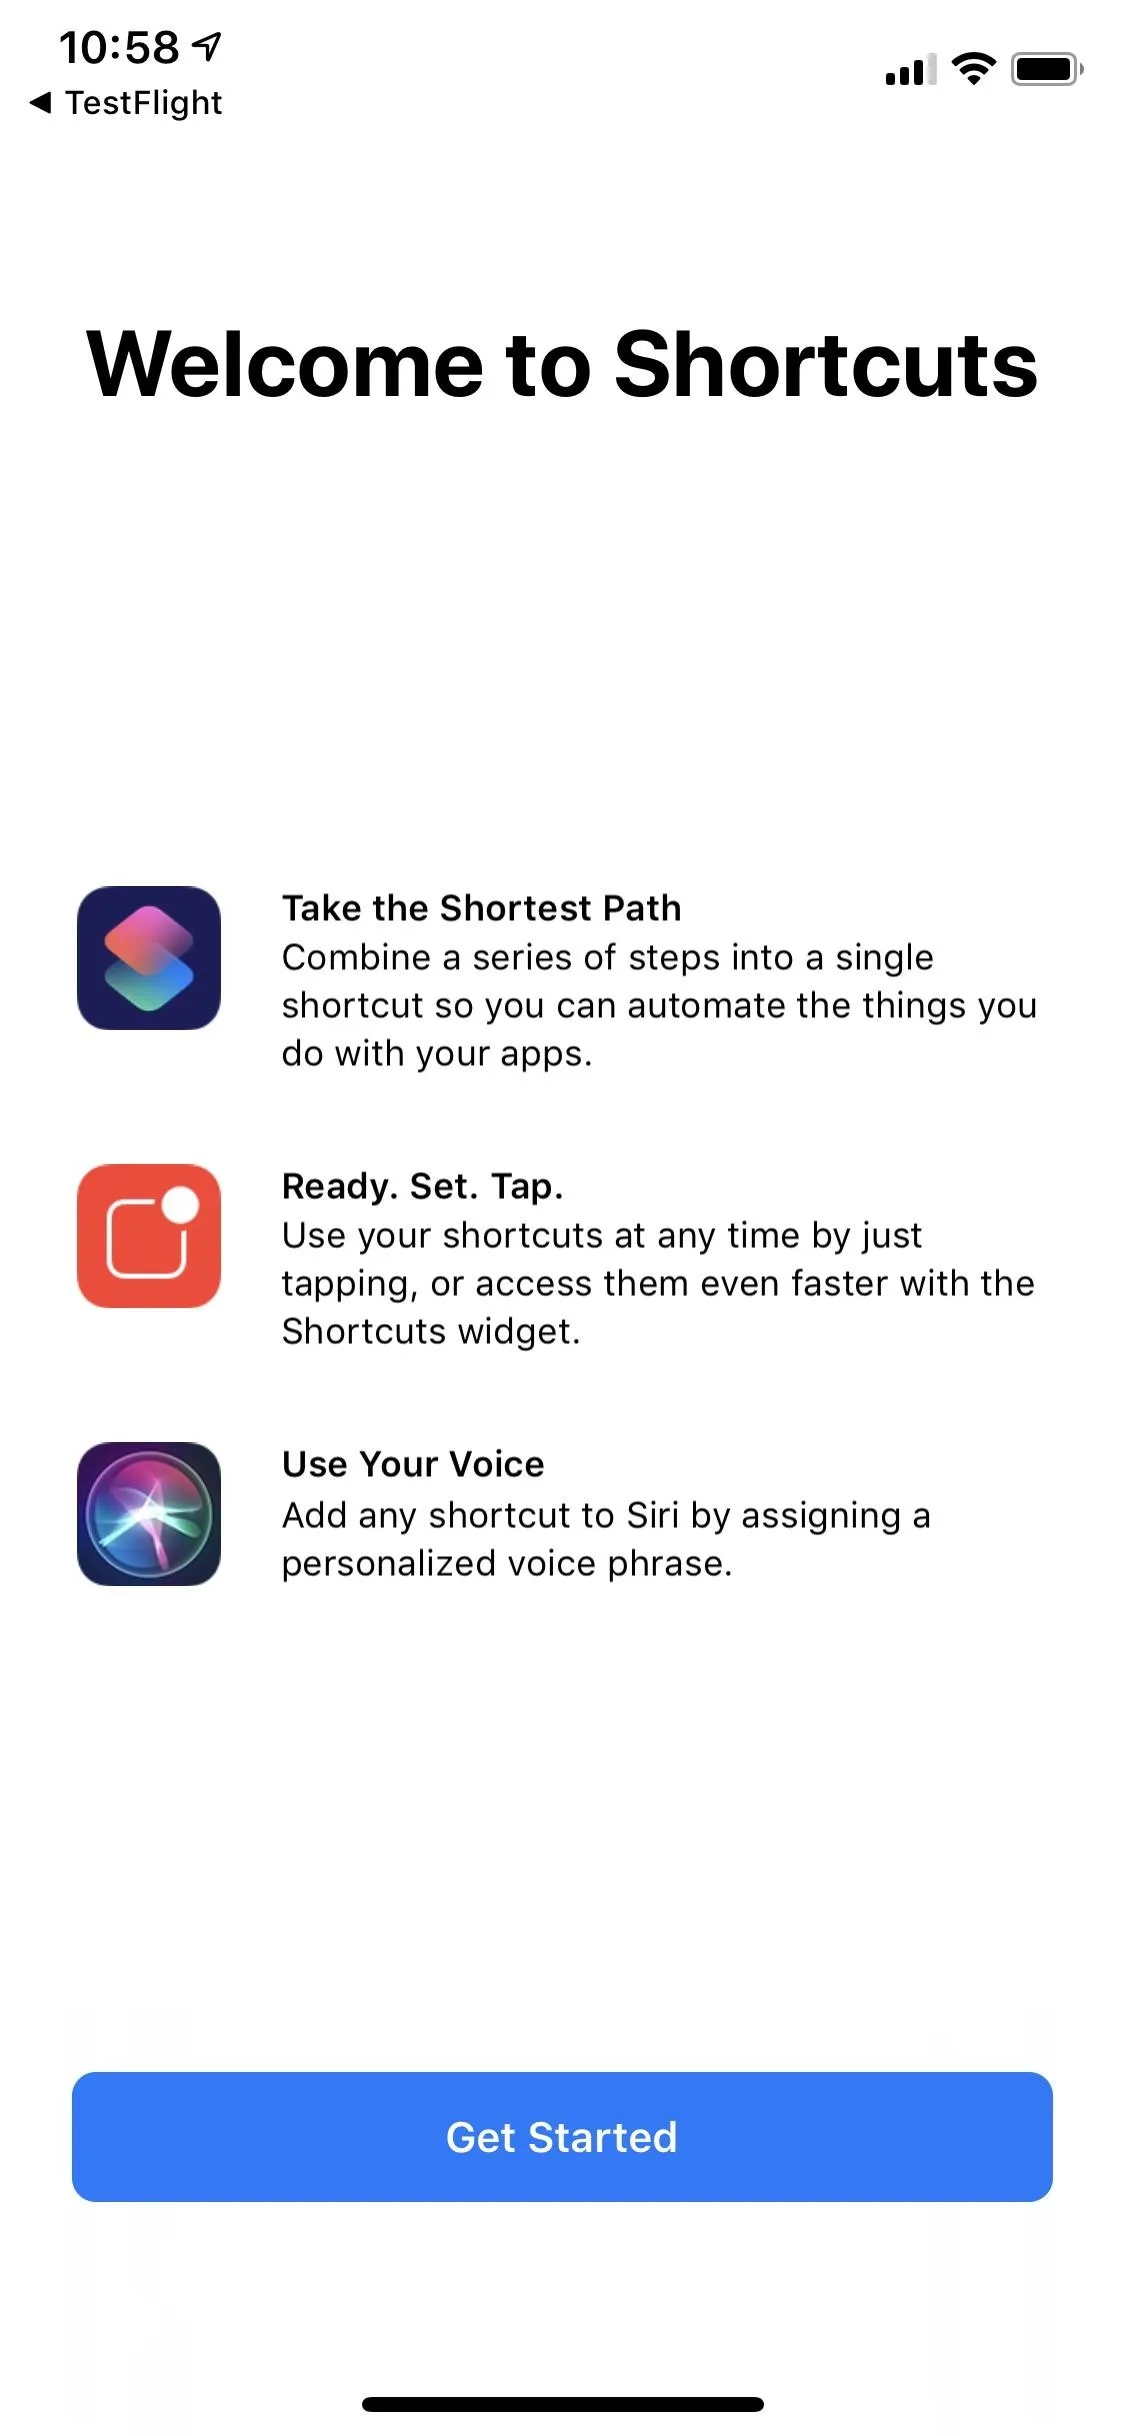
If you've ever used Workflow to automate tasks, whether you've just chosen workflows from the galleries or created your own, you'll feel right at home in Shortcuts. As soon as you open the app and bypass the welcome screen, you'll see that it looks exactly like Workflow's interface. Plus, if you have any workflows on your iPhone already, they will show up in your Library in the Shortcuts app.
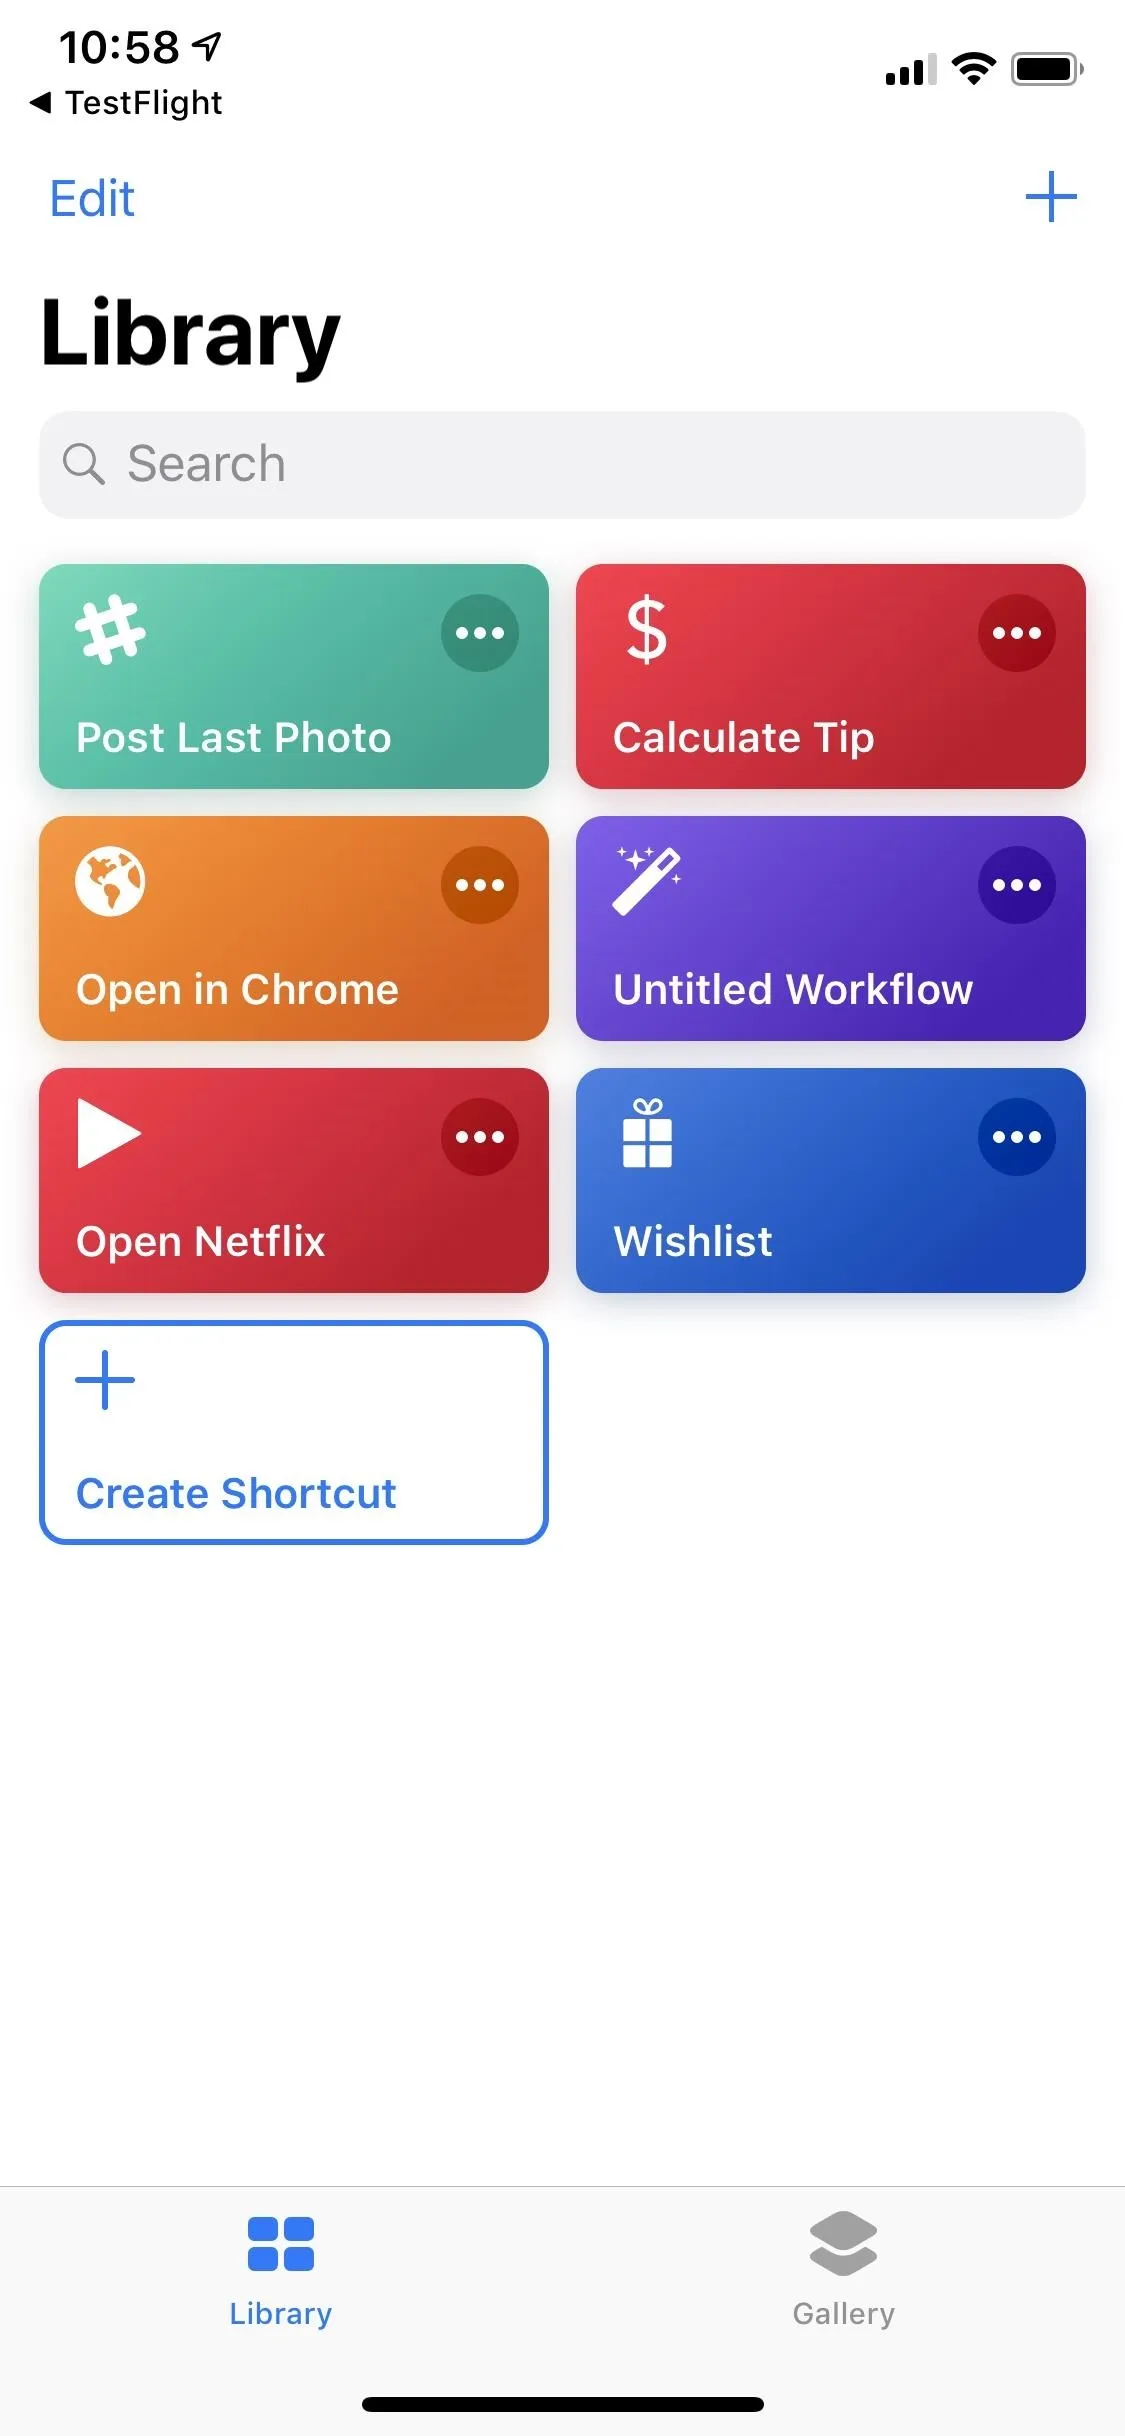


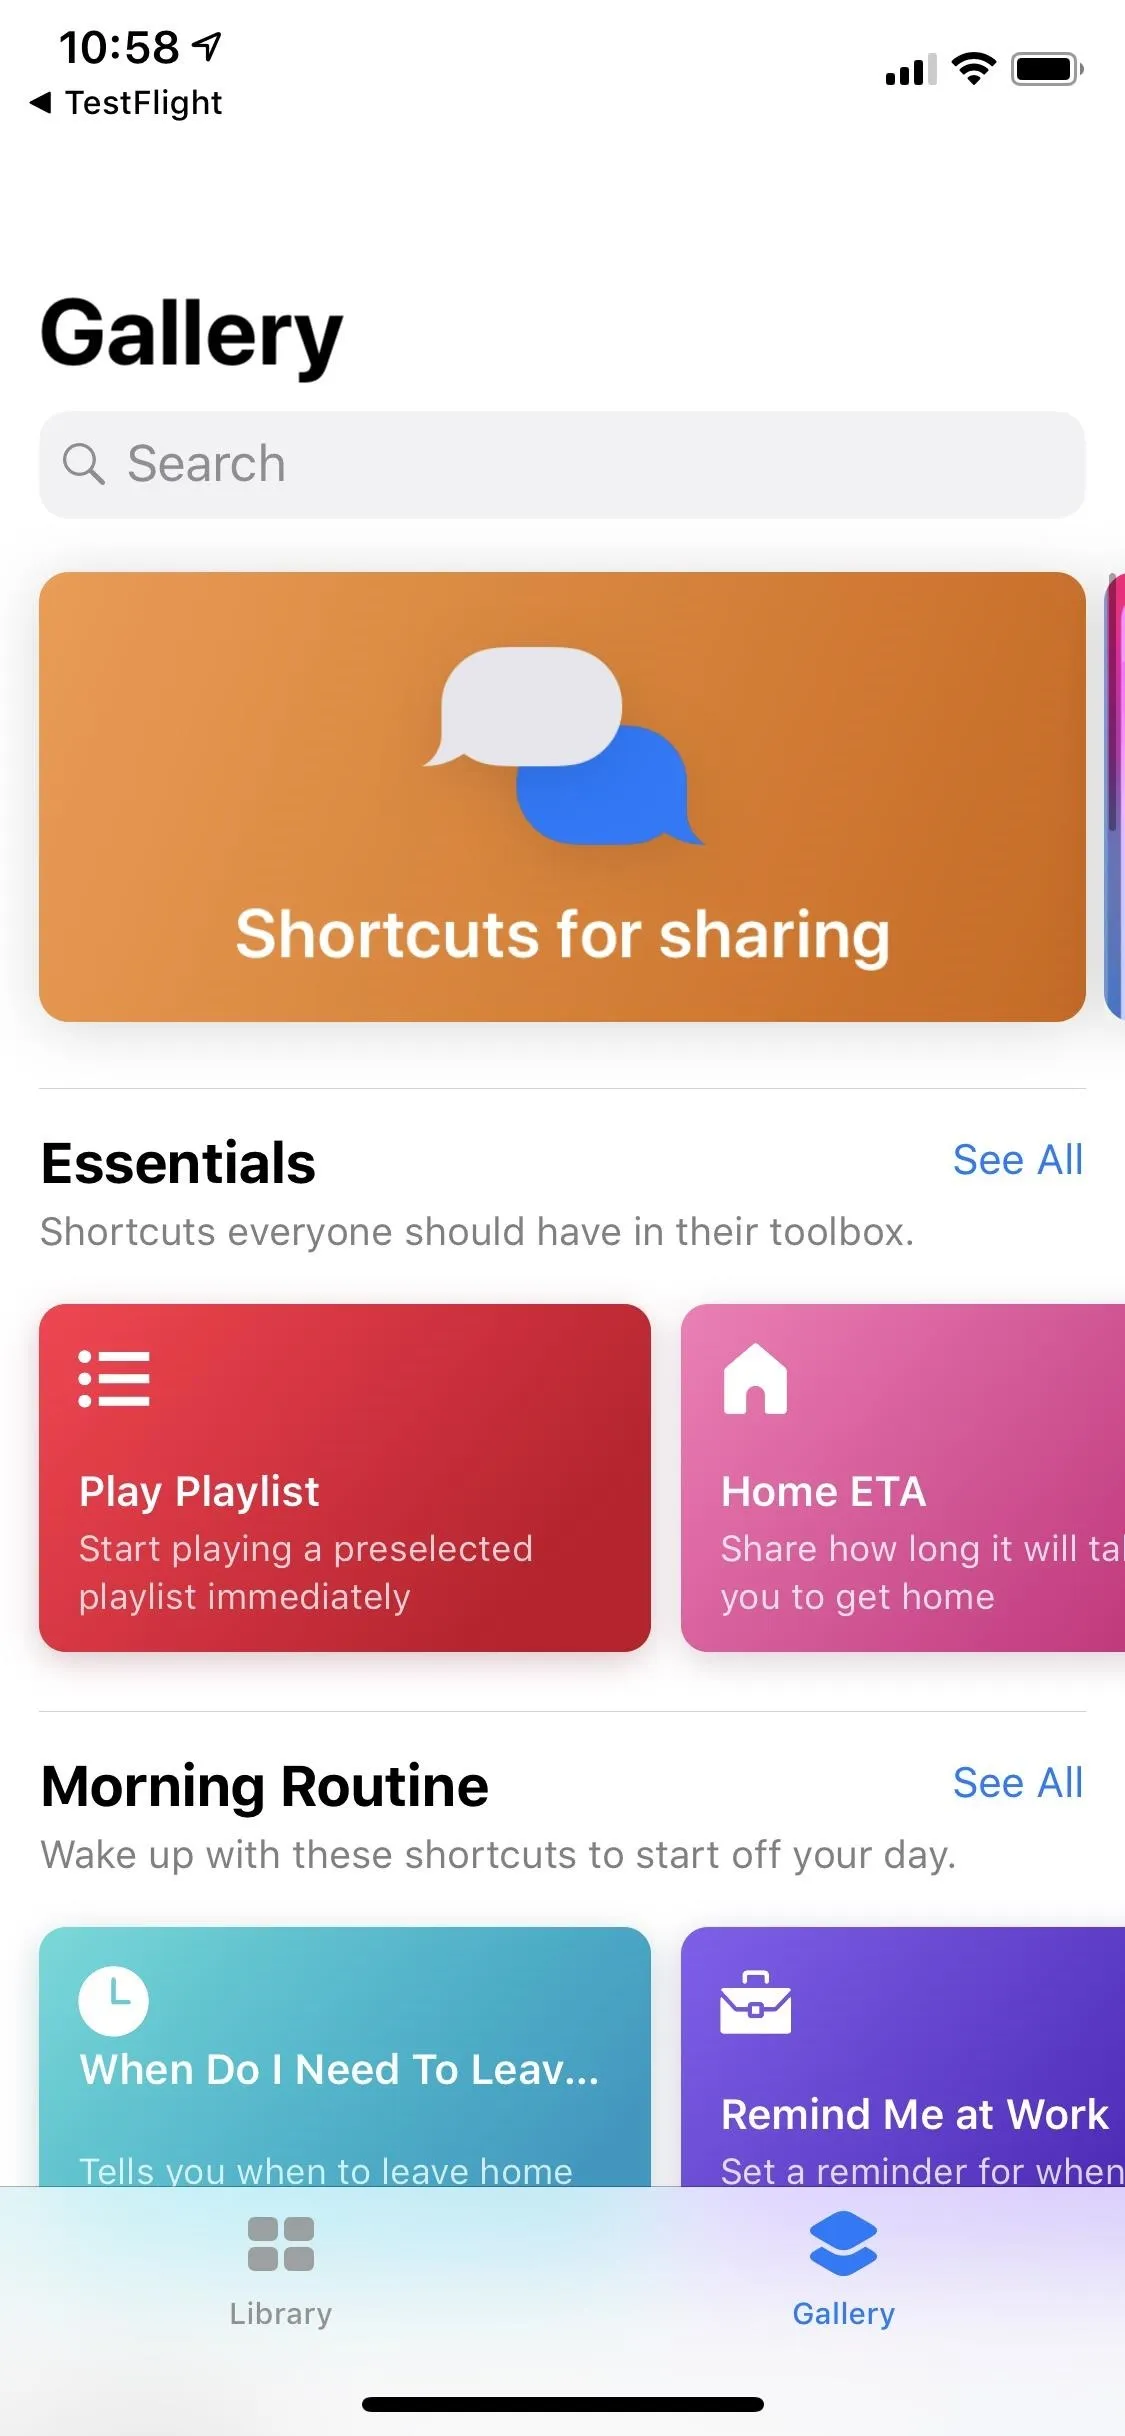
If you've never really played around with Workflow before, the "Gallery" tab is the best place to be. Here, you'll see all of the available workflows you can use right now, which numbers over 300 workflows, and after installing a few and seeing how they work, they'll give you a better idea how to create your own workflows and shortcuts.
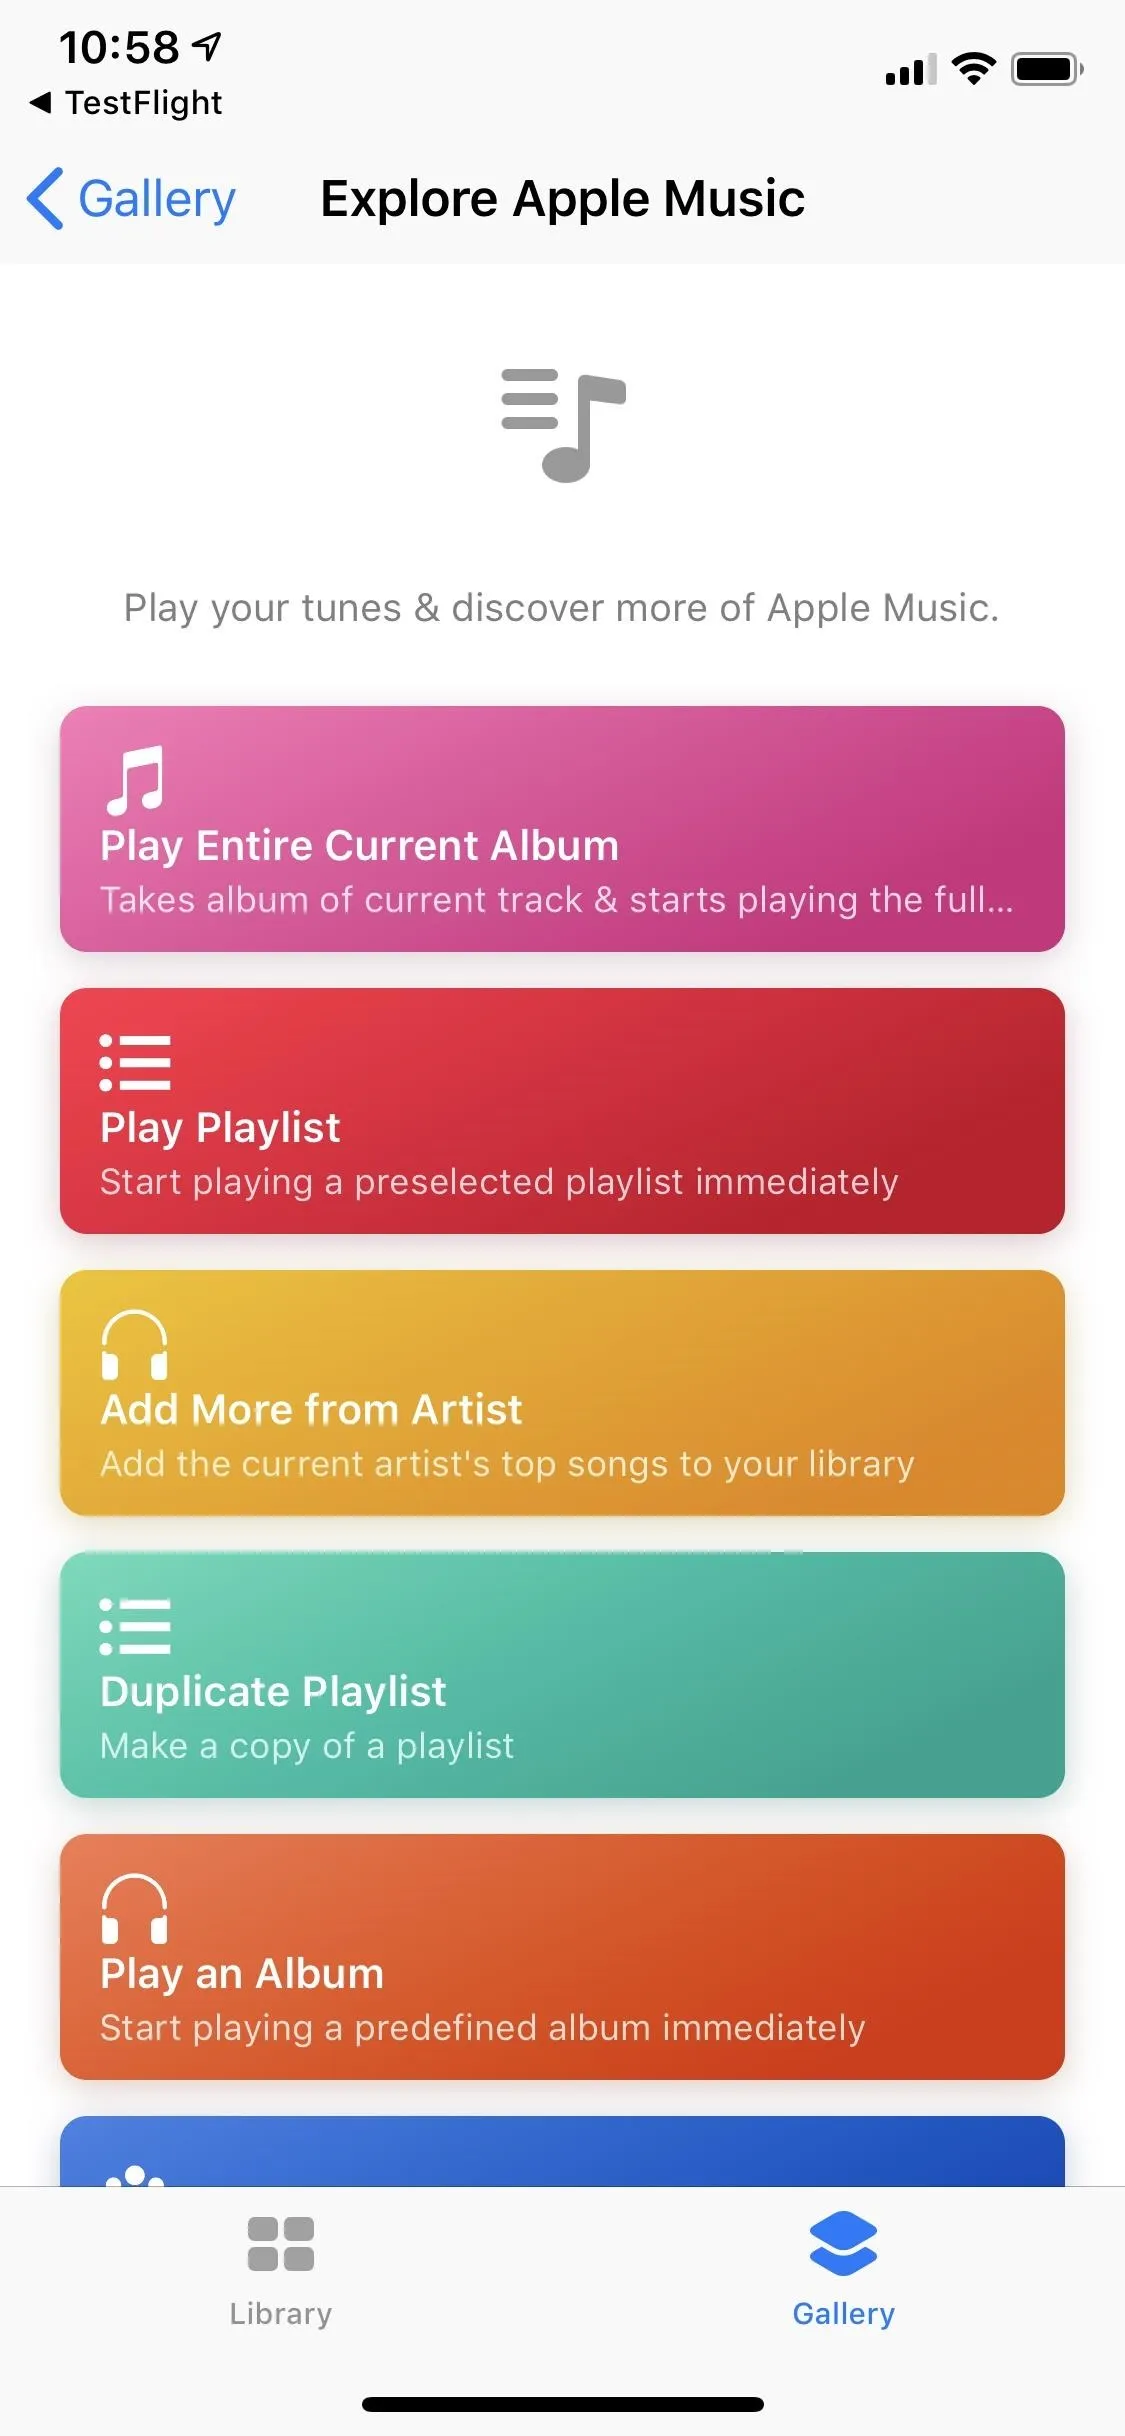
Apple provides collections of similar workflows in categories such as Essentials, Morning Routine, iPhone X, Featured, Explore Apple Music, Read It Later, Photography, and the list just keeps going. These seem to be the same as the collections and workflows that are available in the Workflow app, indicating that the Workflow app itself might disappear when iOS 12 is released in September.


Step 2: Choose a Shortcut from the Gallery
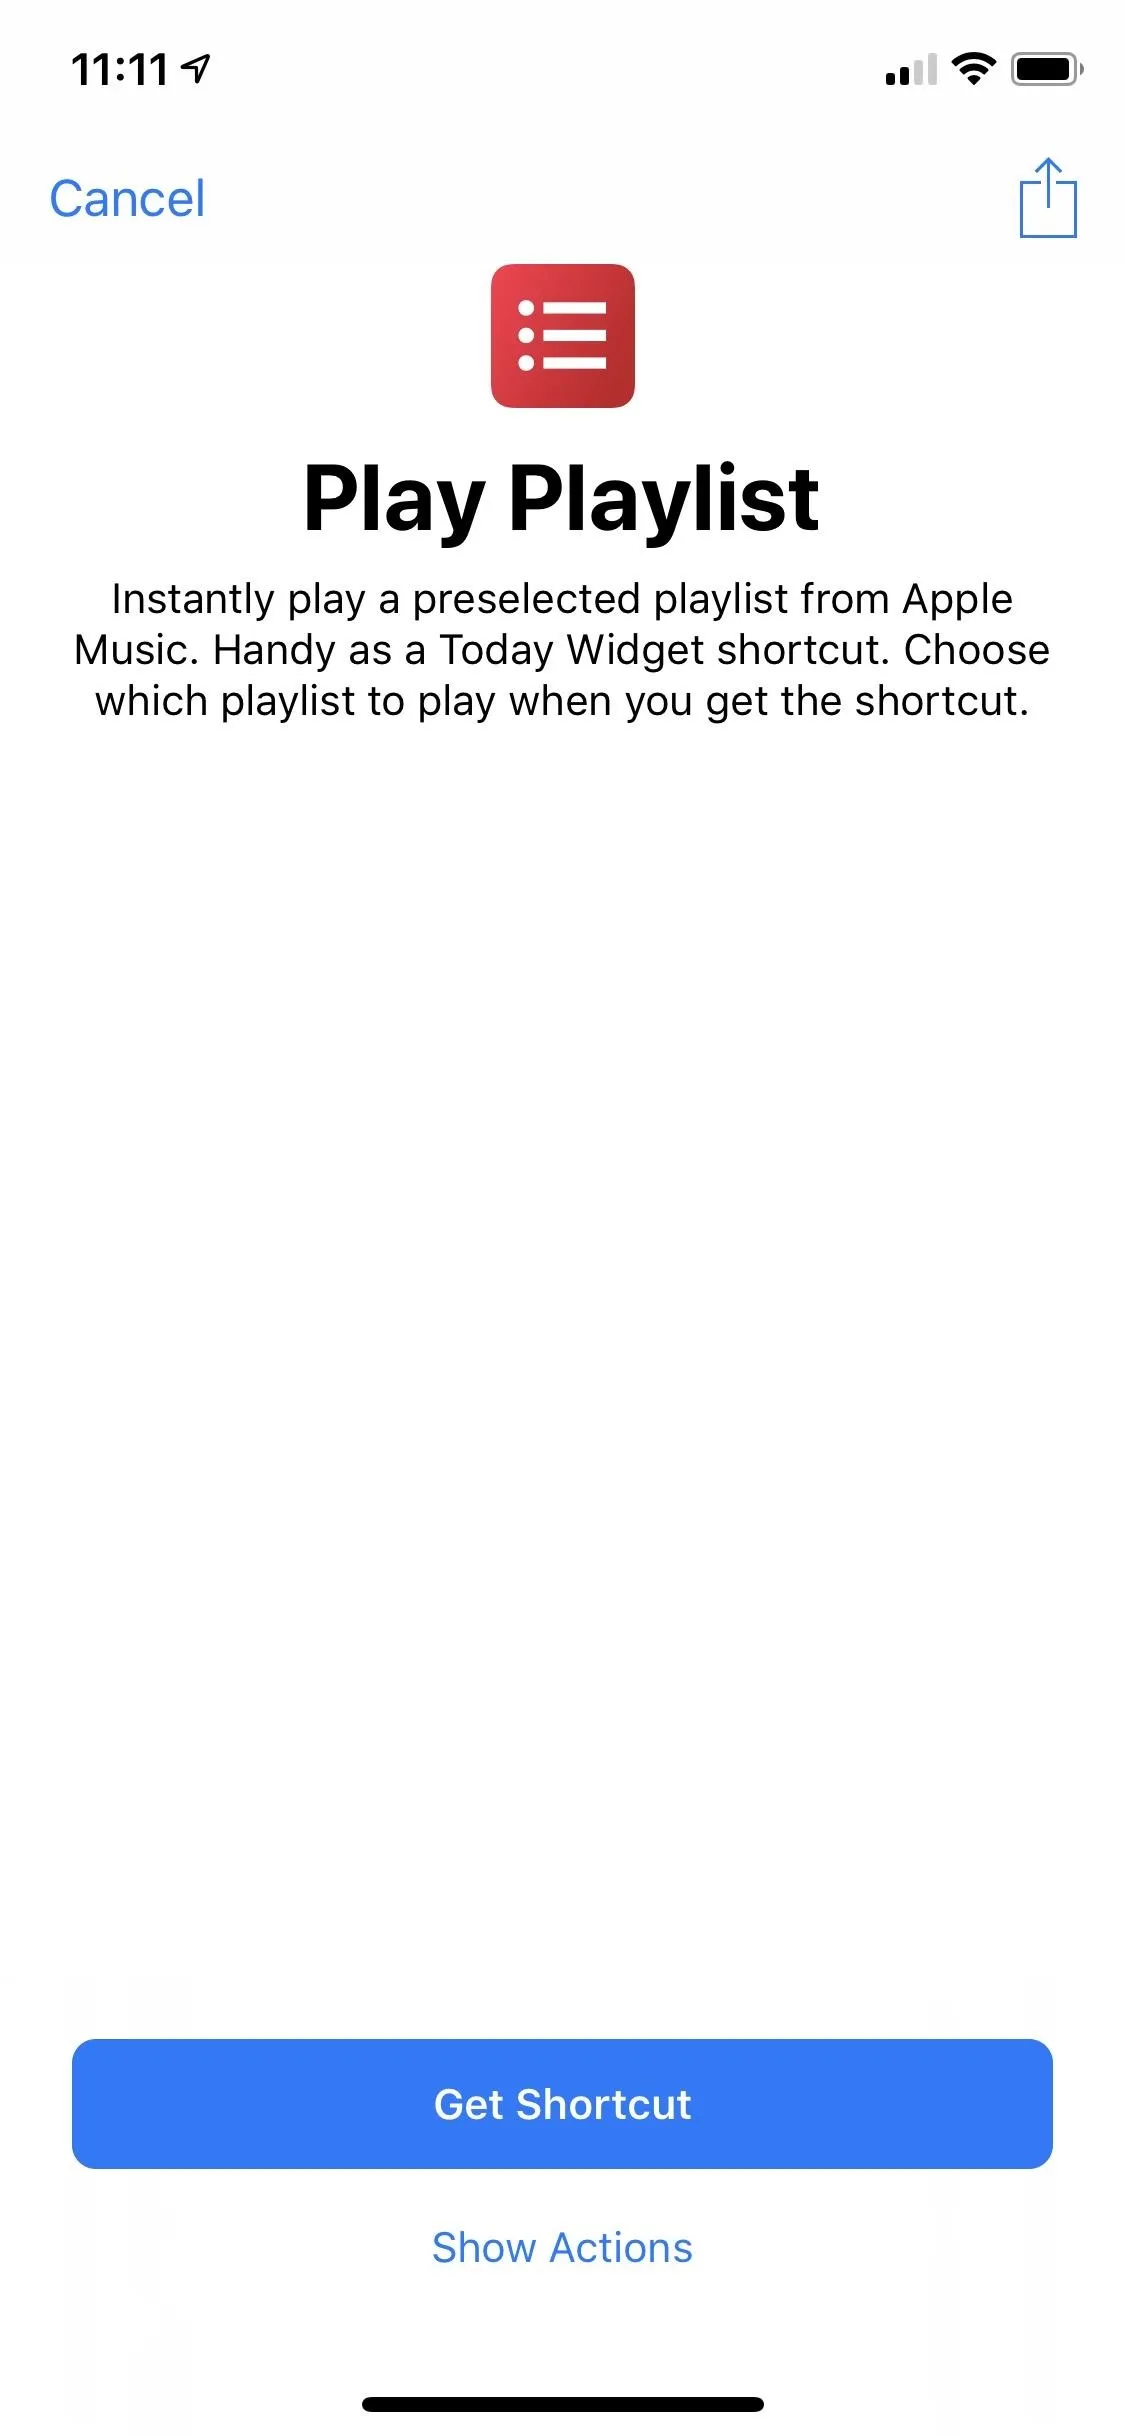
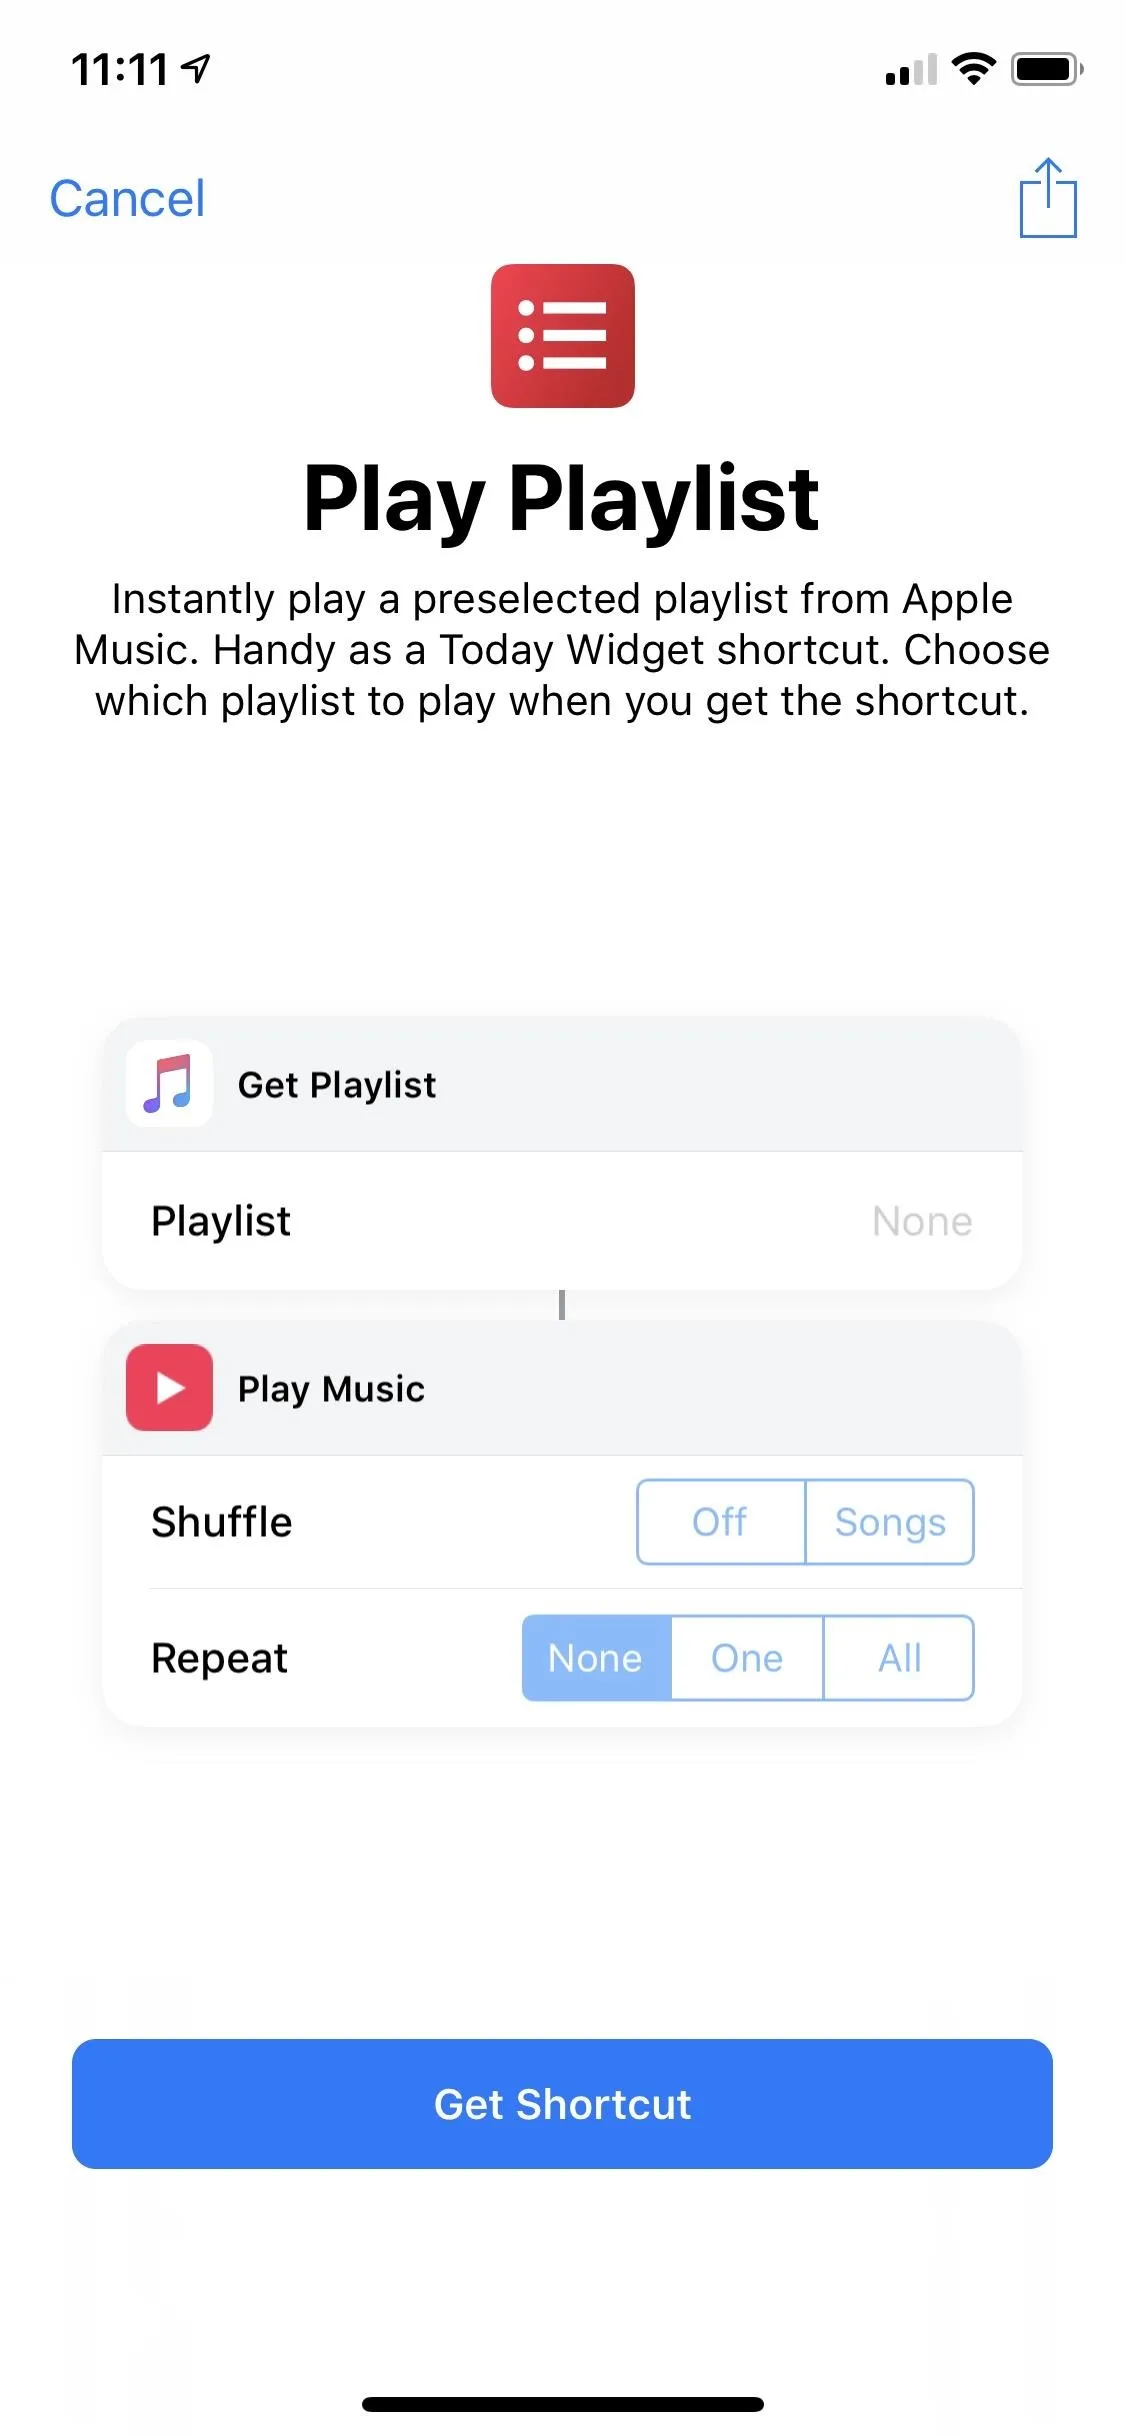
Once you find a workflow you'd like to try out, tap on it. On the next screen, you can tap "Show Actions" to see what this workflow involves. To add it, just tap "Get Shortcut." As an example, I'm using the "Play Playlist" workflow, but you can choose anything. The "Calculate Tip" and "Open in Chrome" workflows that I covered for Workflow are good ones you can play around with too.
For the one I chose, my goal is to play and shuffle my "Peter Gabriel" playlist using the custom "Play Peter Gabriel" command with Siri, which will start playing the playlist in the Music app. It won't actually open the Music app, which is nice since that's not really needed. I also want a widget and home screen shortcut to do this.


Step 3: Grant Access (If Necessary)
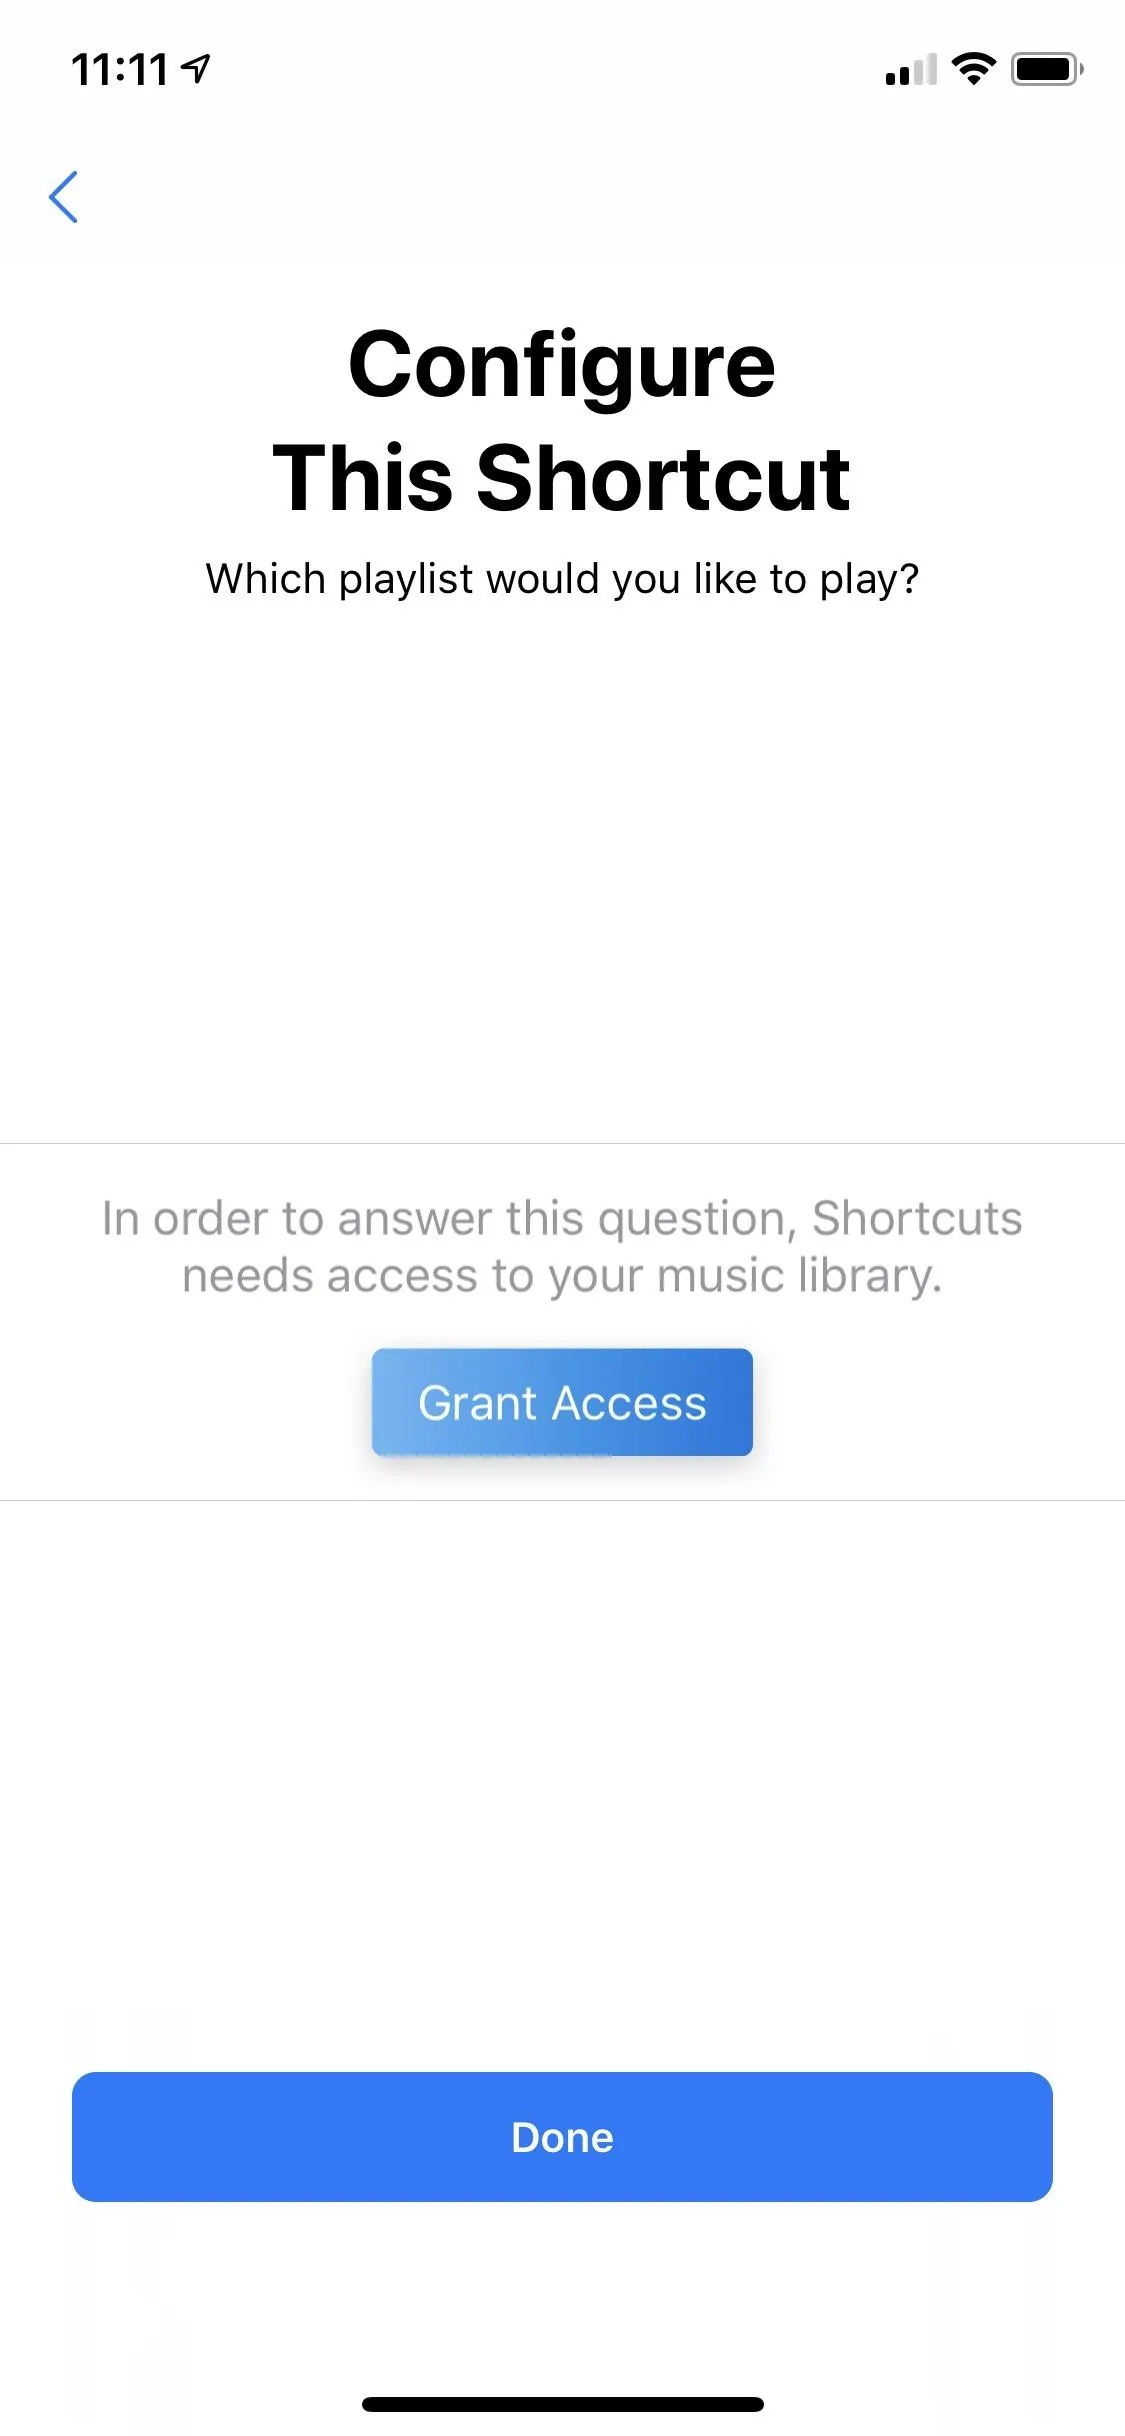
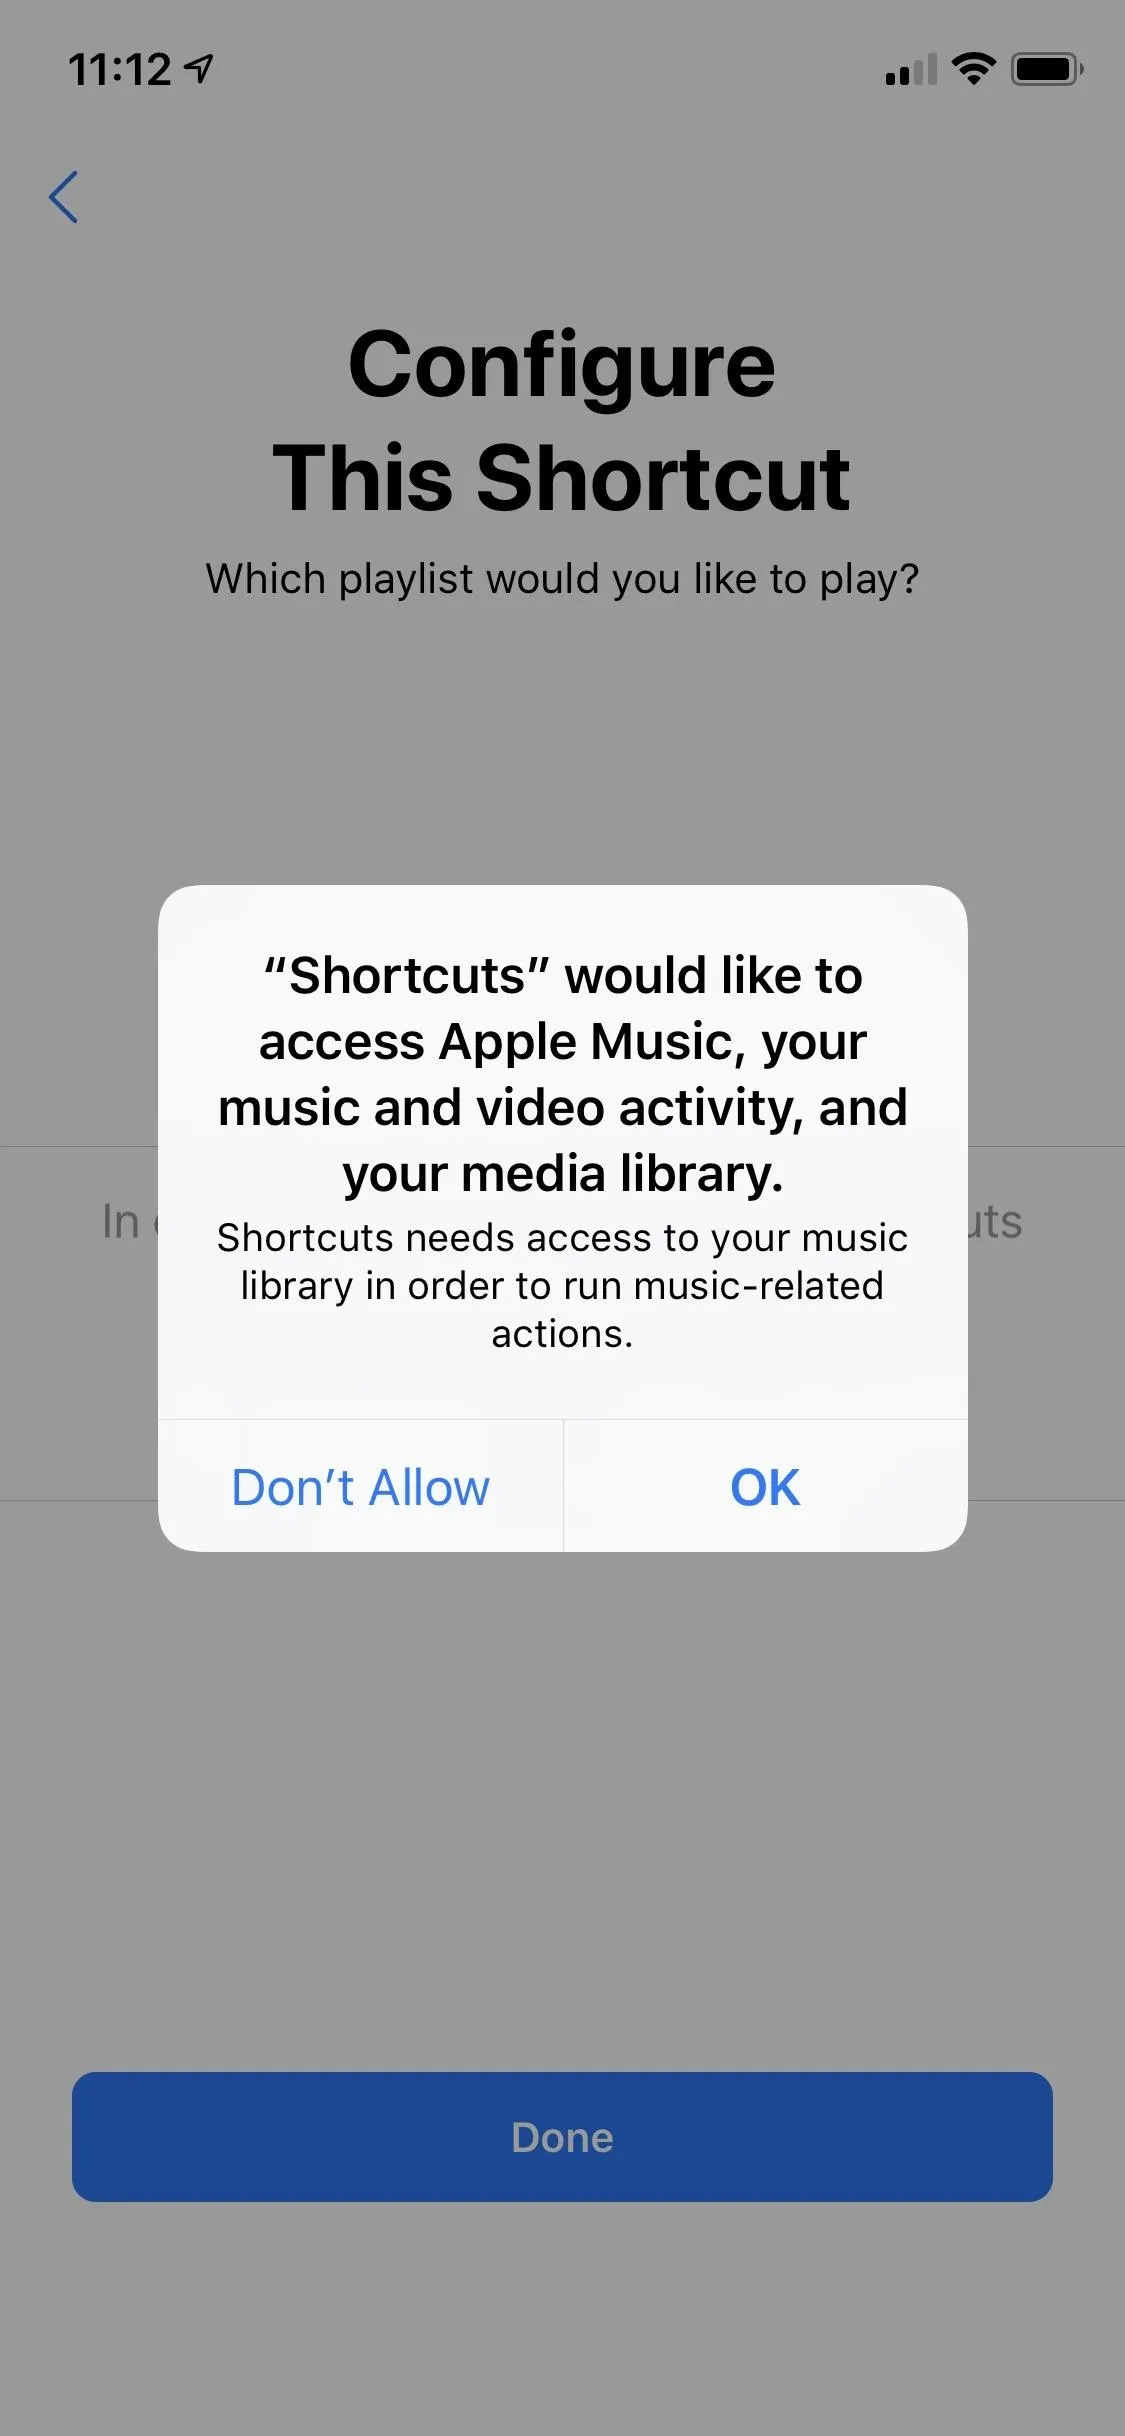
After getting the workflow, you may need to "Grant Access" to whatever app or service is required. In my example, that would be Apple Music activity as well as my media library.


Step 4: Configure the Shortcut
Each workflow will work differently, but Apple tries to make it as easy as possible to get working right away, so you will likely have to configure the workflow right away by answering a simple question or two. In my example, I need to choose a playlist. Tapping "Choose" shows me a list of all my playlists; Folders appear first, followed by regular and smart playlists combined in alphabetical order.
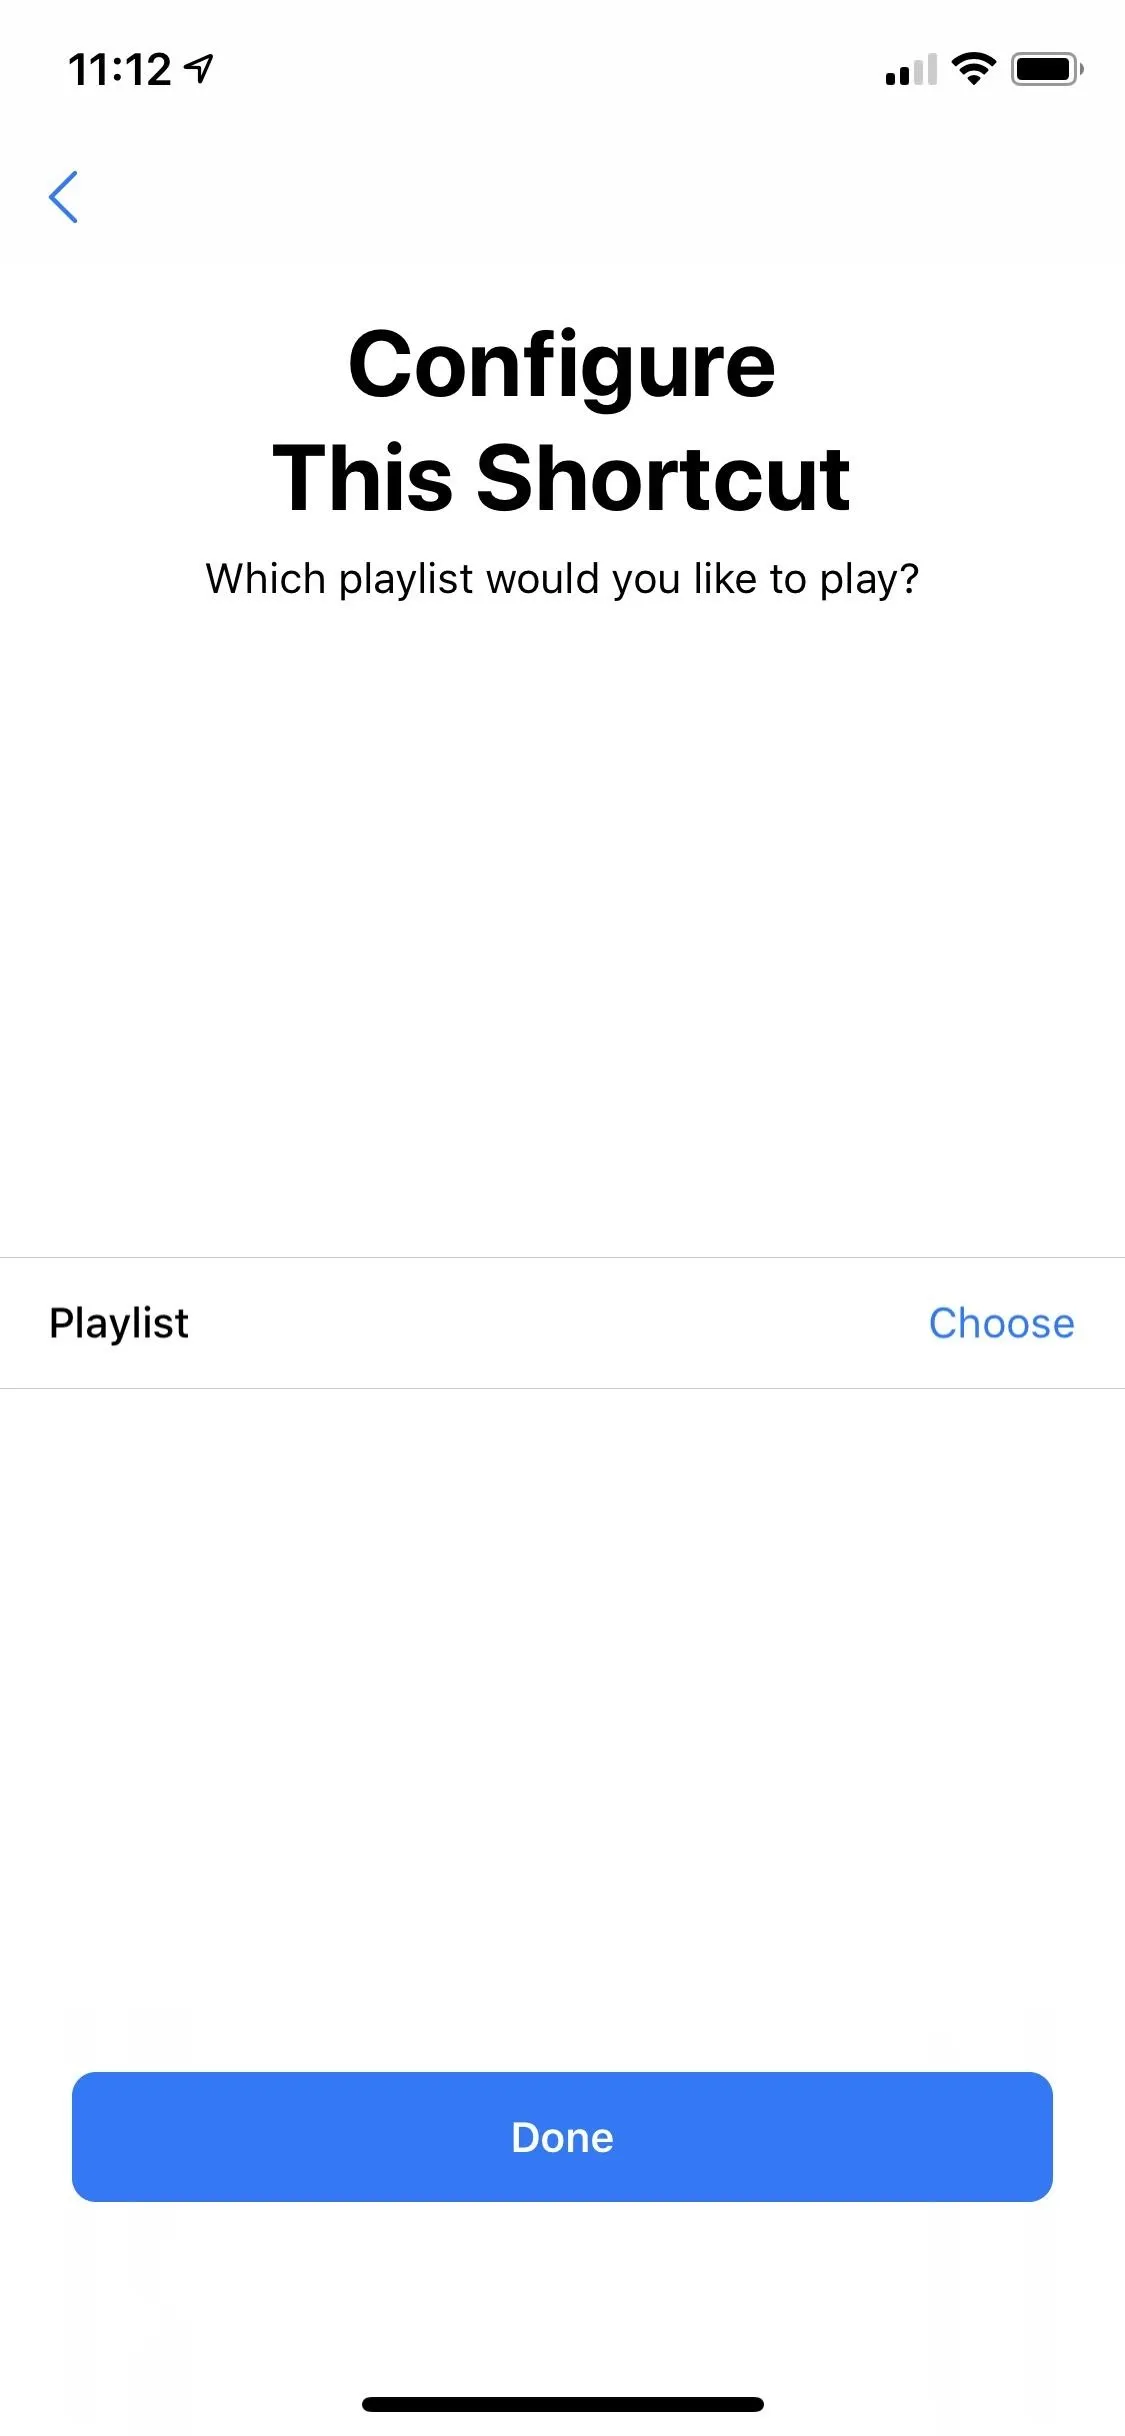
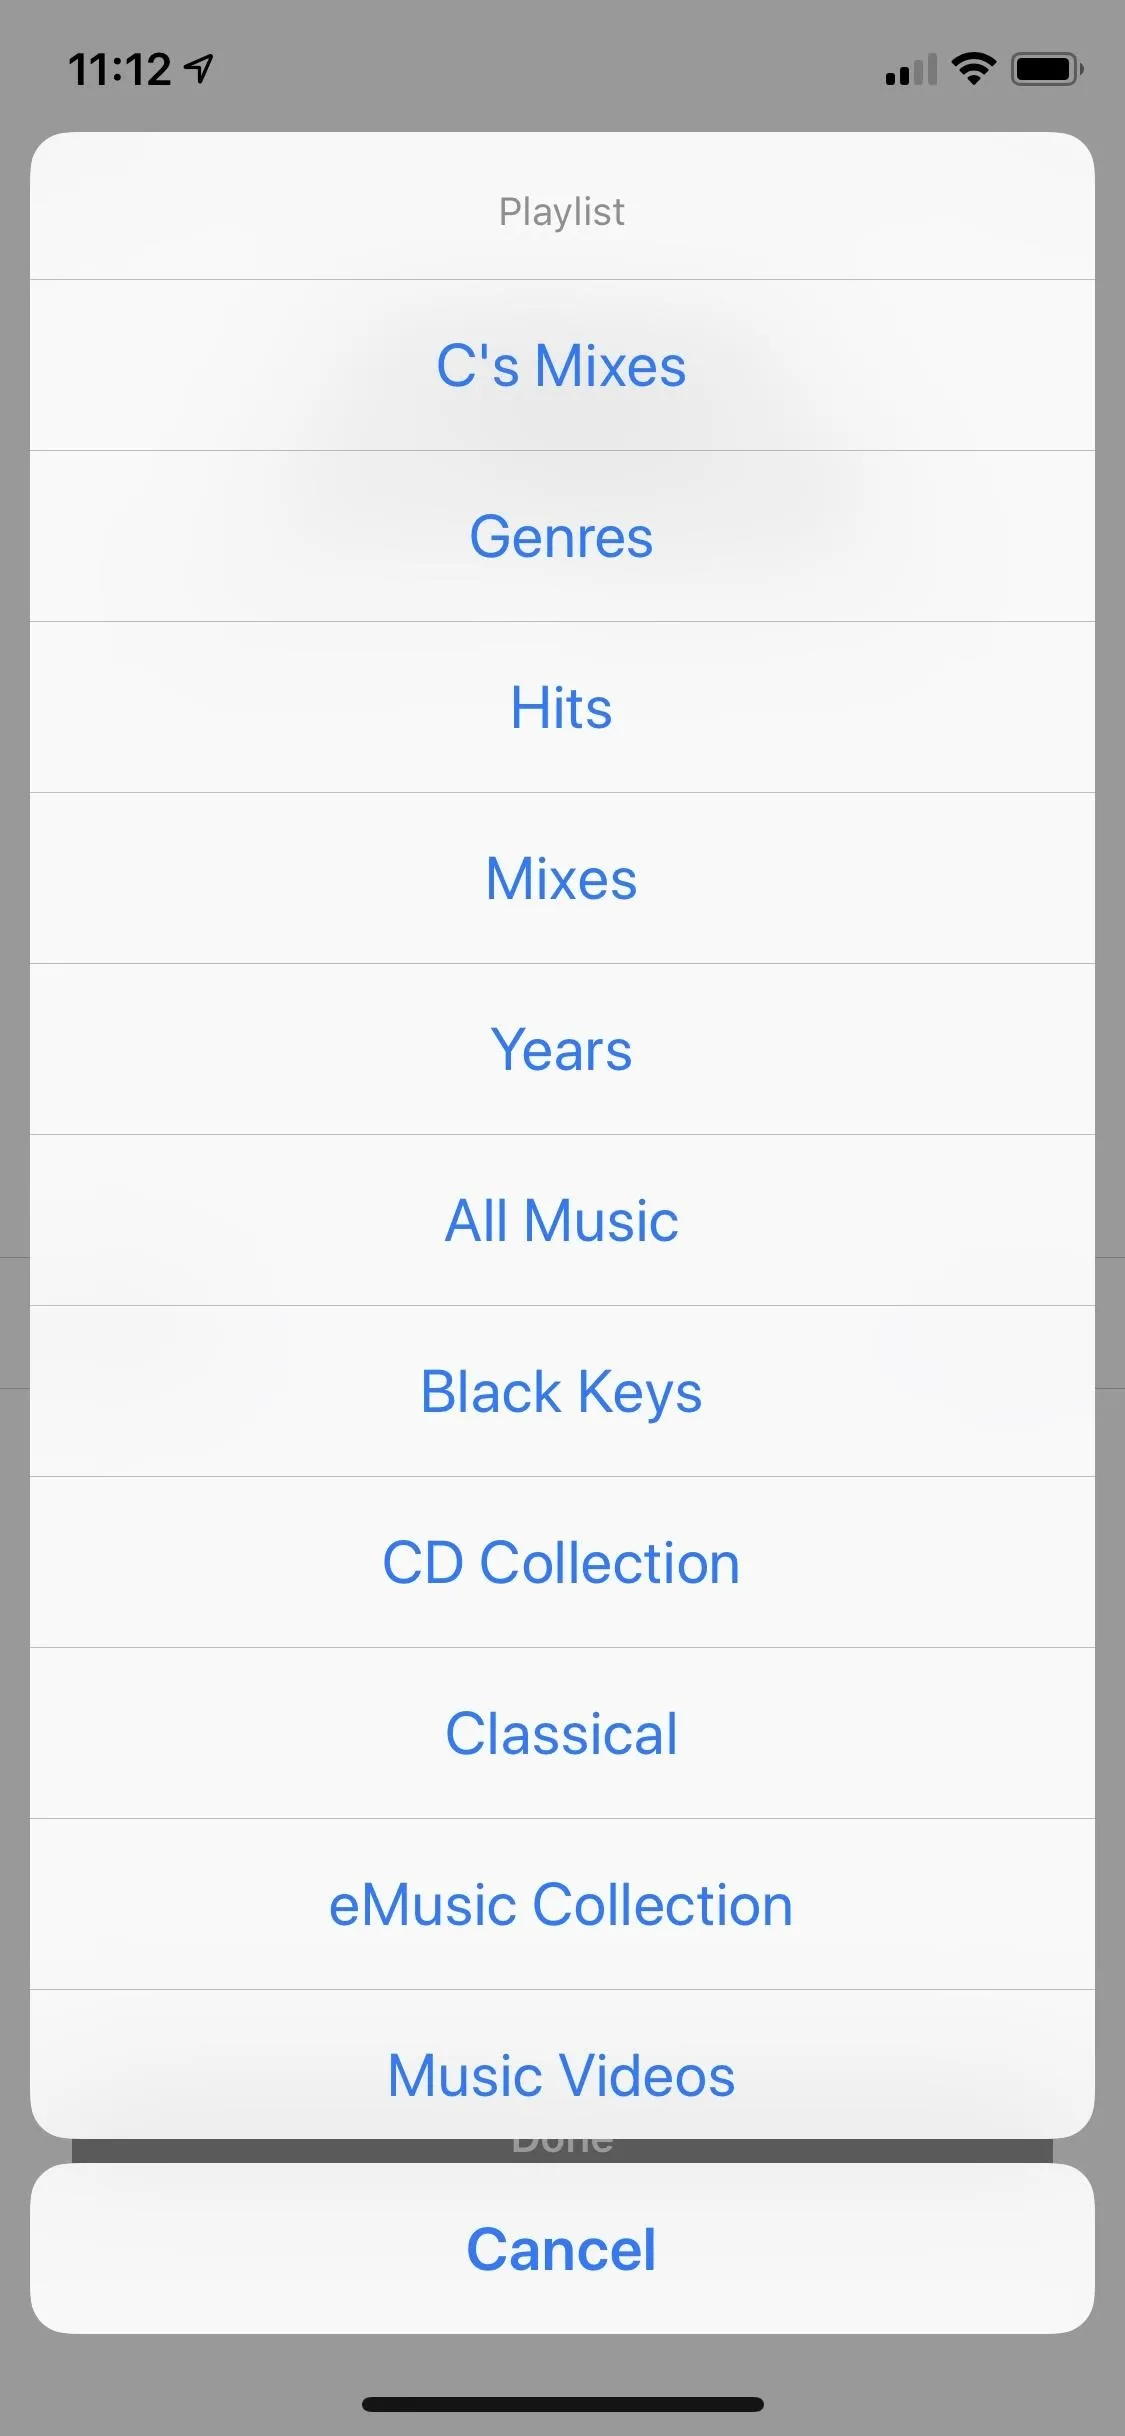


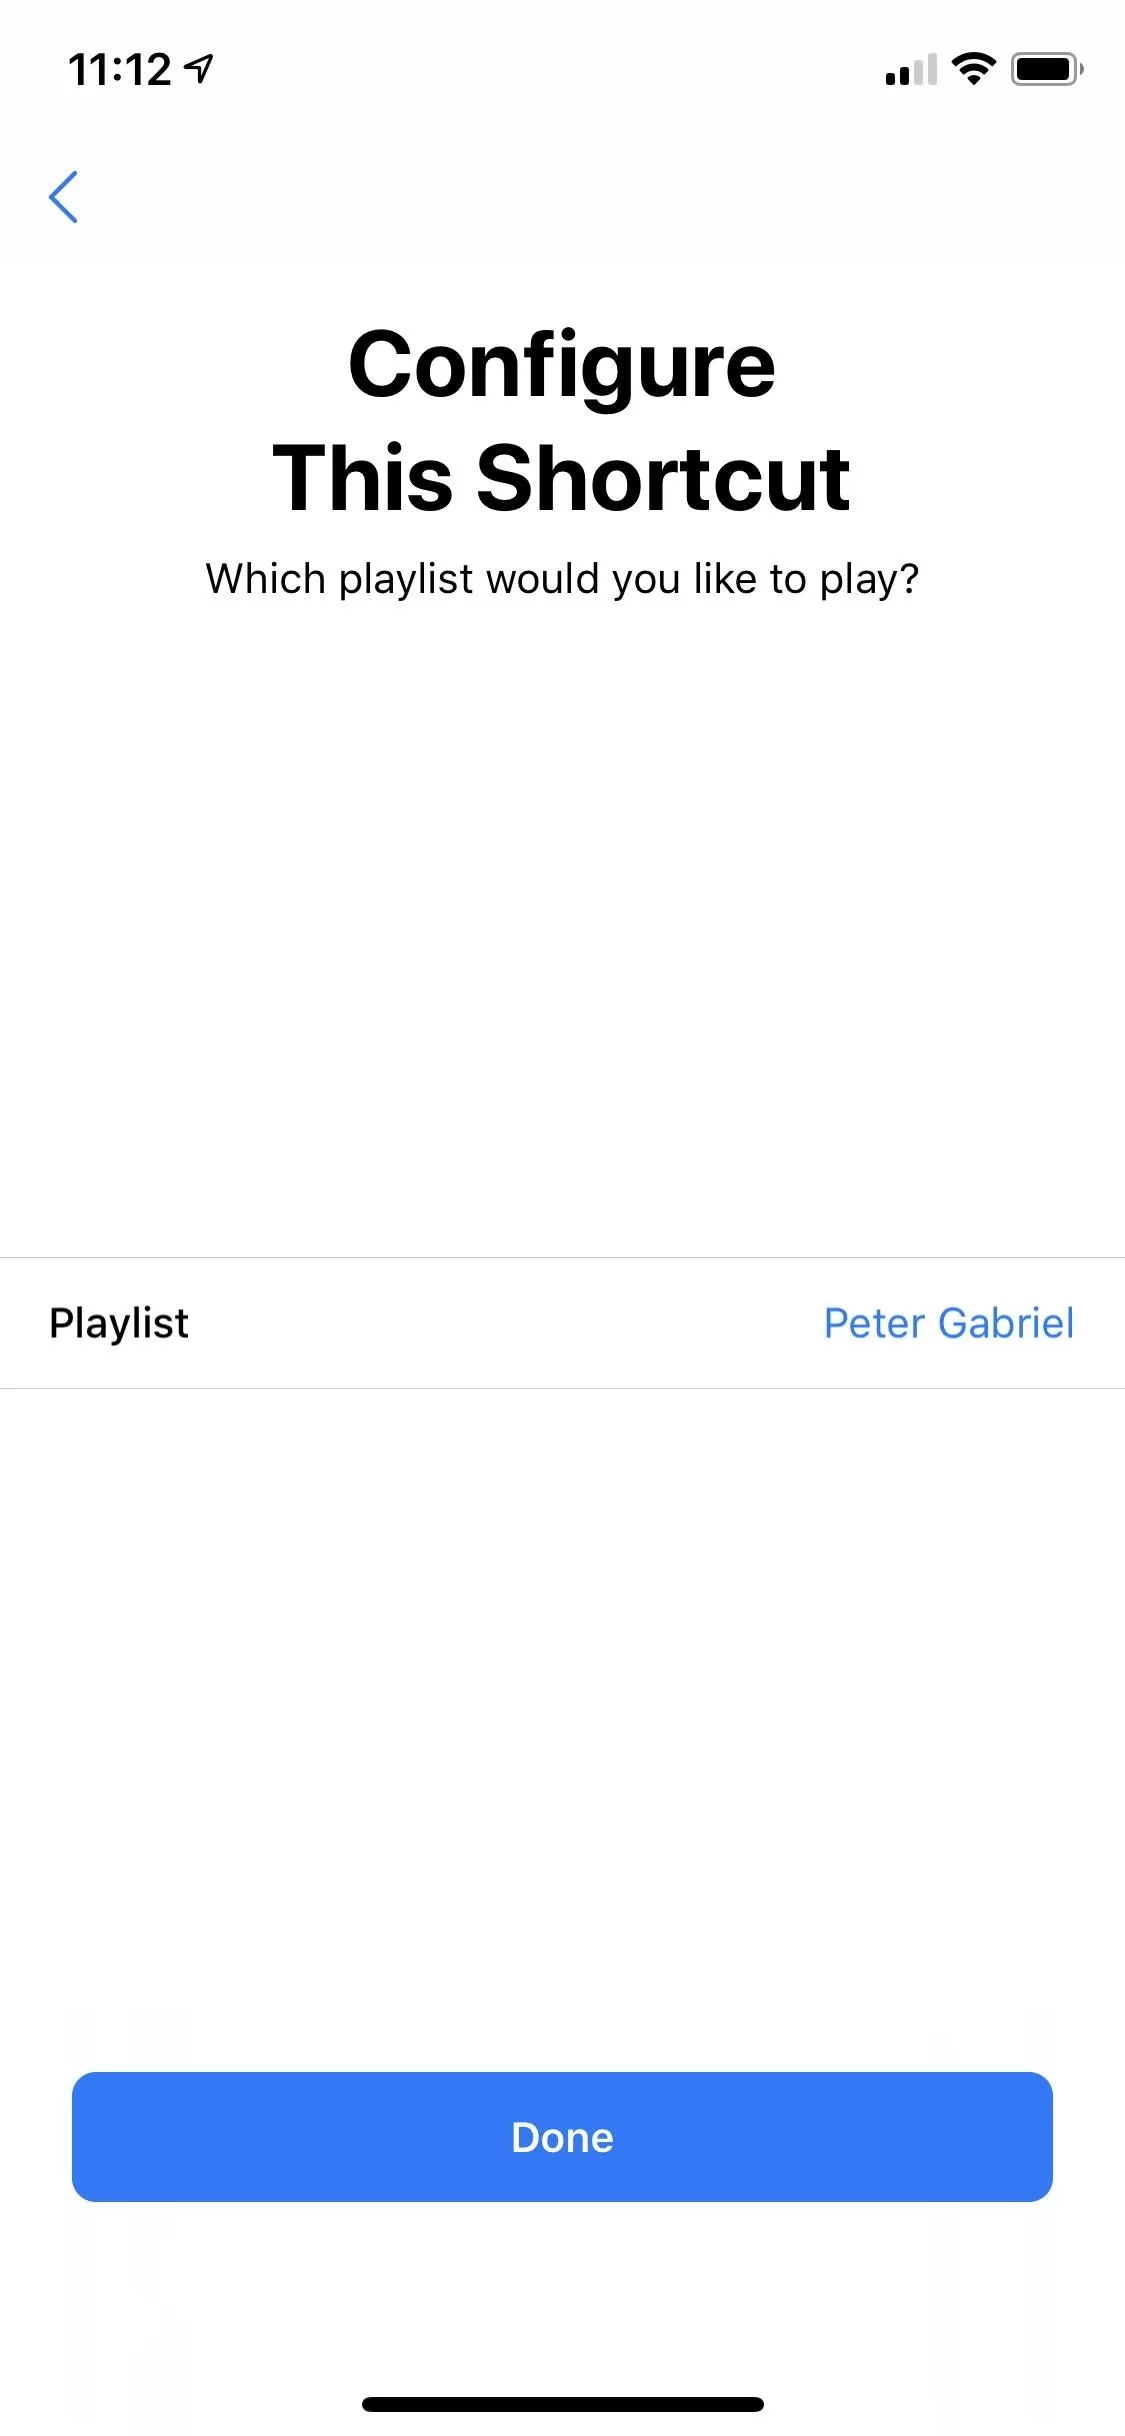
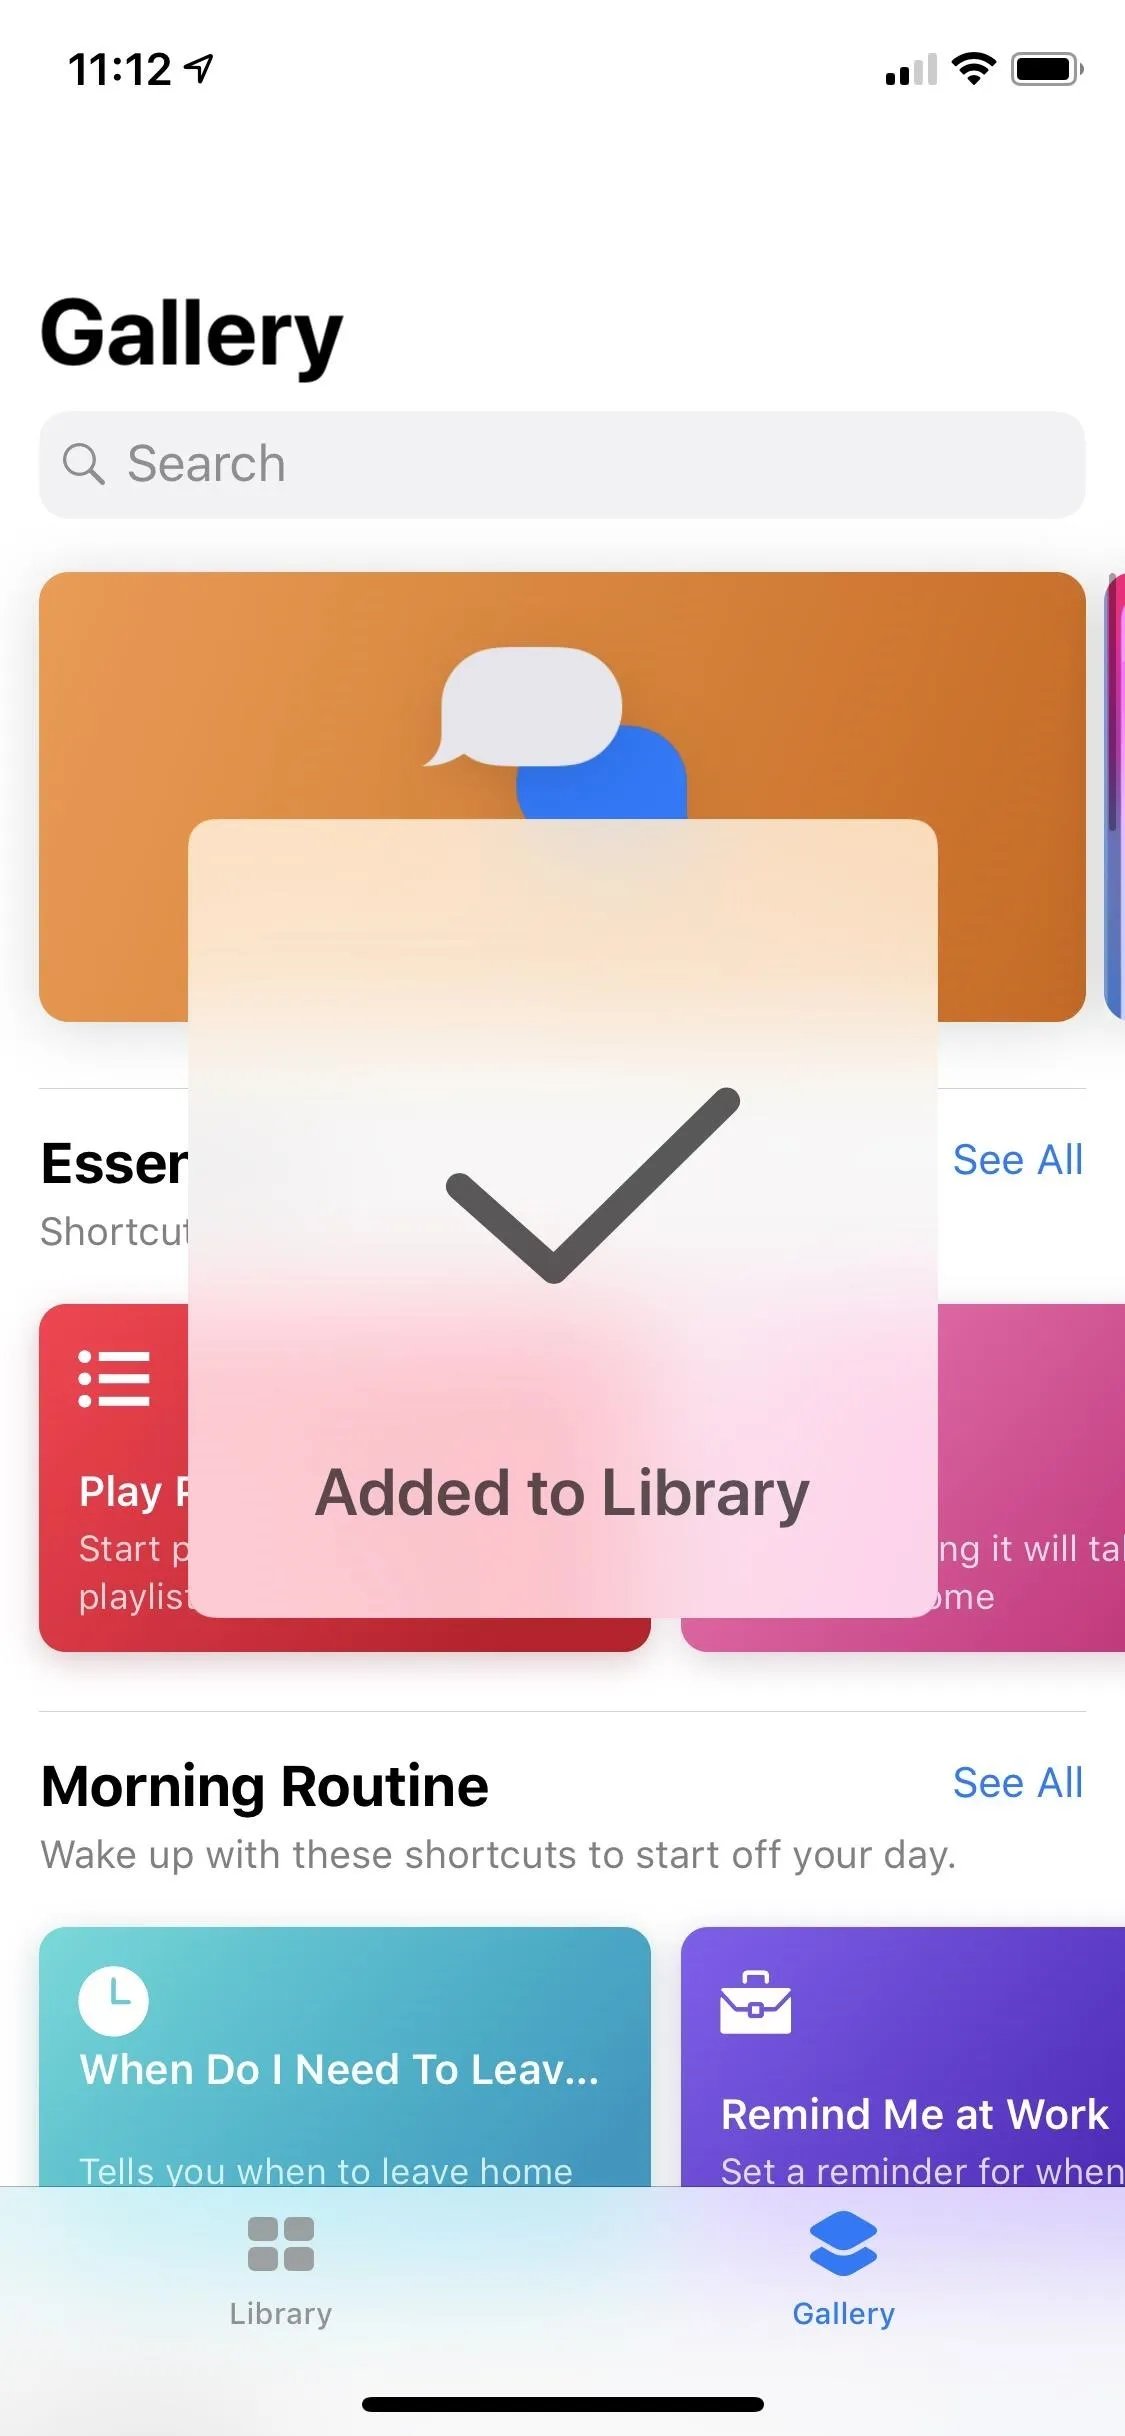
After choosing one of my playlists, all that's left to do is hit "Done," and the workflow will be added to your "Library" tab.


Step 5: Use Your New Shortcut
After configuring your new workflow, how do you use it? Well, you haven't done any deep customization yet, so there are only a few things you can do right now to use the workflow. First, open up the Shortcuts app and tap on the workflow from the "Library" tab. That will make the workflow immediately run.
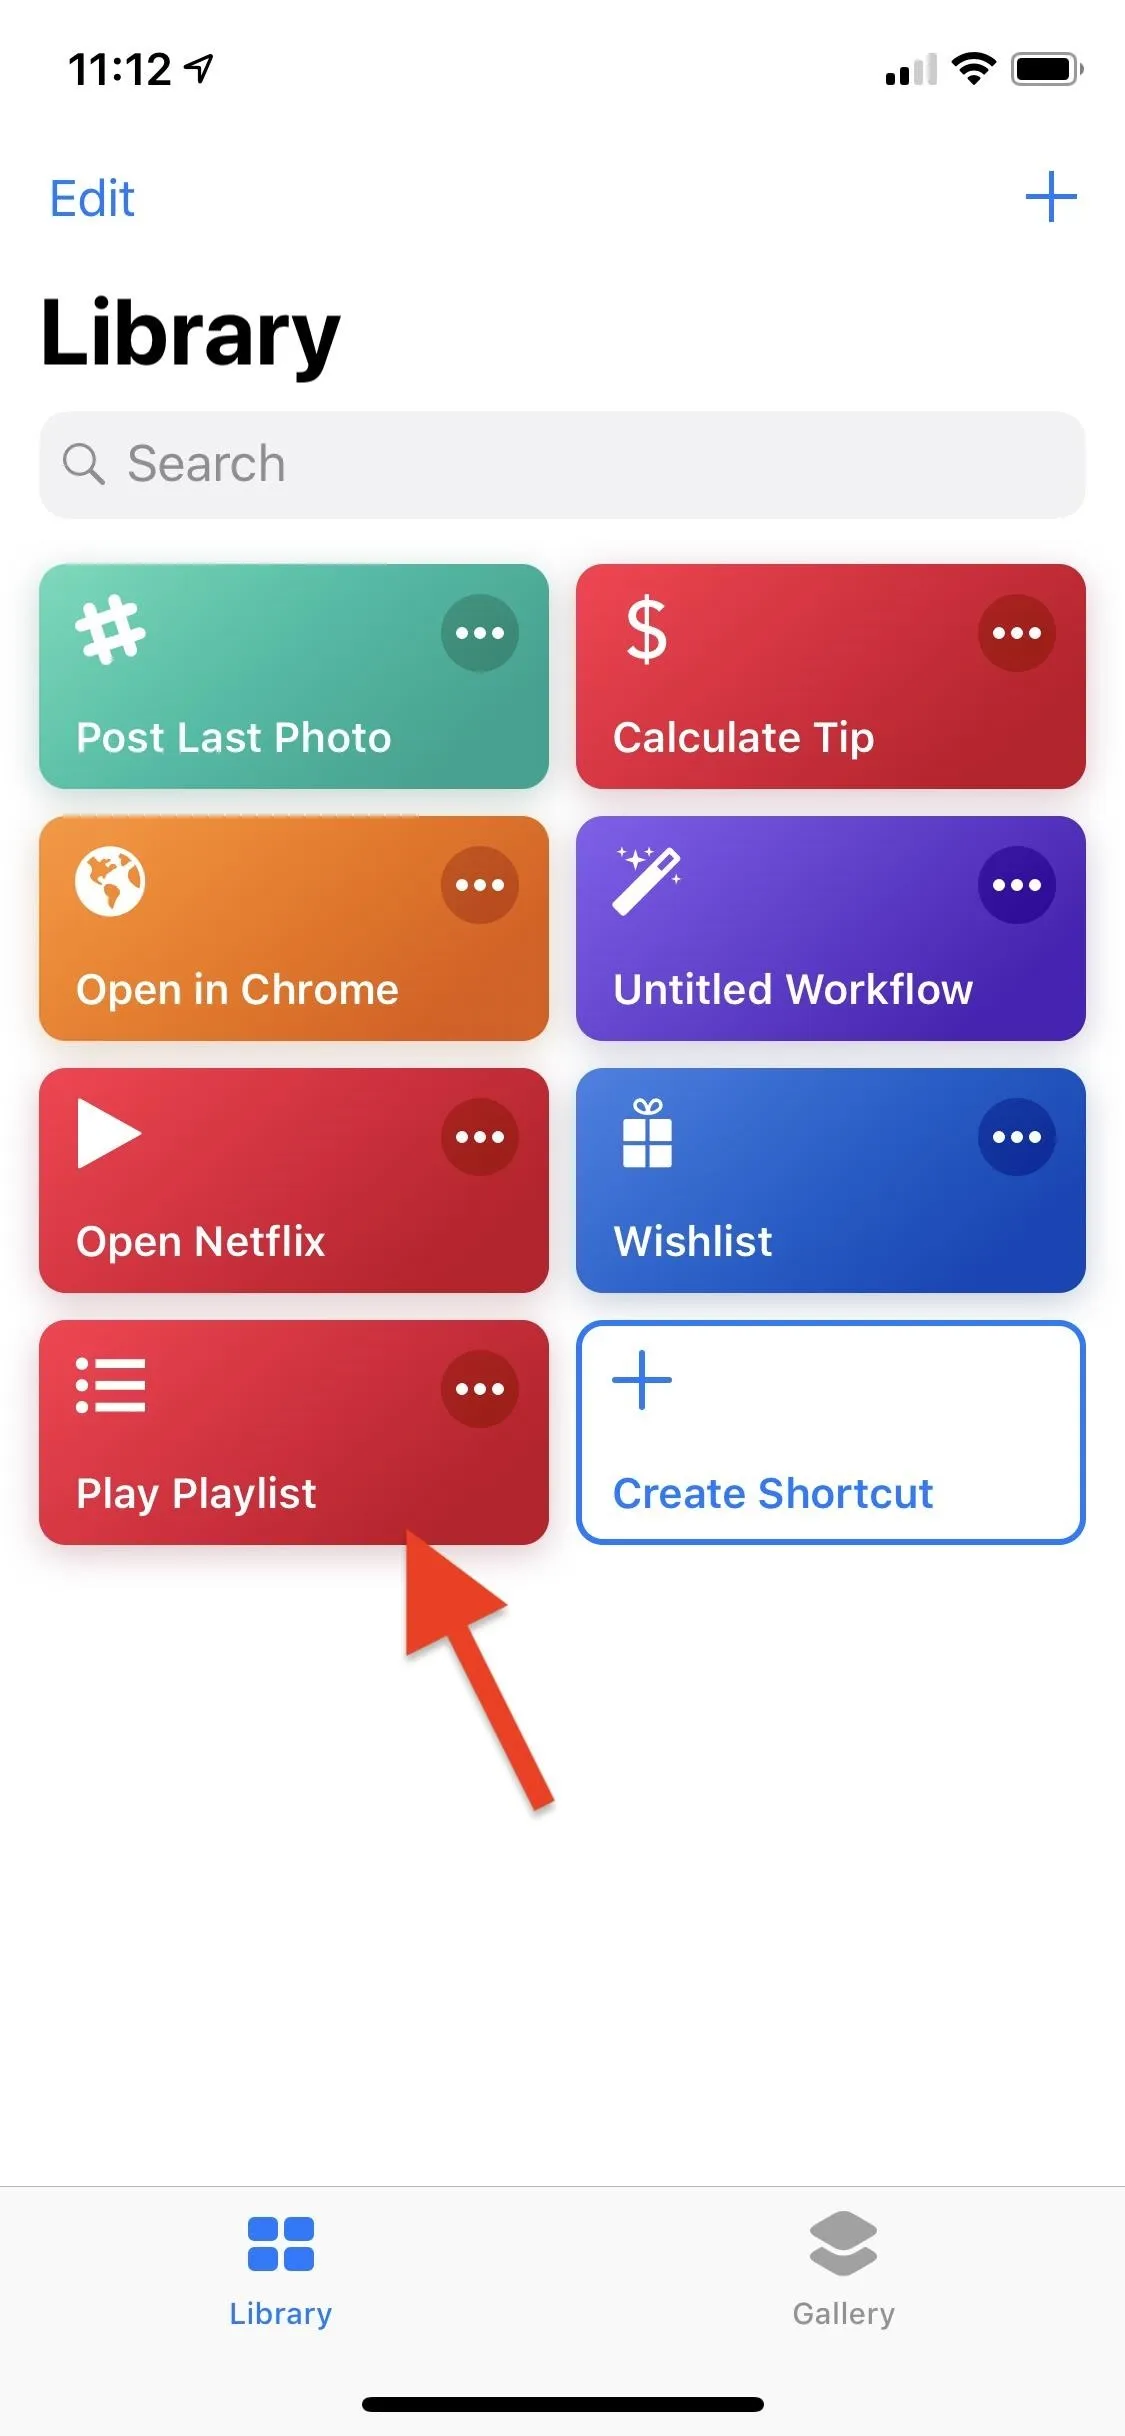
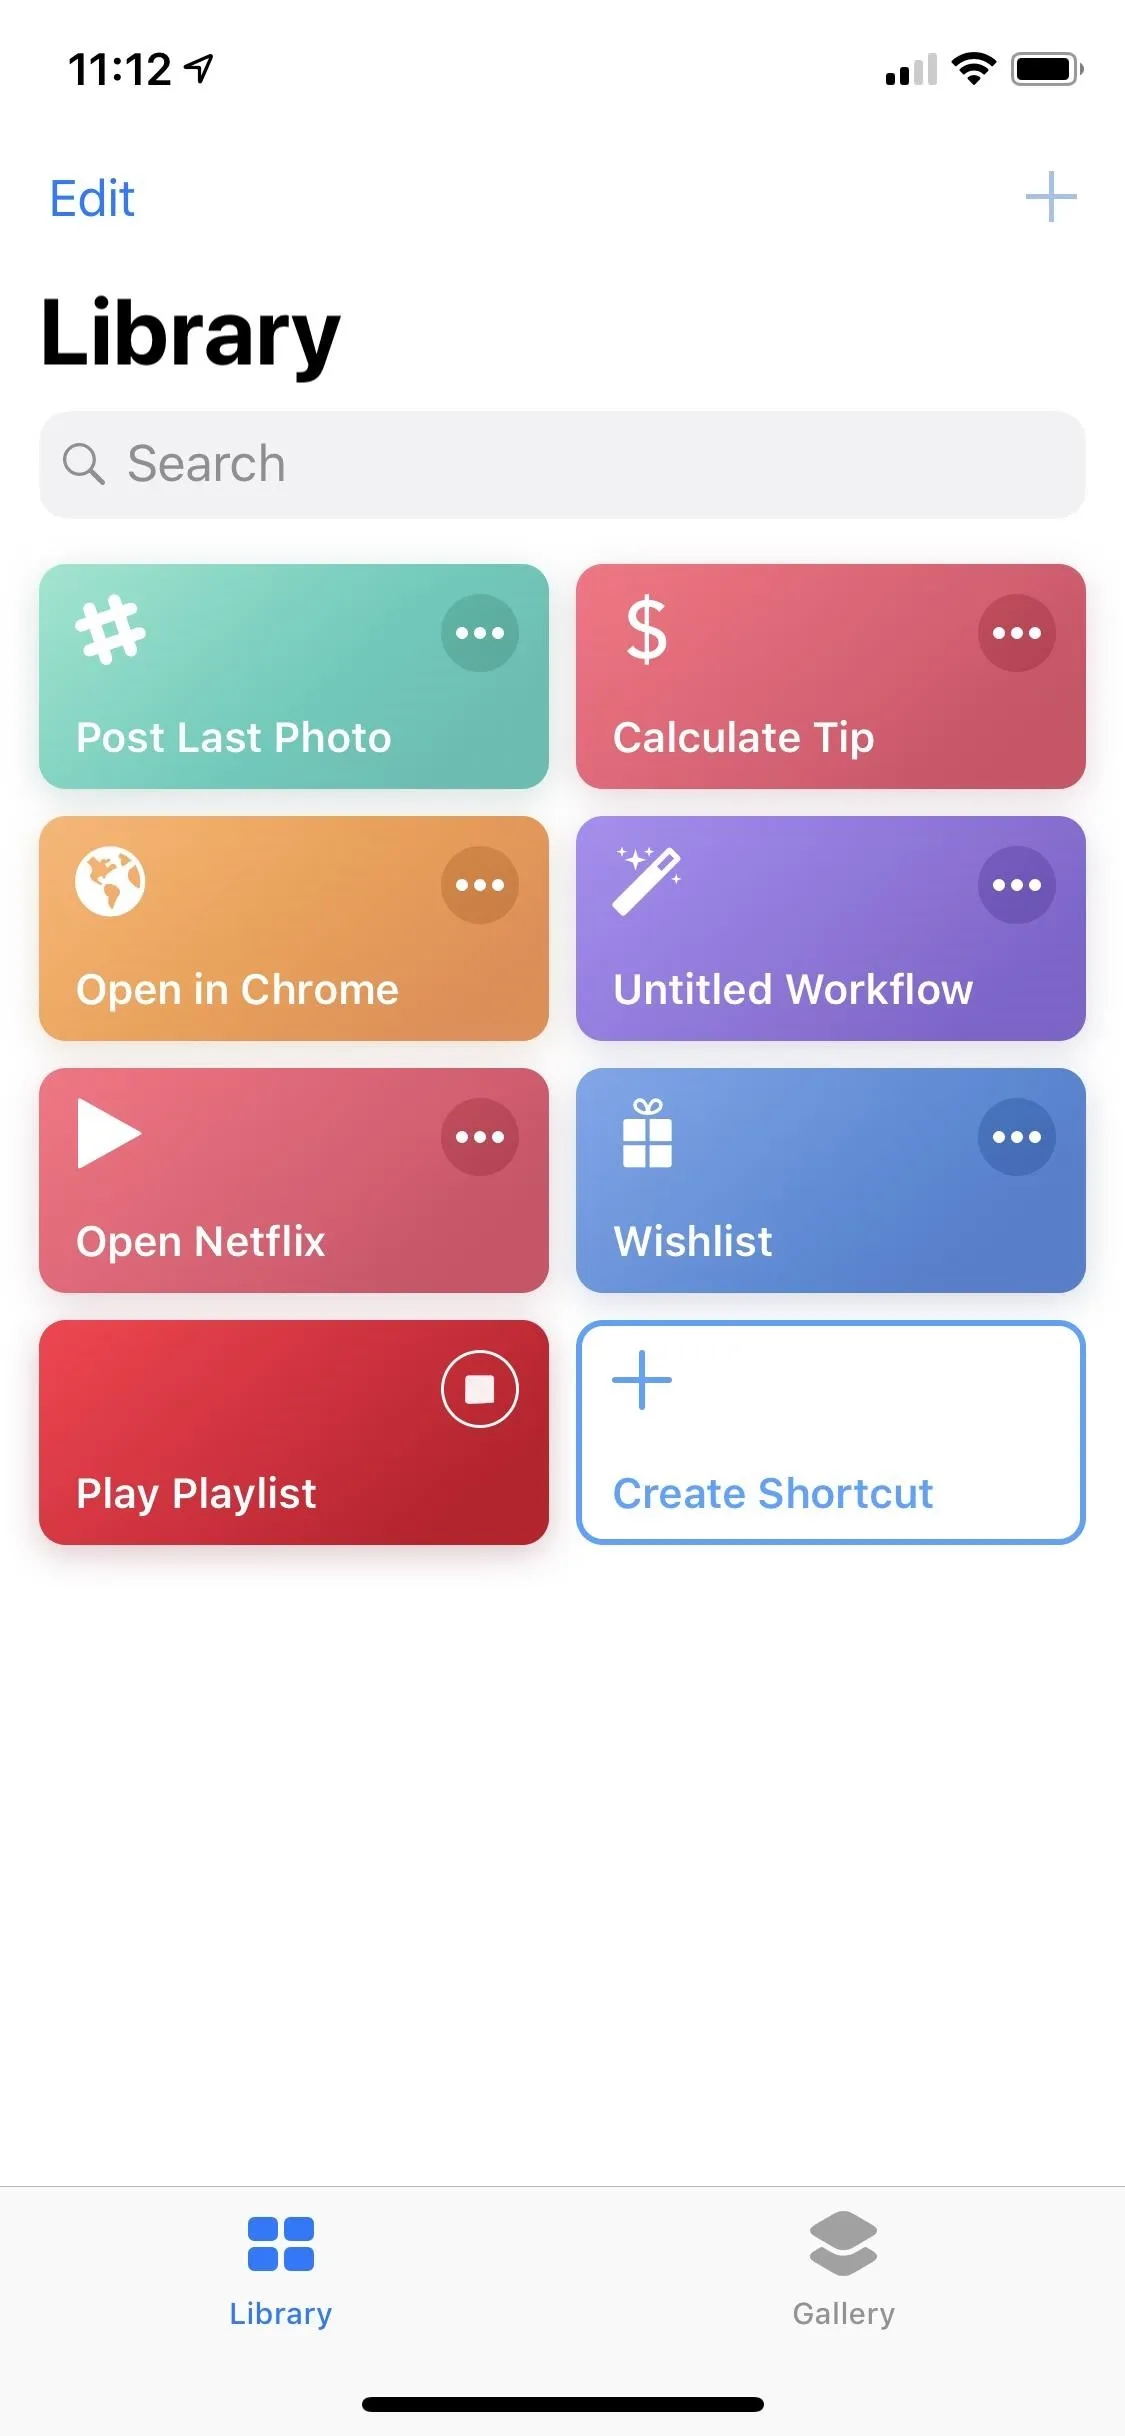


Think of this more as a test to make sure it's working like it's supposed to. You likely won't want to open up the Shortcuts app every time you want to start one of your shortcuts, which is where the second method comes into play.
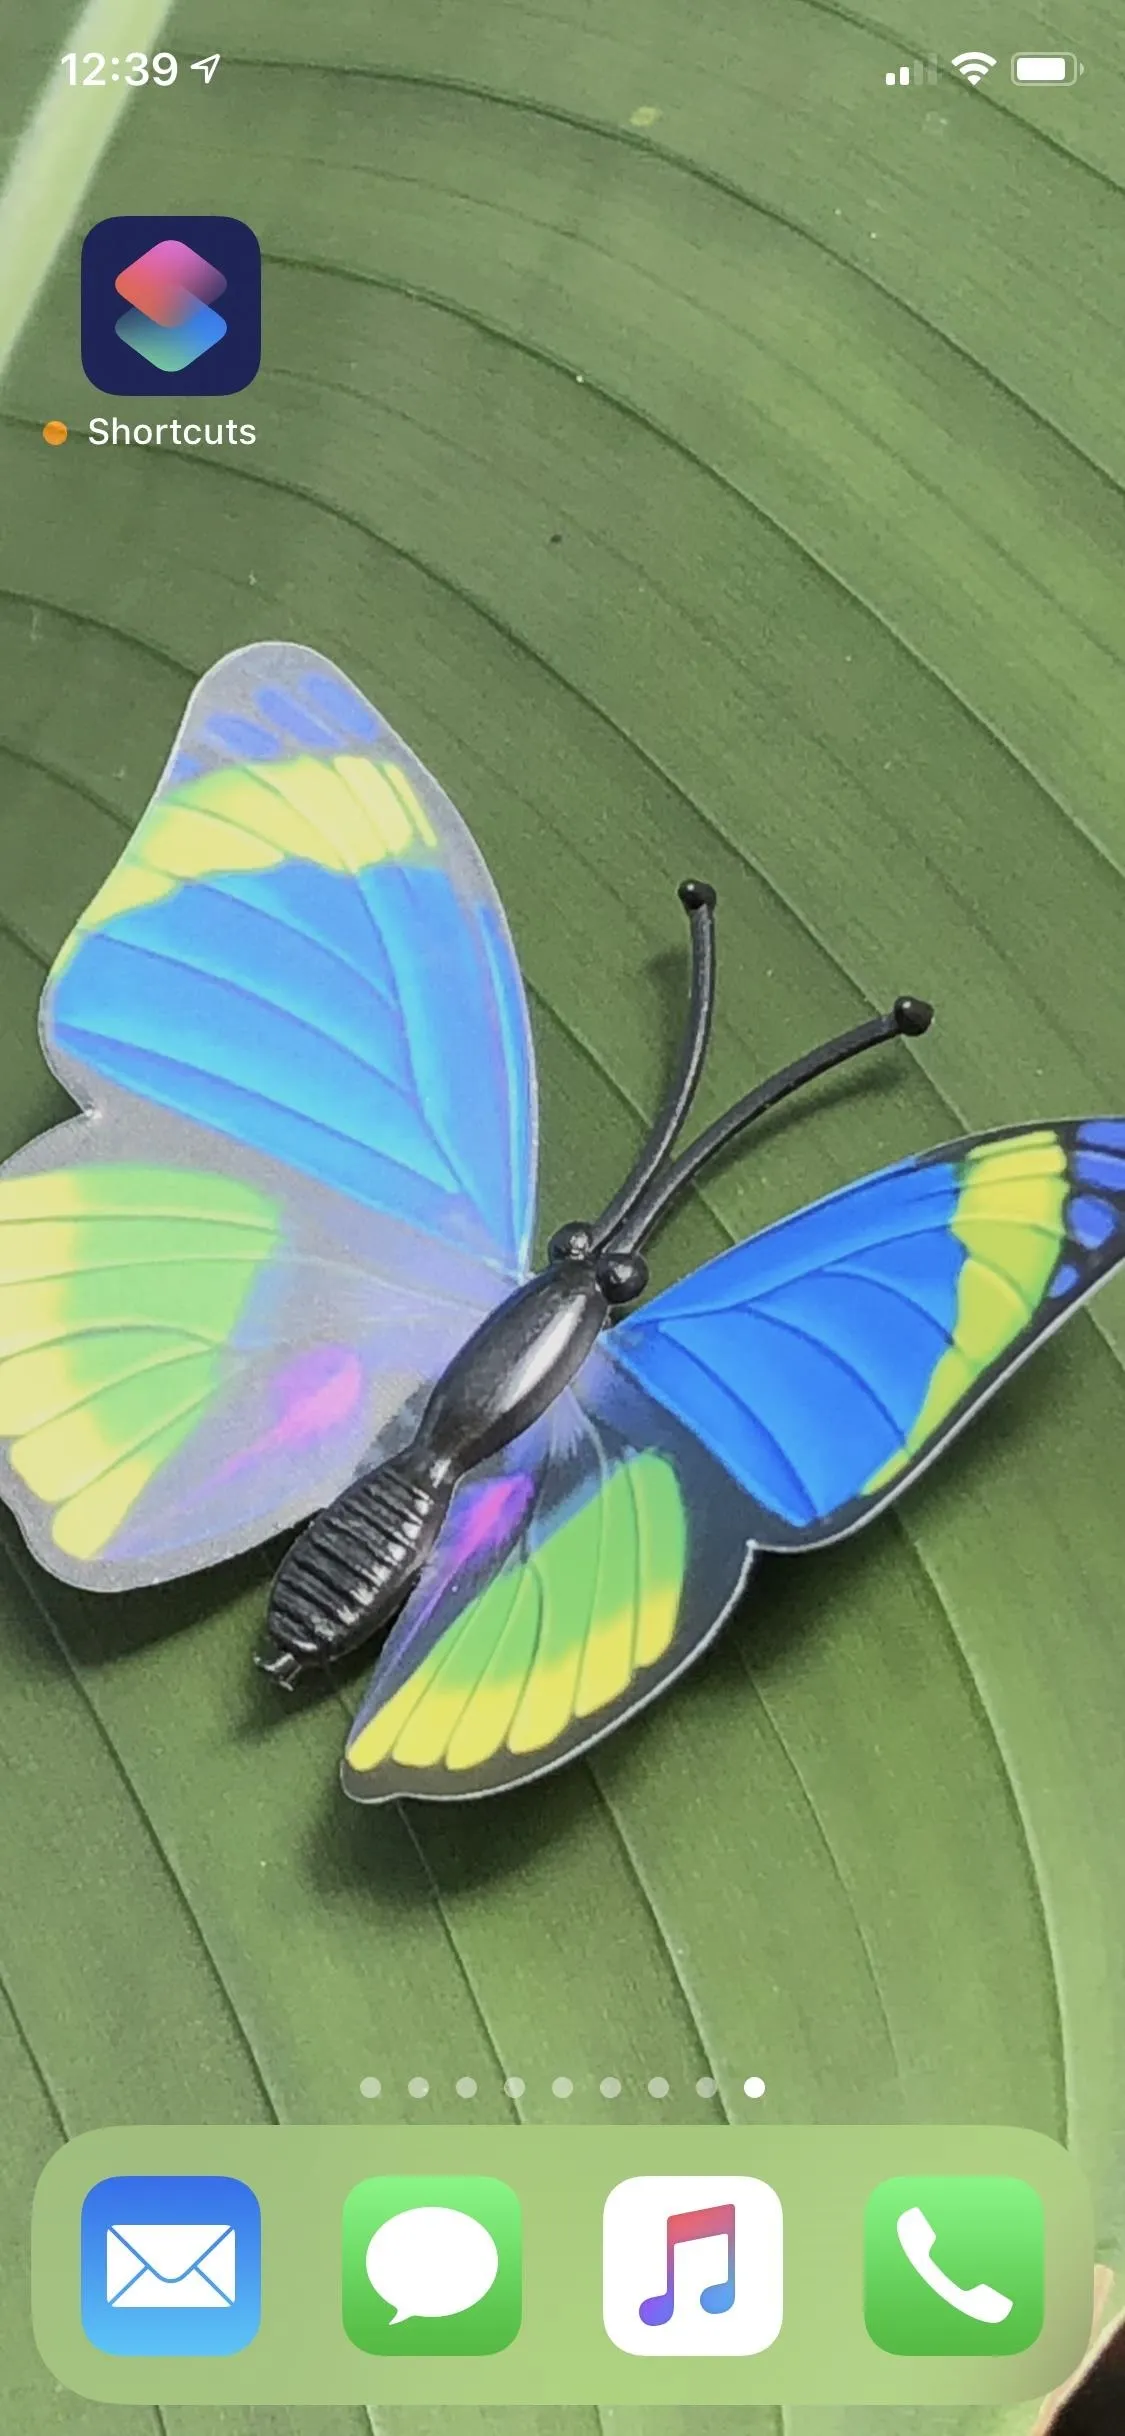
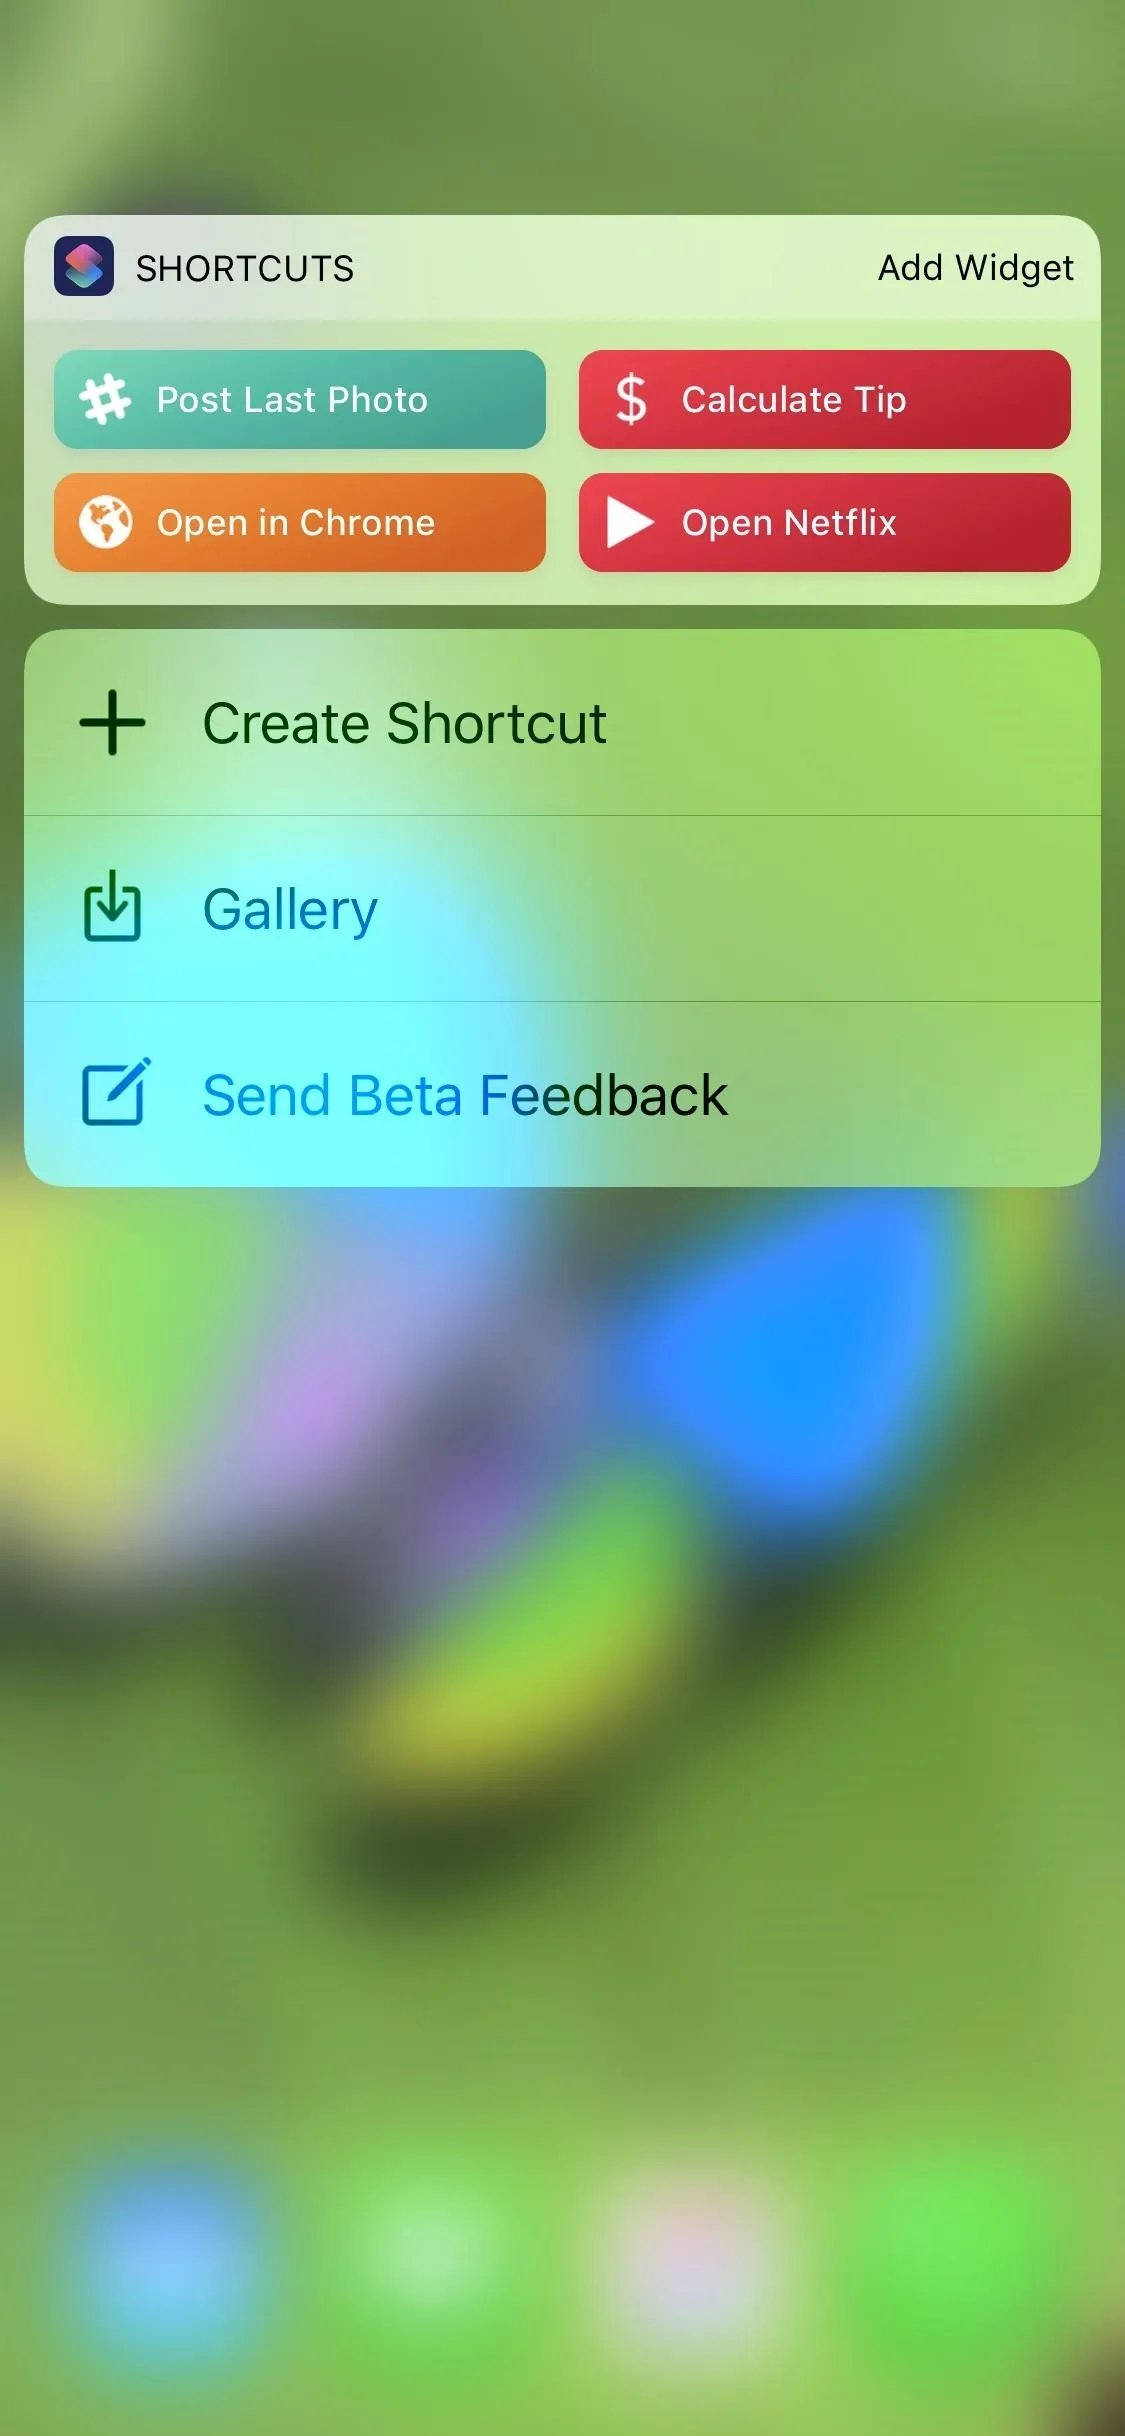
On your home screen, you can use 3D Touch on the Shortcuts app icon to show the widget, which lists your first four workflows. As you can see below, my "Play Playlist" workflow is not visible, so this doesn't help me out much. That's because it only shows the first four workflows in your Shortcuts library.


Step 6: Add & Use the Shortcuts Widget (Optional)
By default, any new workflow you add in the Shortcuts app will be visible in the Shortcuts widget. However, as you can see above, the home screen widget is very limited, but the Today View widget is a lot more helpful.
The Shortcuts widget is not added to your Today View by default, so you'll need to do that yourself. Using 3D Touch on the Shortcuts app icon on the home screen, open the home screen widget, then tap "Add Widget."
If you don't have 3D Touch or don't like to use it, you can swipe right from the first home screen page, lock screen, or notifications window, then tap on "Edit" at the bottom of the Today View page. Tap the "+" icon next to Shortcuts, then hit "Done."
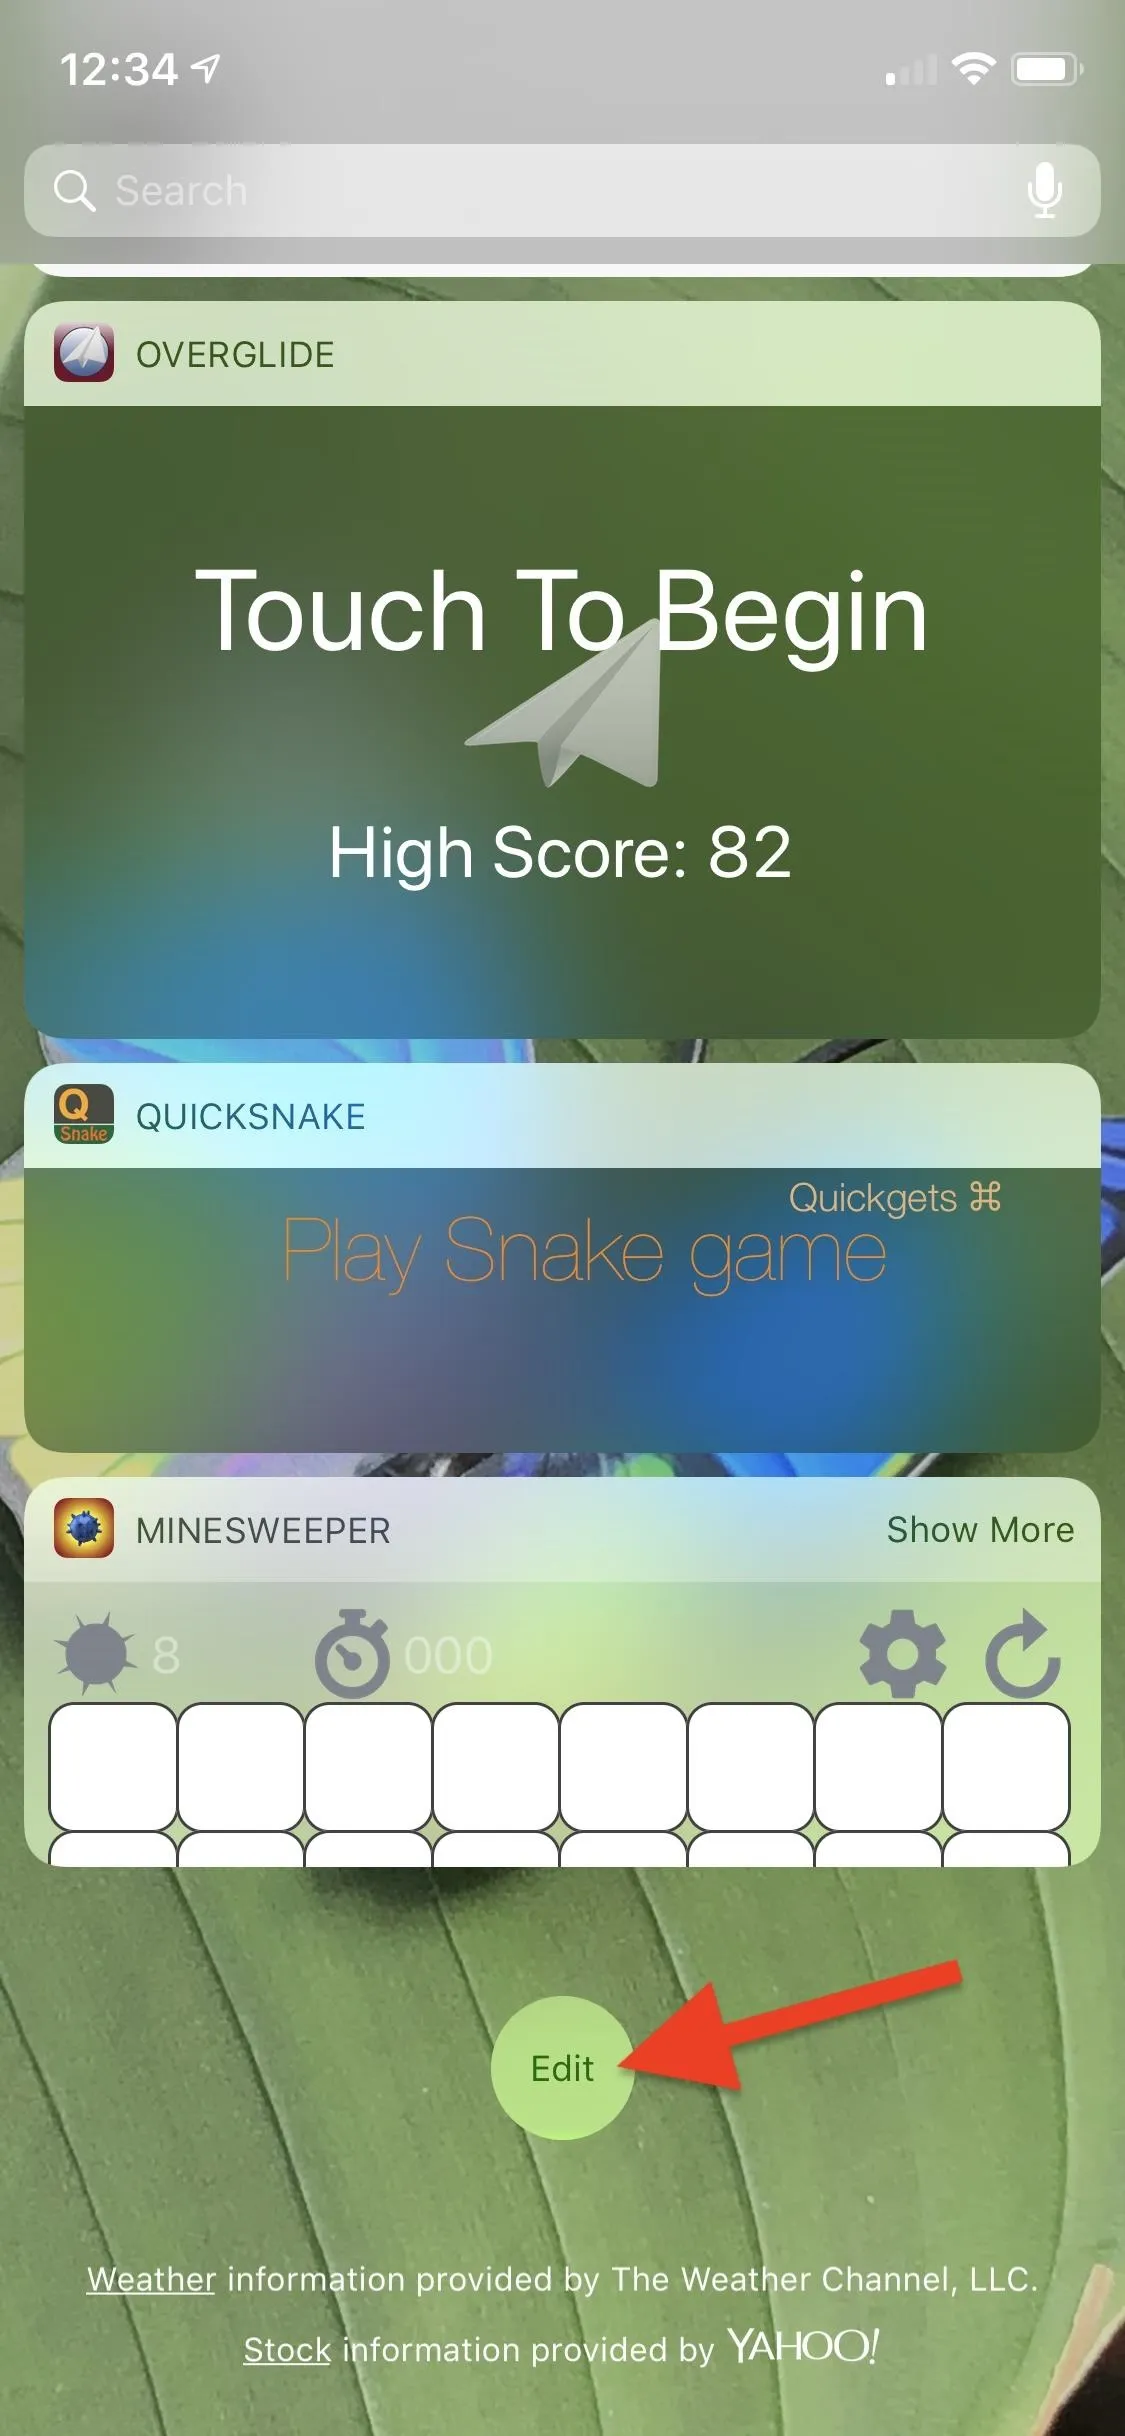
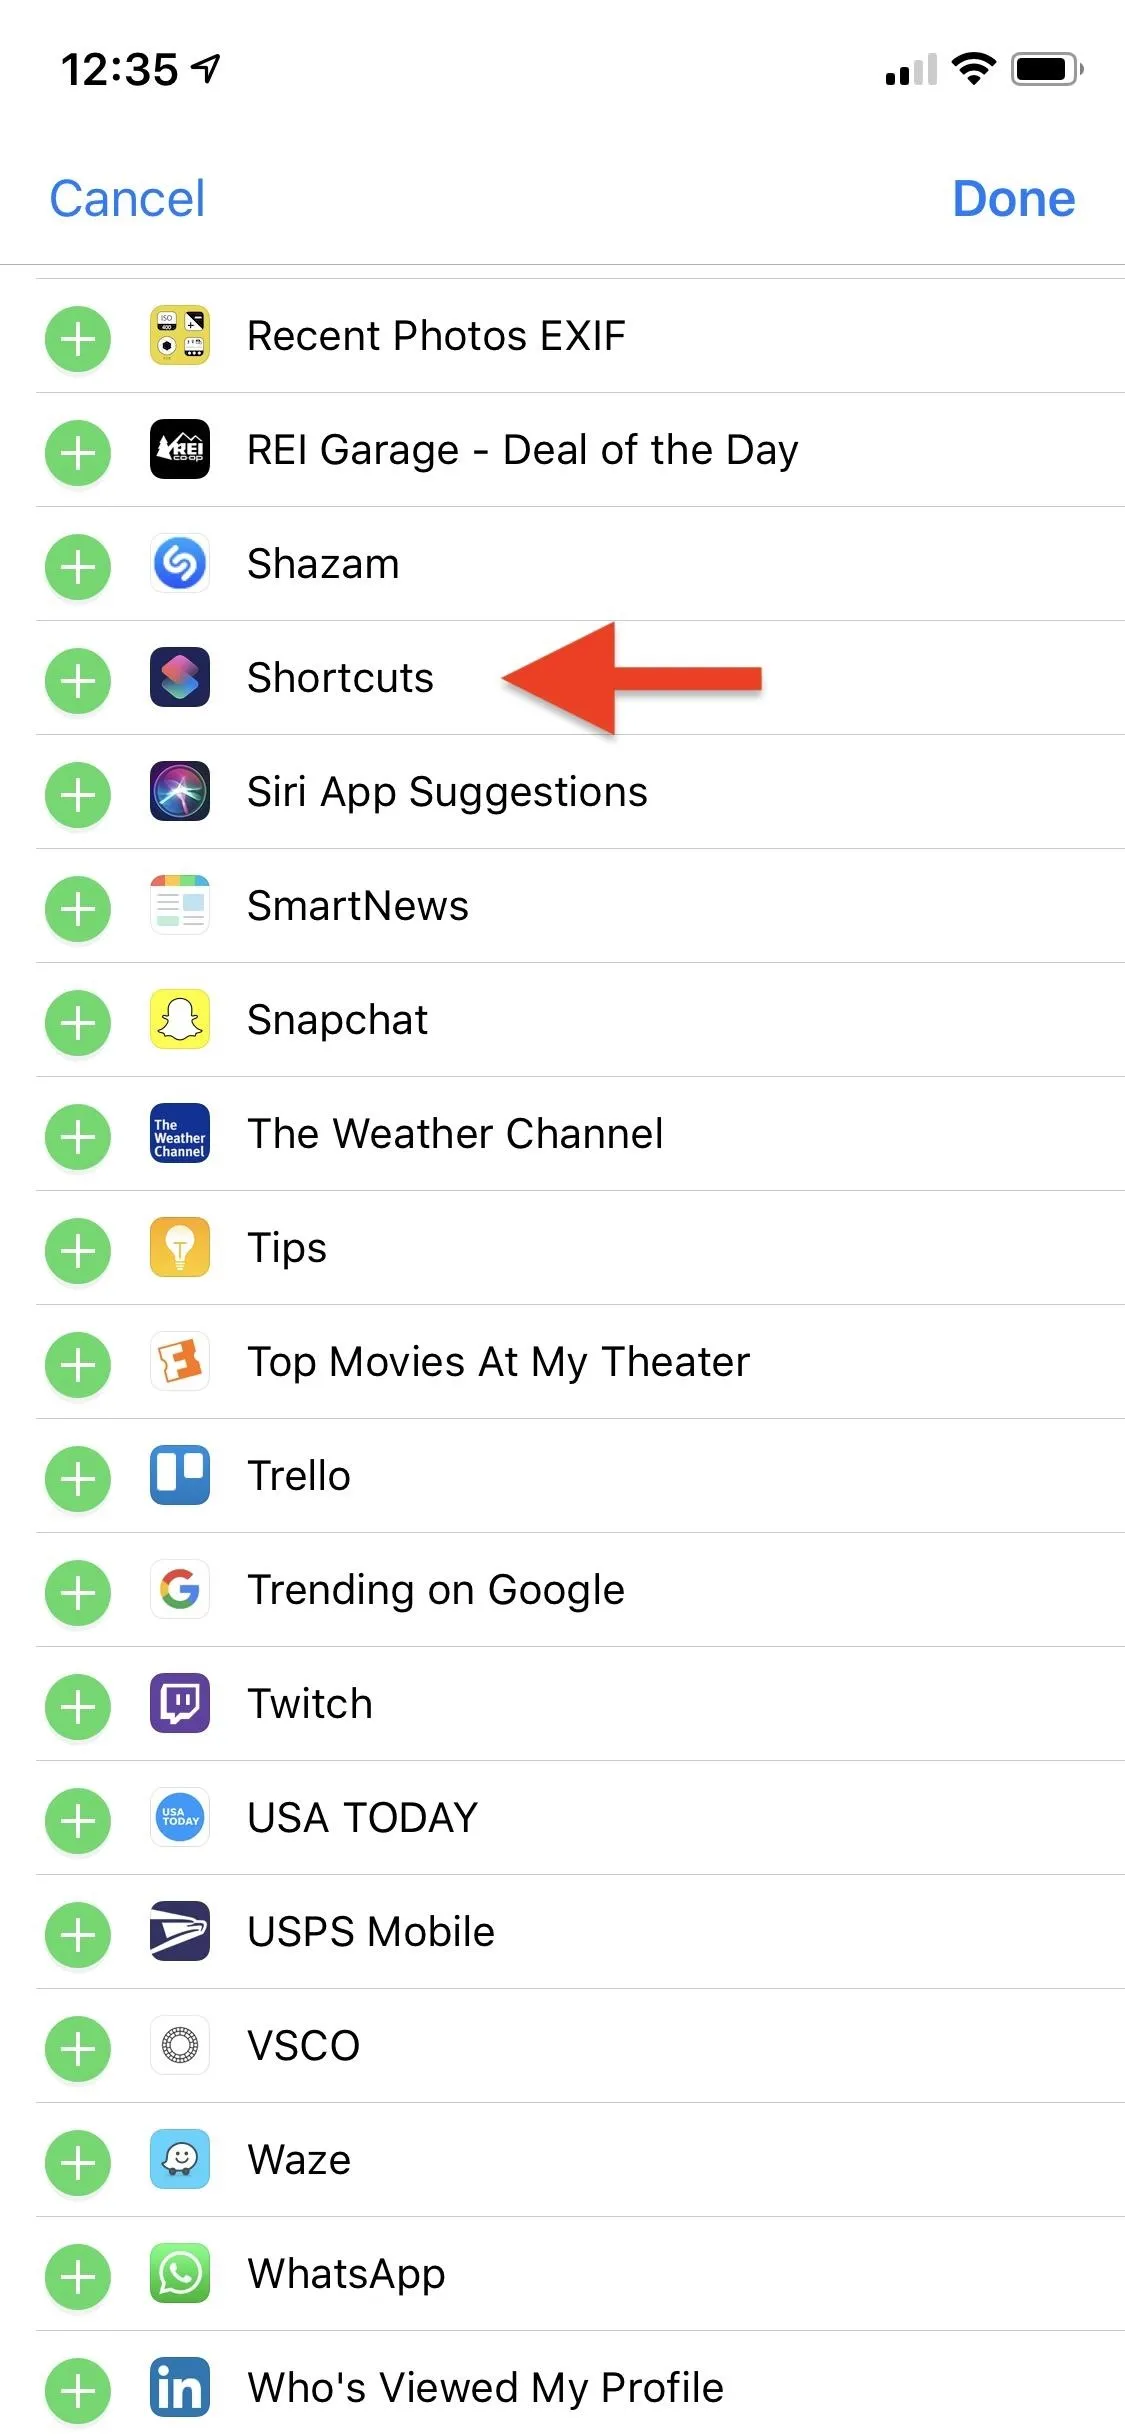


Now, whenever you swipe right from the first home screen page, lock screen, or notifications window to view the Today View screen, you'll see the widget at the bottom (you can rearrange widgets in the "Edit" screen). If you don't see your workflow right away, tap "Show More" to see the rest. To use it, just tap on the workflow.
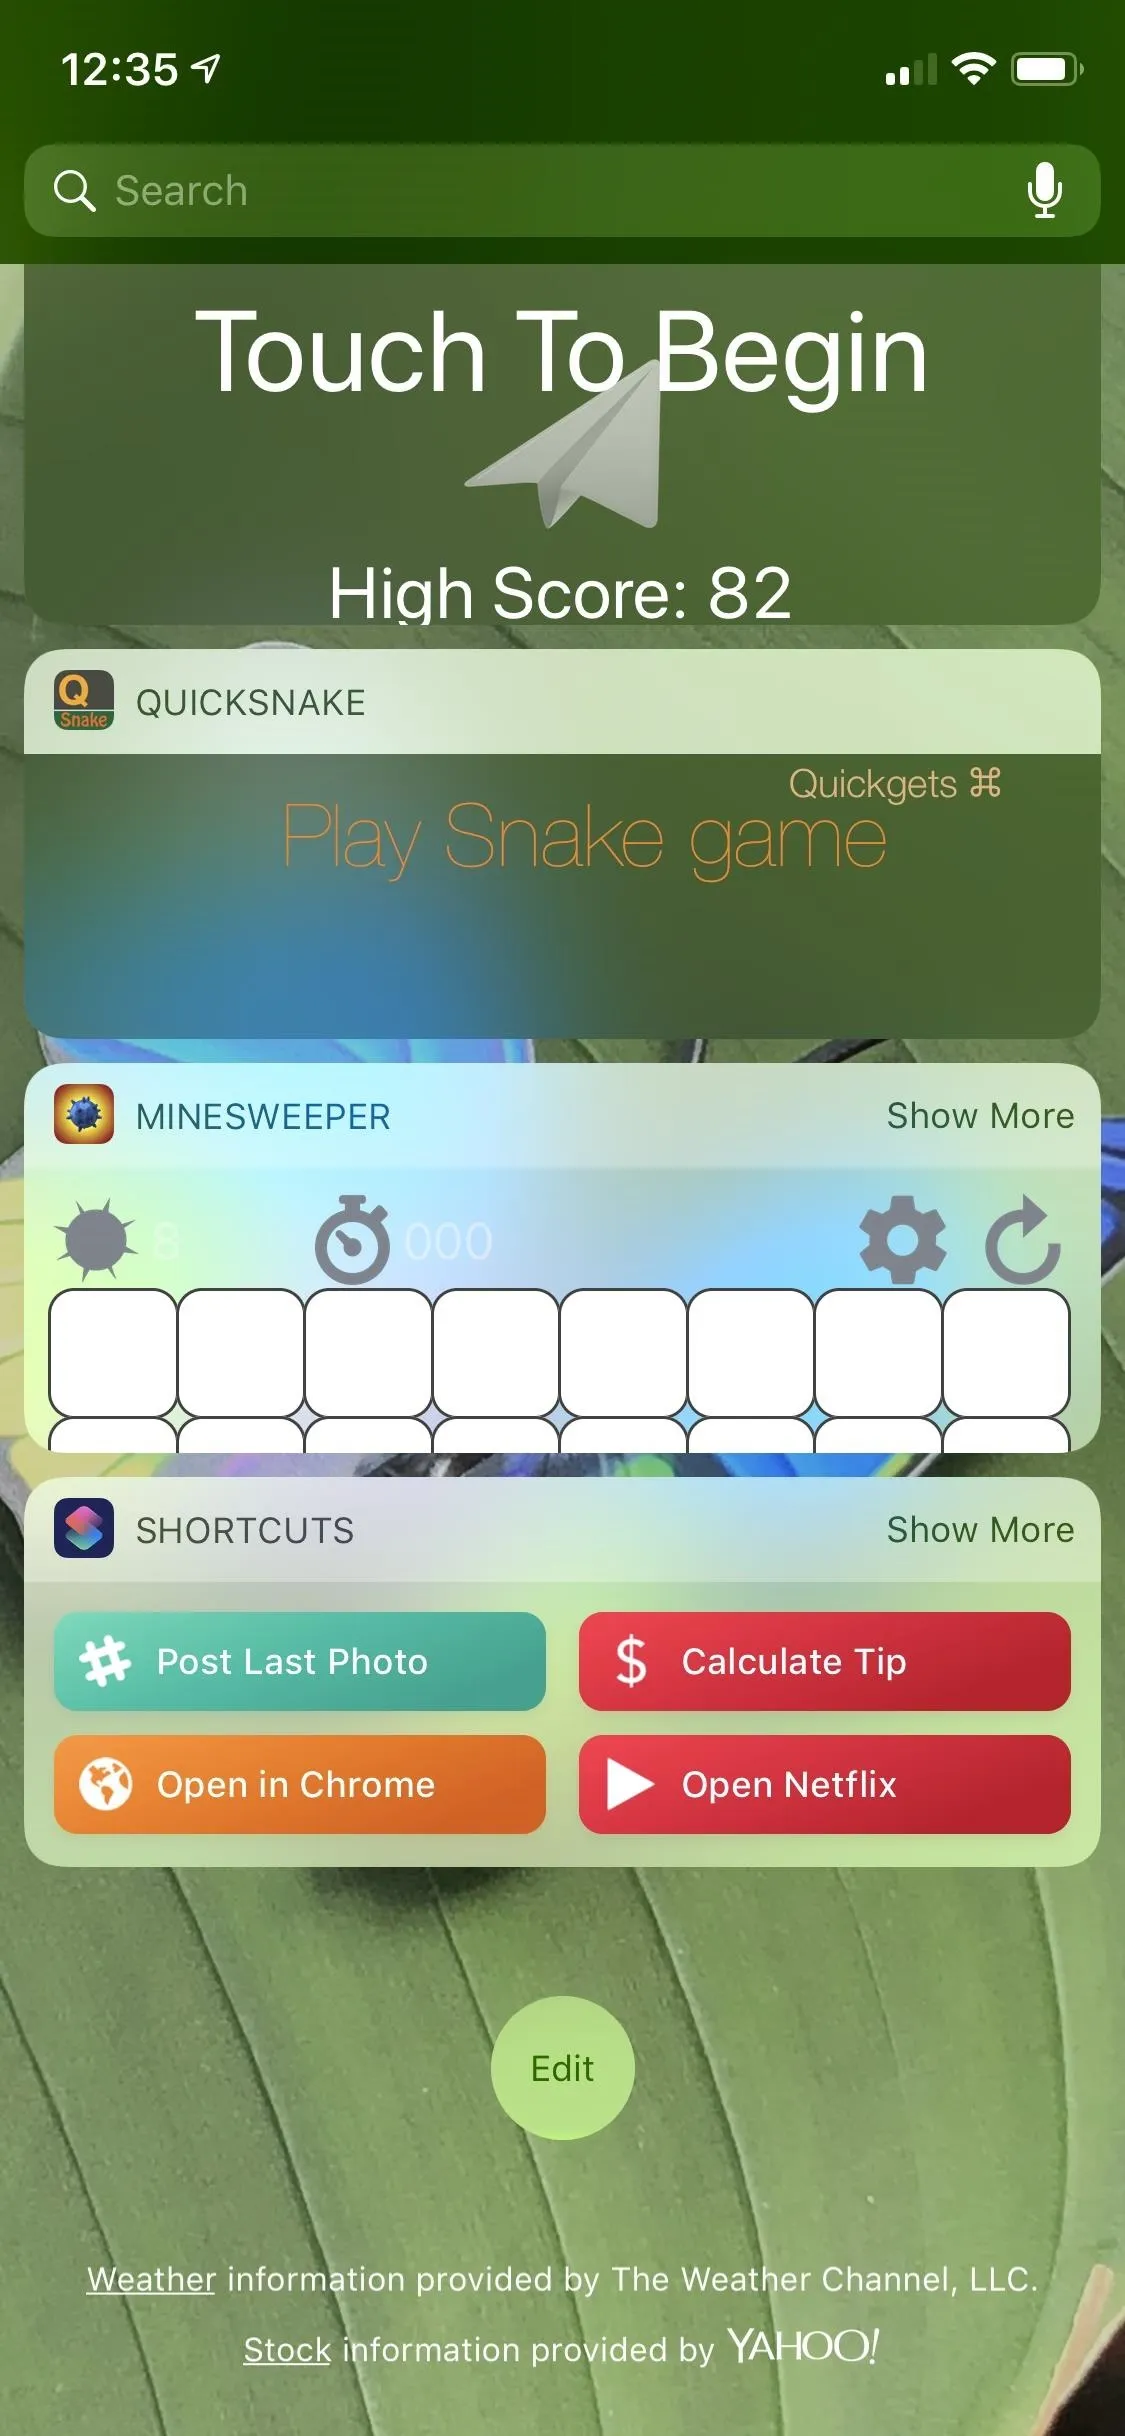
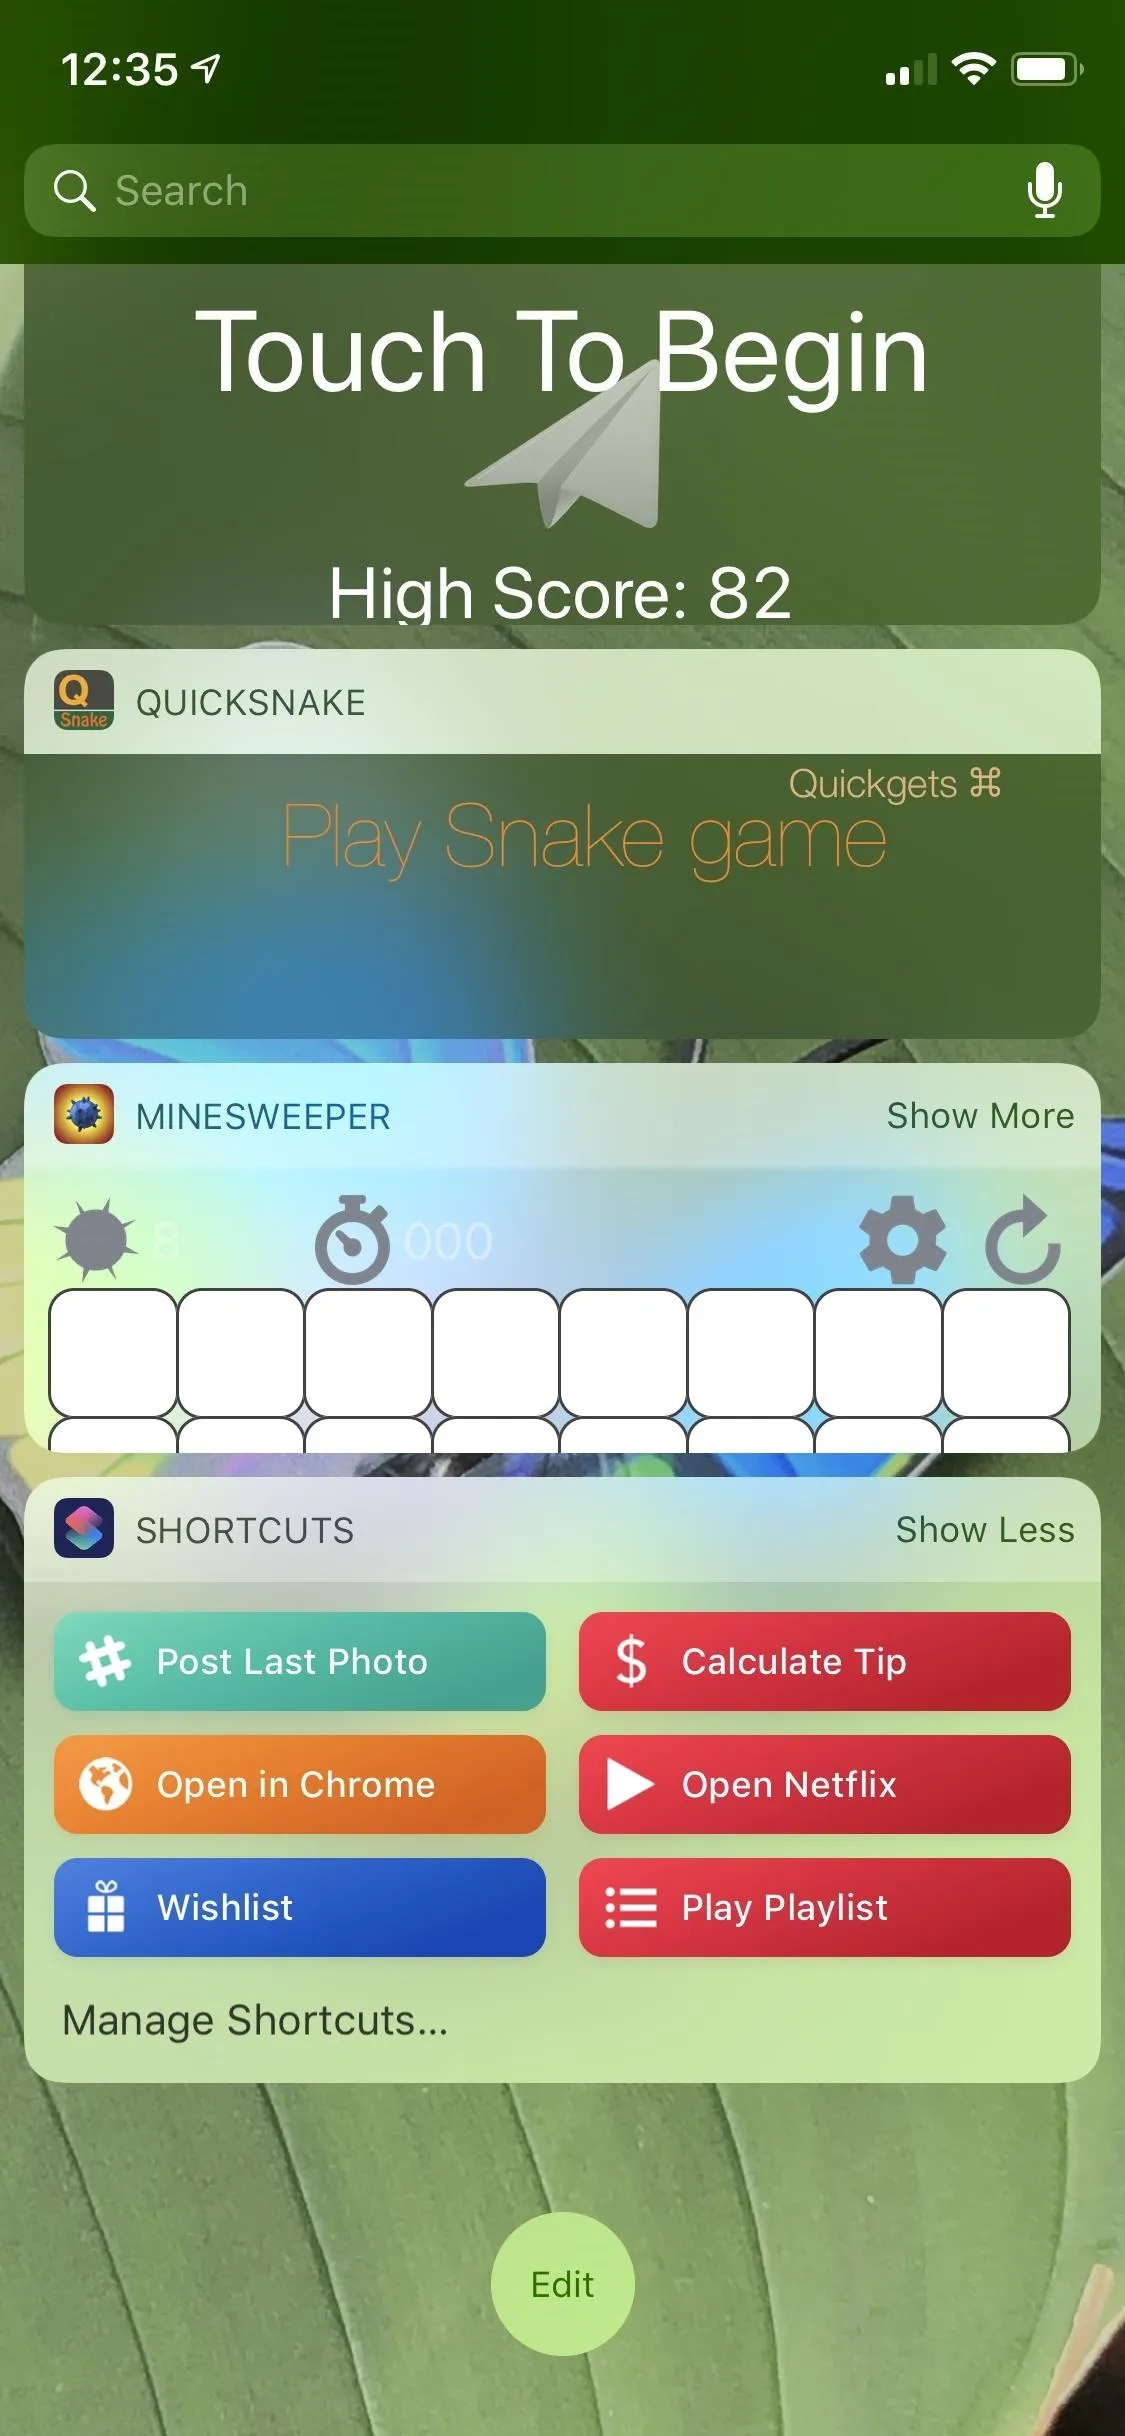


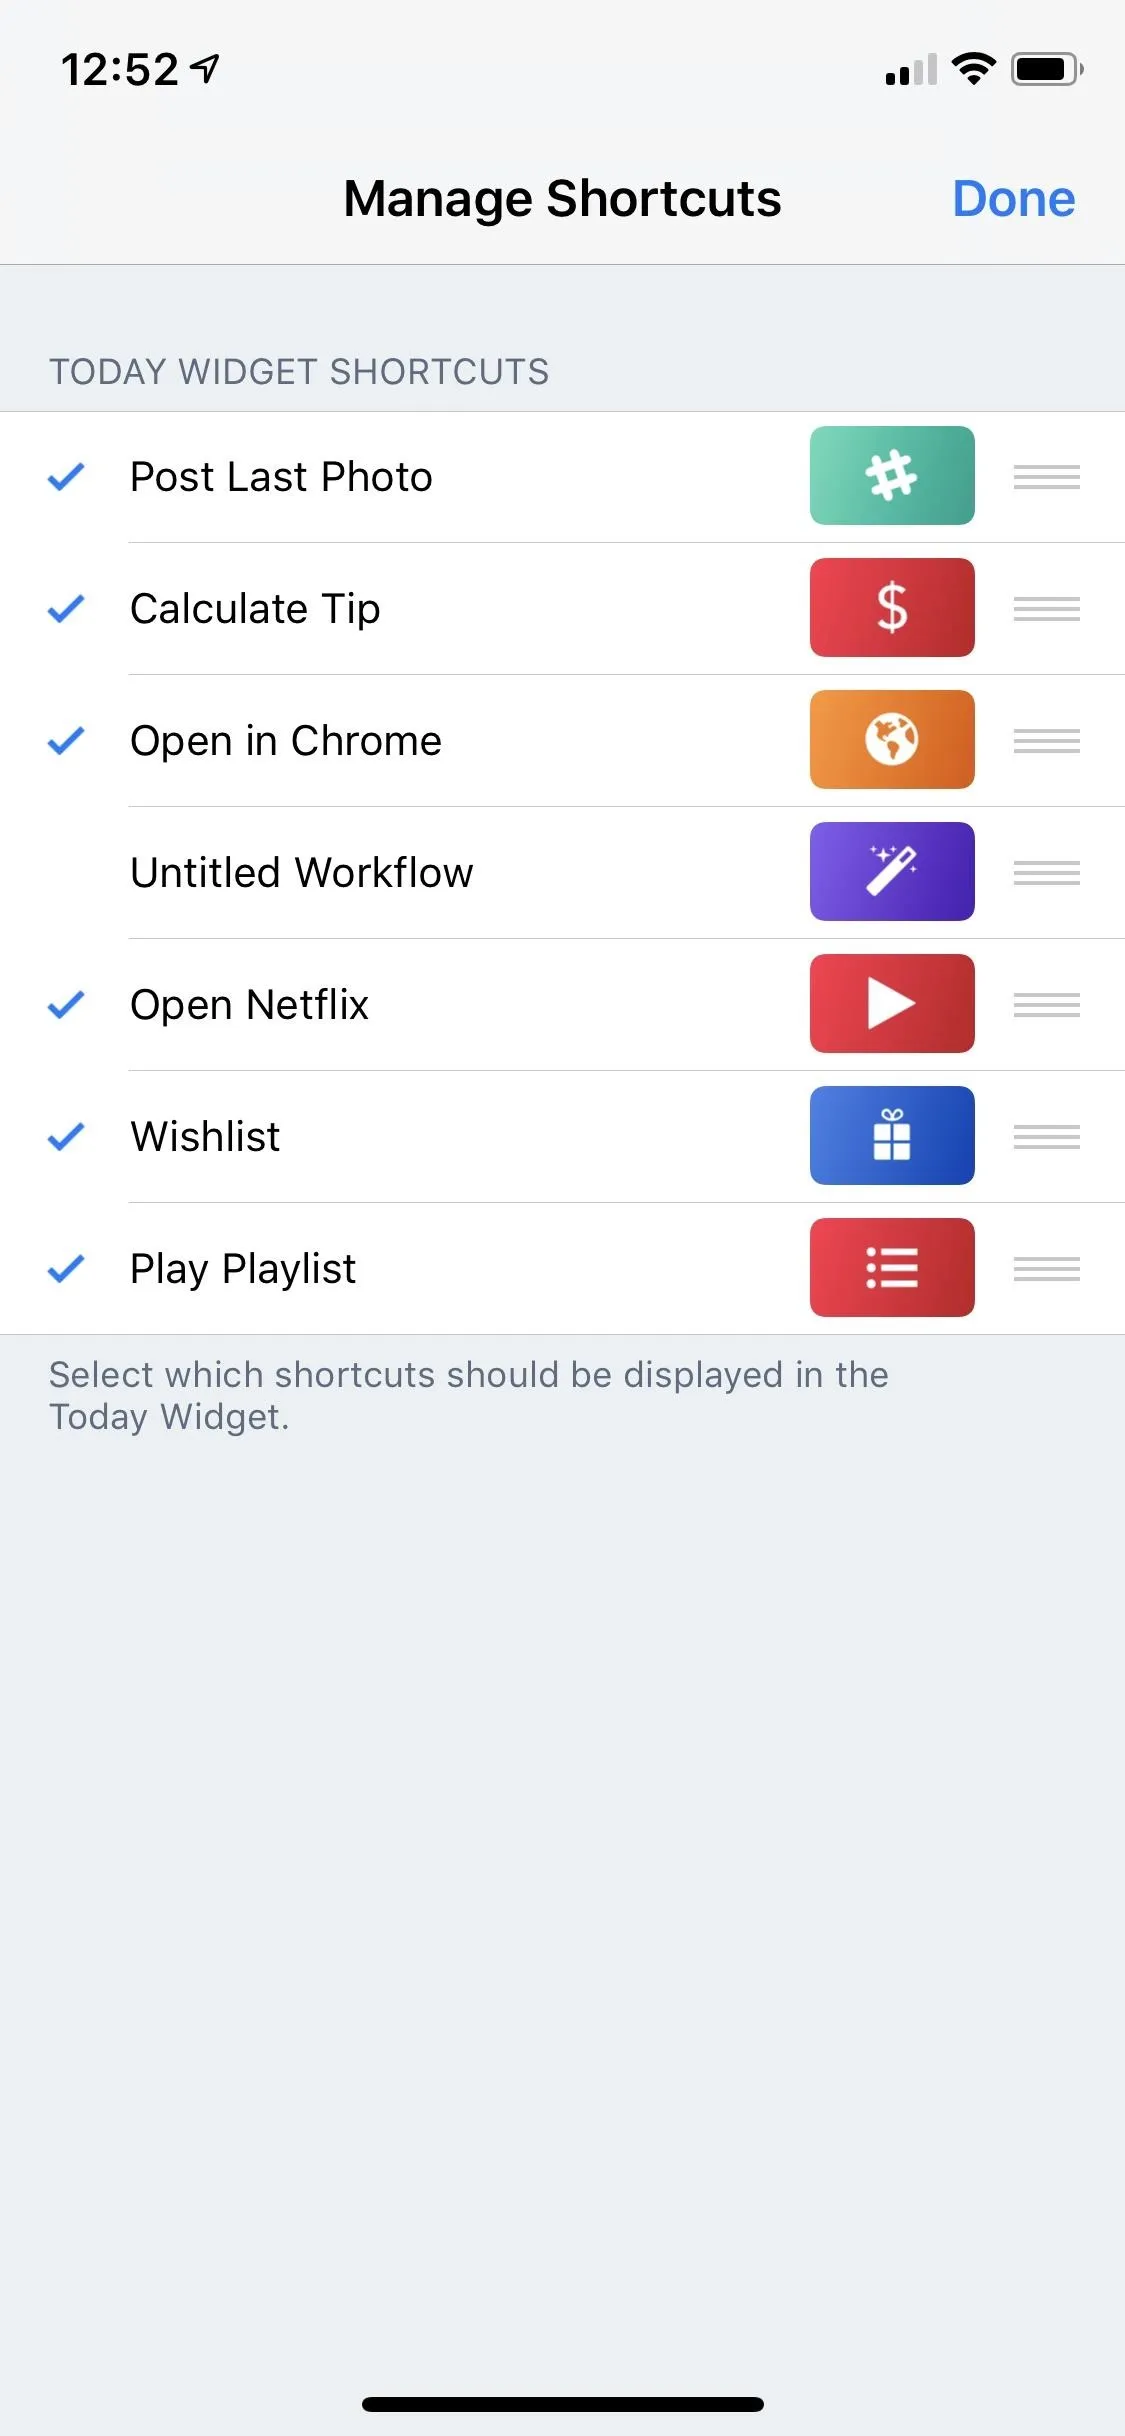
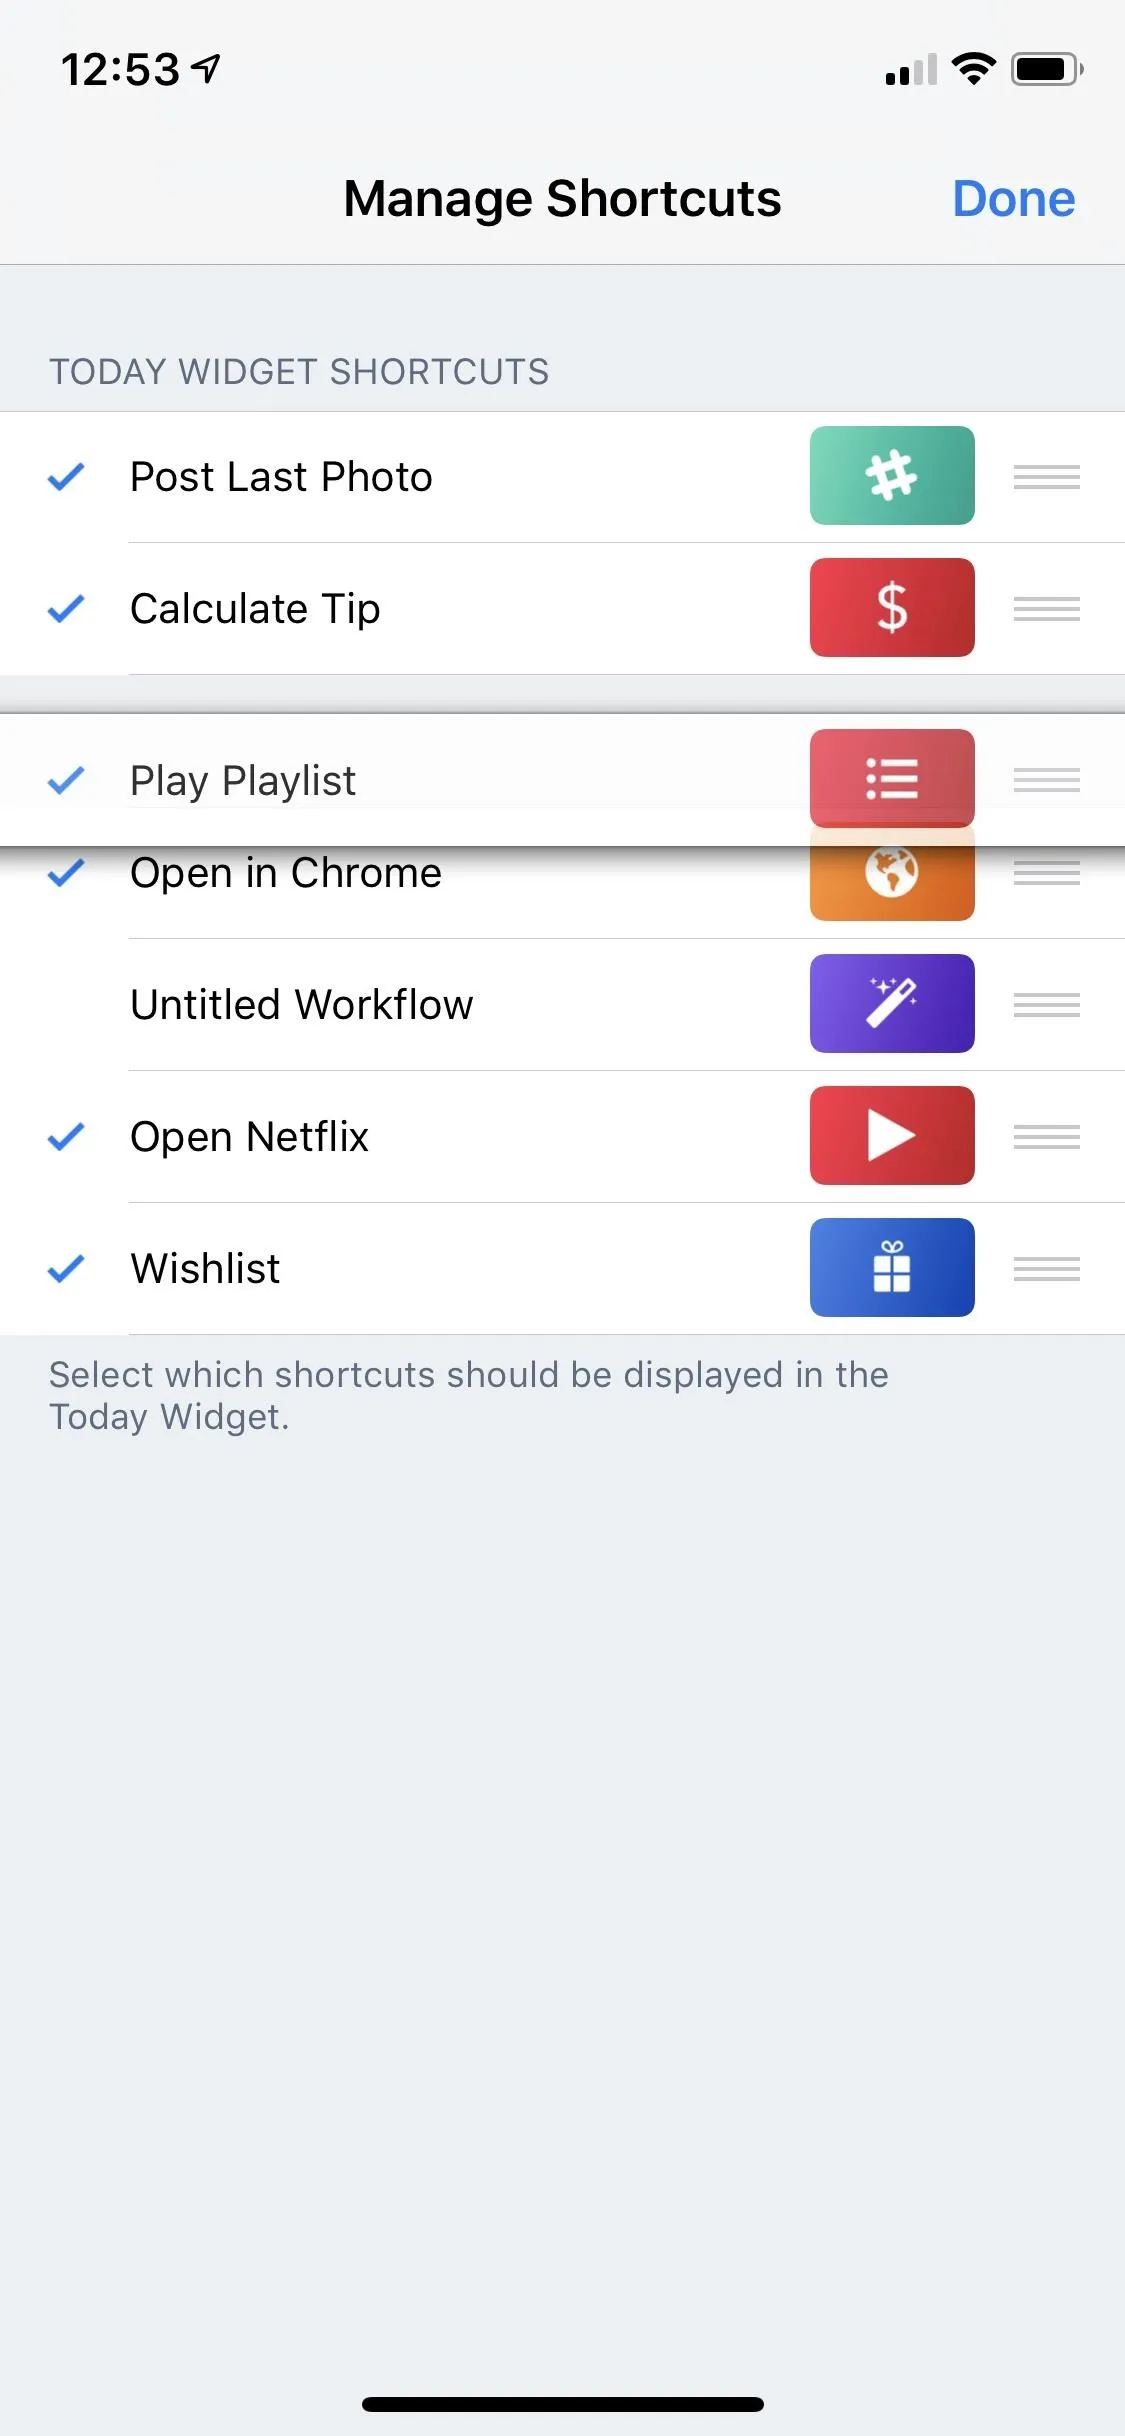
If you tap "Manage Shortcuts" in the widget, you'll see all of your workflows in the Shortcuts app. Here, you can check or uncheck workflows to include in the widget as well as reorganize them by dragging and dropping from the three-lined icon.


Step 7: Customize Your Shortcut (Optional)
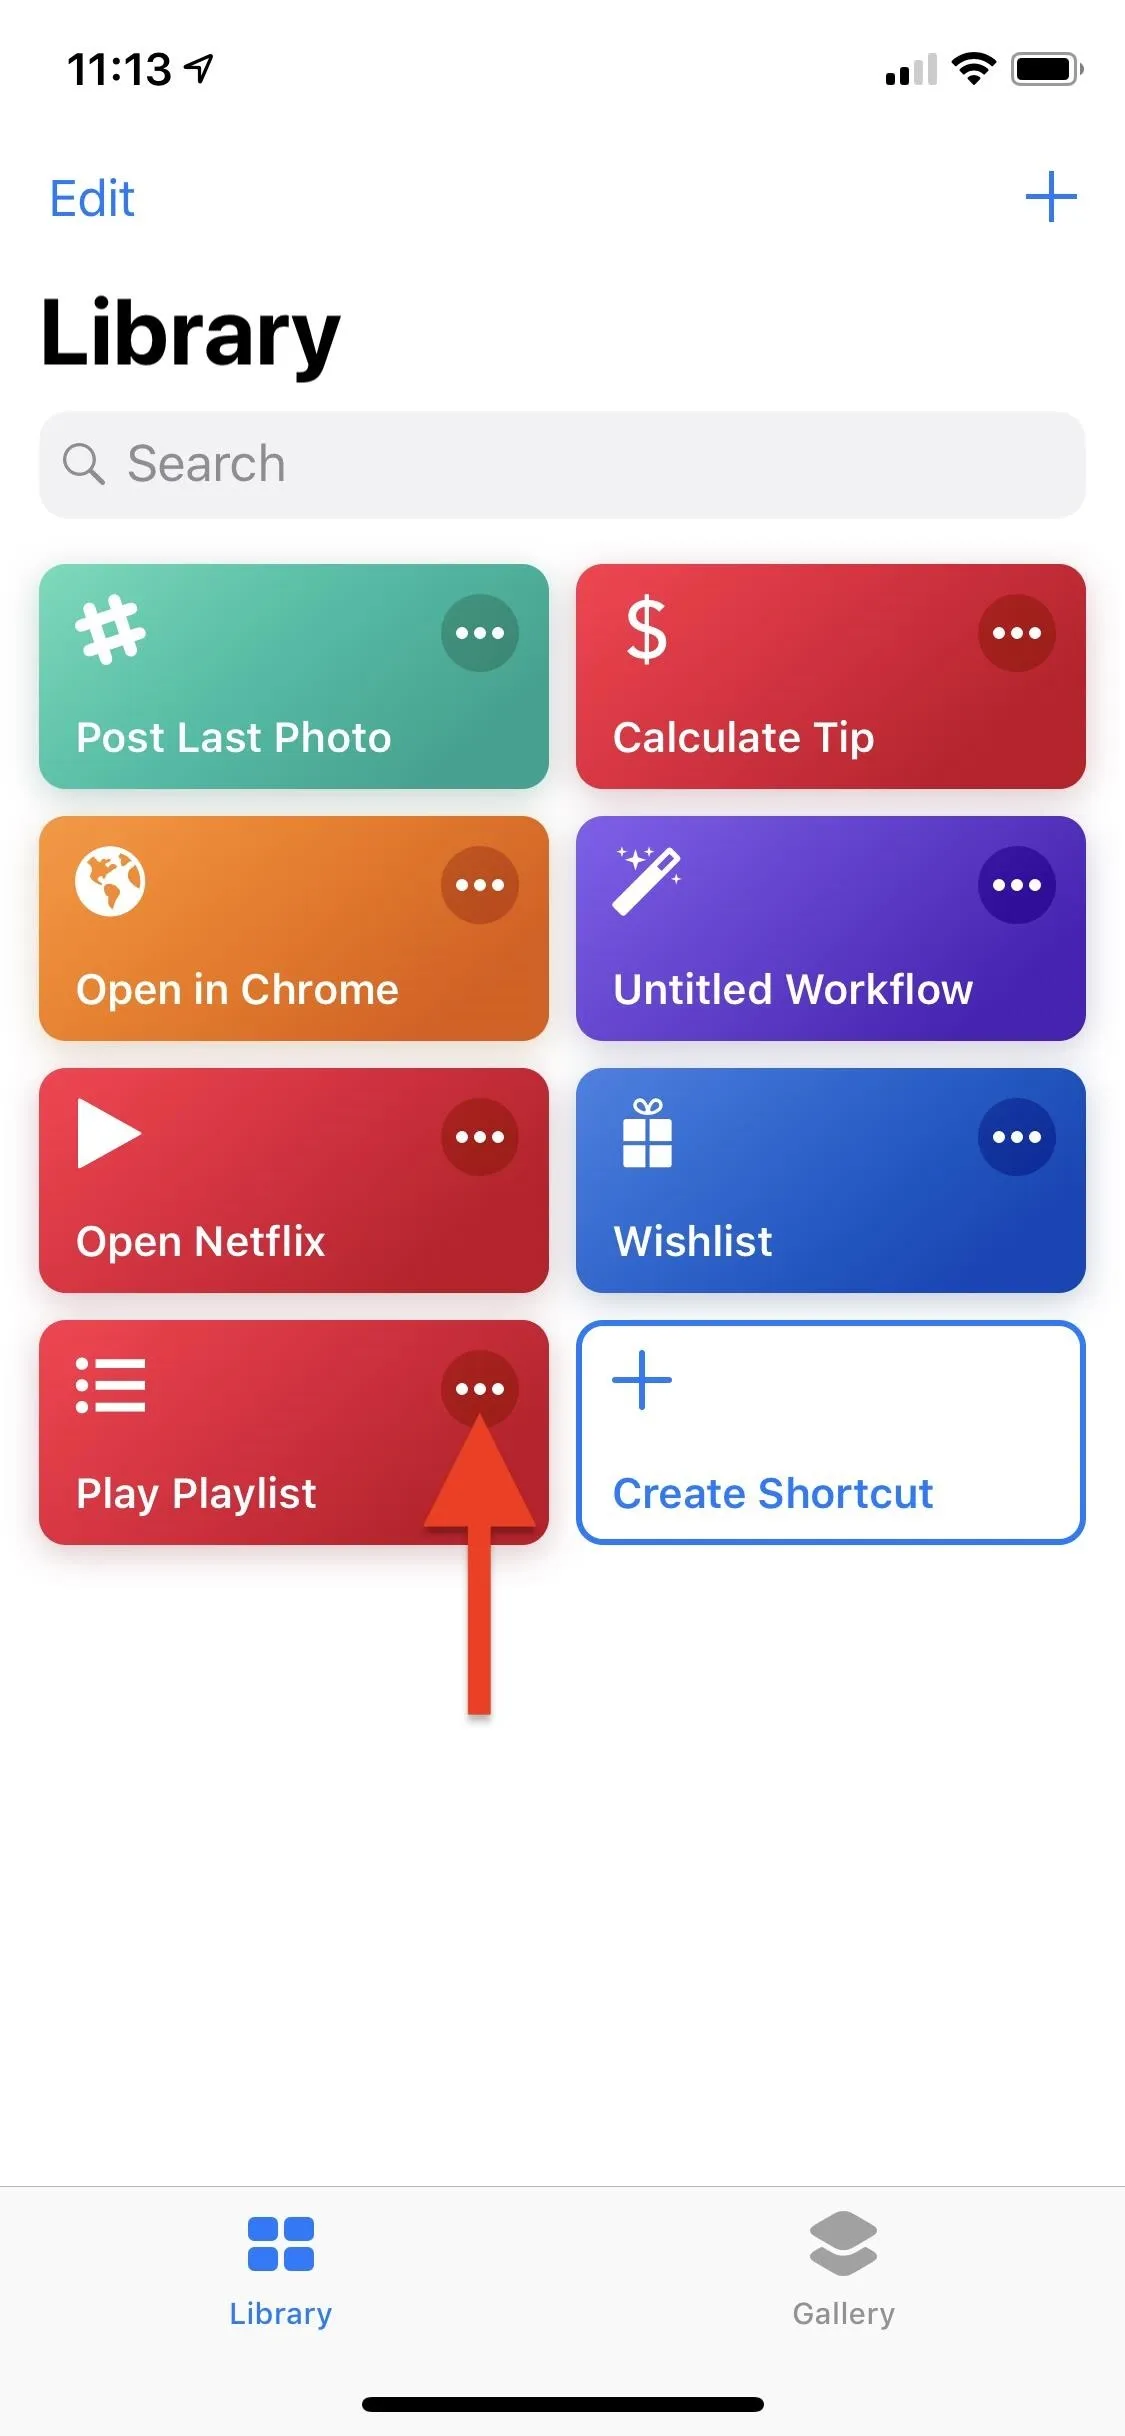
Sometimes, the default options Apple provides for a workflow aren't enough to get the job done right. For instance, in my "Play Playlist" example, I may want to shuffle the playlist or disable shuffle altogether. To see what changes you can make, tap the ellipsis (•••) icon on the workflow you want to edit in the Shortcuts app.
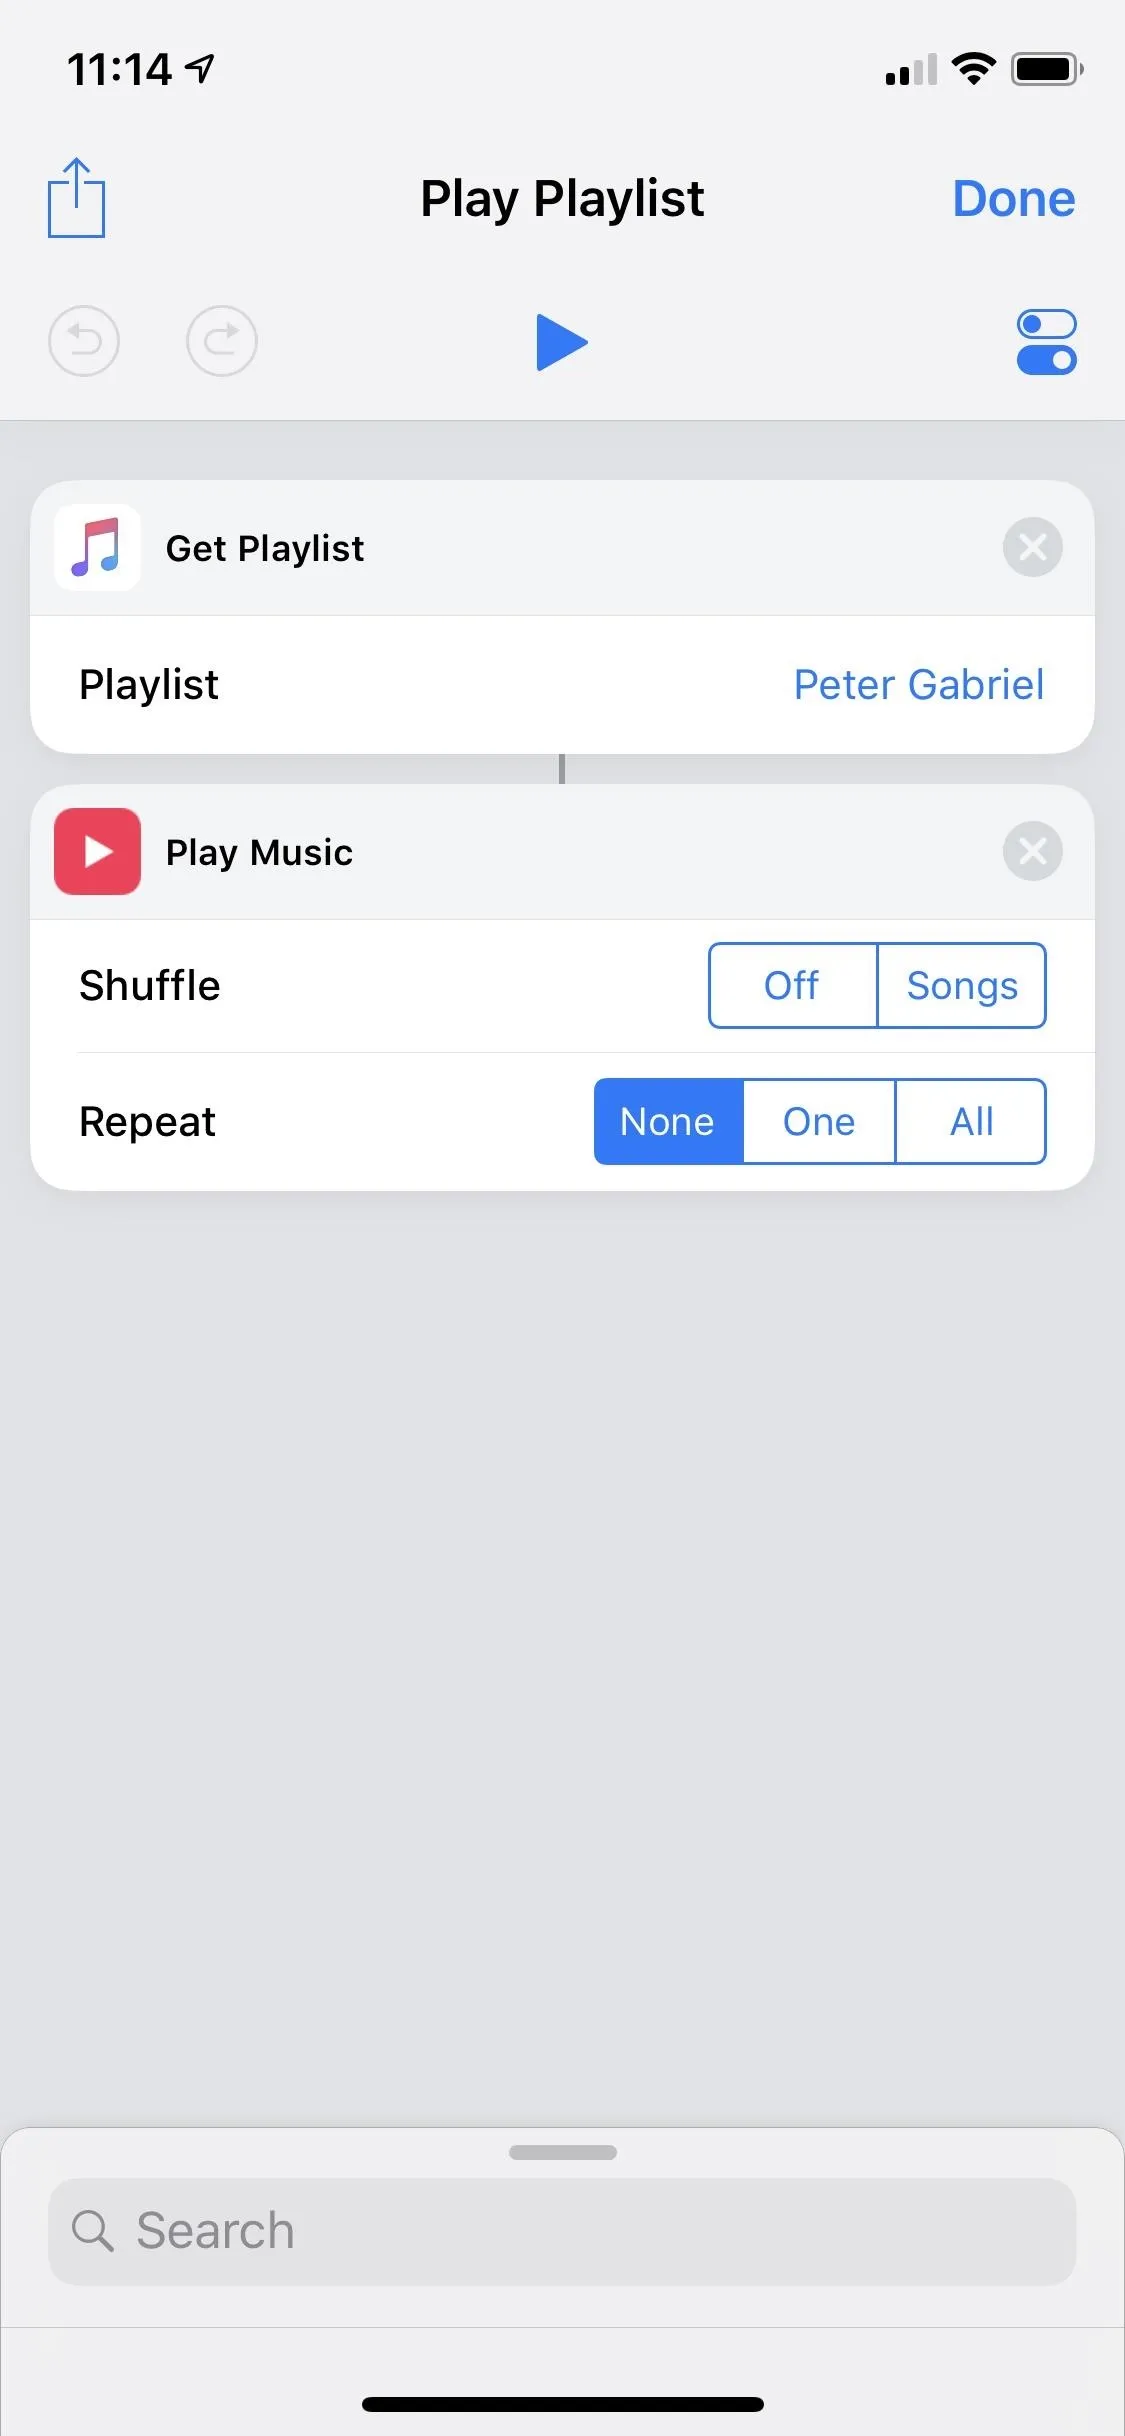
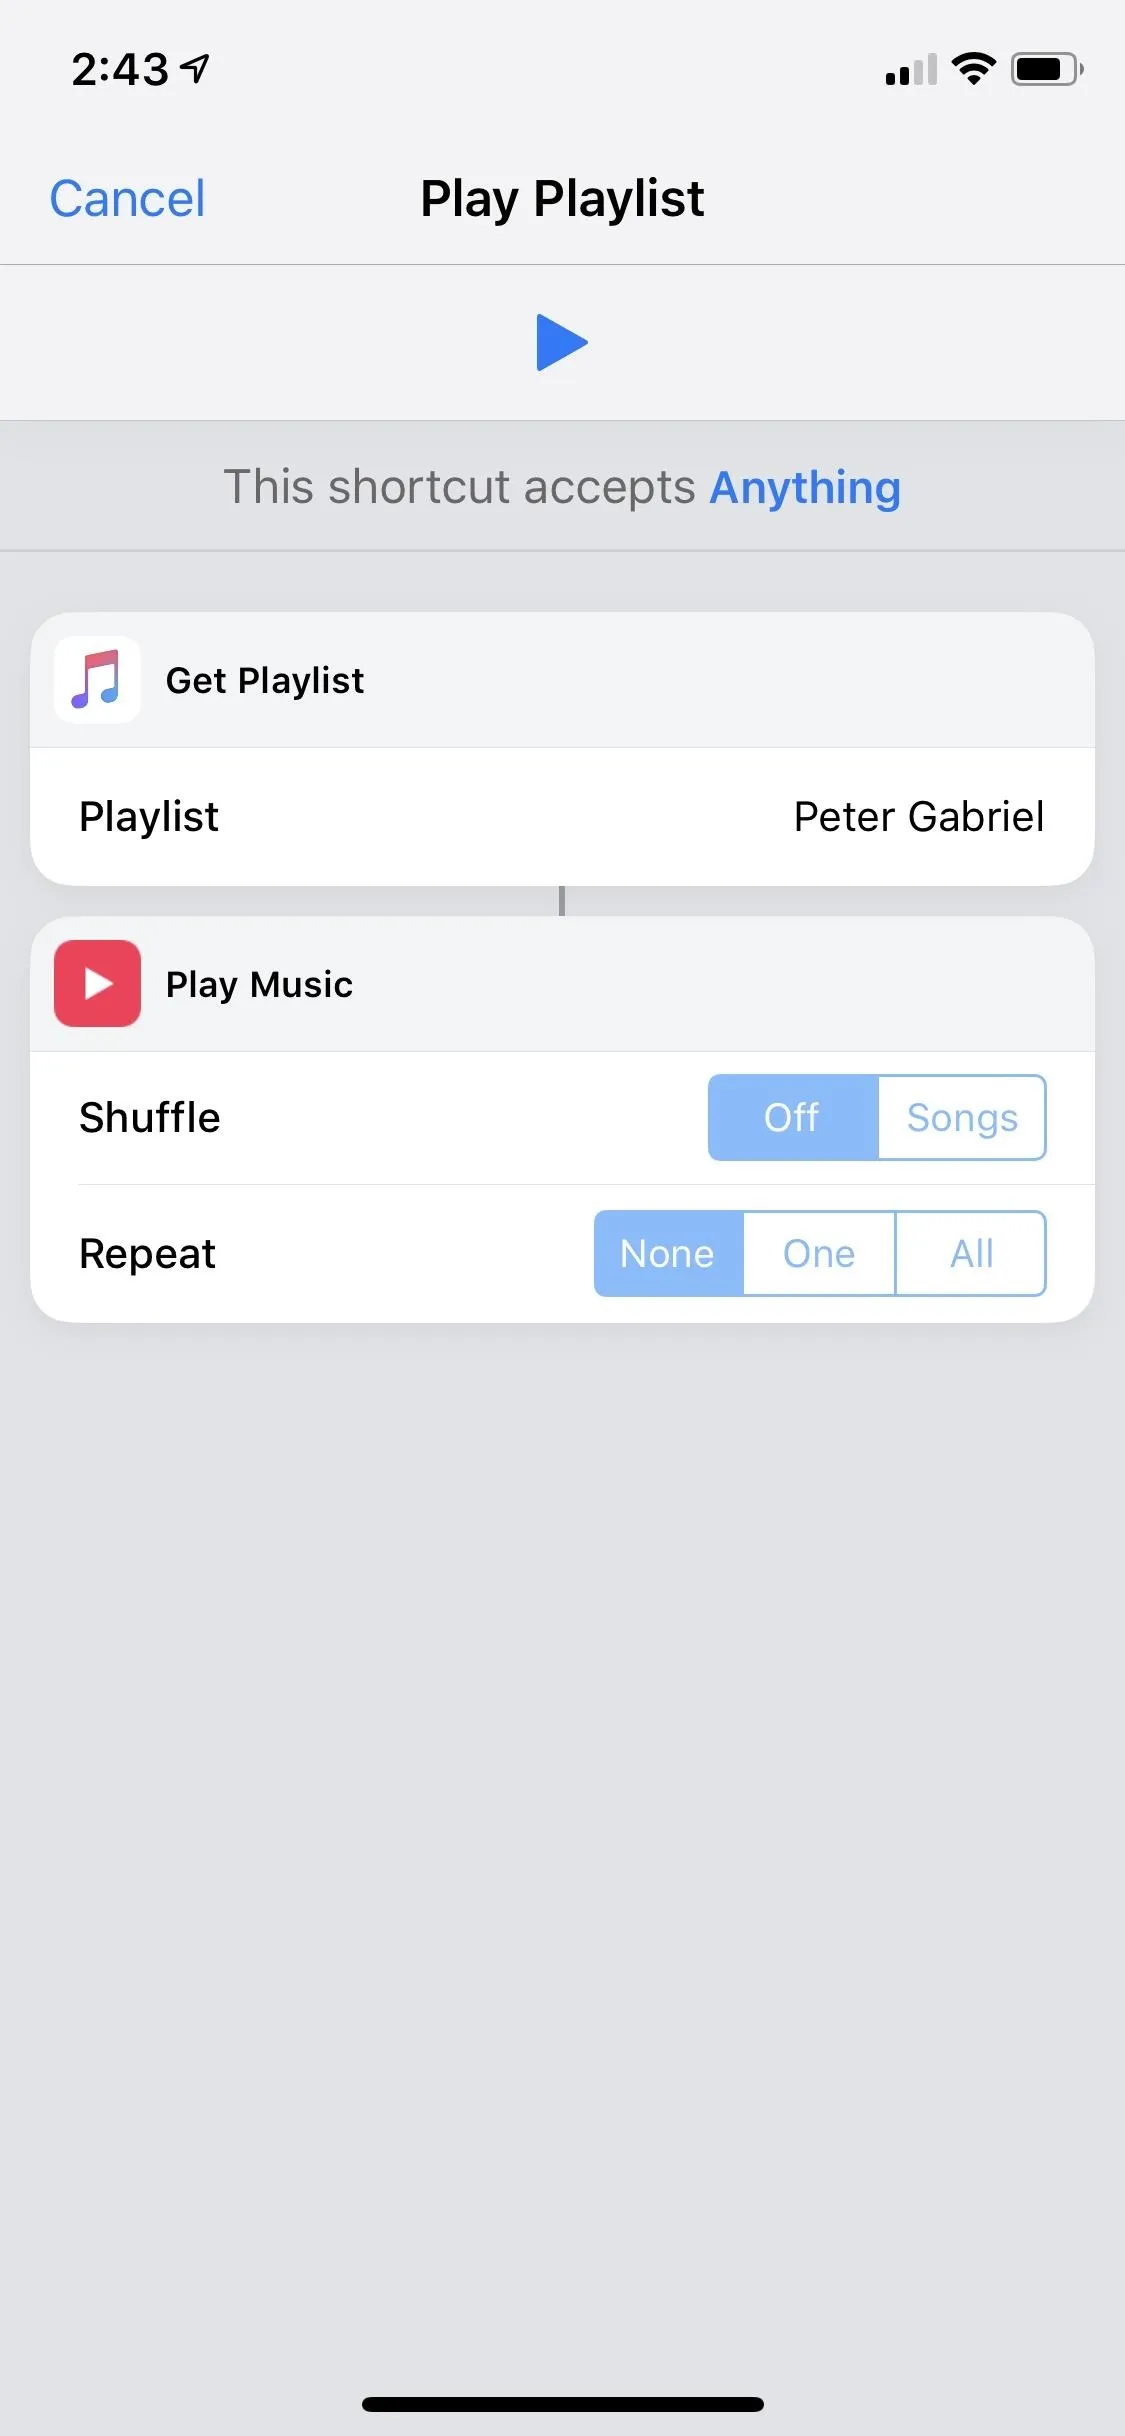
As you can see below, there's not much for me to edit or change with the "Play Playlist" workflow. I can tap "Playlist" to change the playlist, turn shuffle "Off" or shuffle "Songs," or repeat one song, all songs, or none of them. Tap the play button to test out your changes, then "Done' to save them. You can also pull up the search bar to search or browse for more actions that you can add.
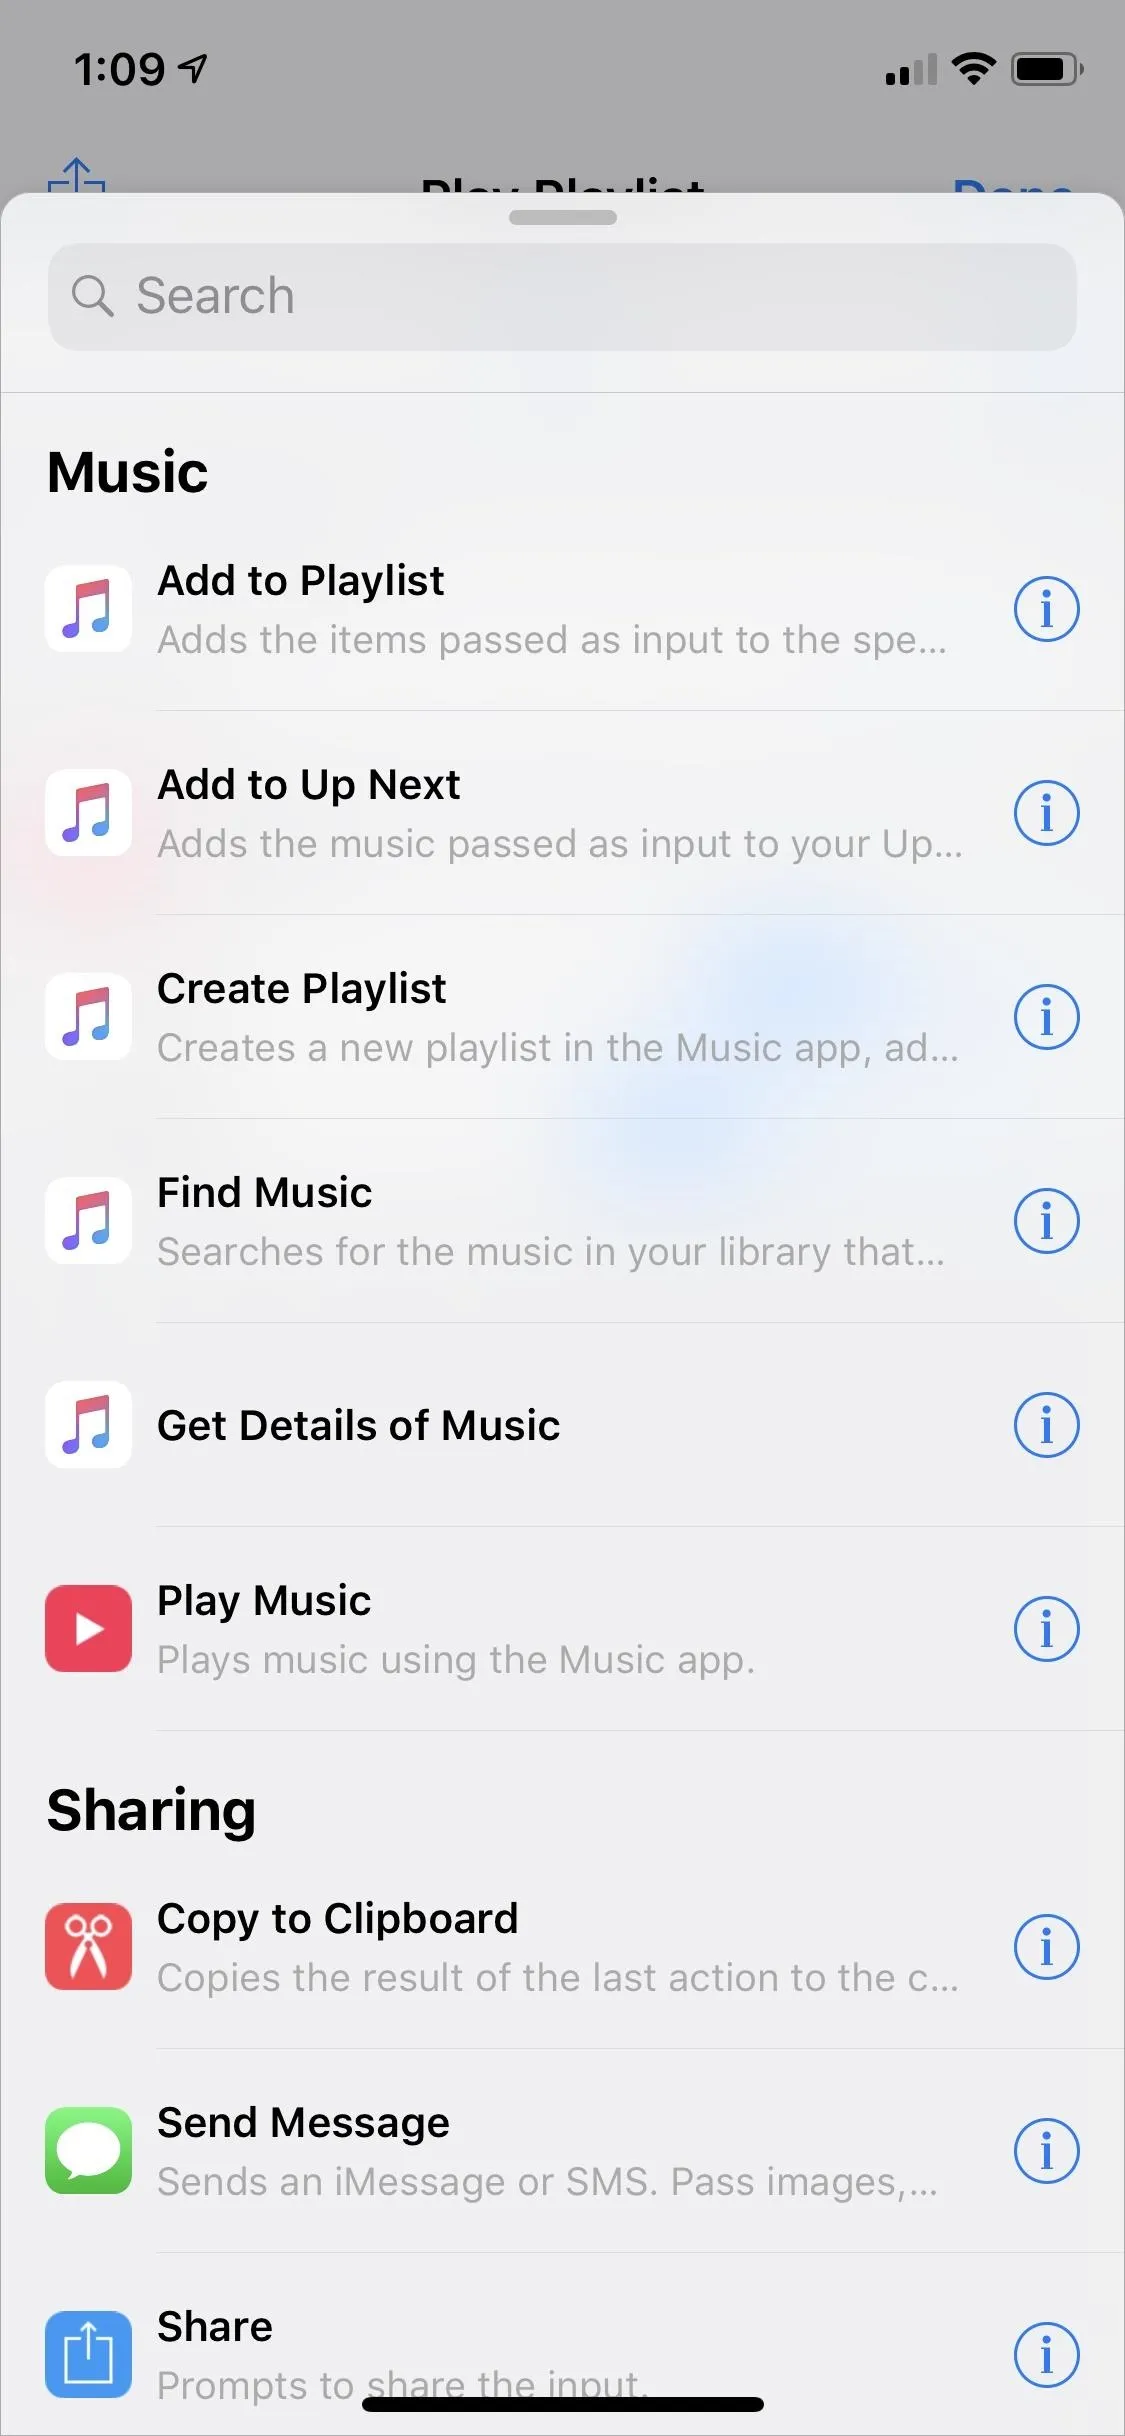


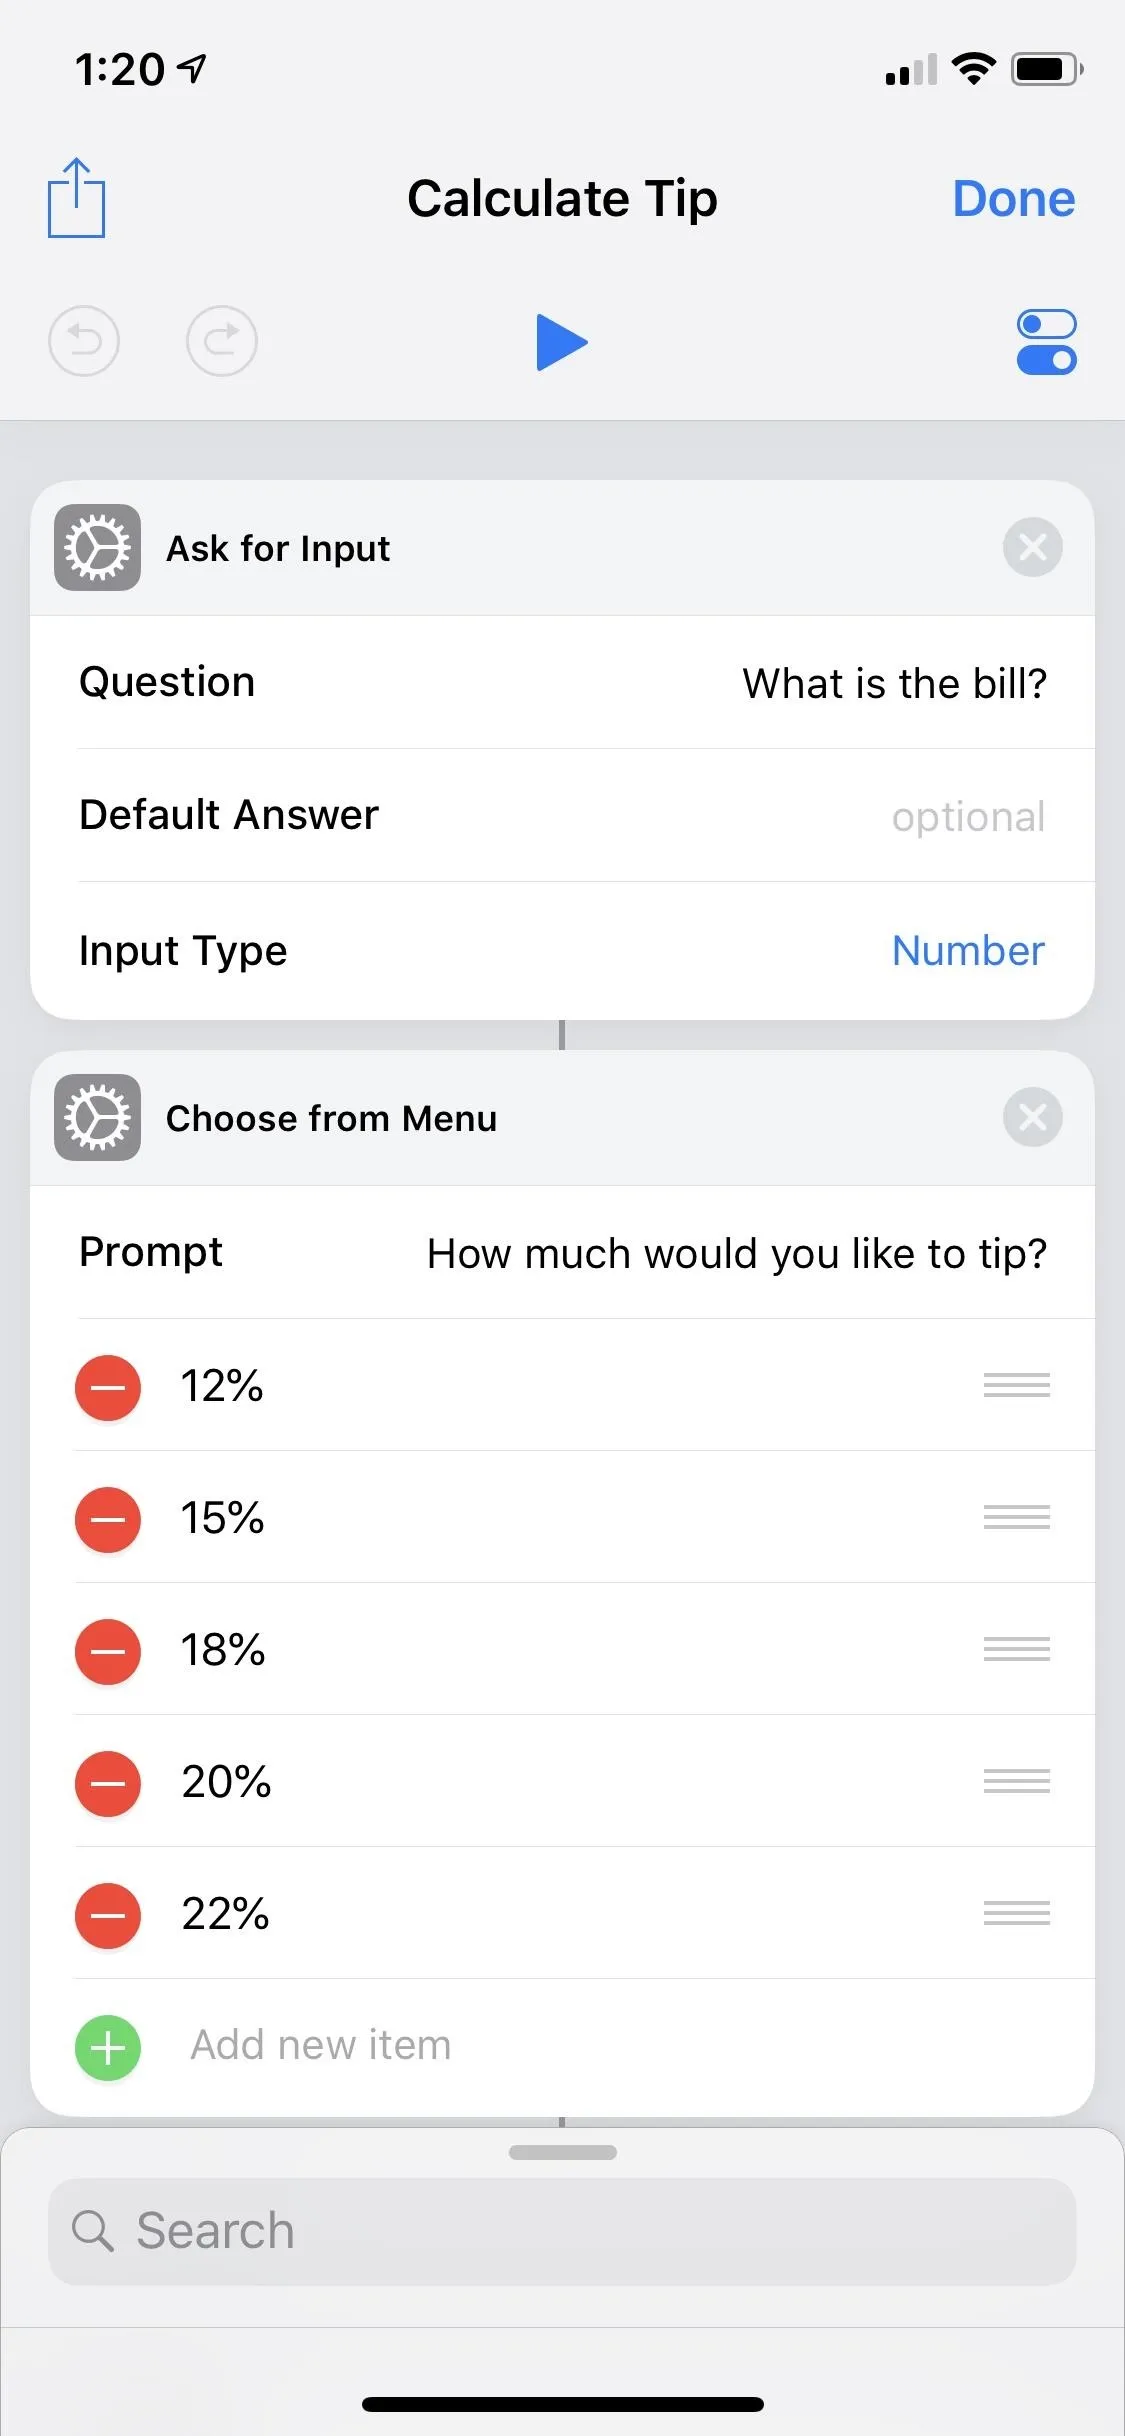
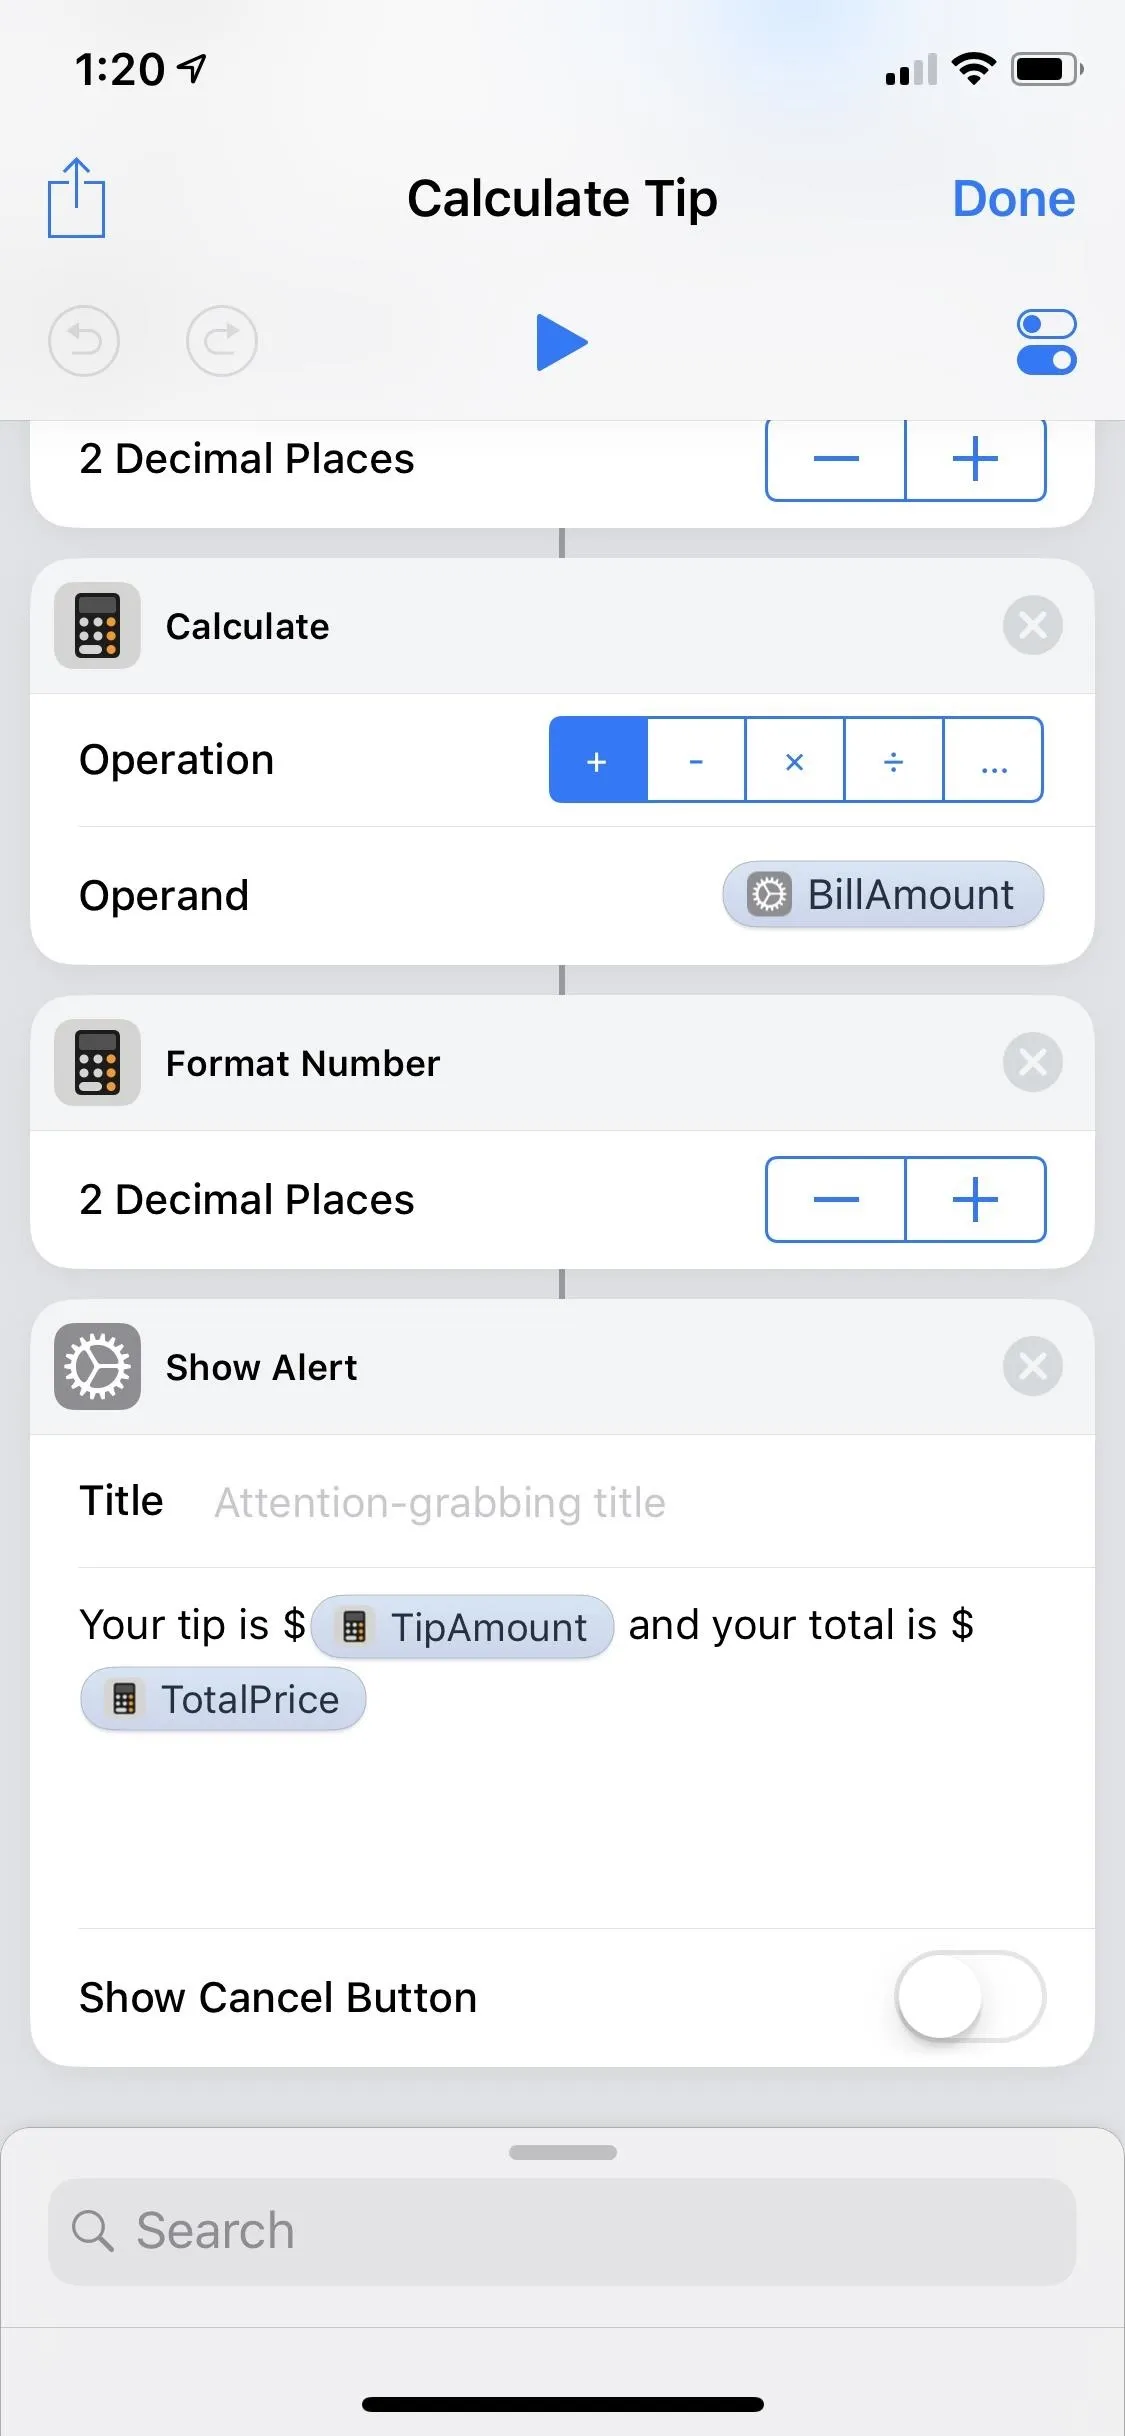
That is a very simple example of what a workflow can do. To see something more complicated, the below screenshots show what the workflow for my "Calculate Tip" shortcut looks like. There's a lot to change here!


Step 8: Change Your Shortcut's Settings (Optional)
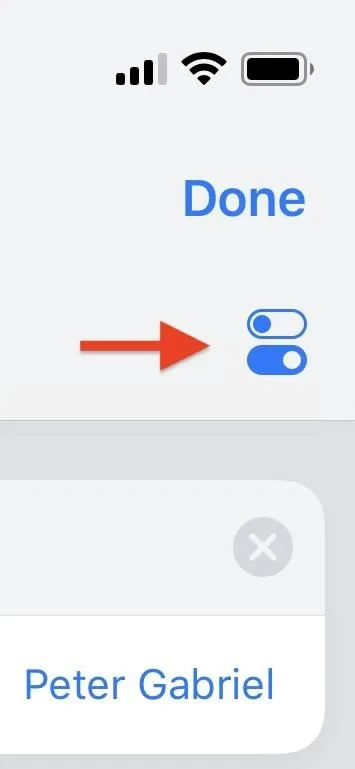
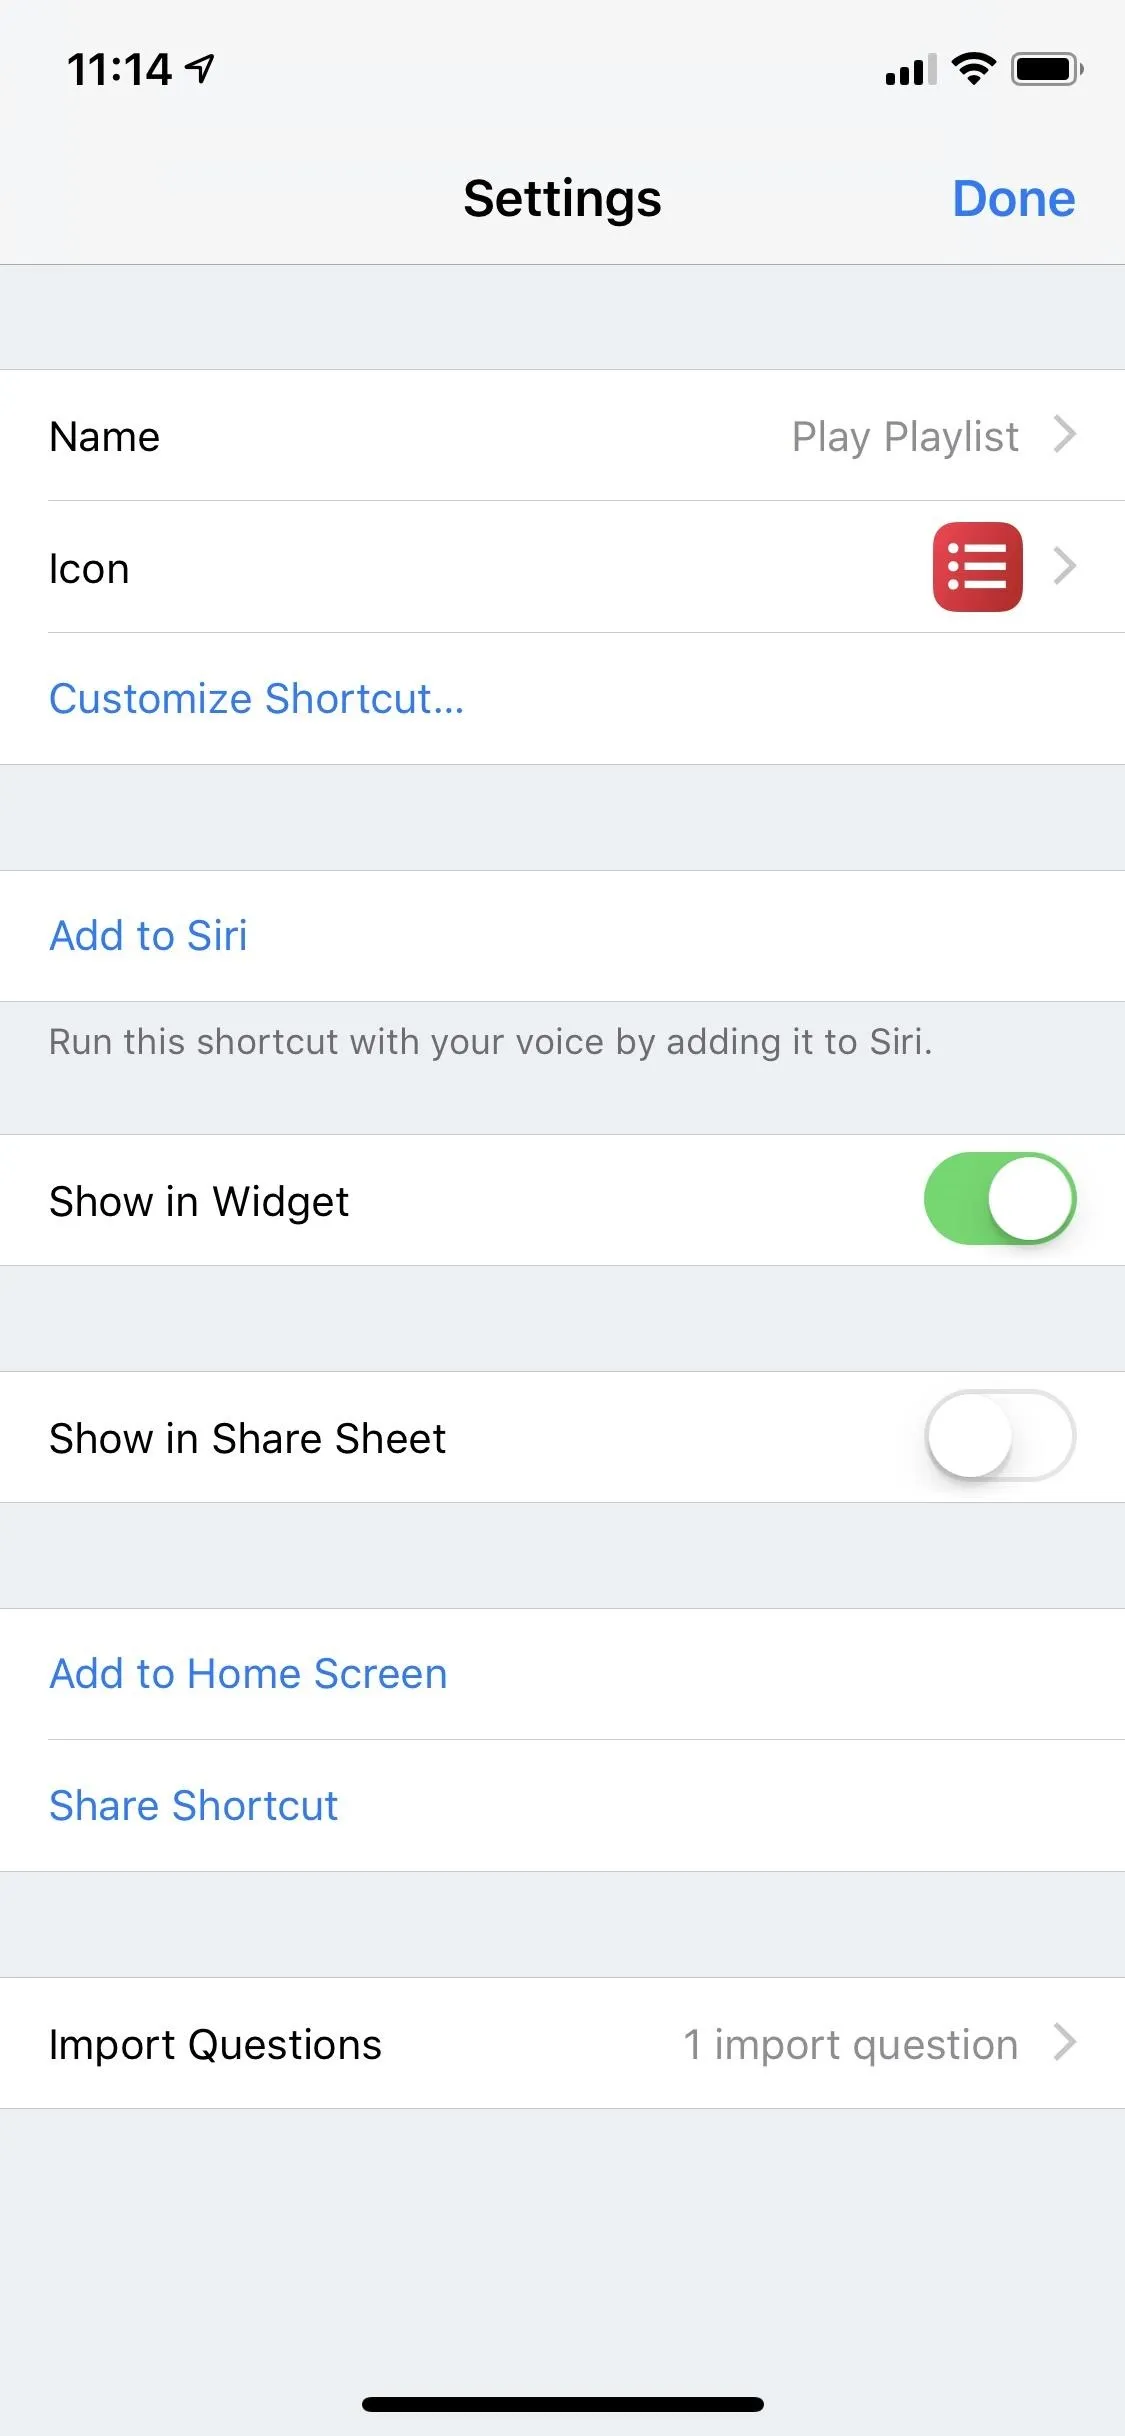
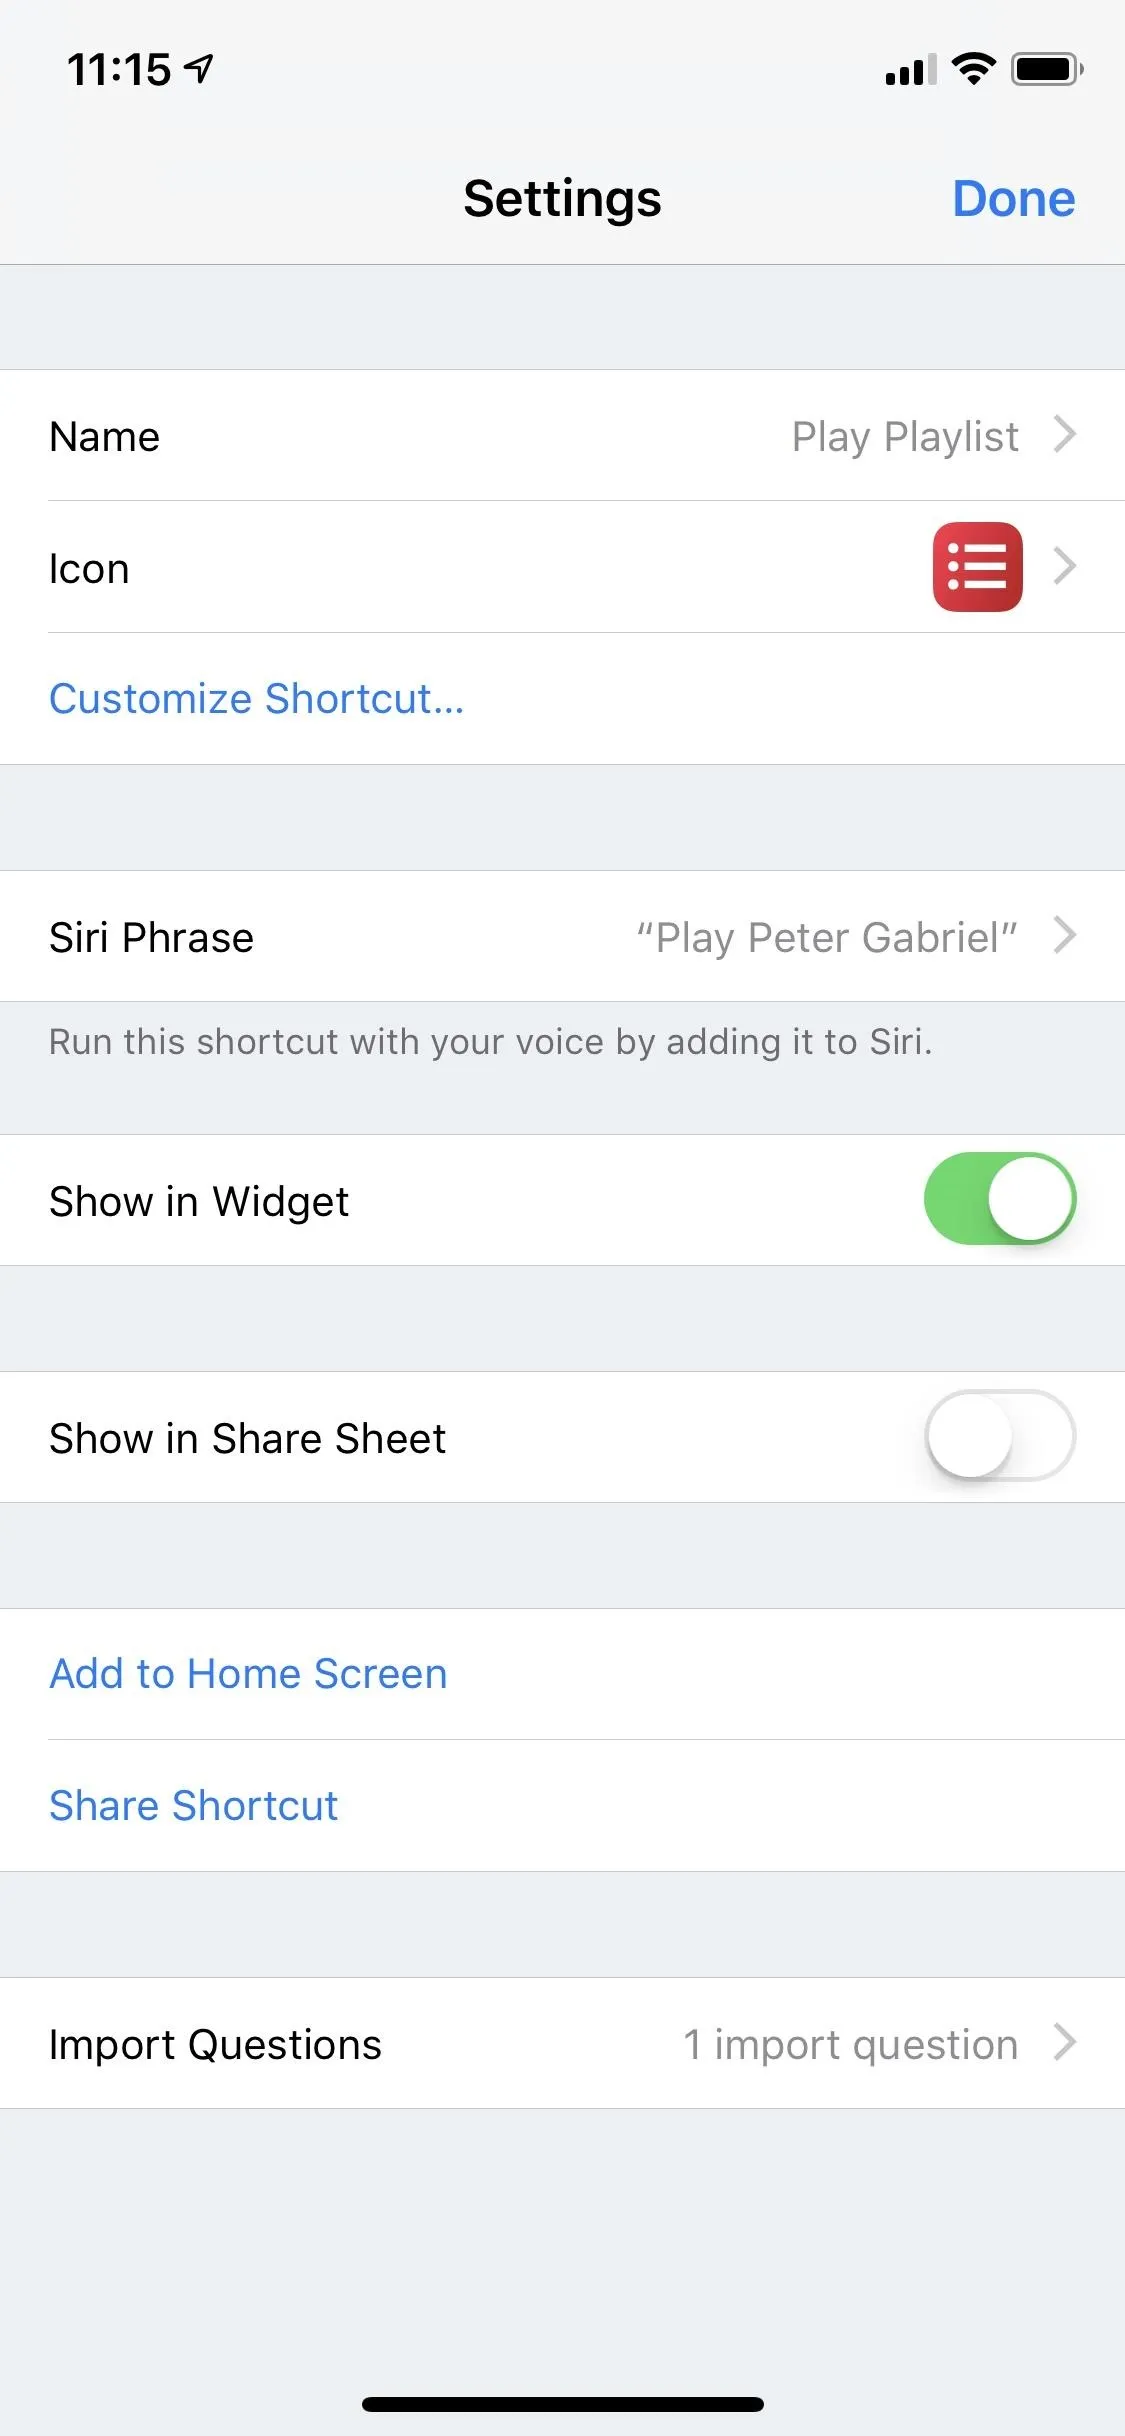
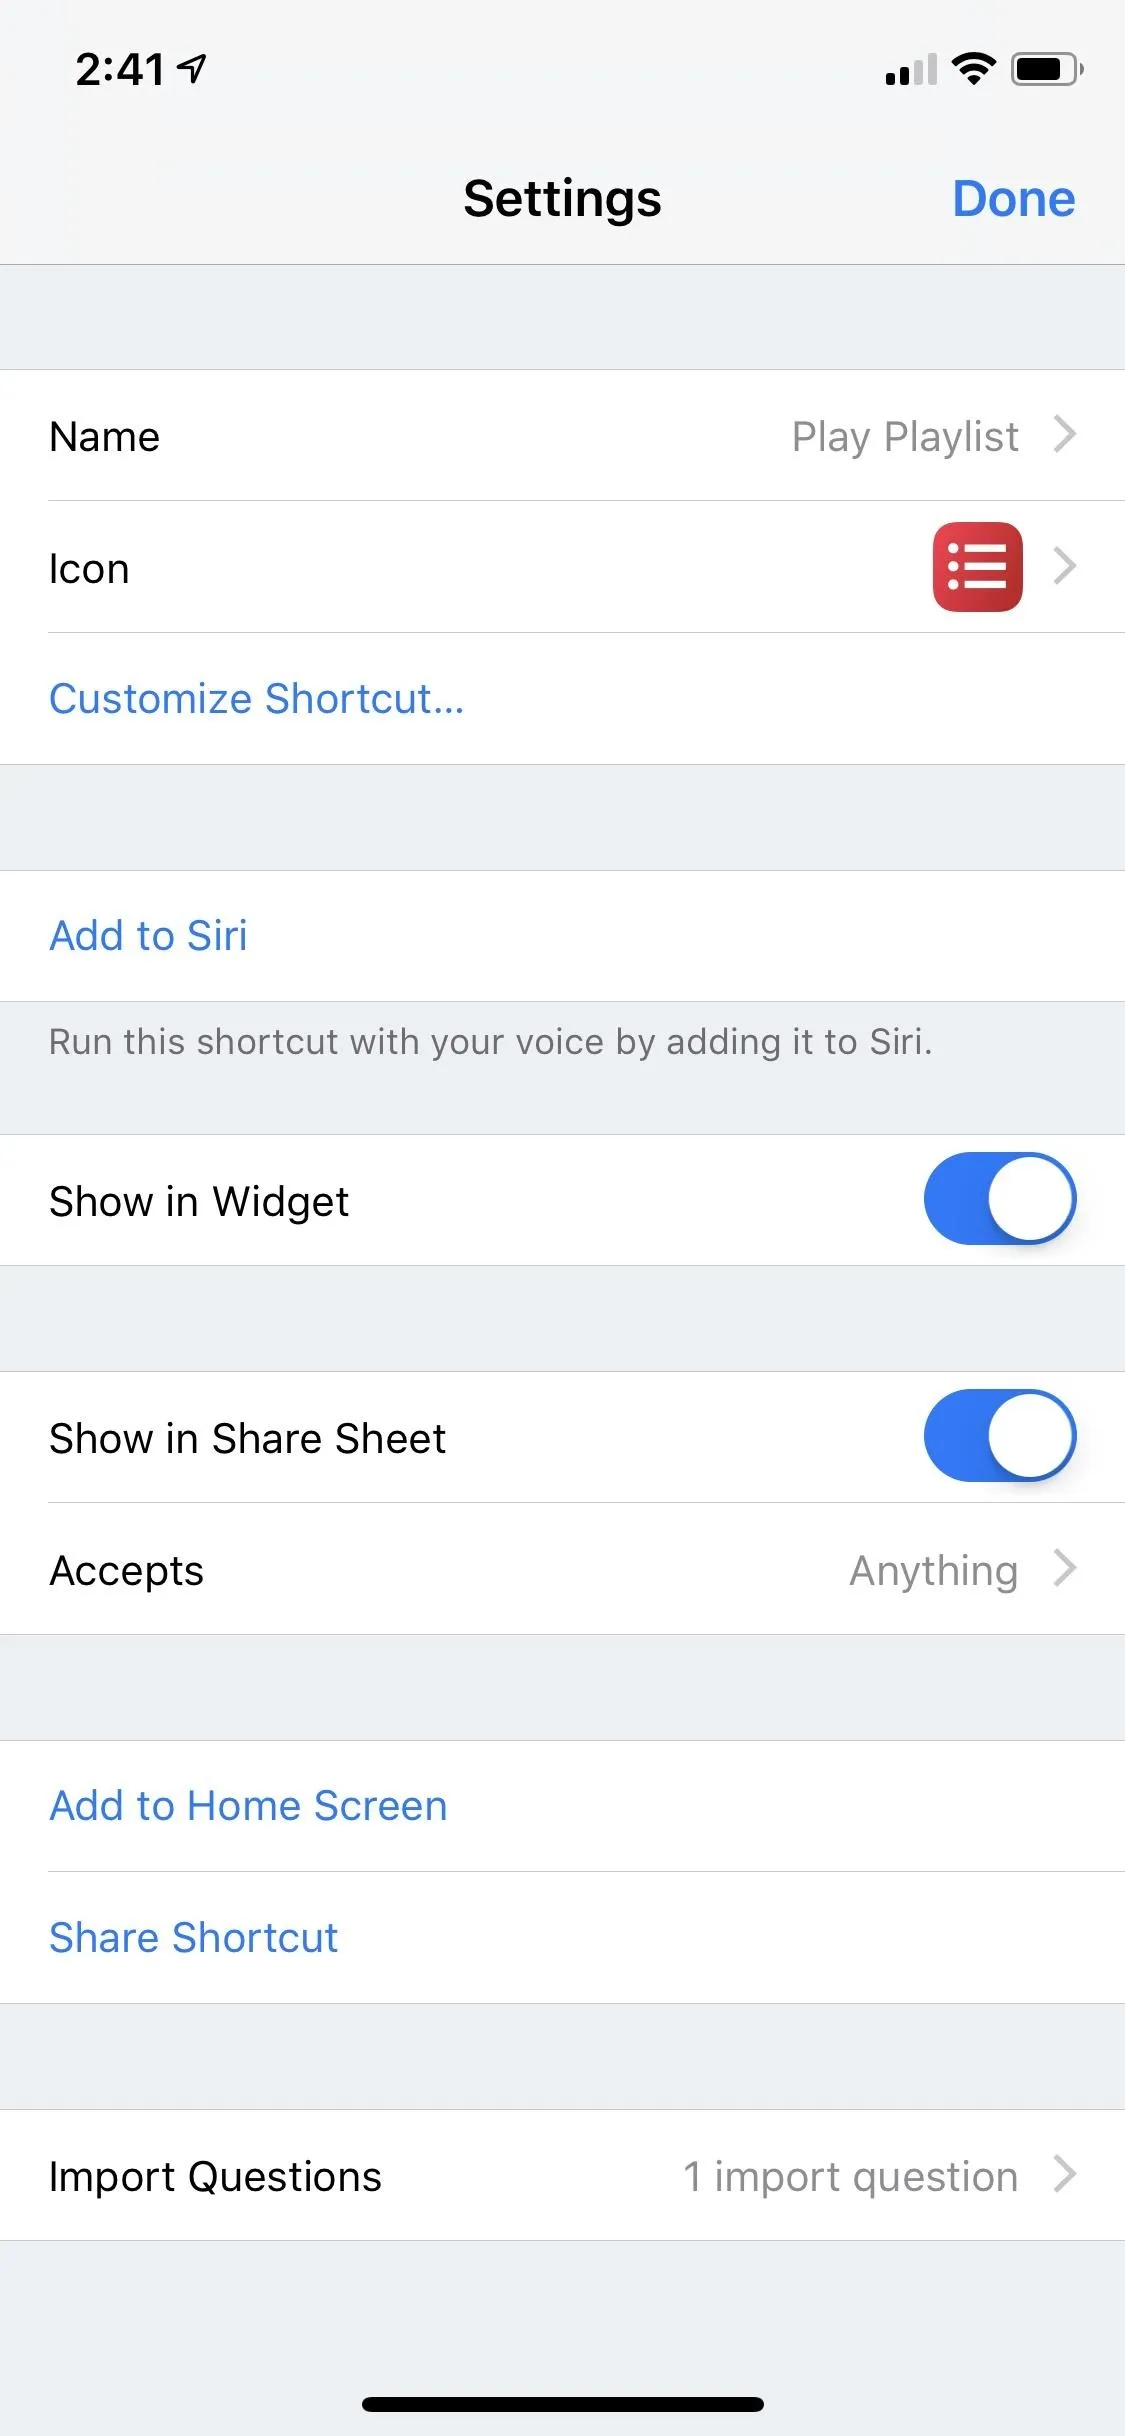
When you're customizing your workflow, you'll probably notice the toggles icon under "Done." Tapping that will take you to the workflow's settings. Here, you can change the name of the workflow, edit its icon, customize the shortcut further, add a Siri shortcut, hide in the widget, show in the share sheet, add an icon to the home screen, share the shortcut, and more.


Step 9: Add a Shortcut to Your Home Screen (Optional)
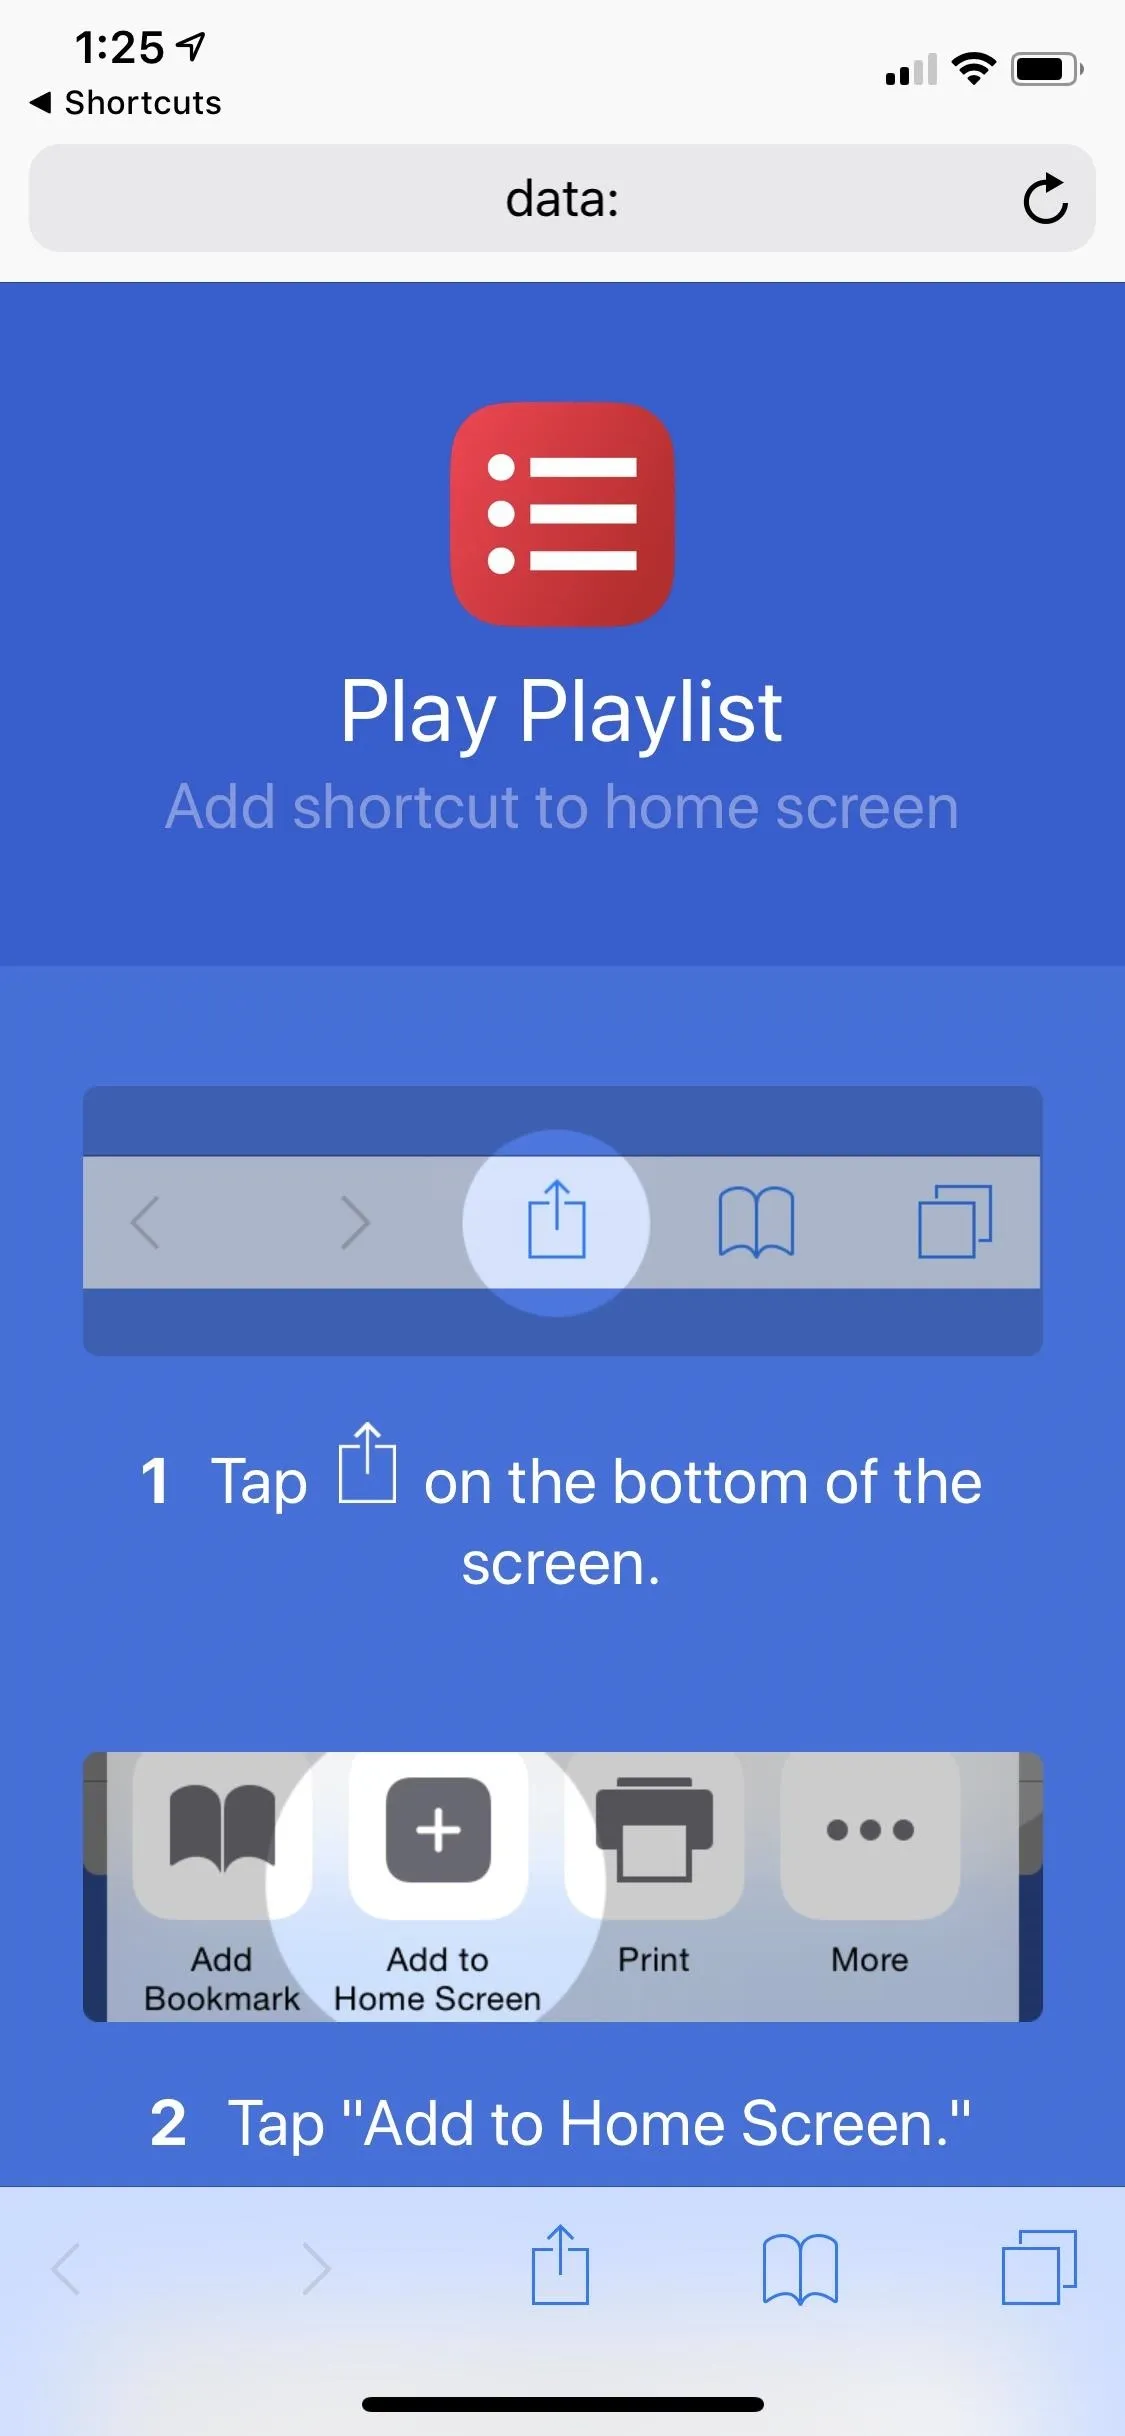
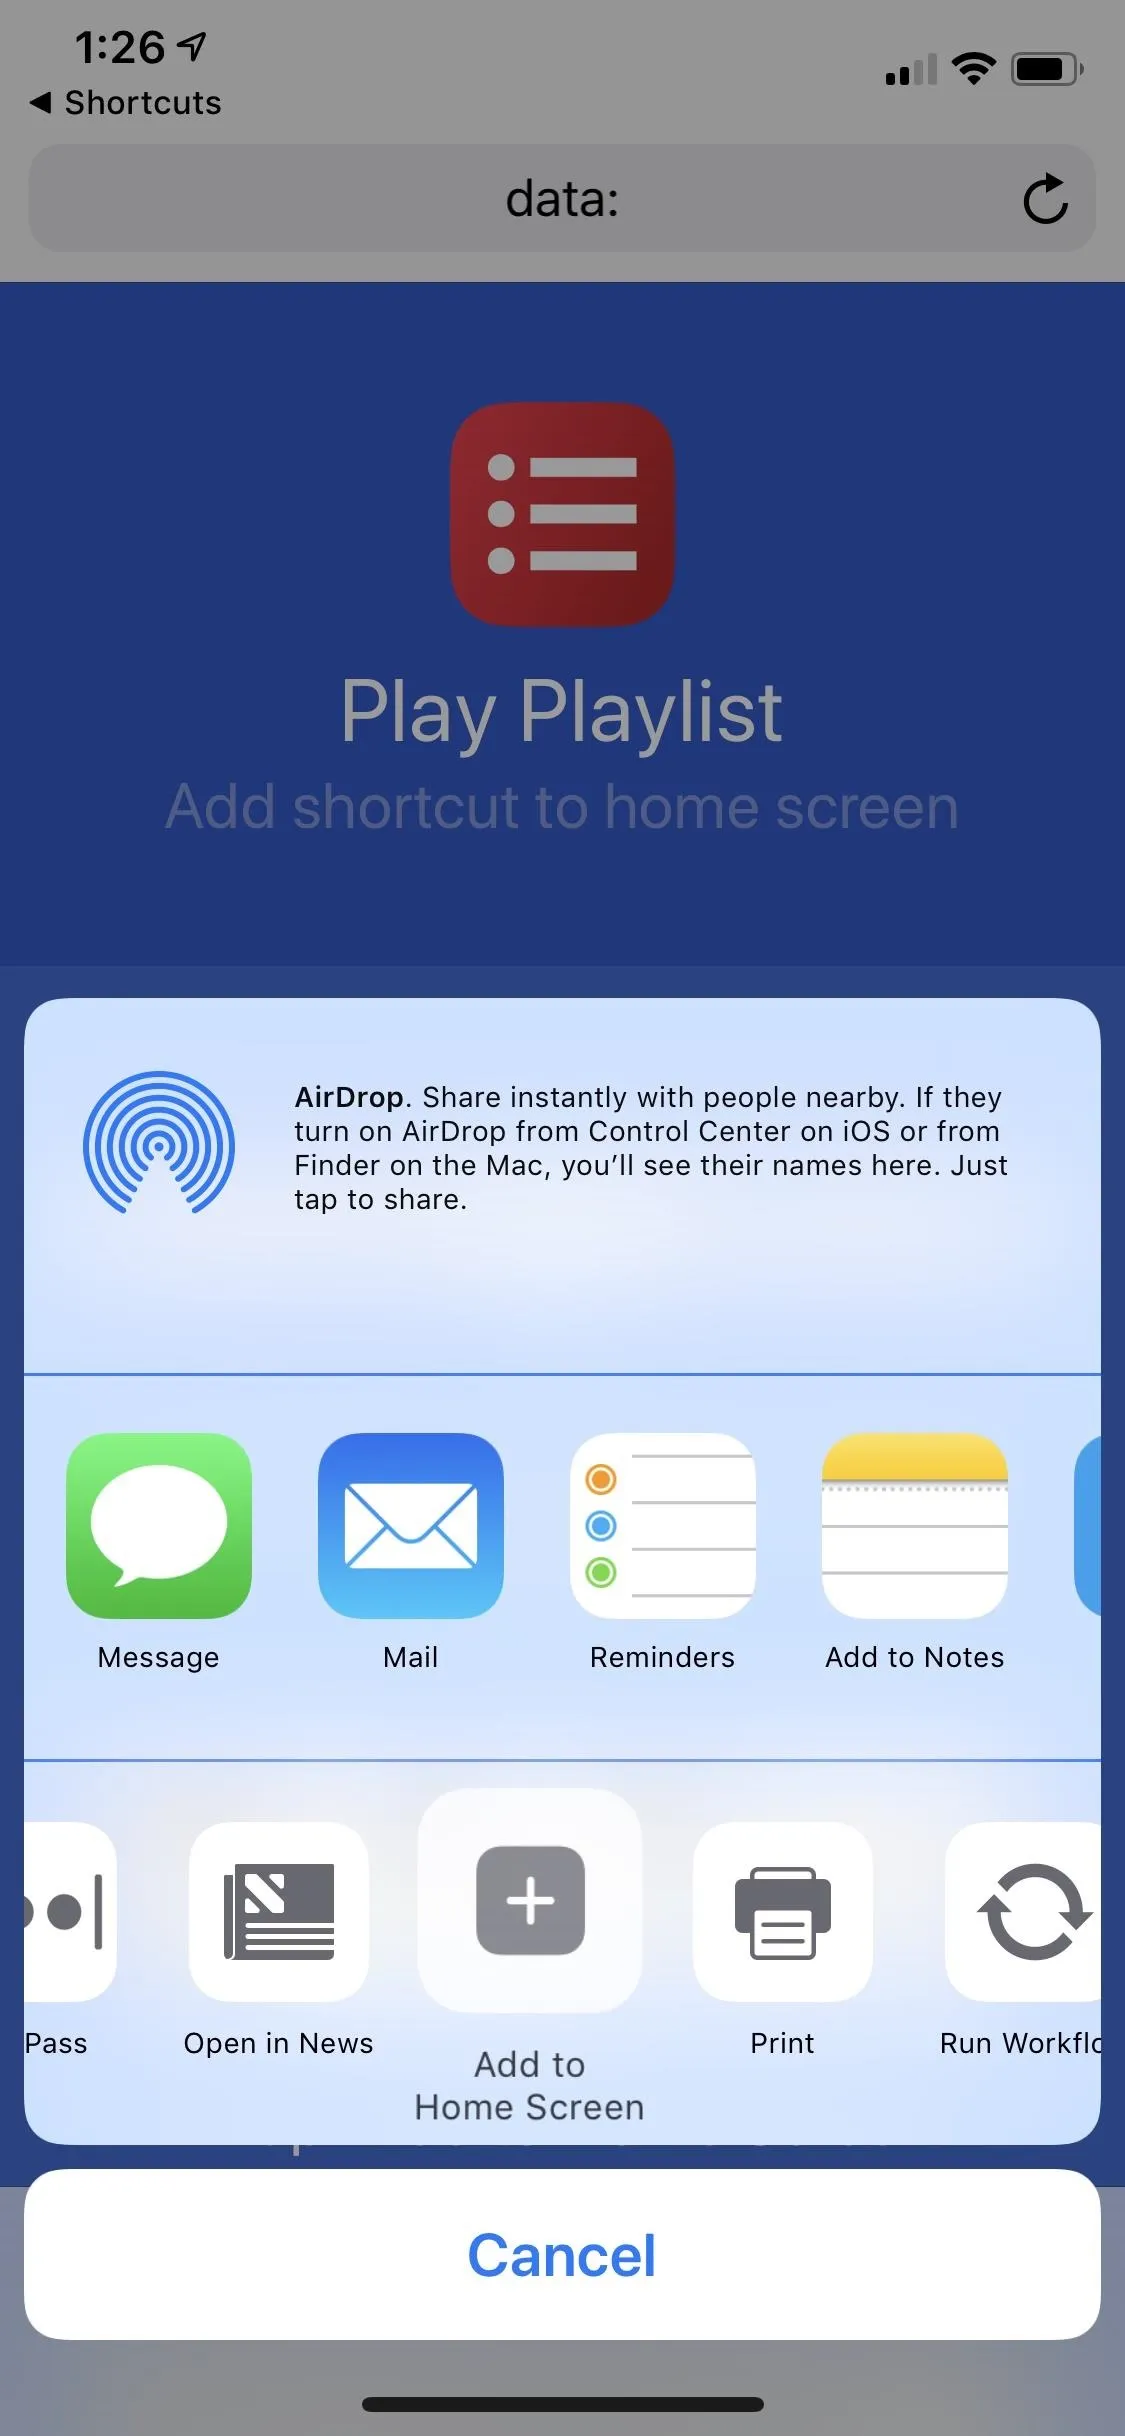
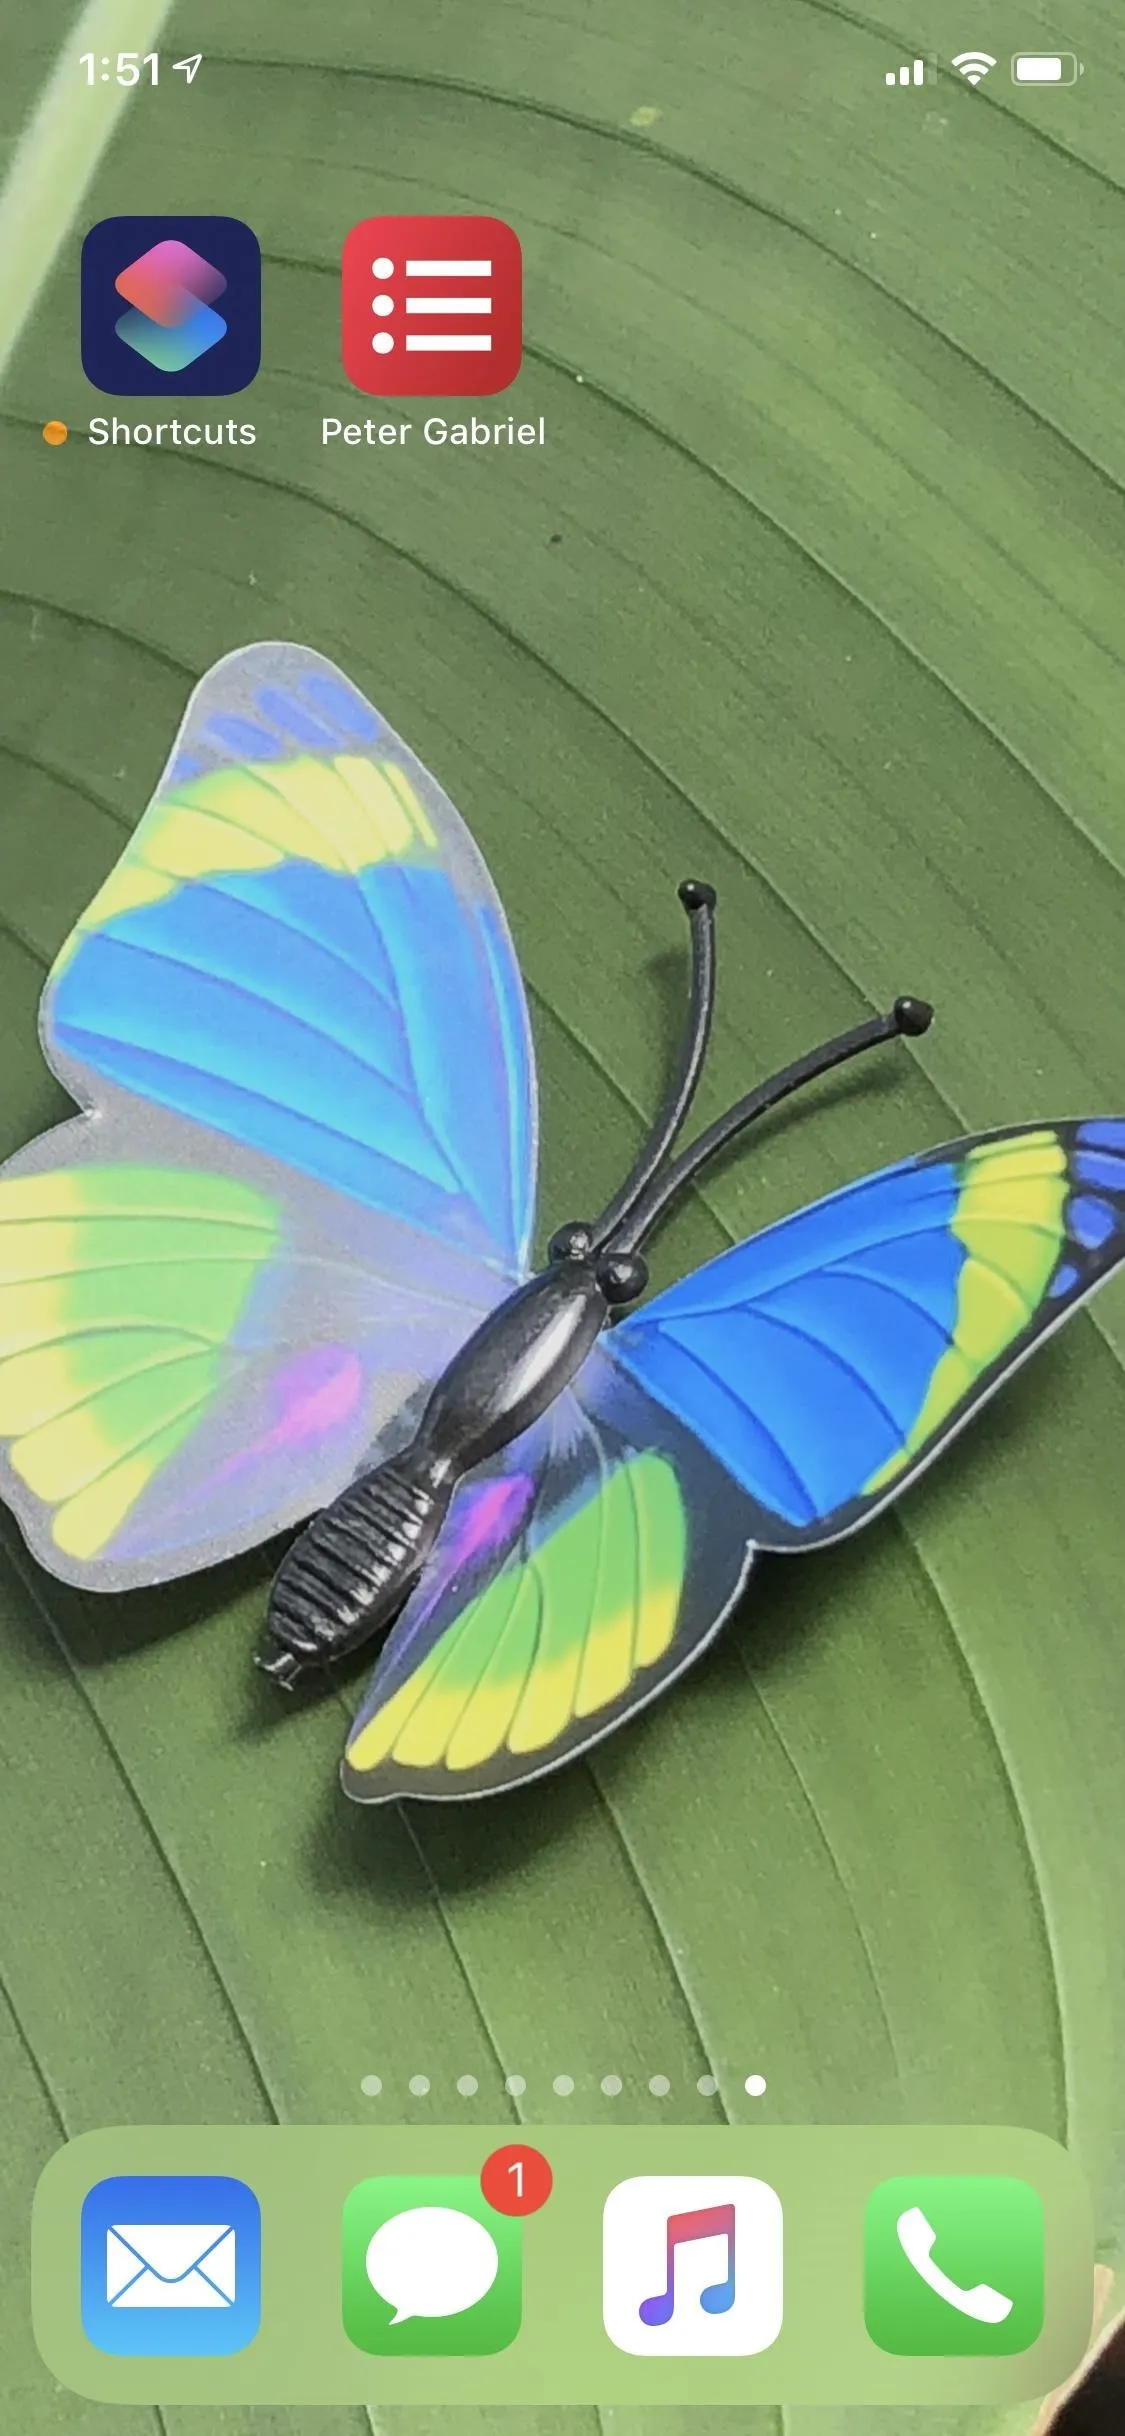
One of the most exciting settings in this menu is the "Add to Home Screen" option, which adds a shortcut icon to your home screen, just like you can with webpages in Safari. Tapping the option will show the data URL in Safari. Once there, tap the share sheet icon, then "Add to Home Screen."


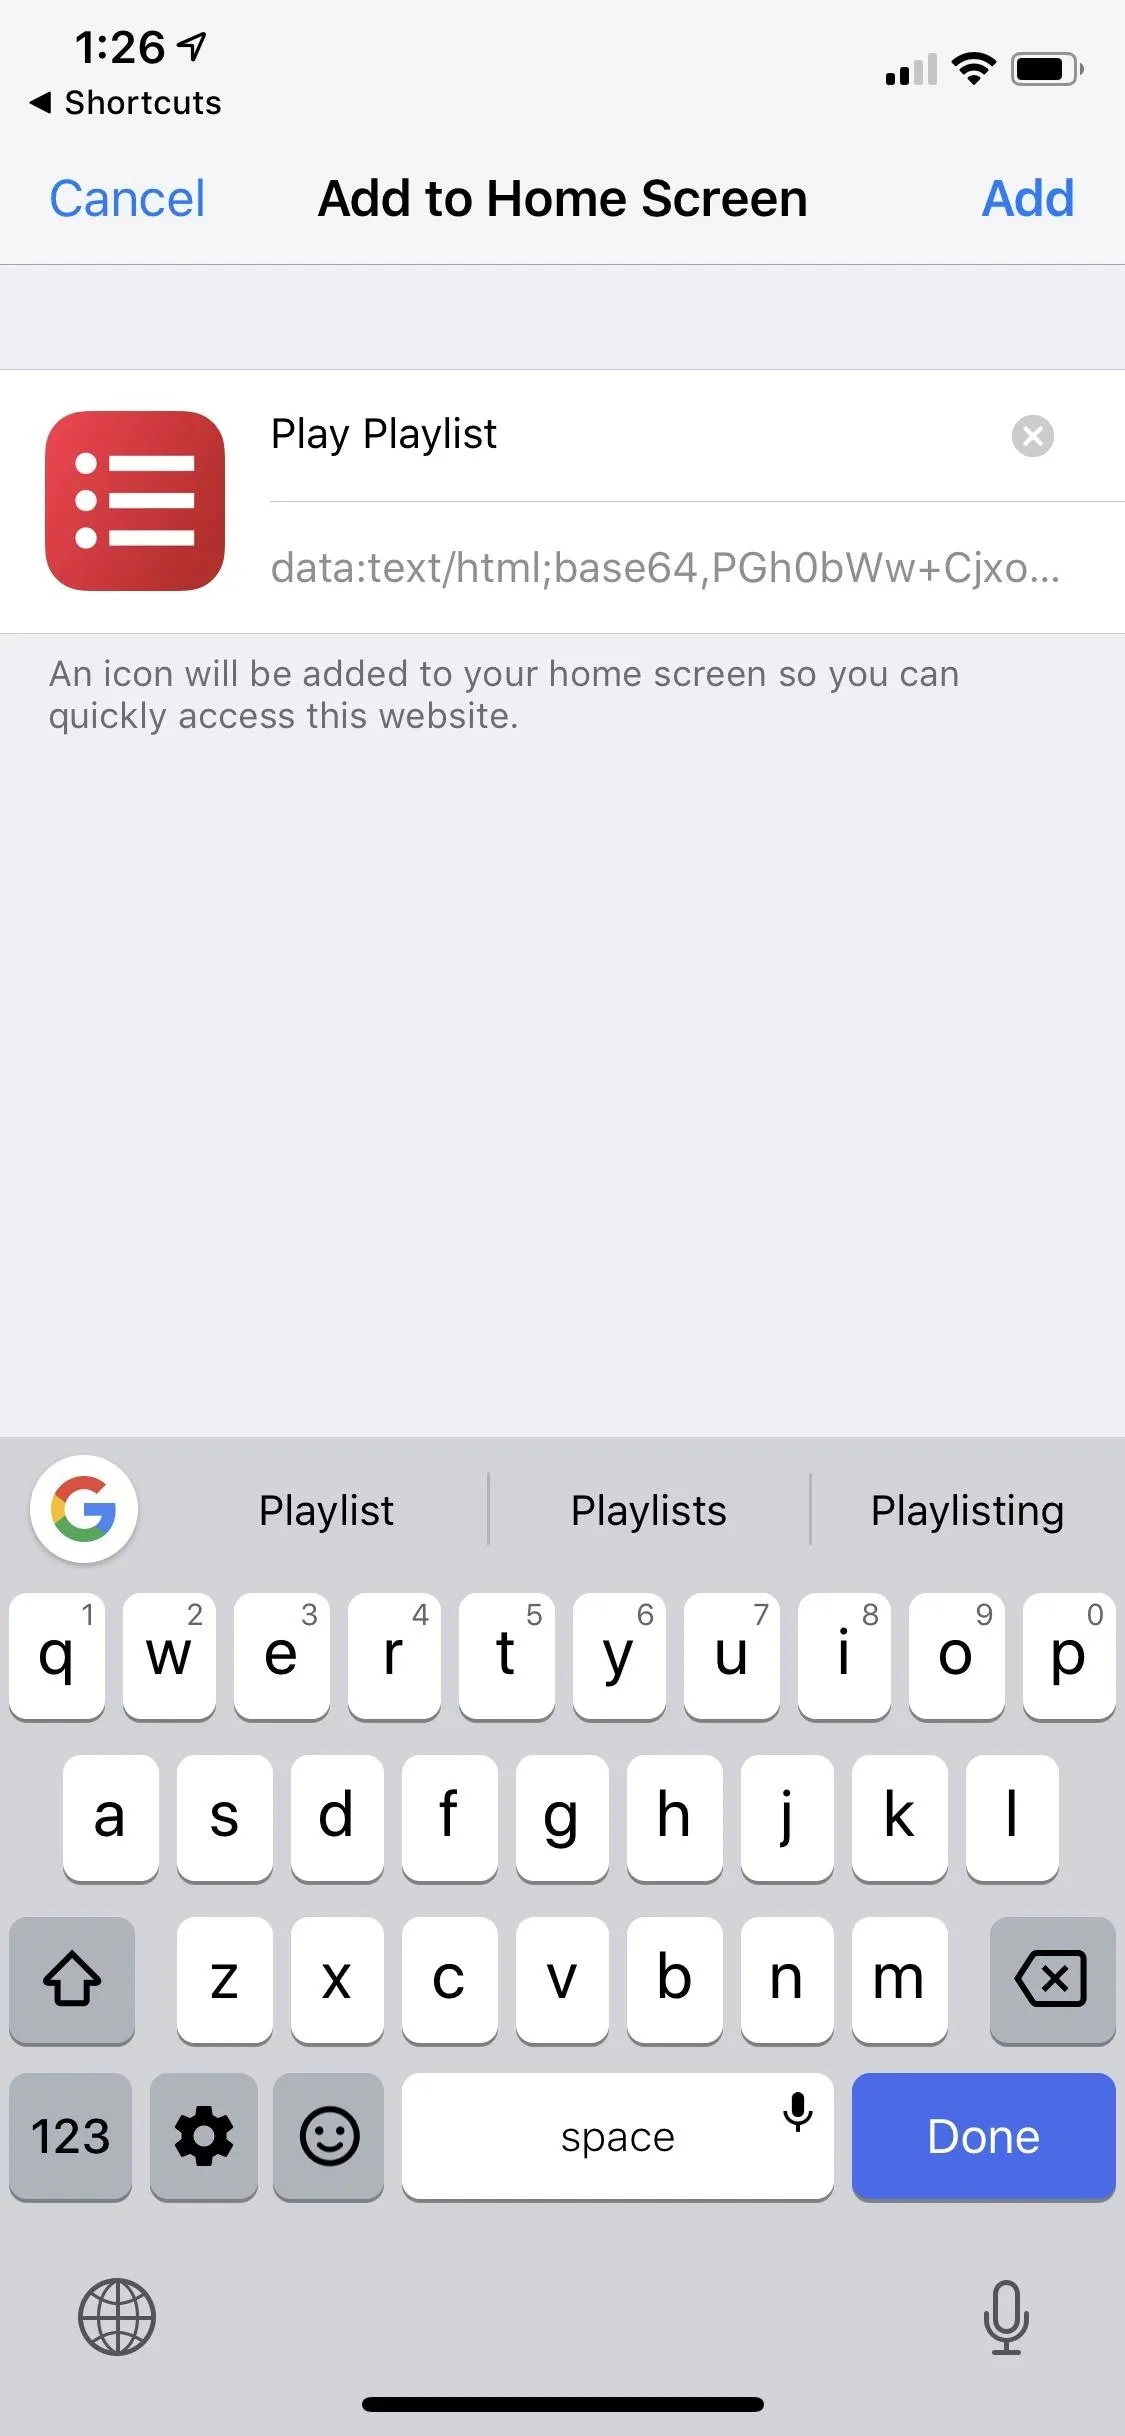
Next, you'll be able to name your home screen shortcut anything you want. Once you do, tap "Add," and you'll find your shortcut's icon on your home screen. Tap it to start the workflow.


Step 10: Change Your Shortcut's Name & Icon (Optional)
If you don't like the default name, icon symbol, or icon color, you can change those. Tapping "Name" will let you do exactly what it implies, and tapping "Icon" will show you all the icon options.
For the icon, there are 15 colors to choose from in the "Color" tab. To change the icon shape, you just hunt for a new one in the "Glyph" tab. You can even take a photo or choose one from your Photos gallery.
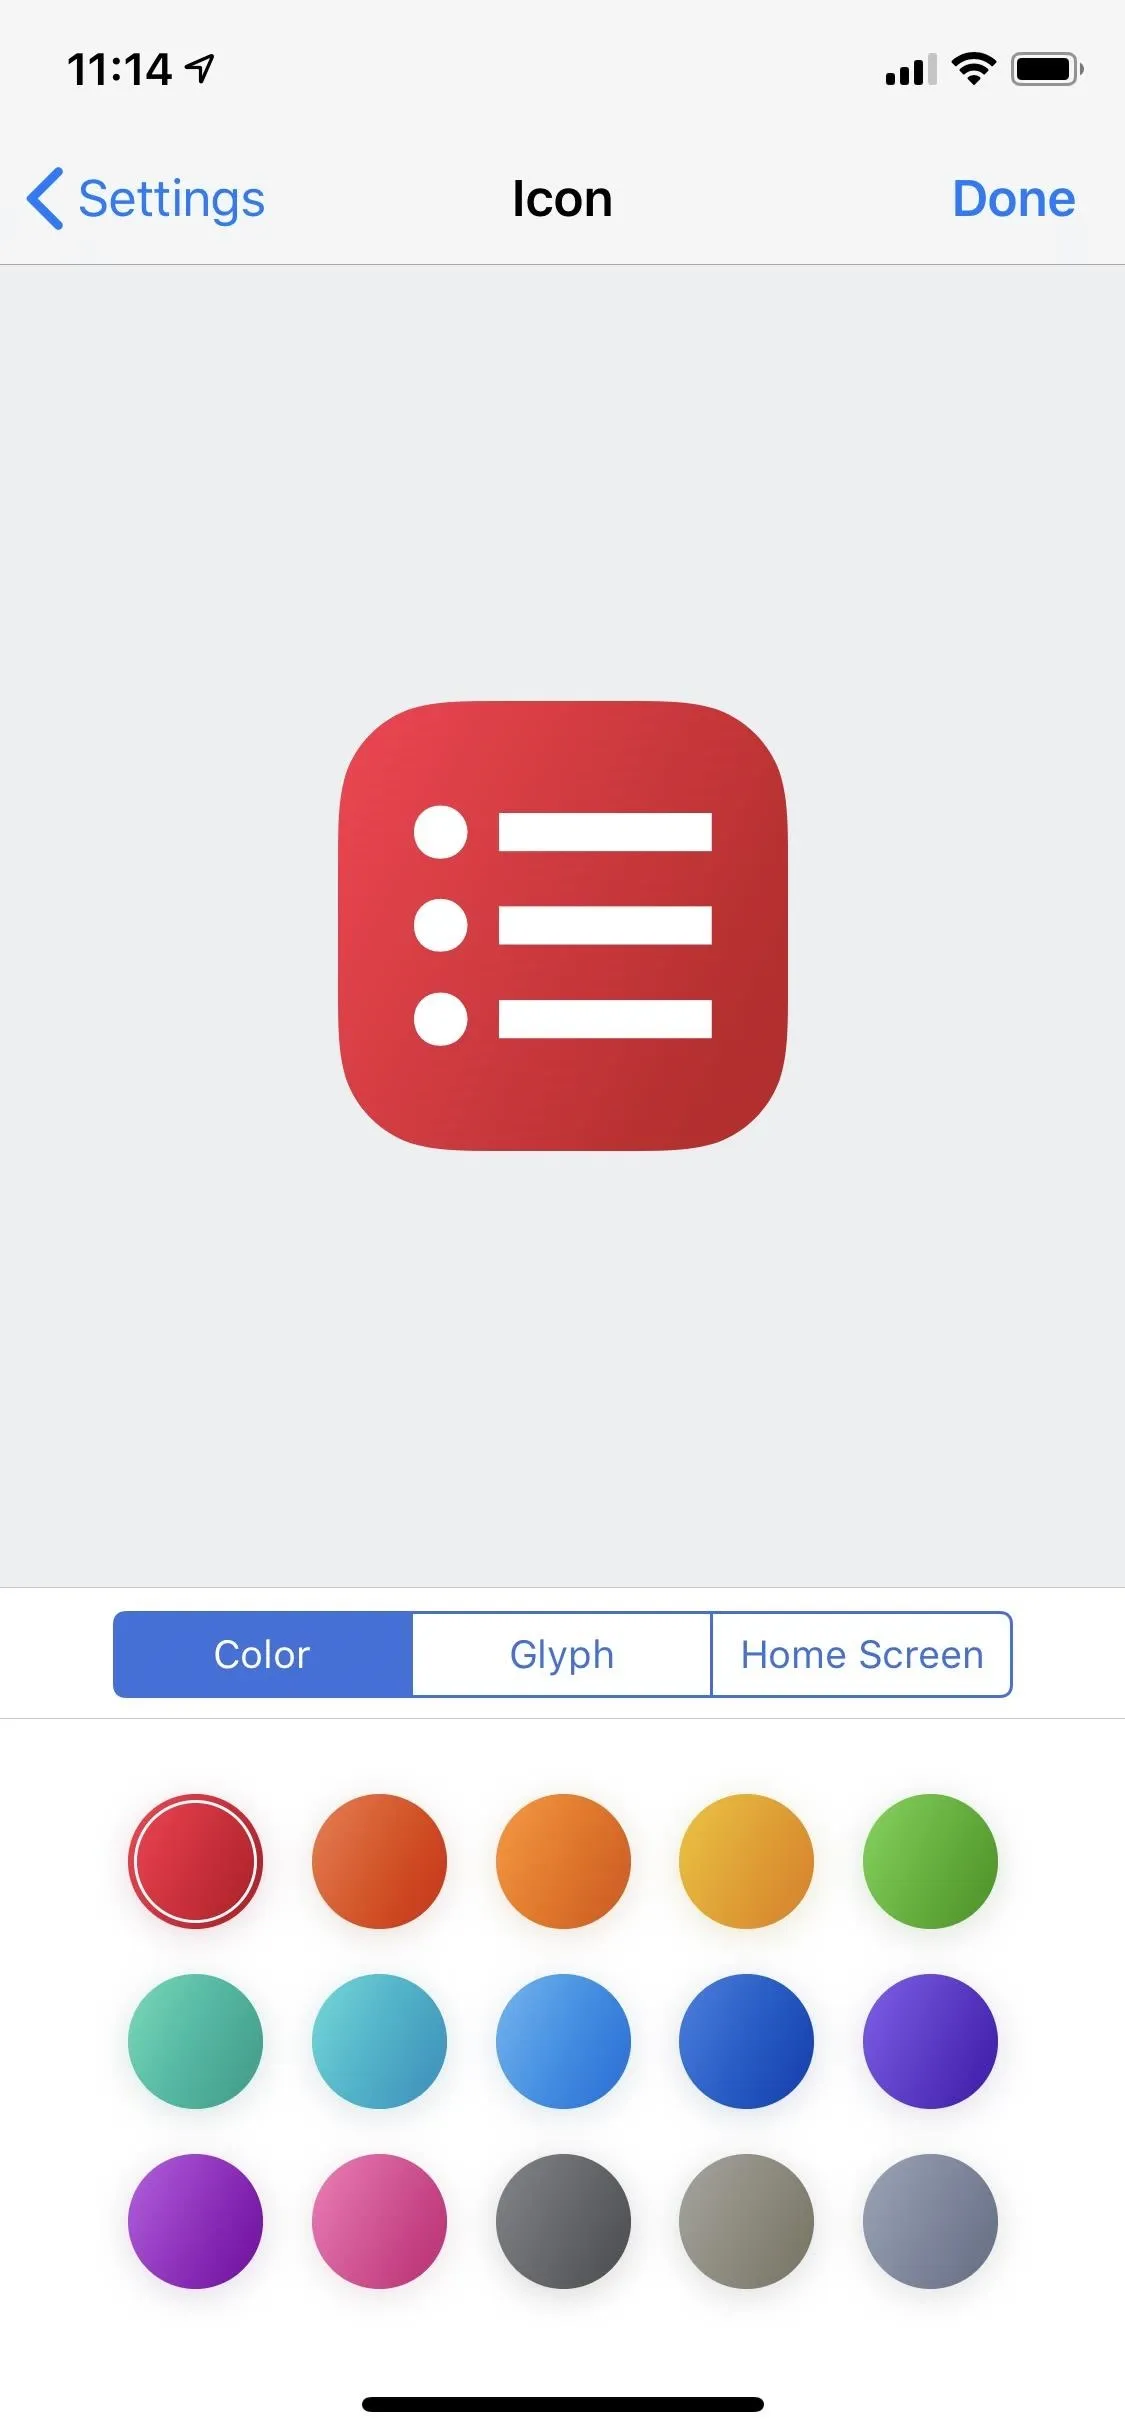
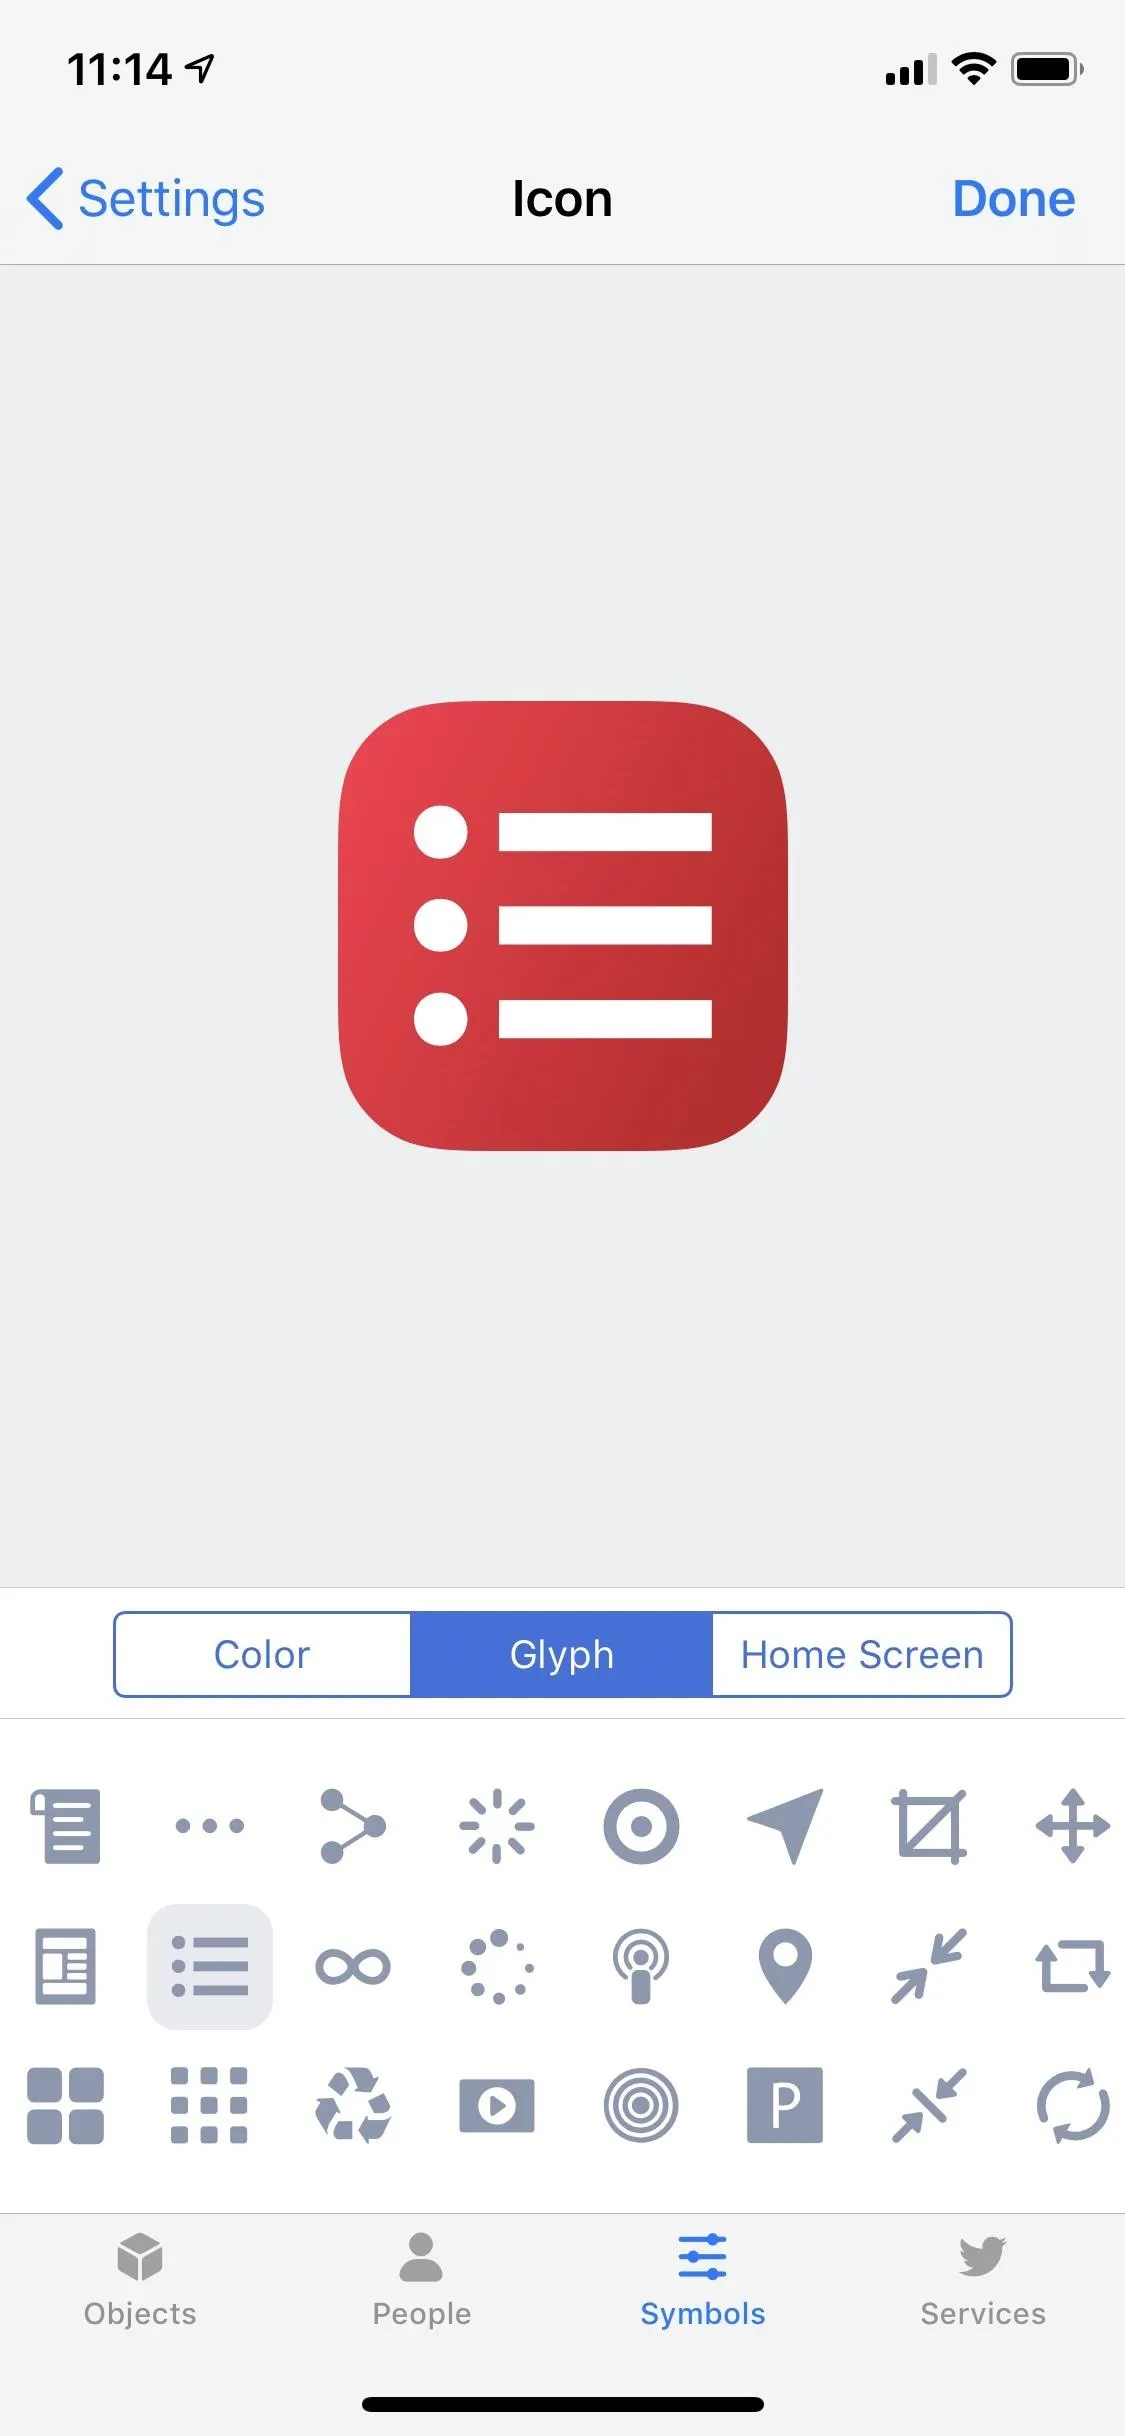
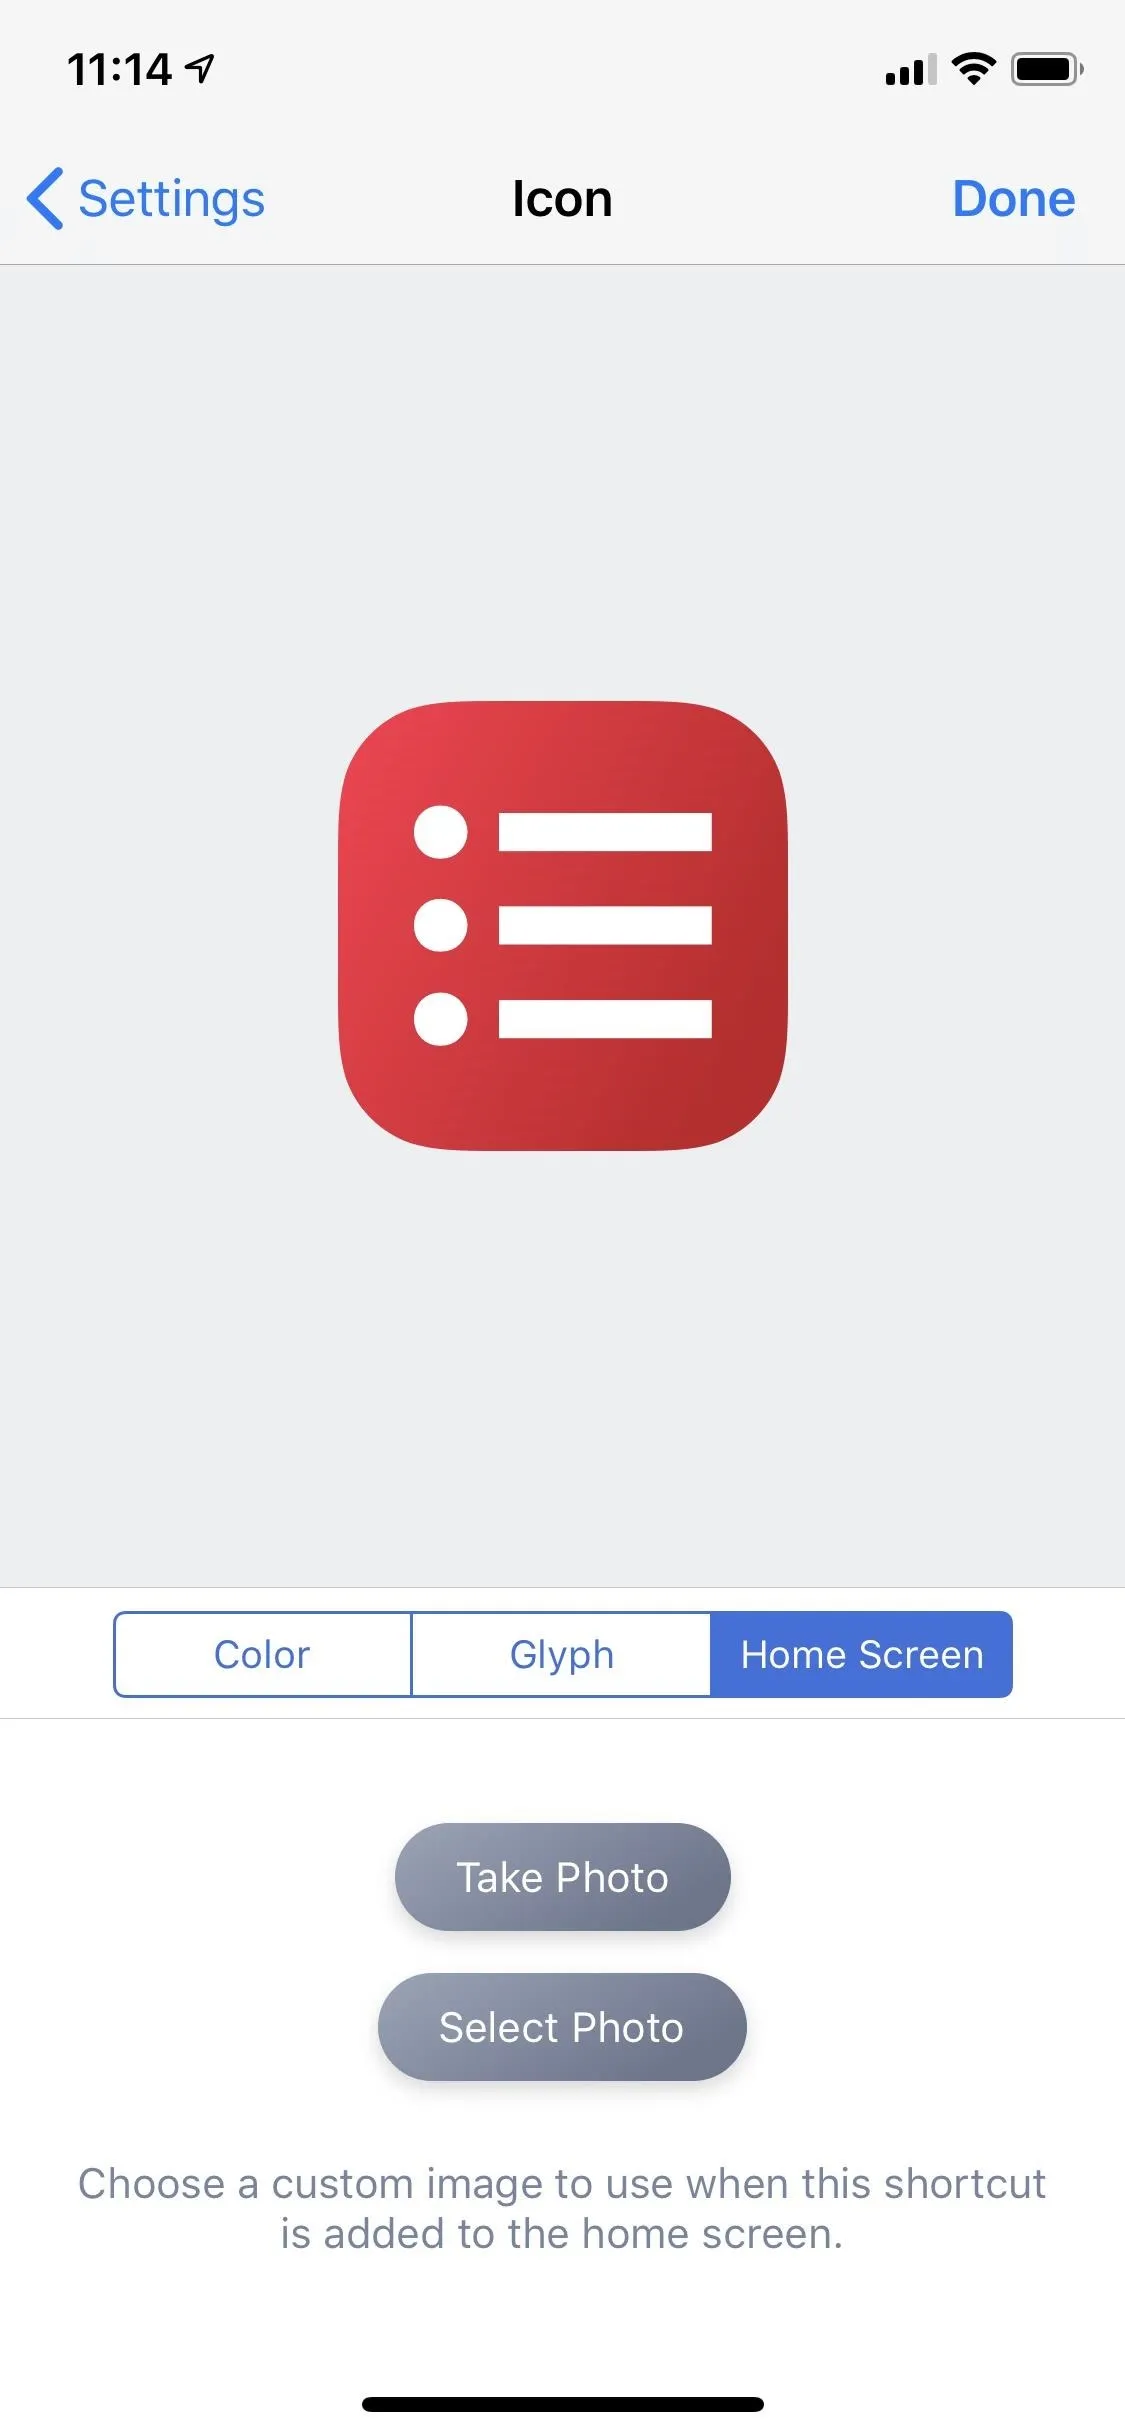


However, none of these options for the name or icon will change the home screen icon if you already added one. You'll have to delete that icon off your home screen, make the edits, then add the icon to your home screen.
Step 11: Create a Custom Siri Phrase for Your Shortcut (Optional)
This is the best part and the feature that Apple highlighted at WWDC 2018. While most of the items above you can perform in the Workflow app, you cannot add Siri shortcut phrases except in the Shortcuts app.
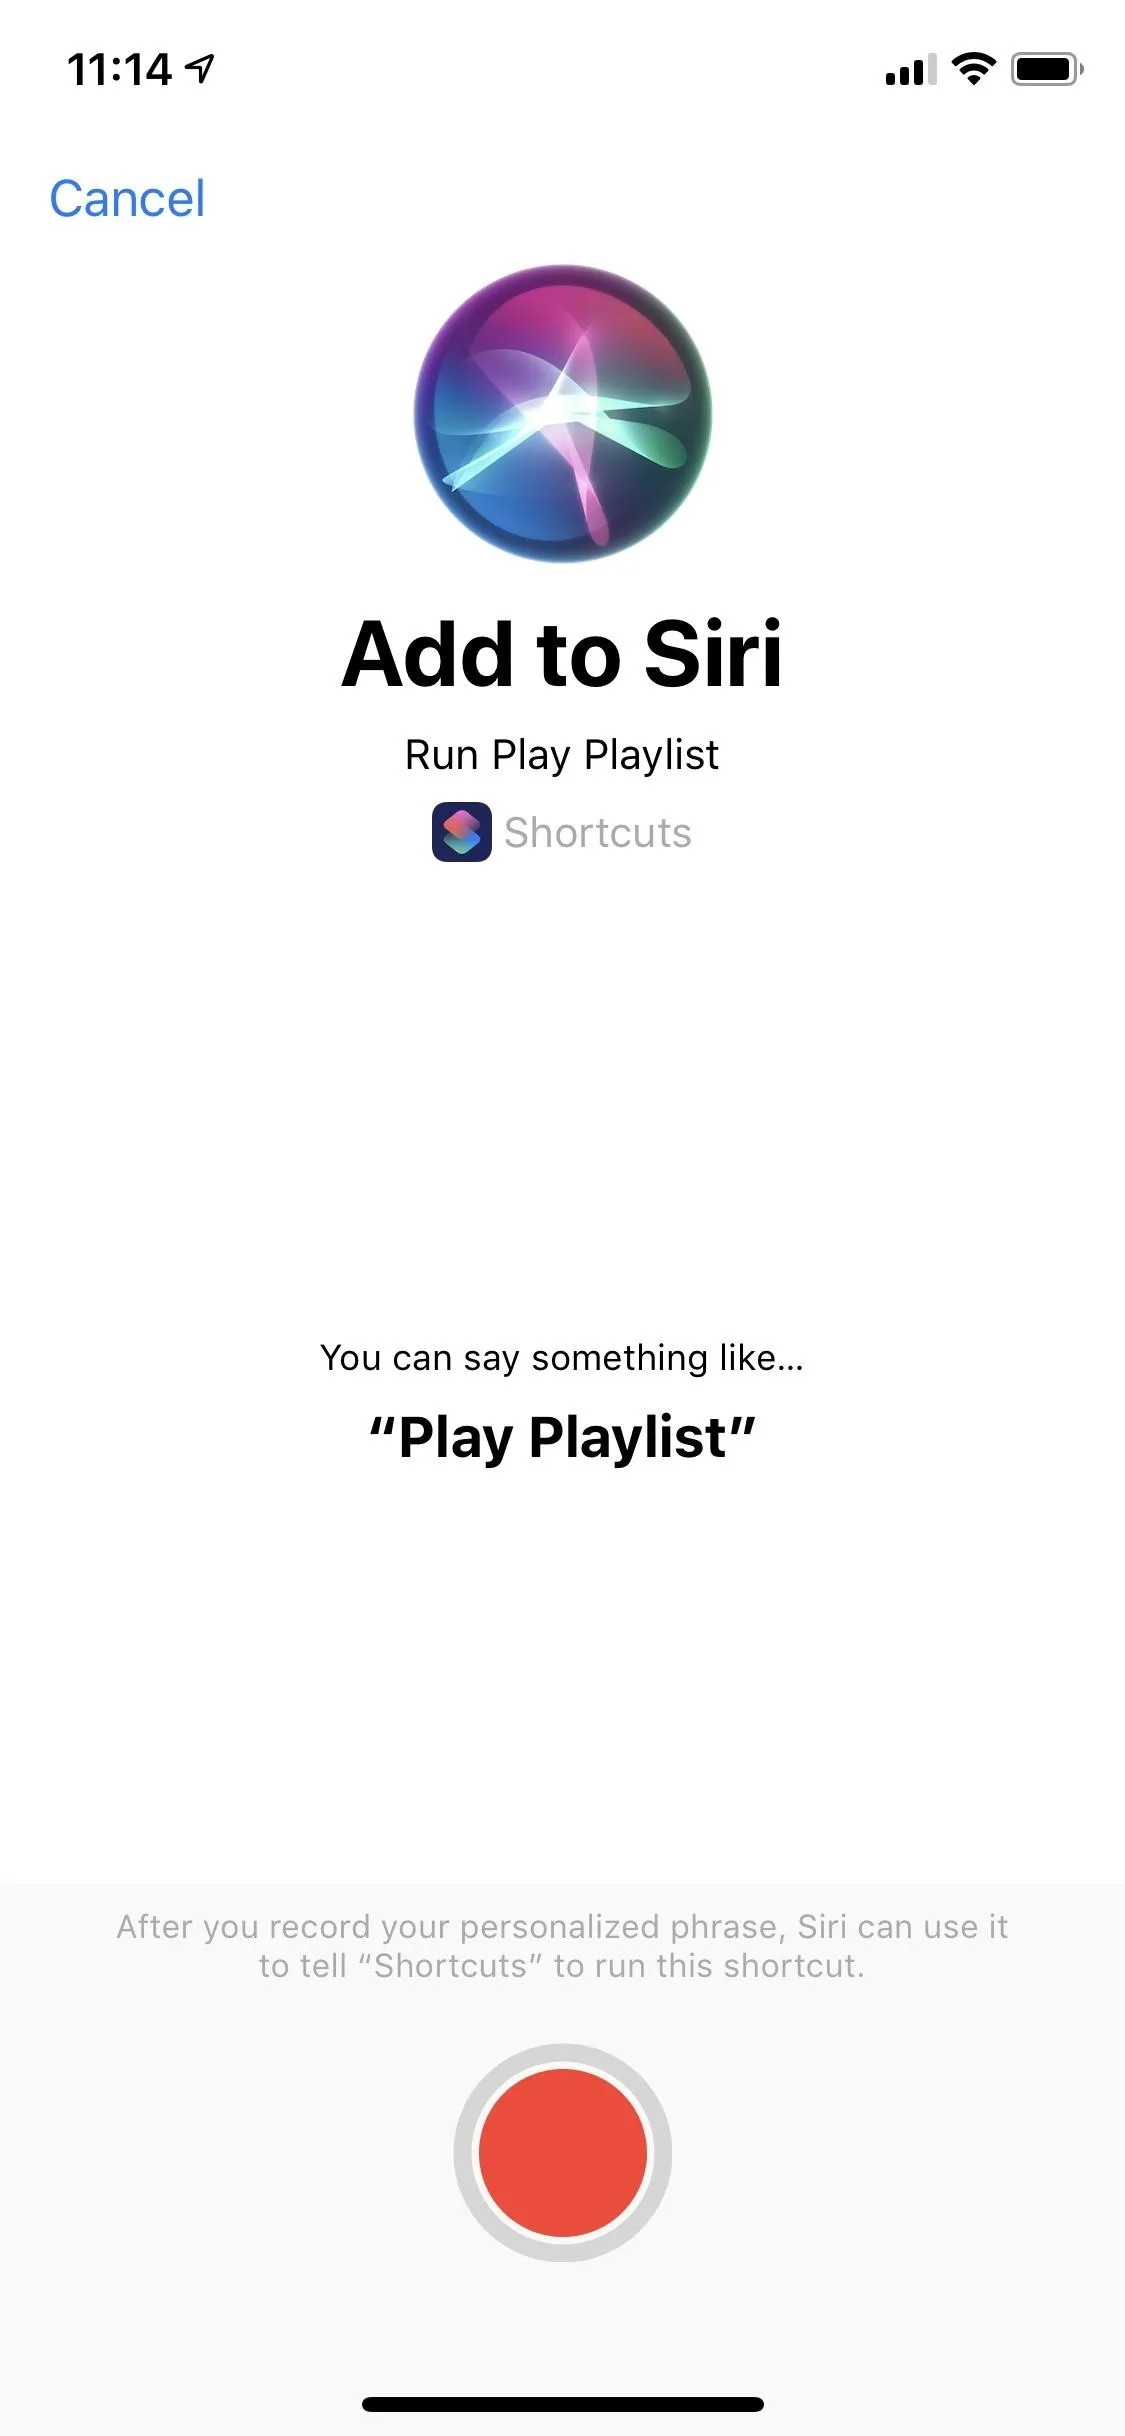
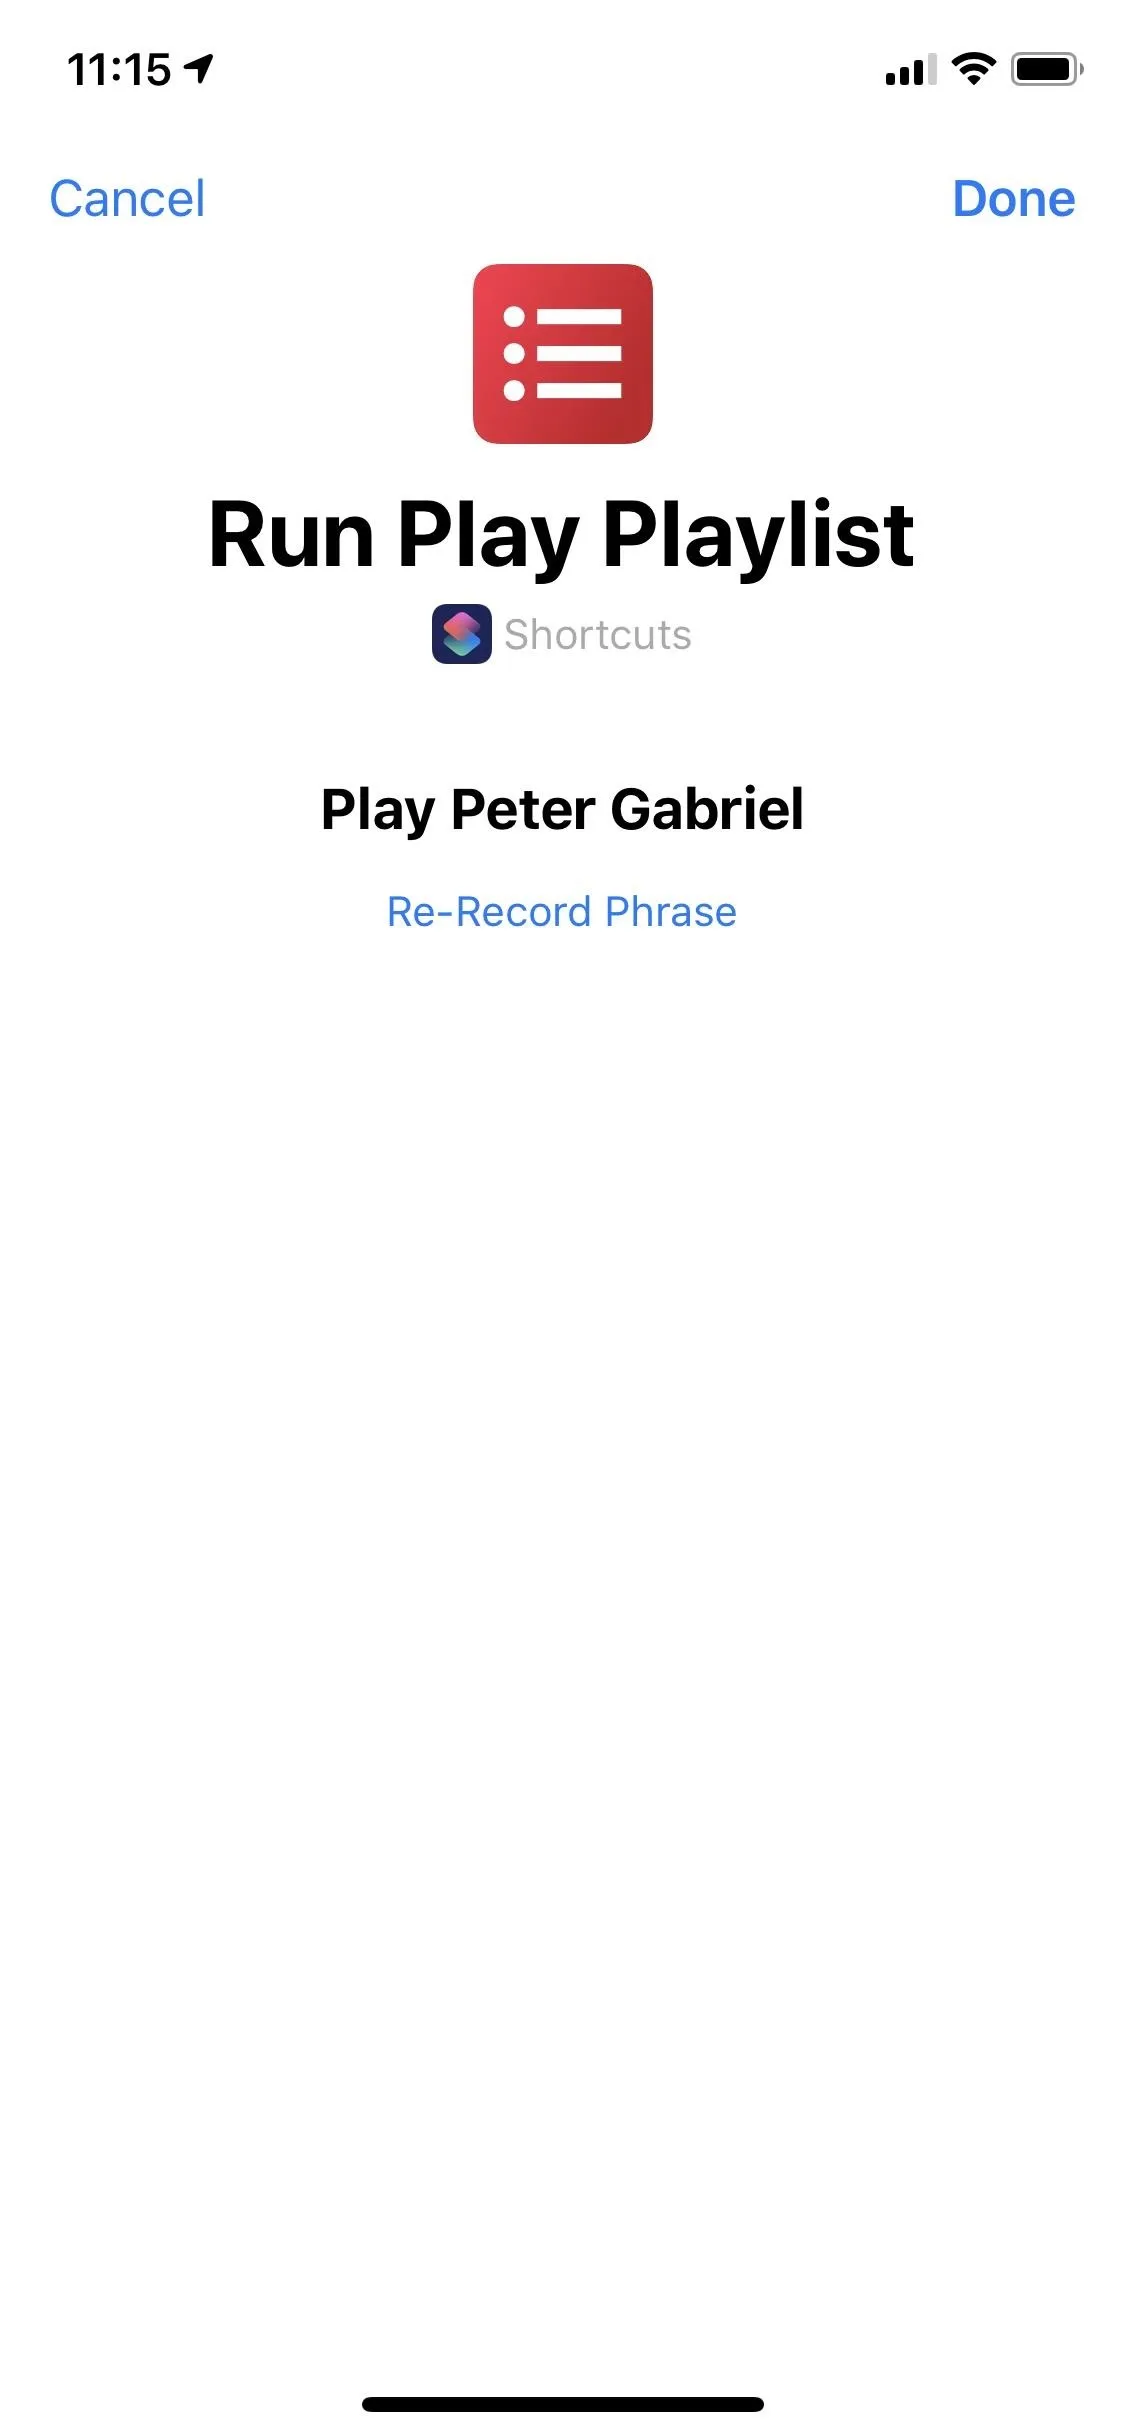
You may, at one point, receive a suggestion to add a particular shortcut to Siri, but to make one yourself, tap "Add to Siri" from your workflow's Settings page. Next, tap the red record button to say a phrase that will be registered with Siri. If Siri didn't hear you correctly, tap "Re-Record Phrase" to try again. When finished, tap "Done."


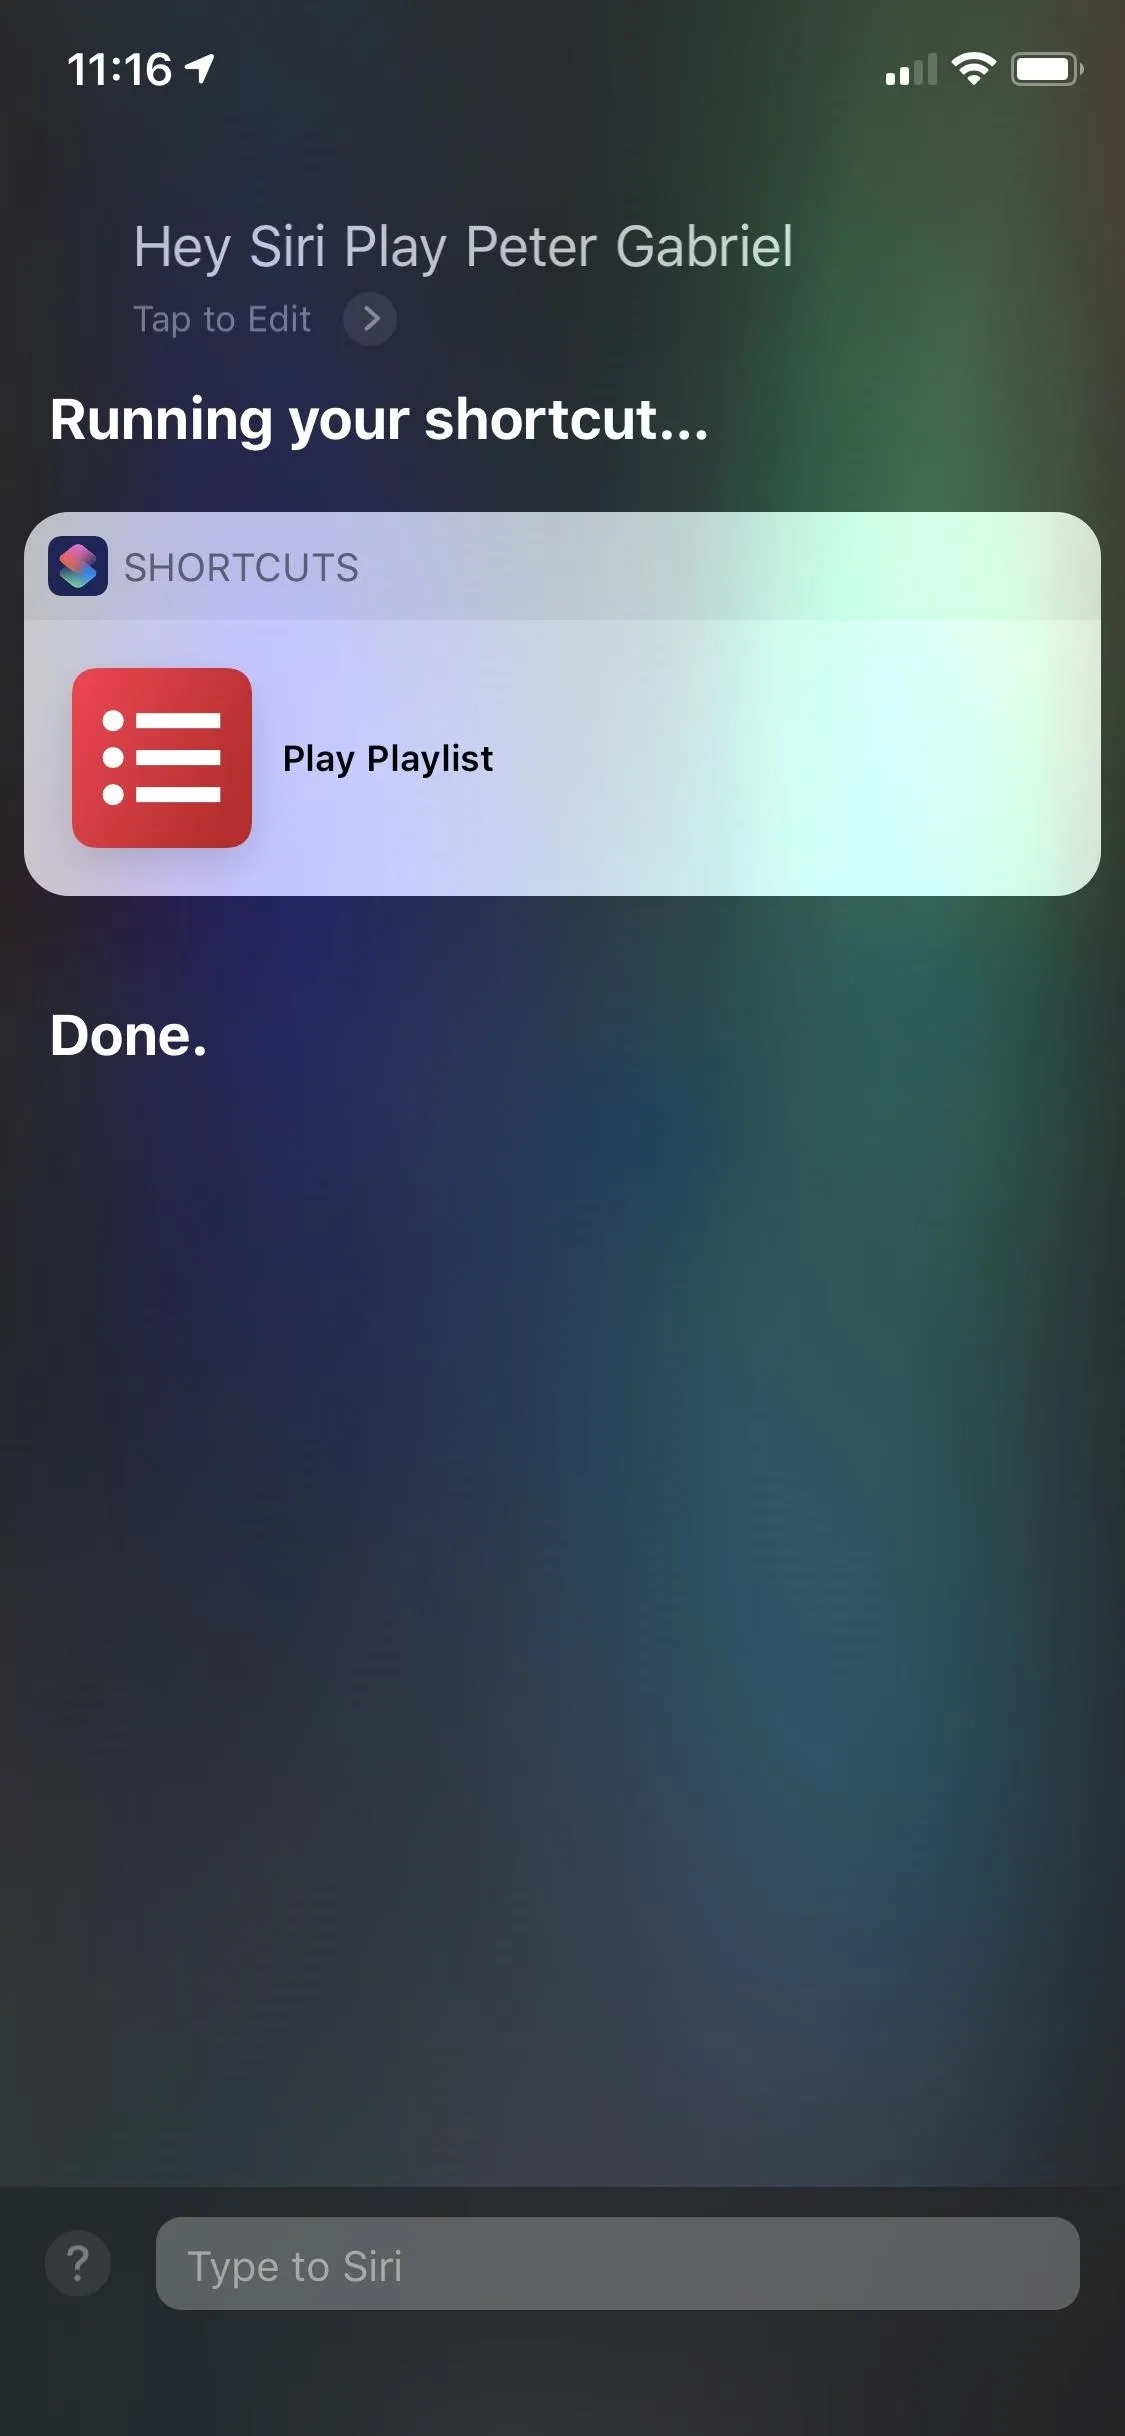
Back in your workflow's Settings screen, you'll see the Siri phrase you added instead of the "Add to Siri" option. To use your new Siri shortcut, use the phrase with Siri using the Side or Home button shortcut, "Hey Siri." or "Type to Siri" to start the workflow. In this case, playing my selected playlist will begin in my Music app.


Step 12: Add a Share Sheet Shortcut (Optional)
Aside from the widget, home screen icon, and Siri, you can also create a shortcut in the share sheet for your workflow. This is the least convenient option, but it may come in handy with specific workflows. My "Play Playlist" workflow isn't the best example here, but it'll at least show you how it's done.
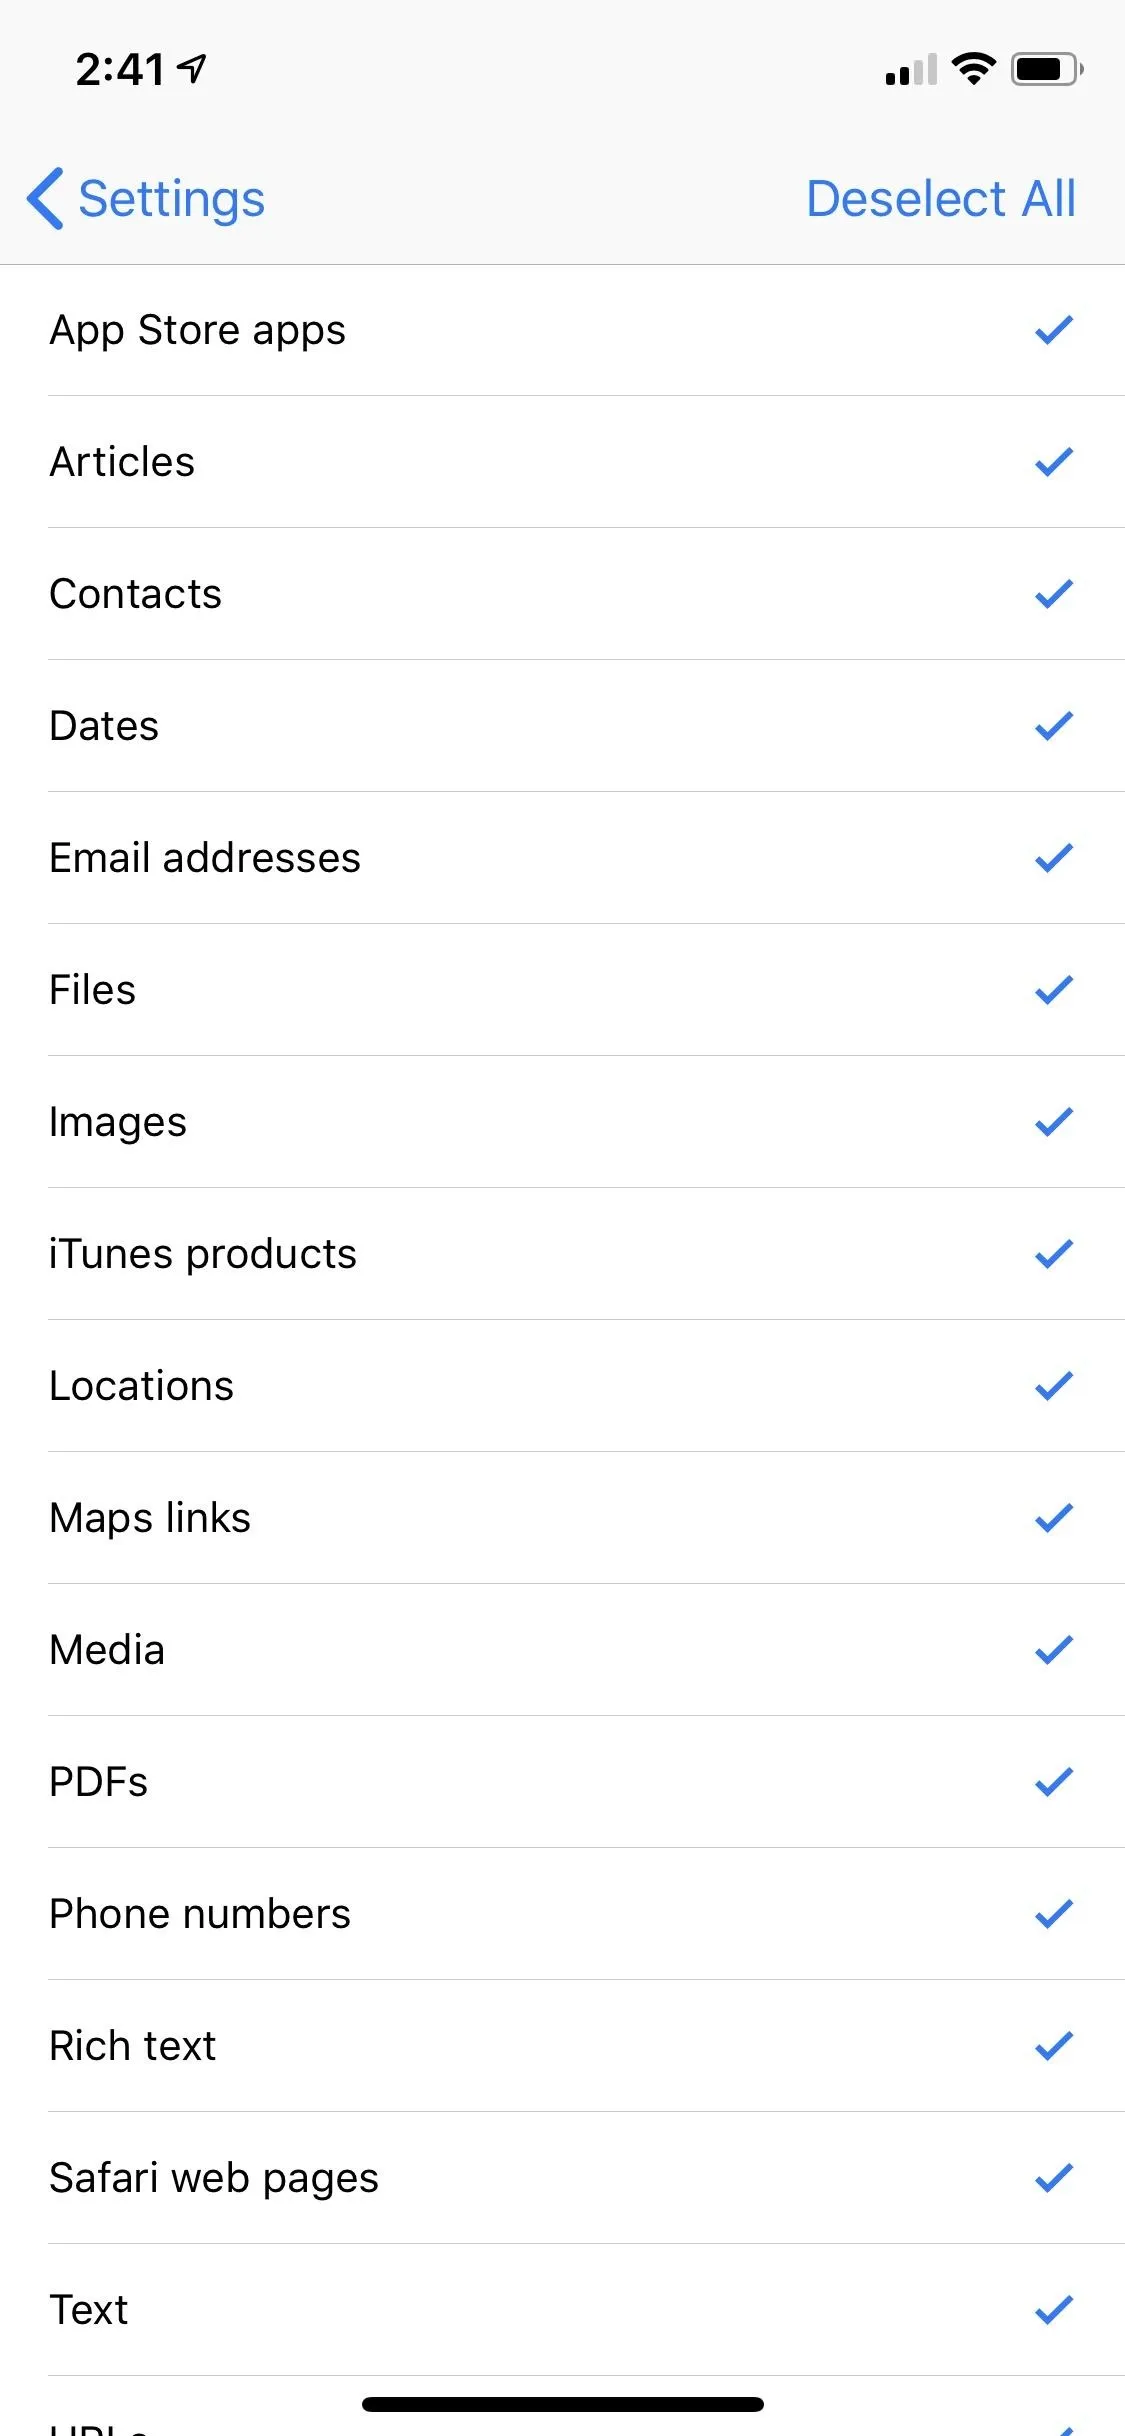
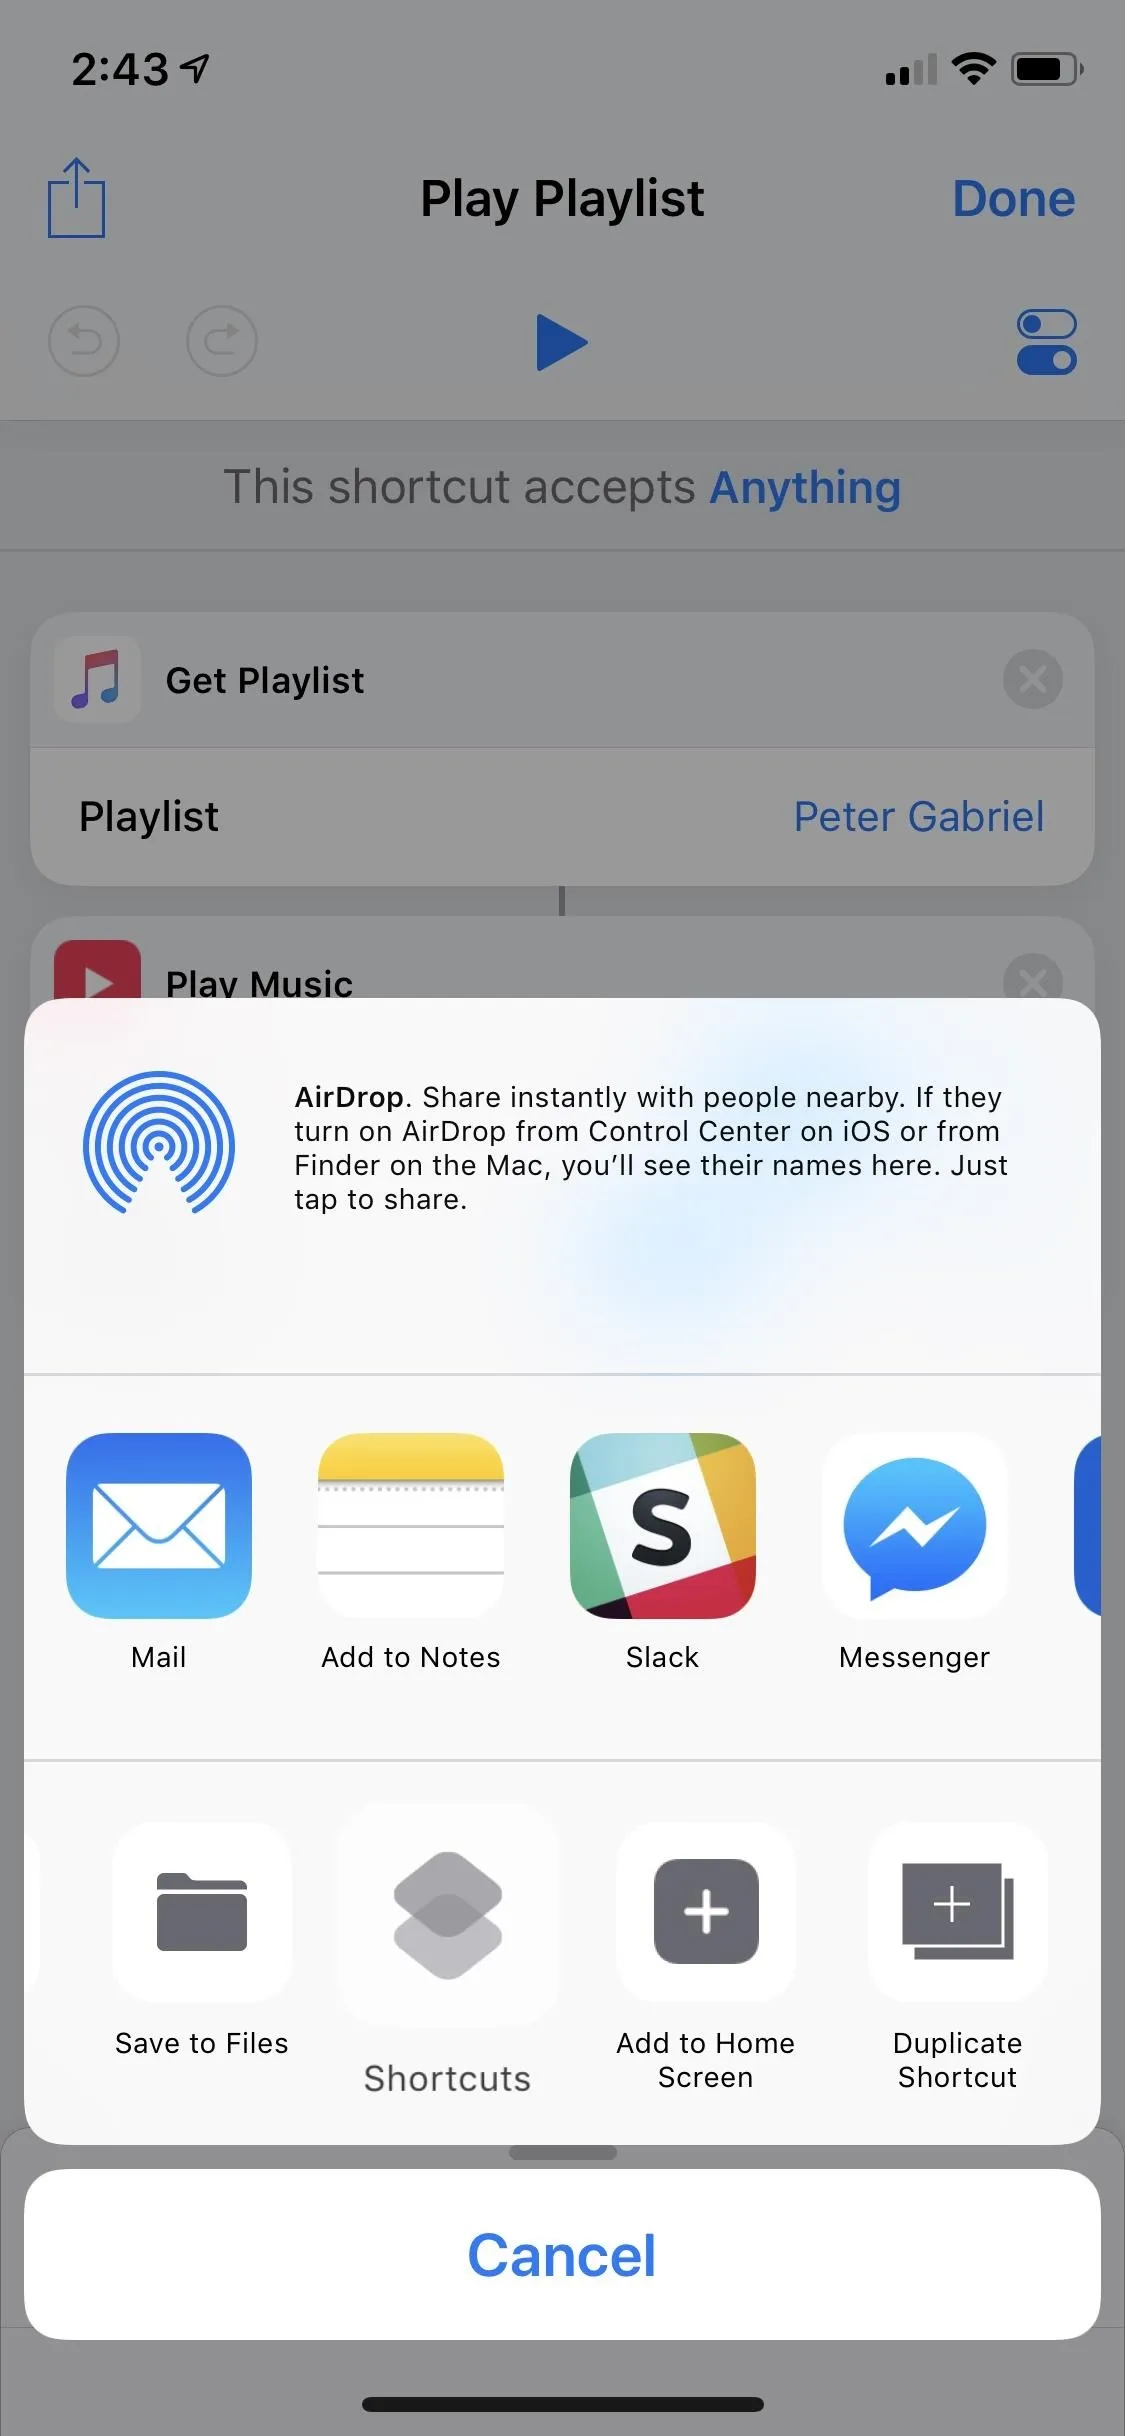
From the workflow's Settings page, make sure "Show in Share Sheet" is toggled on. Additionally, you can tap "Accepts" to limit the type of content input that can be run from within another app. By default, it will accept everything. For the "My Playlist" workflow, any app that I'm in wouldn't need access to any of these, so "Deselect All" would be okay here.
Limiting the type of content that a workflow will accept streamlines sharing options in an app, by hiding workflows that aren't relevant to the app. For example, a workflow that accepts only contacts won't appear as a sharing extension in the Maps app.


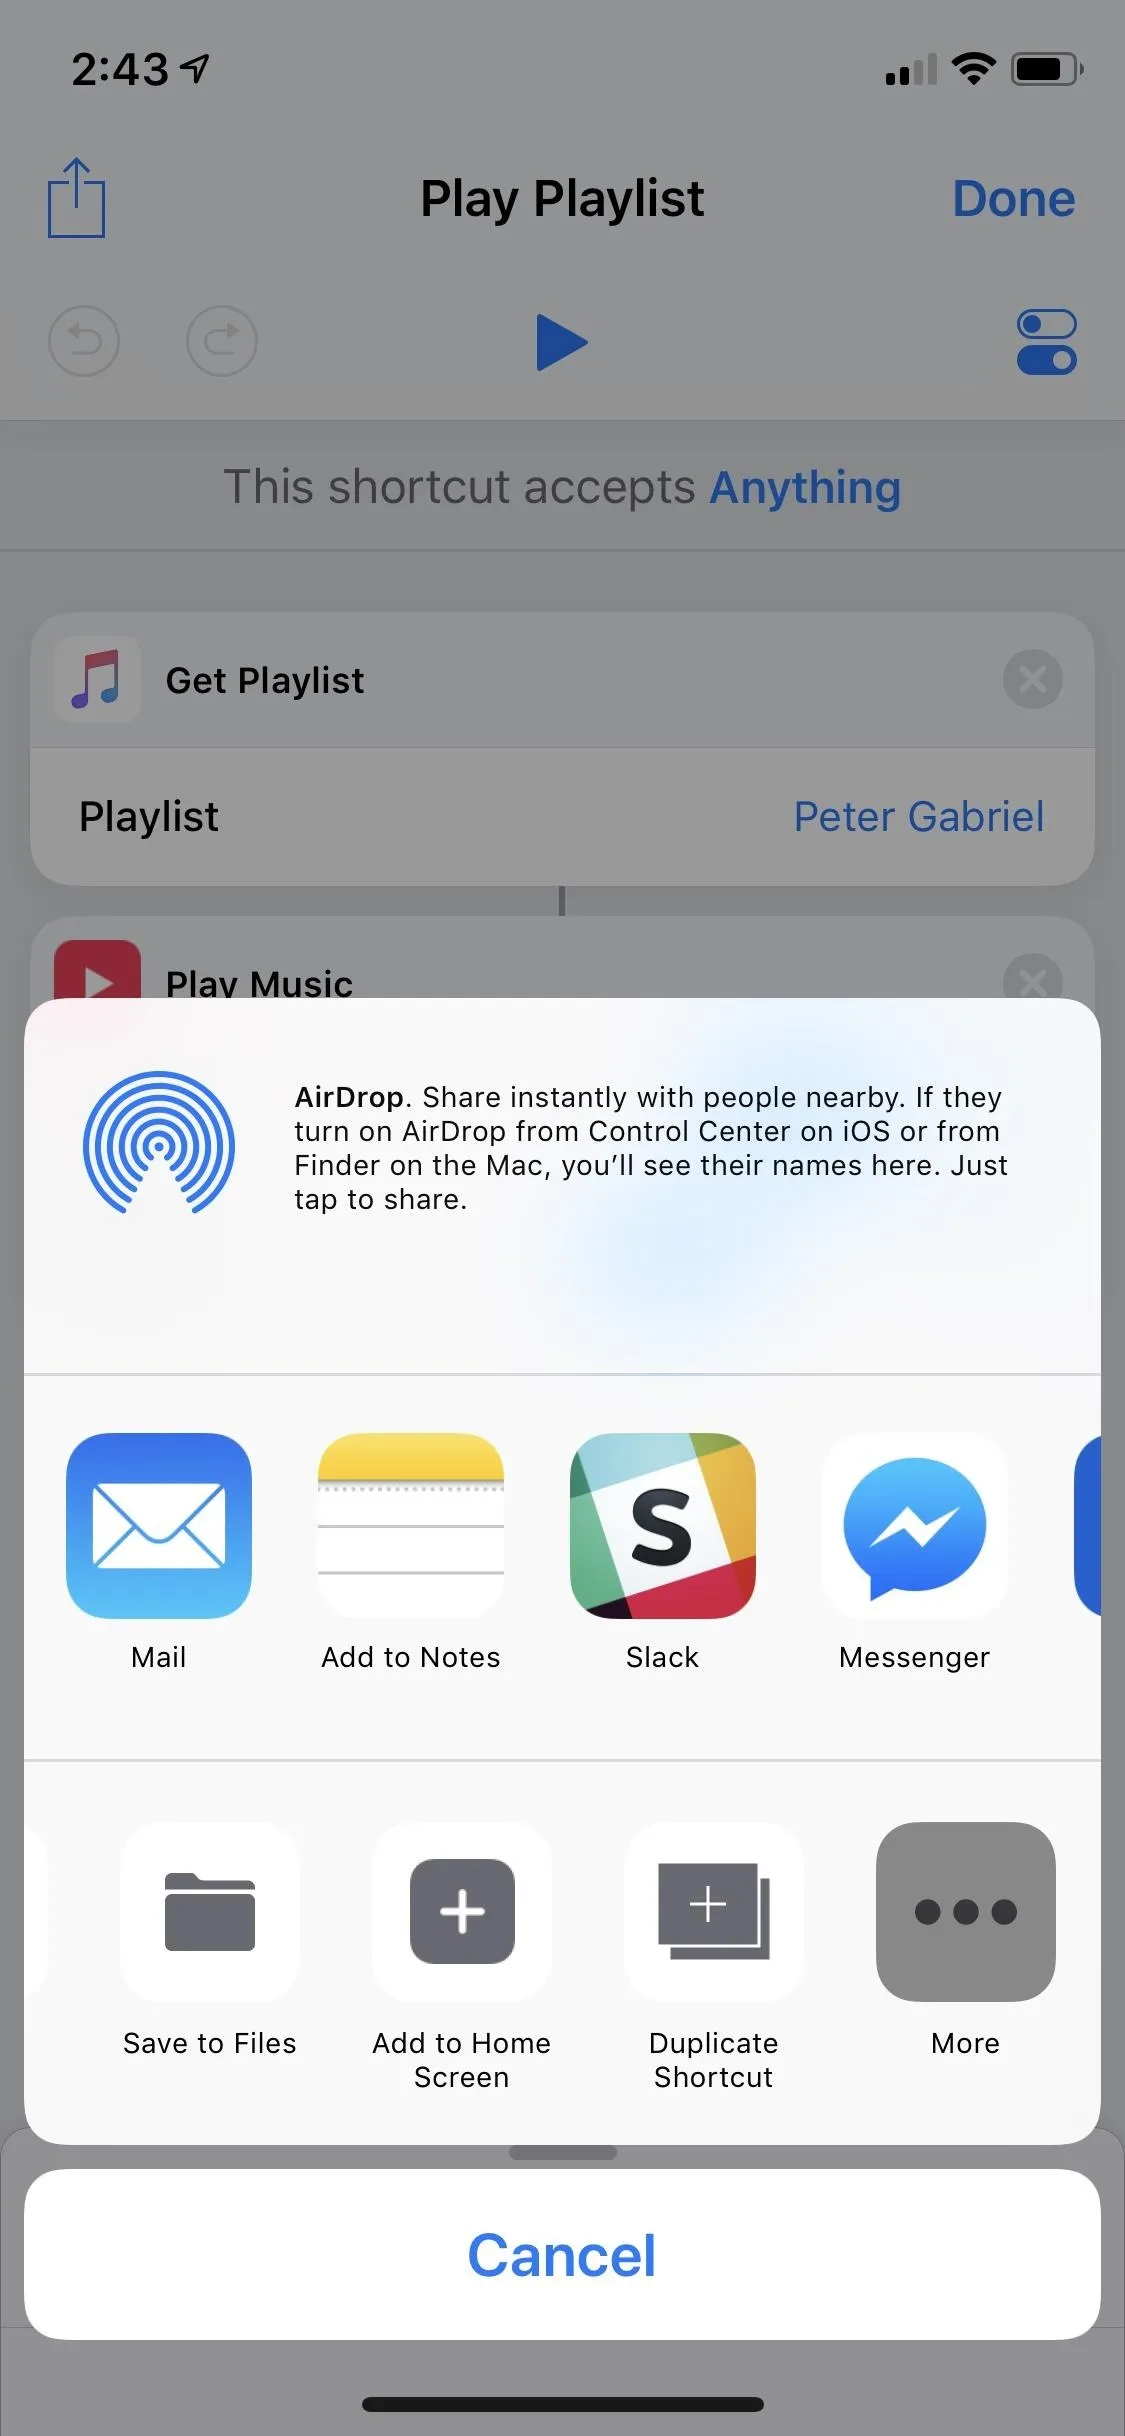
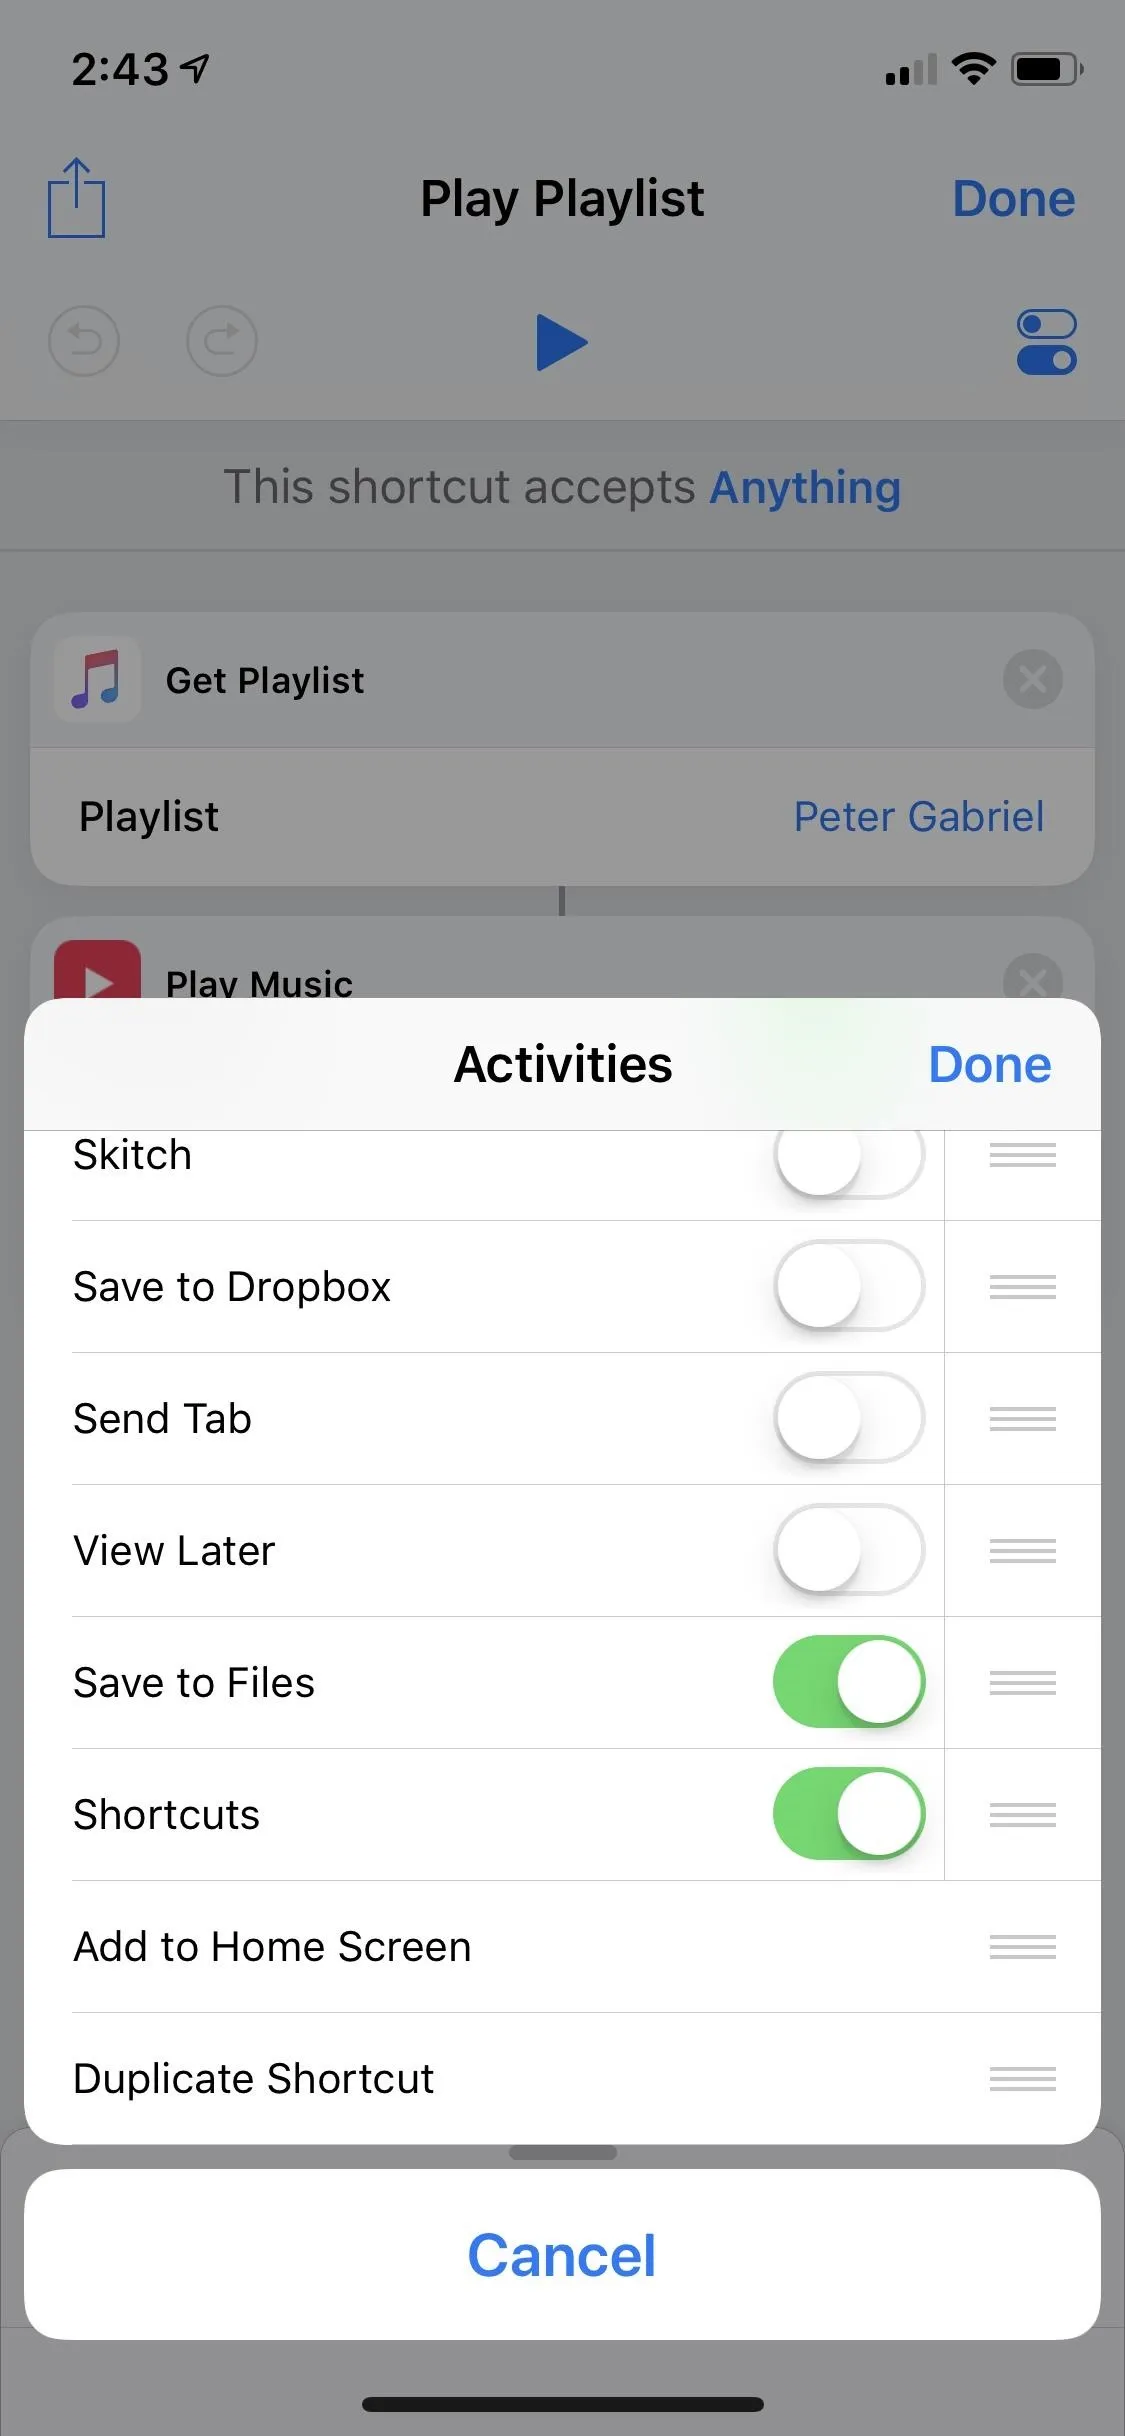
Once you've enabled the share sheet option, tap the share icon in Shortcuts to enable the Action Extension in the share sheet options. On the bottom row, swipe to the end and tap "More." From the list, toggle on "Shortcuts" and tap "Done."


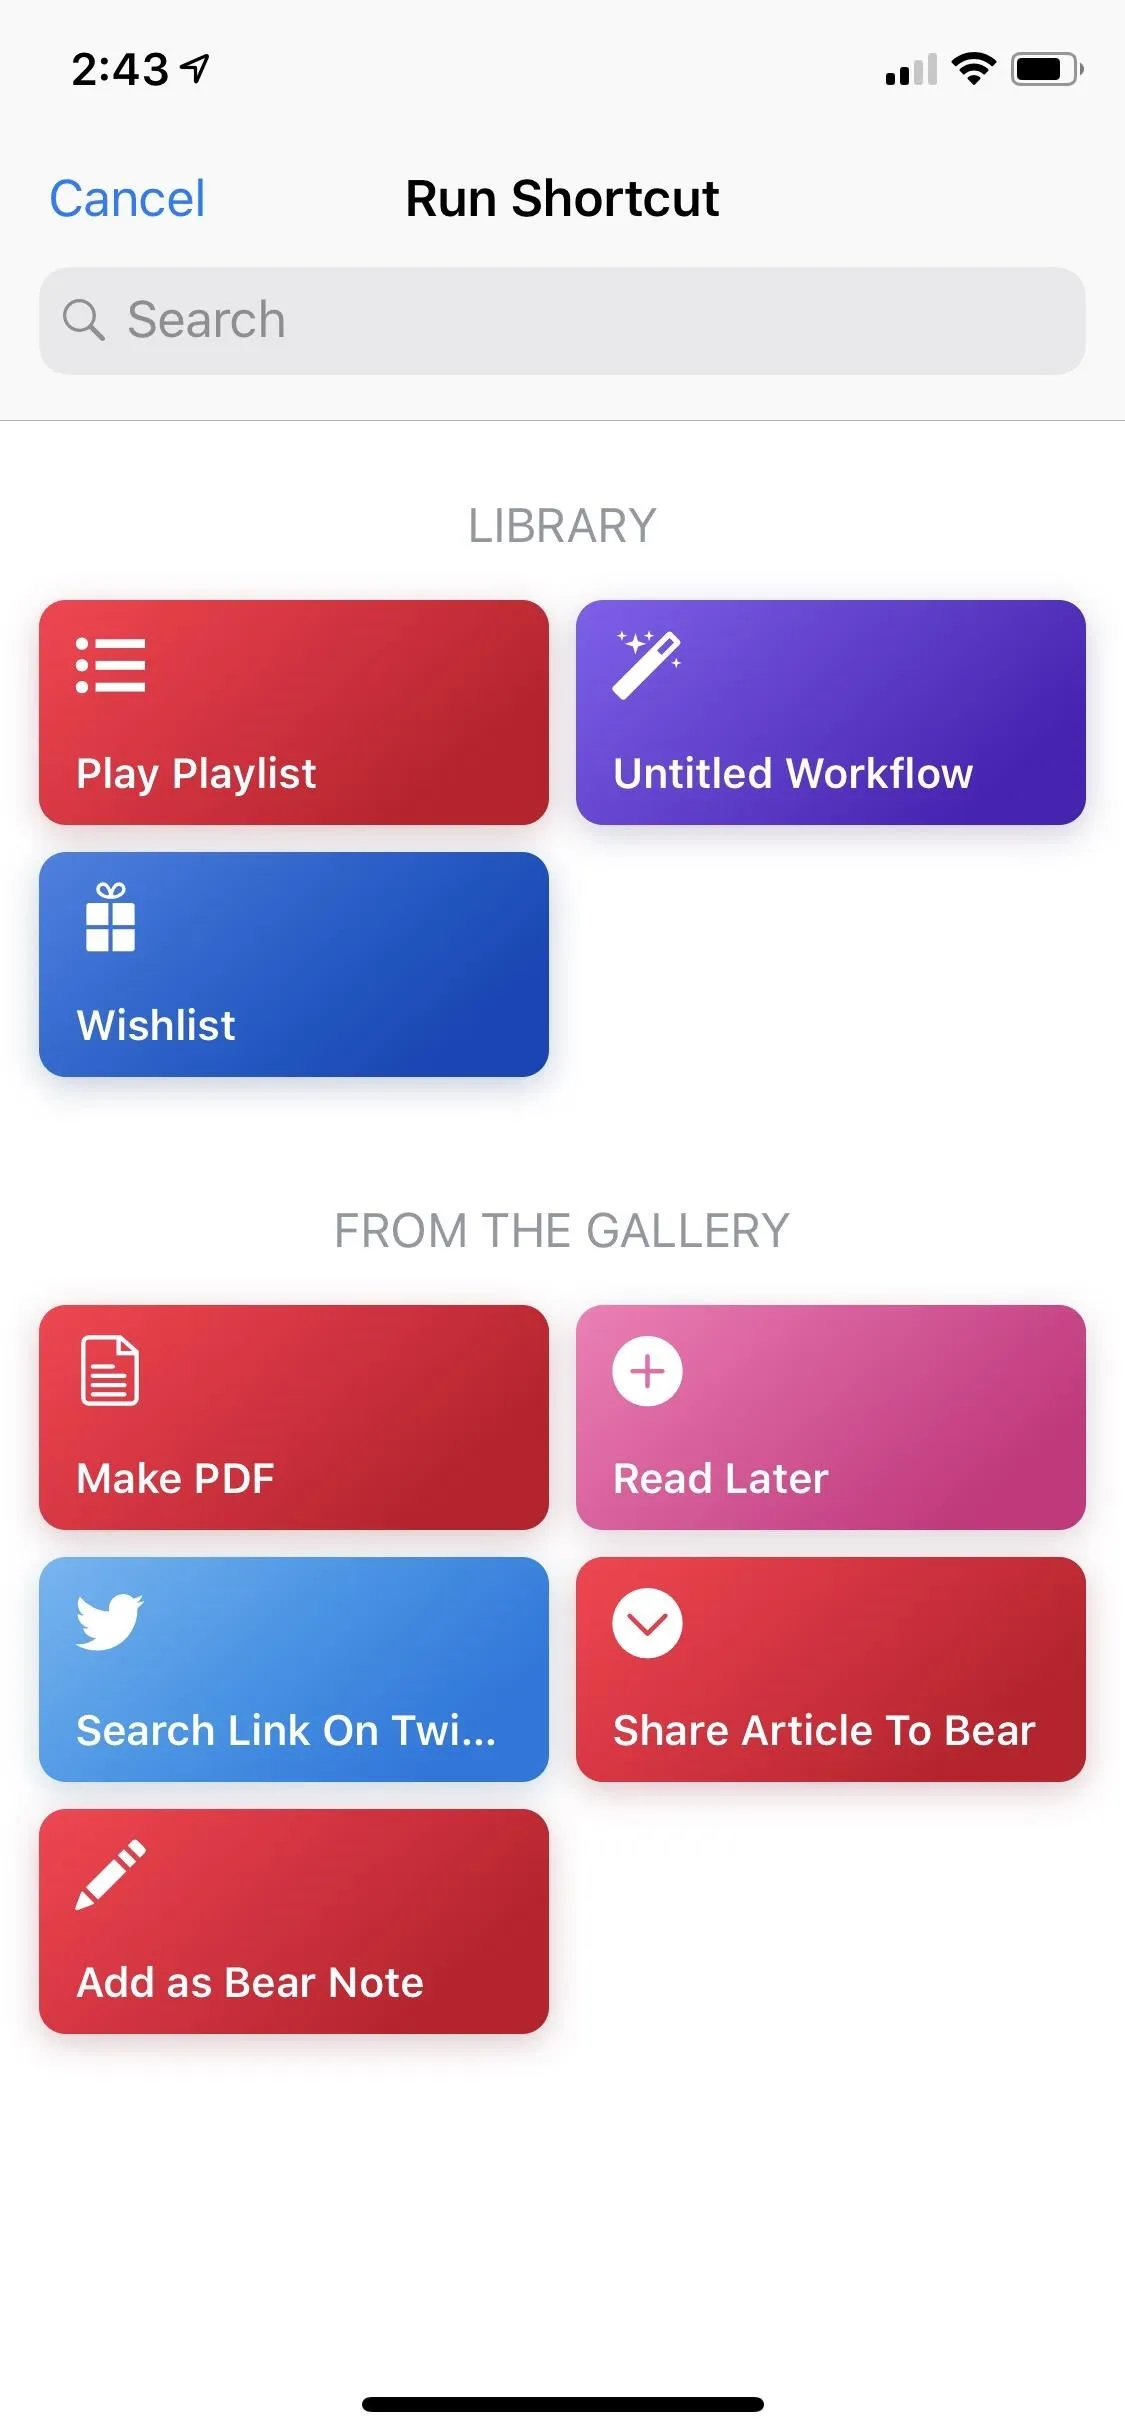
To use your new Action Extension, tap the share sheet when in an app, then tap "Shortcuts" from the bottom row. This will open up the Shortcuts list of workflows. Tap on the one you want to play, and it will start the workflow in the Shortcuts app. You can exit the Shortcuts app afterward.


While my example here wasn't very good, it would be much more helpful in other scenarios. For example, whenever you want to open a page you're viewing in Safari directly in Google Chrome instead. That makes a lot more sense.
More Functionality to Come!
This is just the basics of using the new Shortcuts app in iOS 12. You really won't be able to grasp its power until you start playing around with things in the "Gallery" and, eventually, tinkering with your own workflows.
Shortcuts you make can also be recommended by Siri based on your location, the time of day, and whether you're walking, running, driving, or flying. These are figured out locally on your iPhone itself, so you don't have to worry about any privacy issues. Recommendations to use a shortcut will show as notifications on your lock screen or in Spotlight Search, and you can just tap it to run it.
- Follow Gadget Hacks on Facebook, Twitter, YouTube, and Flipboard
- Sign up for Gadget Hacks' daily newsletter or weekly Android and iOS updates
- Follow WonderHowTo on Facebook, Twitter, Pinterest, and Flipboard
Cover photo and screenshots by Justin Meyers/Gadget Hacks


Comments
No Comments Exist
Be the first, drop a comment!