Safari has always done a great job at letting you browse the web, but it has never so much as offered a way to download files locally. Other apps have stepped in to help fill the gap, but they never felt as integrated into the iPhone as a native downloads manager would. They aren't needed anymore though, because Apple added one in iOS 13, pushing Safari on the iPhone closer to its sibling on the Mac.
The new download manager includes several powerful features, including default folders, file previews, and downloading in the background. By working with the Files app, Safari lets you download a file locally on your device, to iCloud, or to any supported third-party app. You can also monitor the progress of downloads, stop, start, or cancel them, and jump straight to their location in the Files app, right from Safari's new downloads manager.
- Don't Miss: 200+ Exciting New iOS 13 Features for iPhone
Step 1: Change the Default Folder Location
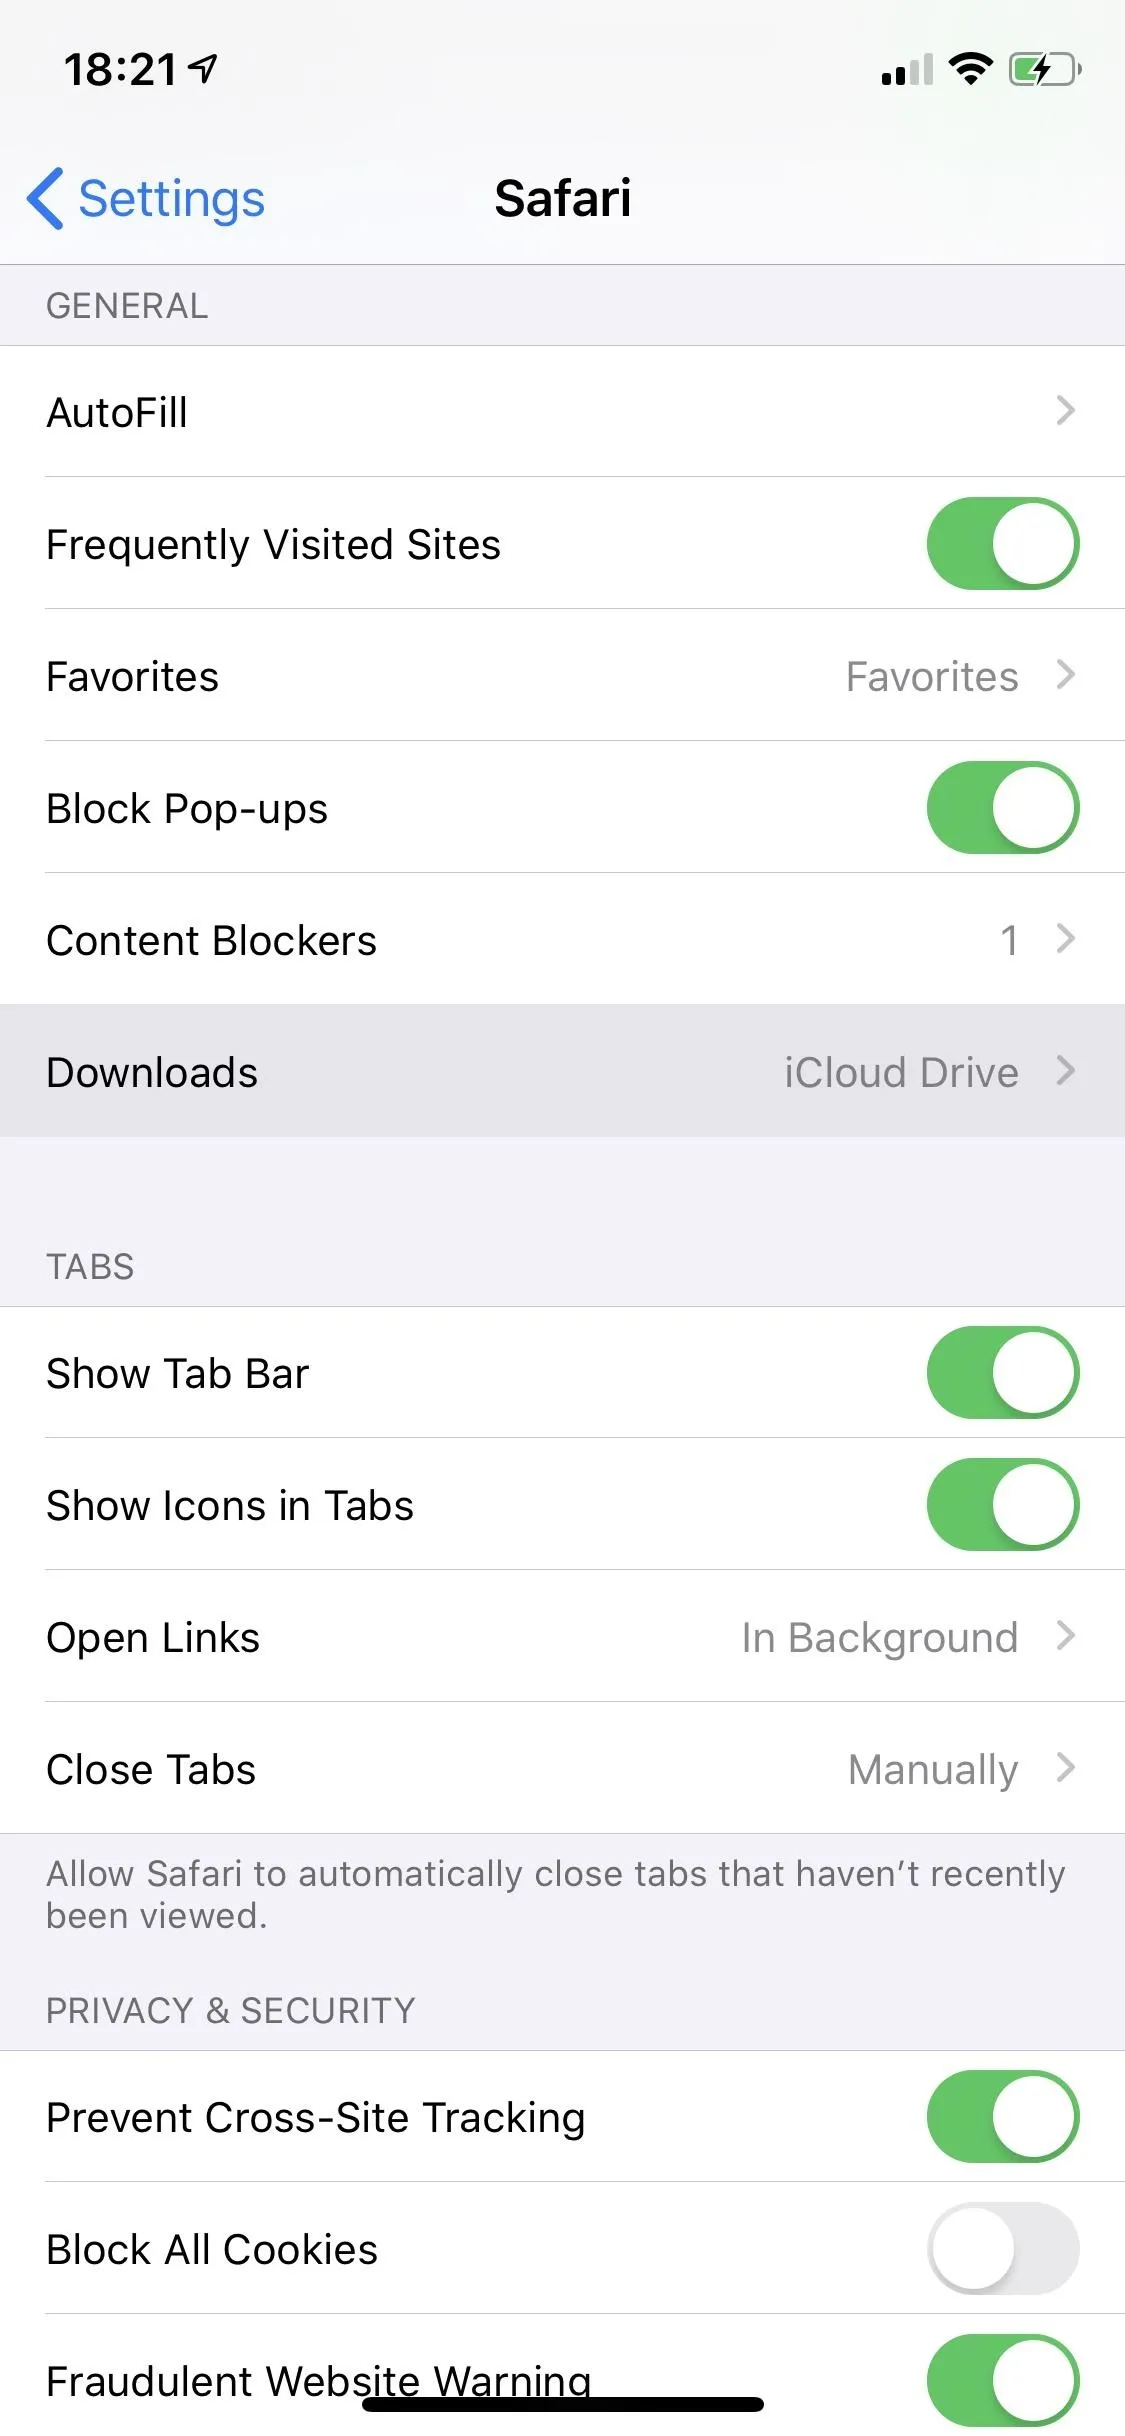
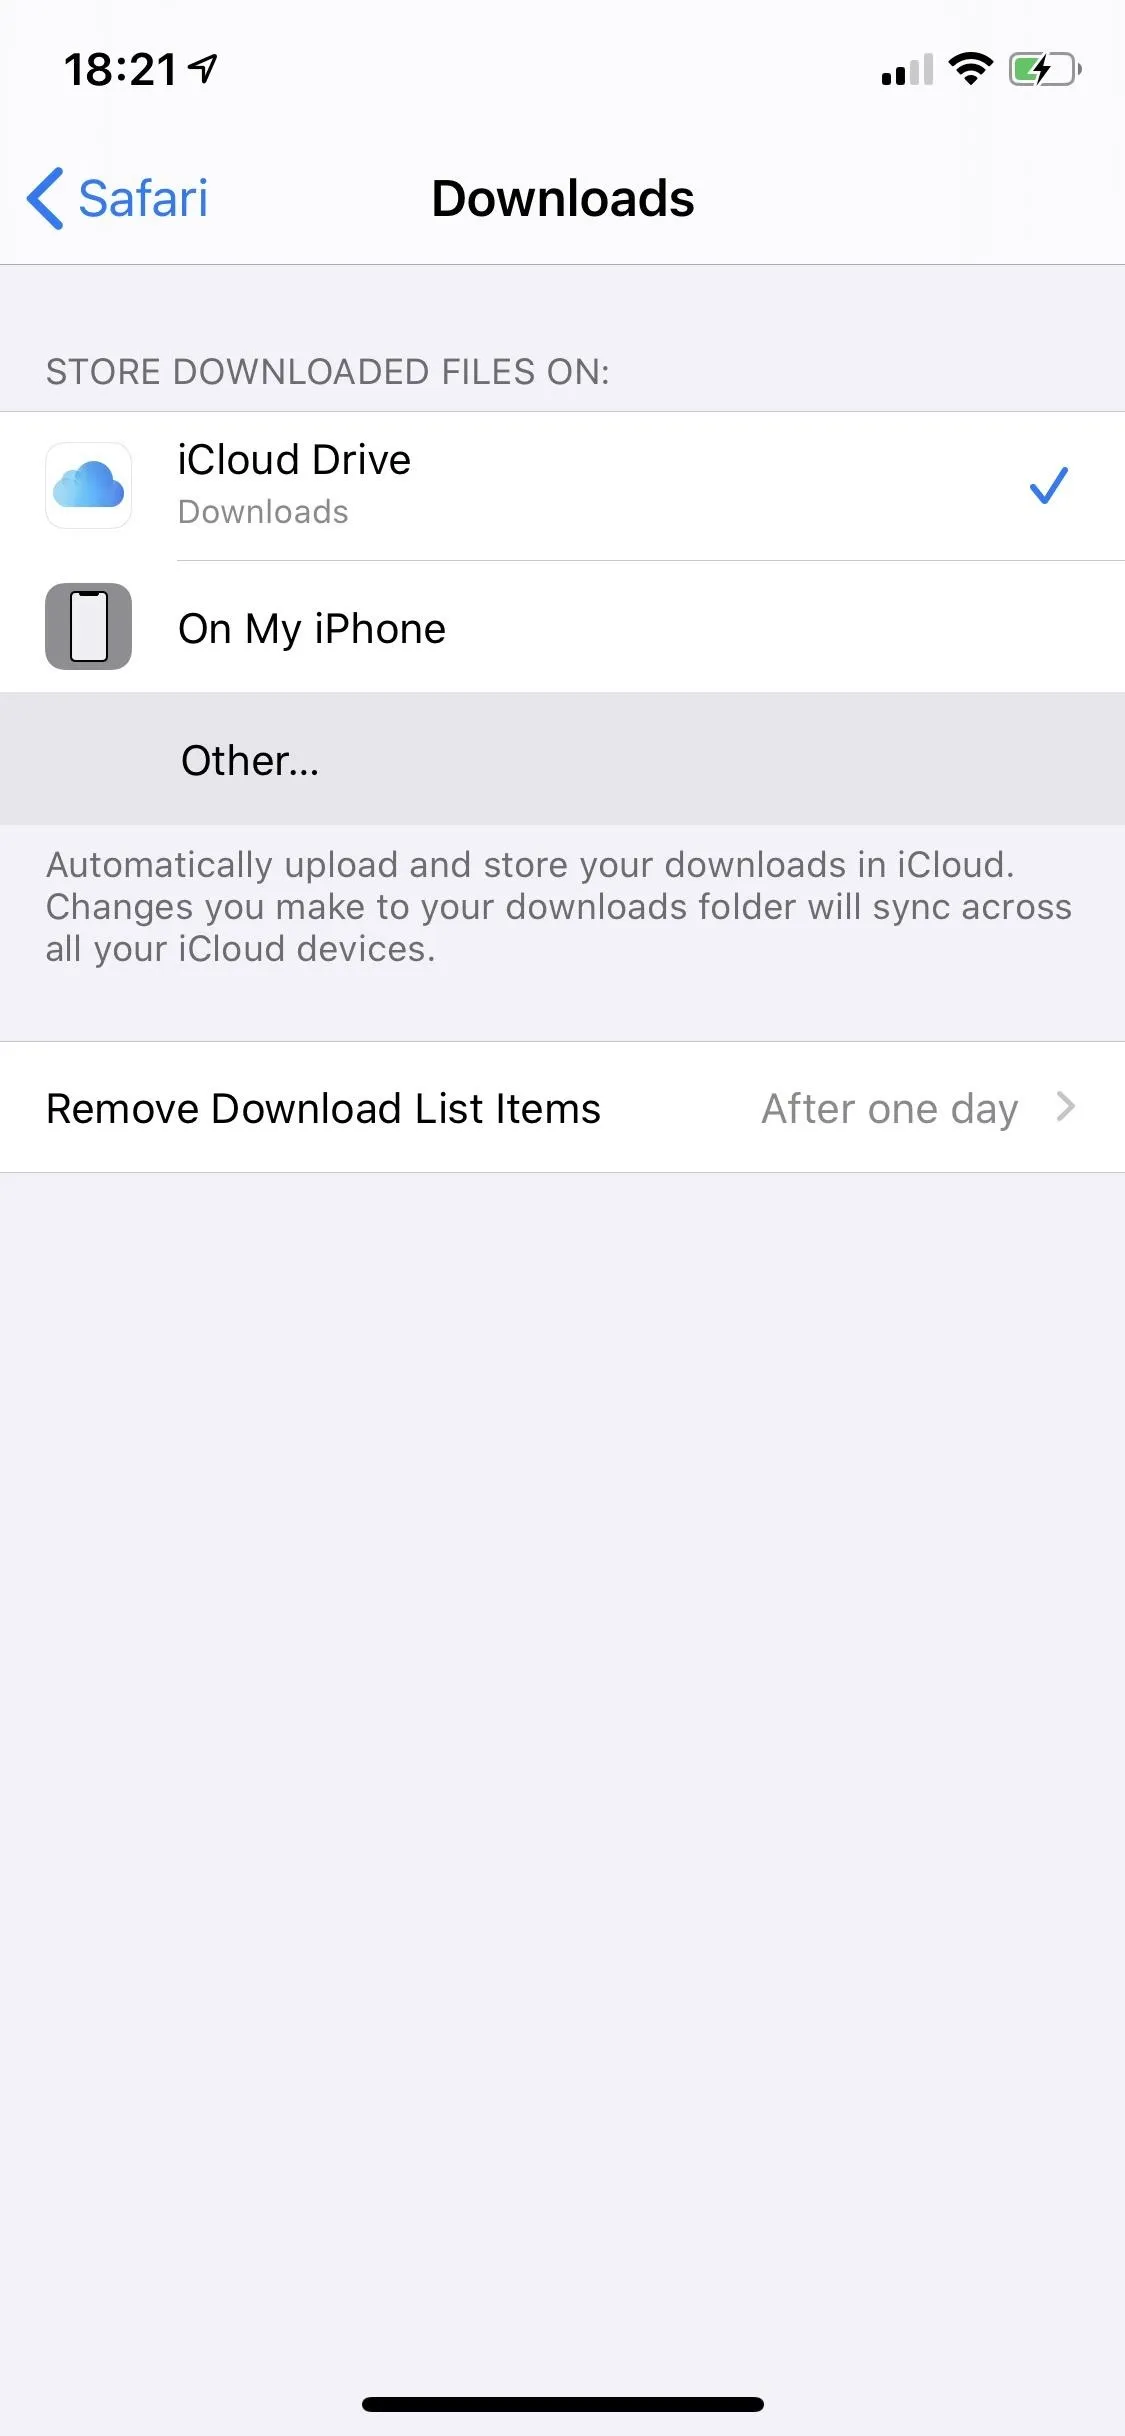
By default, iOS will create a new "Downloads" folder in iCloud Drive and set it as your default download location. You can change that to a different location inside iCloud Drive or to a folder within "On My iPhone" so that downloads are locally contained and not eating up iCloud storage.
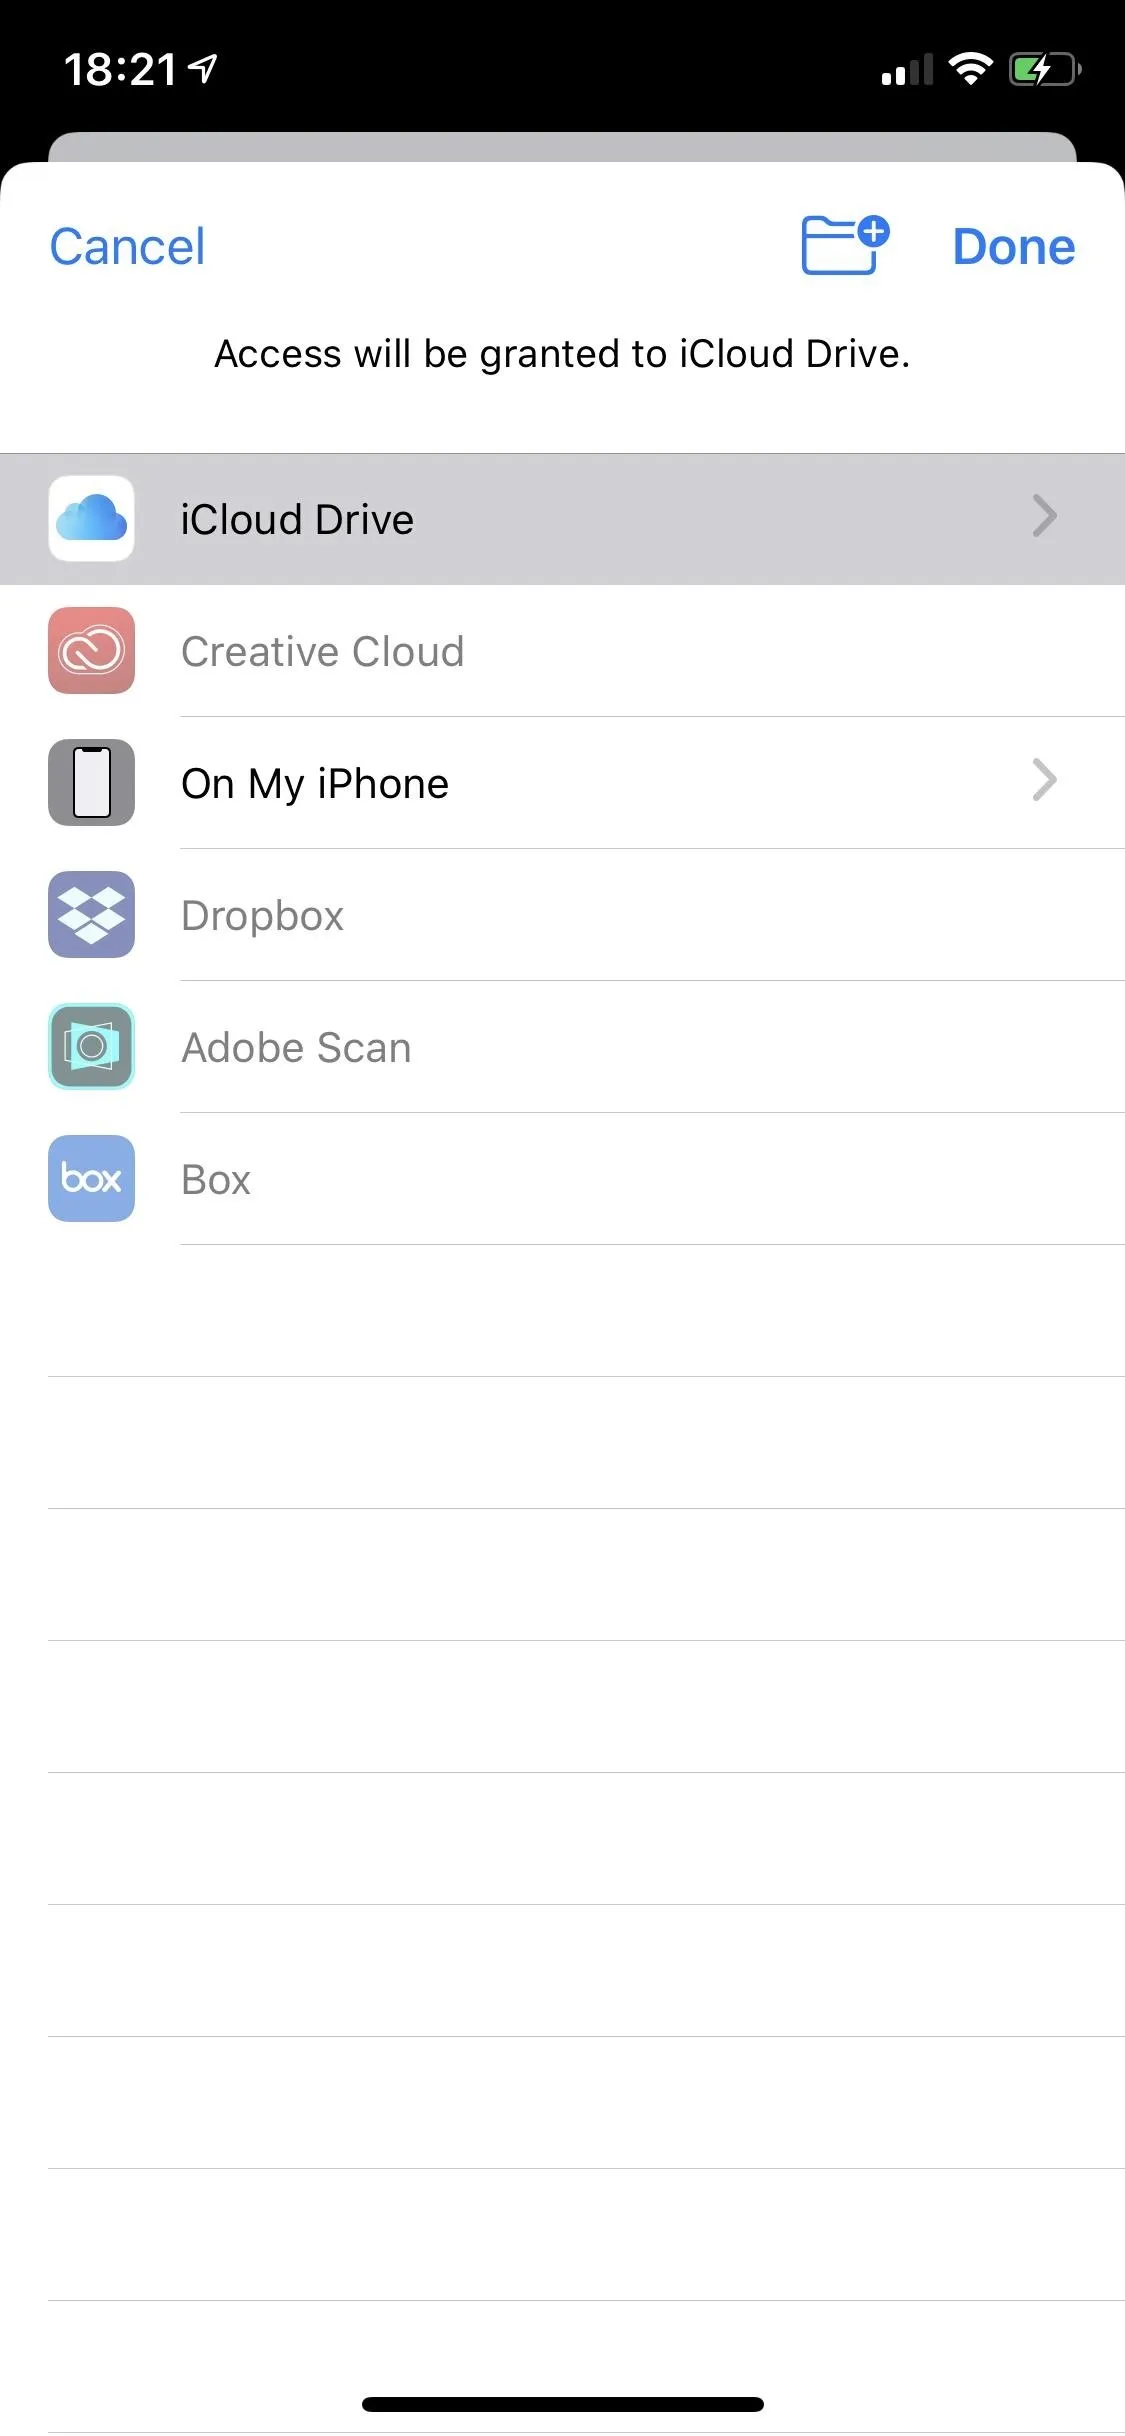
As of now, you can't select folders in third-party apps in Files, such as Adobe Creative Cloud, Amazon Drive, Baidu Network Disk, Box, Boxcryptor, Dropbox, Google Drive, Microsoft OneDrive, and SugarSync. Hopefully, that happens one day.
To change your default download location, open the Settings app, then tap Safari –> Downloads. You can then select one of the suggested places or tap "Other" to choose another directory. Third-party apps may be able to support this option in iOS 13, so if your preferred location is grayed out, you may need to wait for a future app update.


Step 2: Choose How to Keep the List Clean
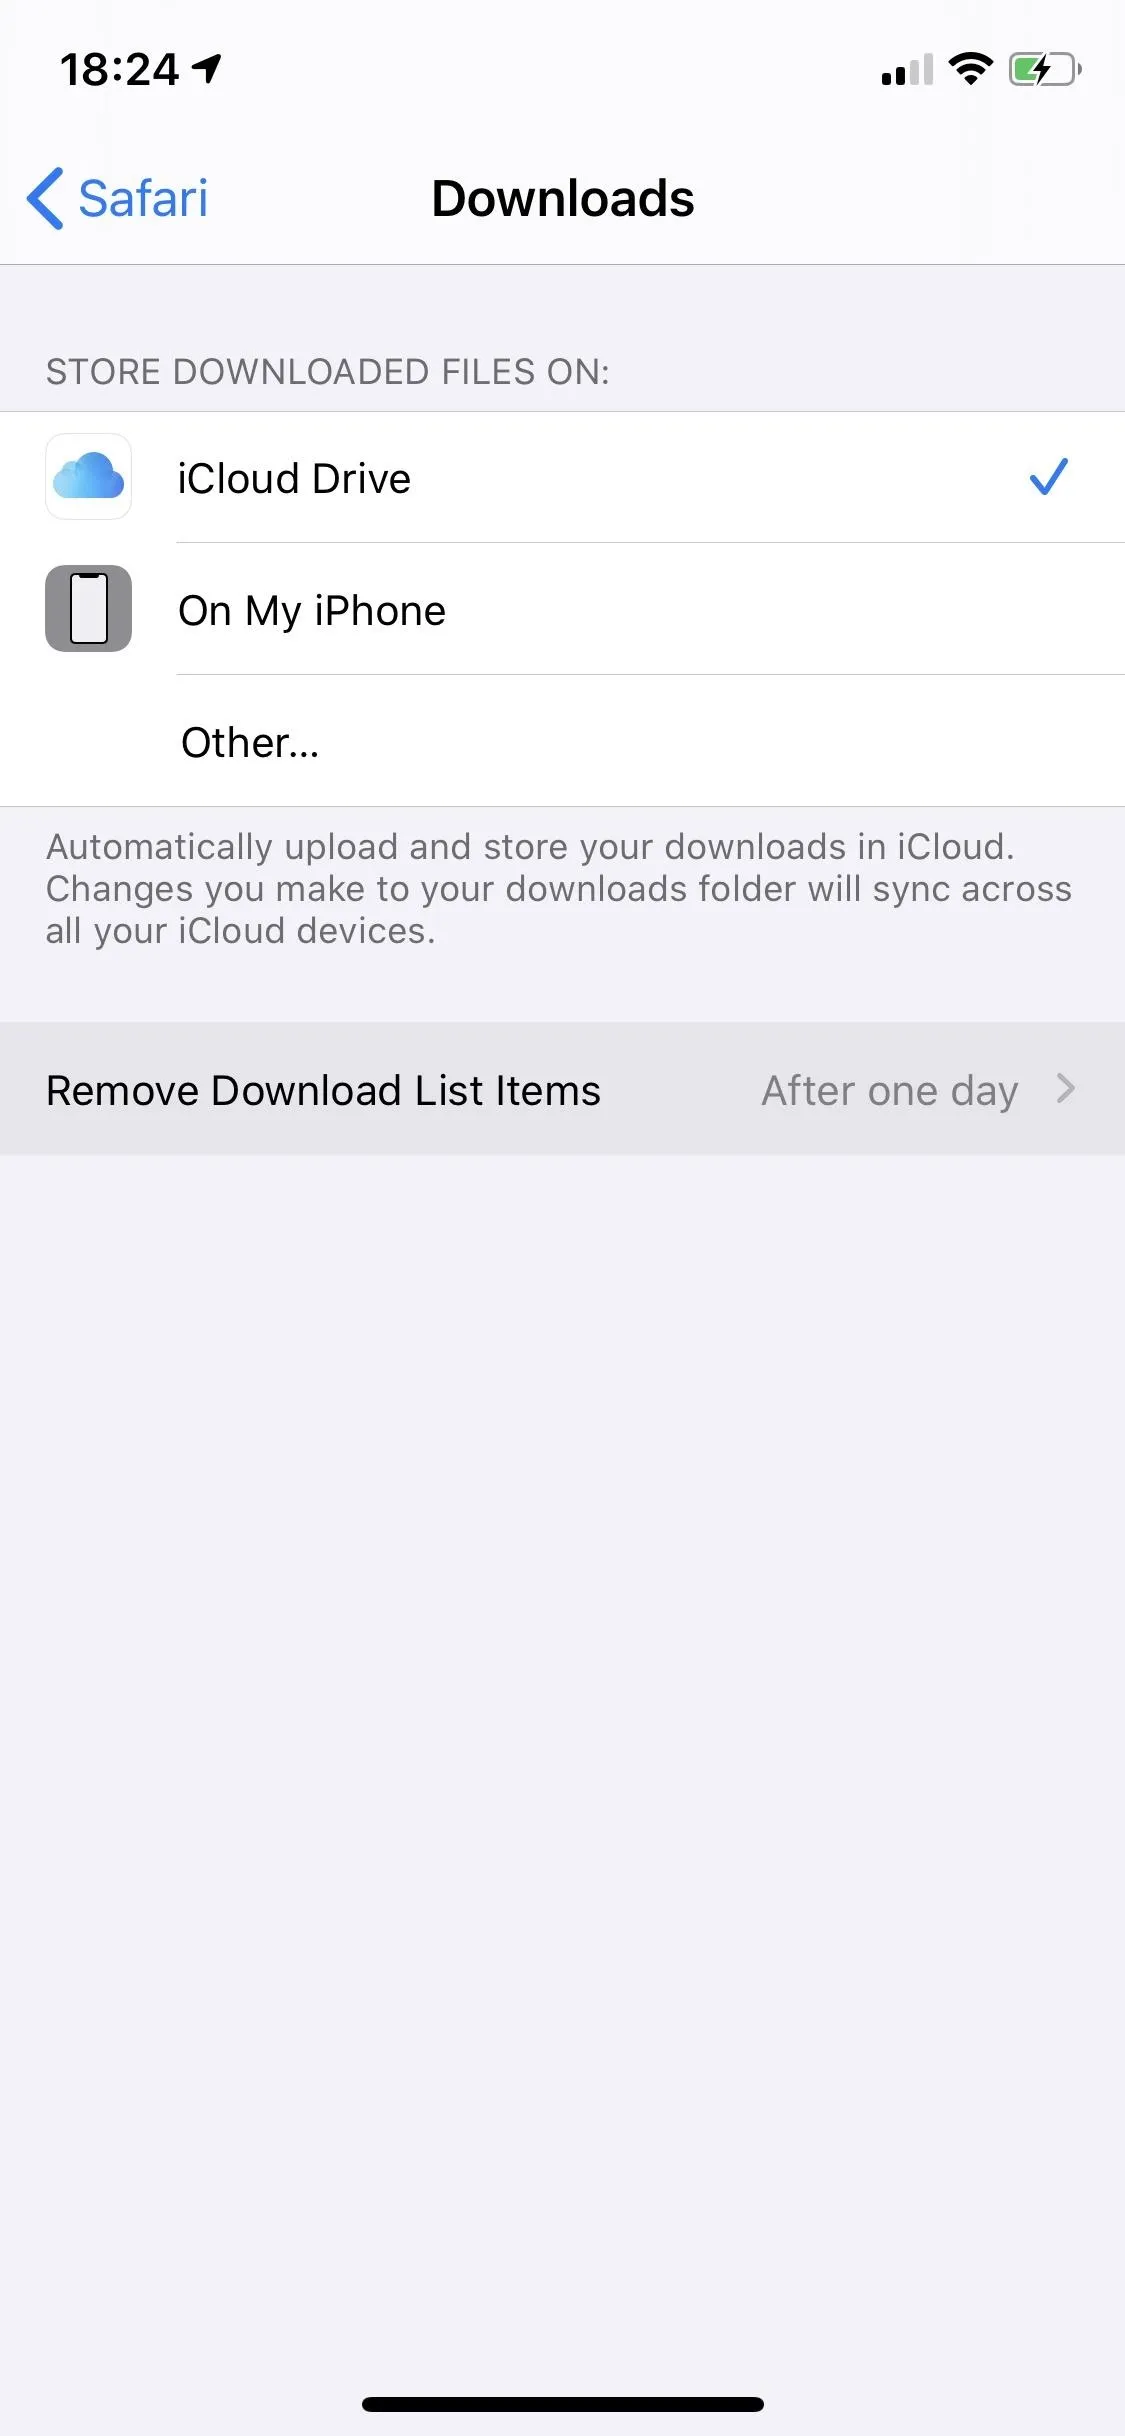
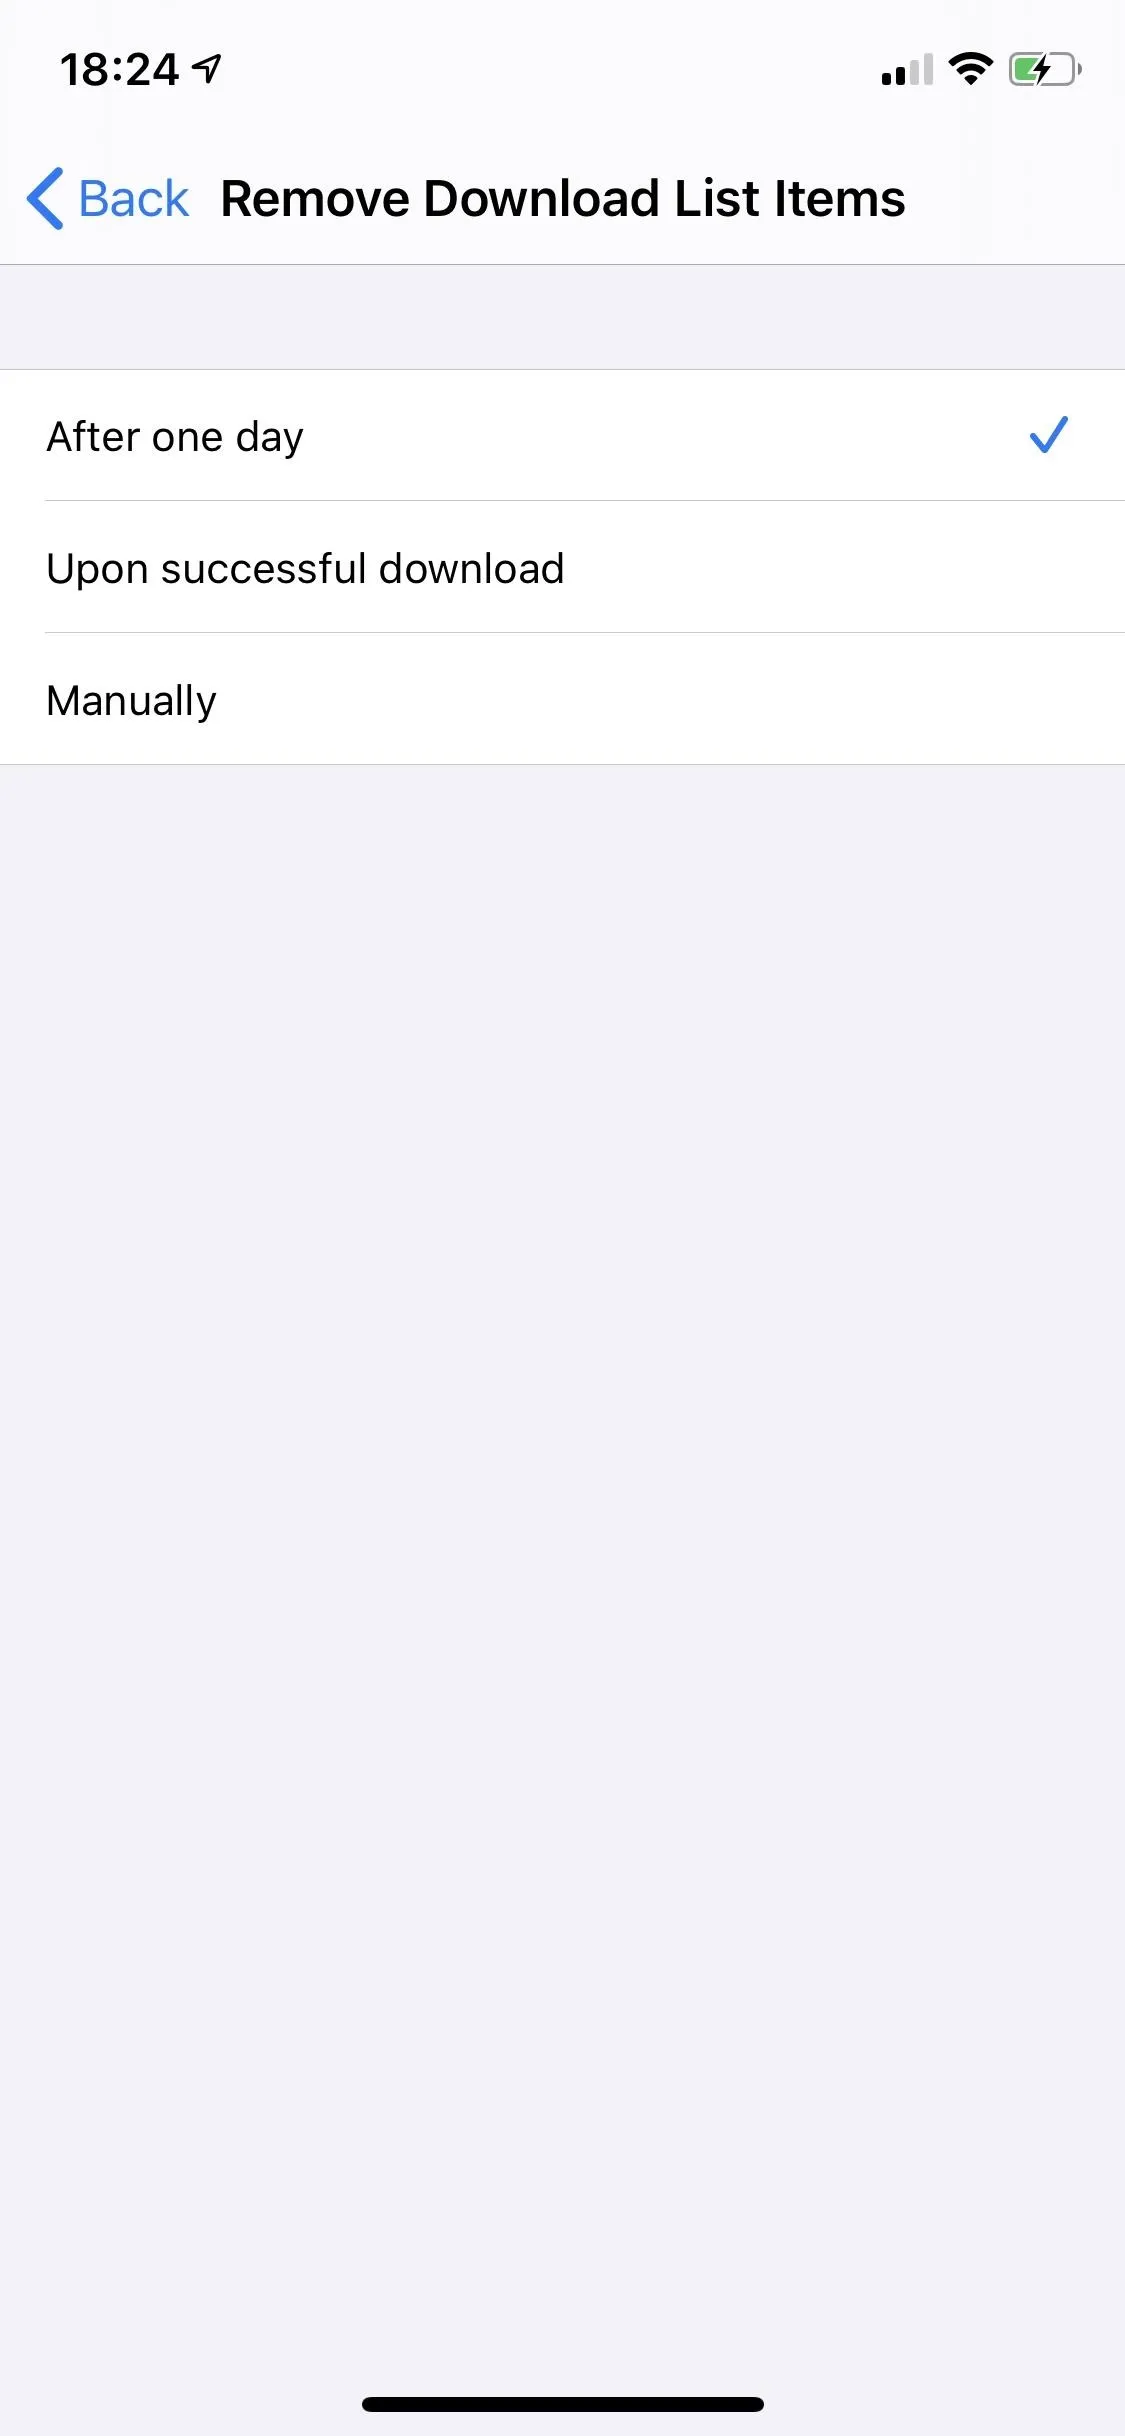
You can also choose when items are removed from the download manager's list of downloads. Removing downloads will not delete the actual file but will just remove it from the list to keep it from getting cluttered with downloads. By default, it's set to remove items from the manager after one day, but there are a few other options.
To see or change the options, open Settings, and go to Safari –> Downloads –> Remove Download List Items. There, you can choose to have items removed after one day or as soon as they finish downloading. You can also make them never disappear automatically with the manual option, meaning you're responsible for cleaning up the downloads manager yourself.


Step 3: Start a Download in Safari
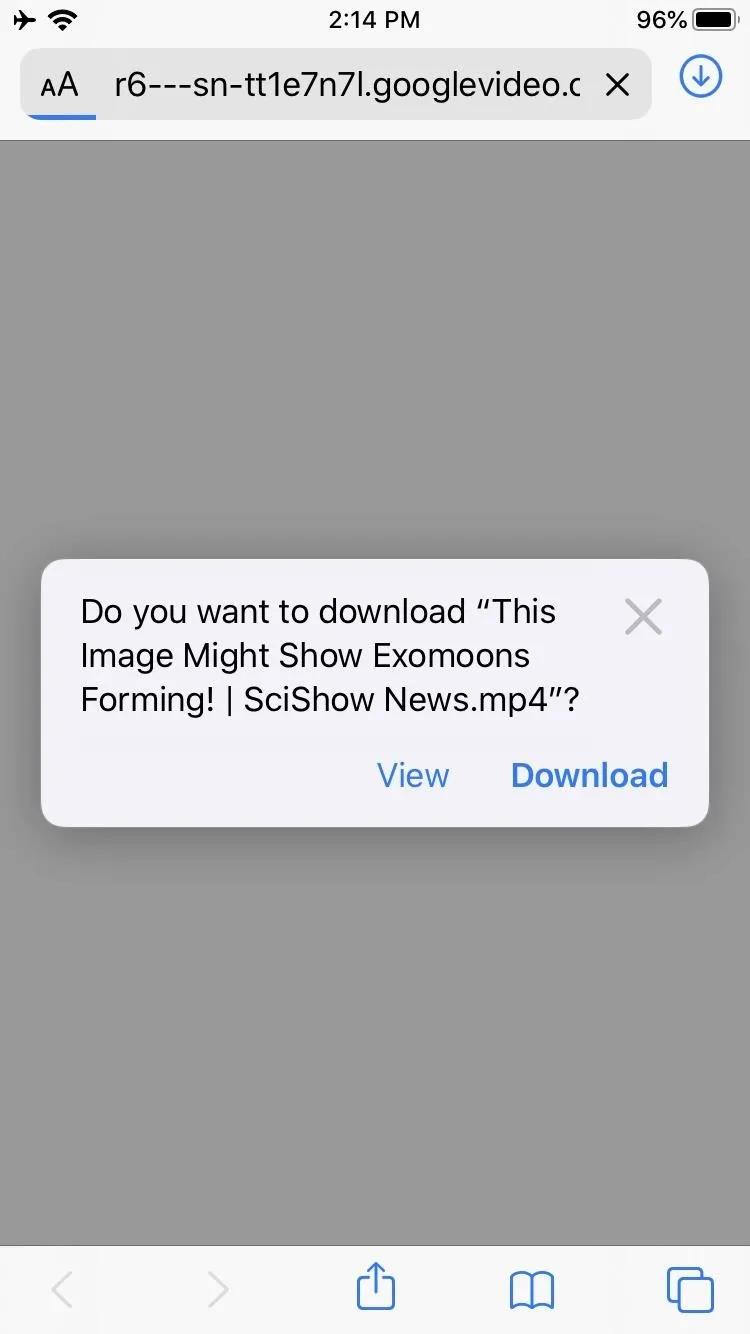
Downloading a file from Safari works just like you'd expect. Tapping a link to a downloadable file will open a dialog box confirming you would like to download the file. Once you tap "Download," the file will be added to the downloads manager and start downloading. It will continue downloading until the entire file is downloaded, even if you close Safari or leave the webpage.
If the file you are downloading is something Safari can view, such as media (audio, videos, or images) or documents (PDFs), the download dialog box will also have an option to load the file right in Safari instead of downloading it. To view the file immediately, select the "View" option in the dialog box.
Finally, if you have an external keyboard connected, you can also hold the Option key and tap a link to skip the confirmation dialog and immediately start downloading the file. You can also Option left-click if you're taking advantage of the new ability in iOS 13 to connect a wireless mouse.



Step 4: Save to a Different Location Than the Default
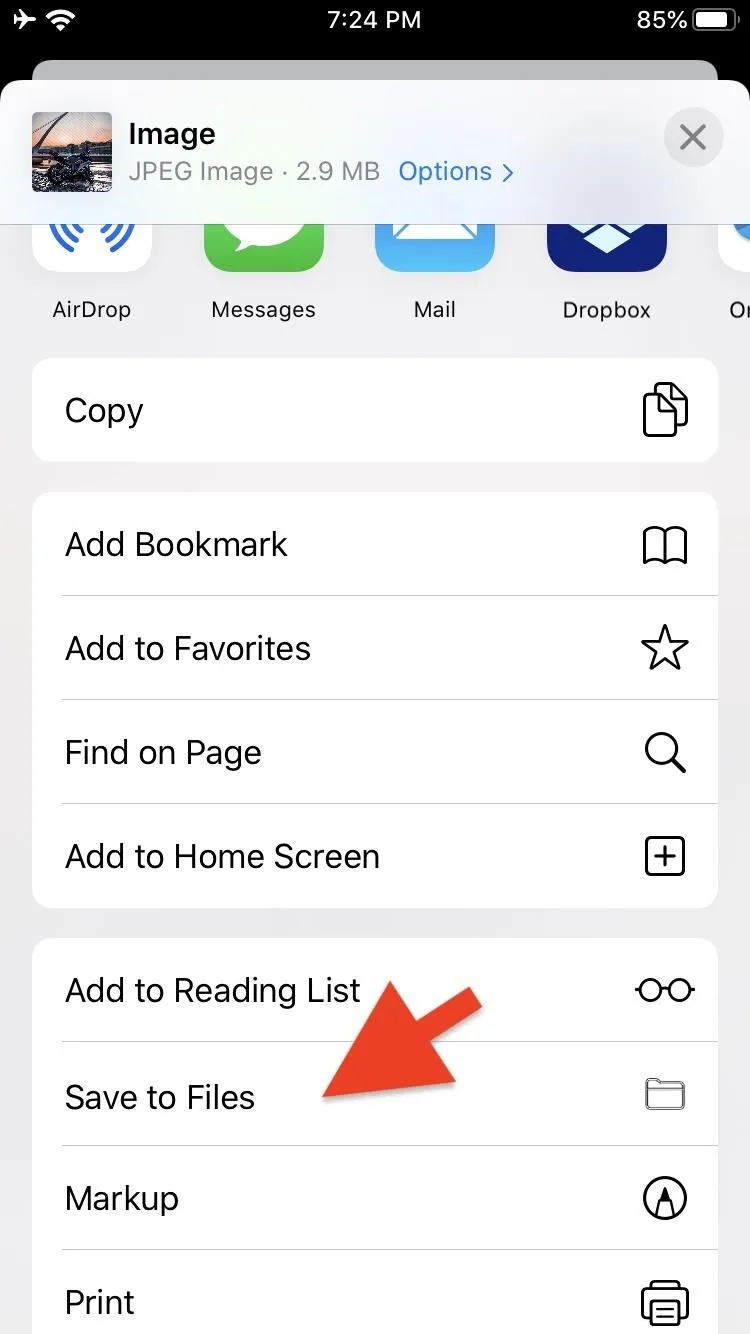
If you'd like to download a file to somewhere other than the default location you've selected for Safari, tap the "View" option when presented with the download dialog. After Safari loads the file, tap the share button, and choose "Save to Files." From there, you can select any location in the Files app to save the file to, as long as the location is supported.


Step 5: View Downloads in Progress
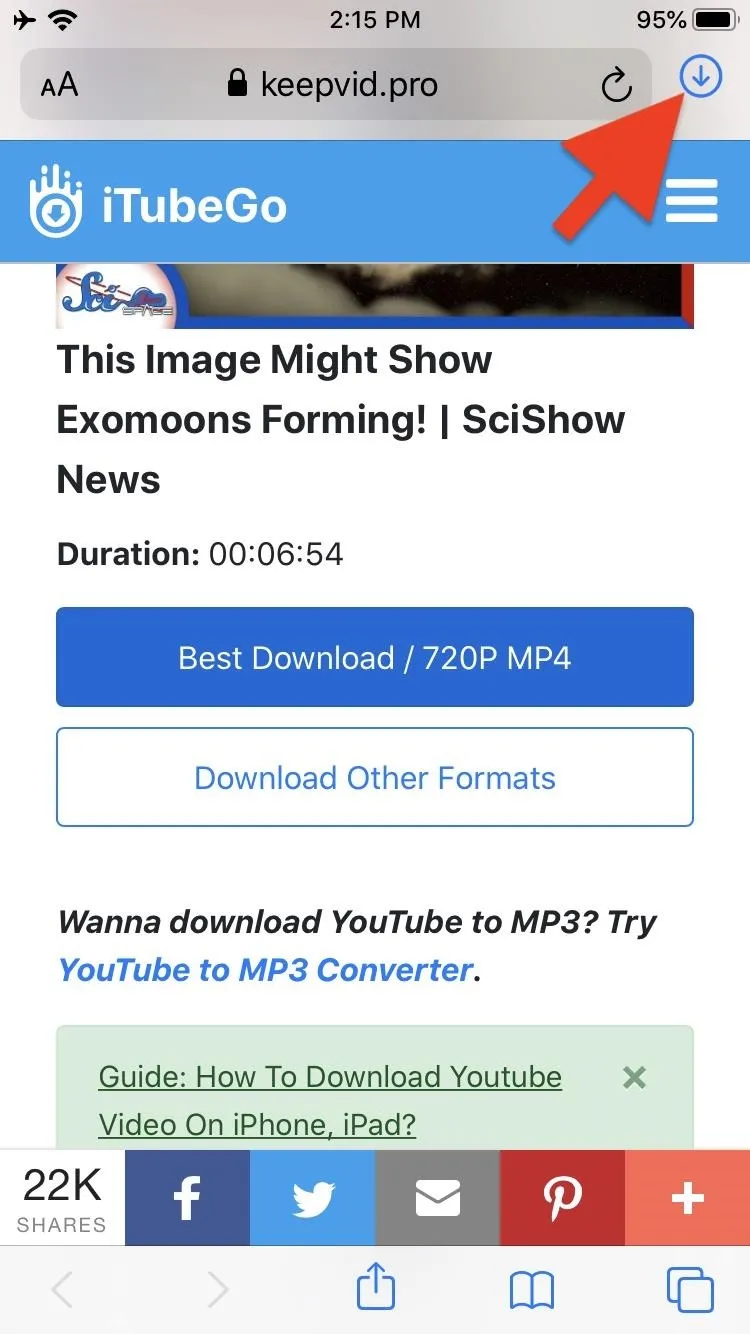
Once your file starts downloading, Safari shows its progress with a small loading bar underneath the downloads manager icon to the right of the address bar. Note that this icon won't appear until you start a download and will be hidden once the download list is cleared.
If you have several files downloading, the progress bar will show you the overall progress across all of the files you are downloading. To view the progress of individual files, tap the downloads manager icon. Each downloading file will have a small blue line below the file name showing how much of the file is left to get.
Finally, the downloads manager icon next to the address bar will bounce to let you know when all of your files have been downloaded.
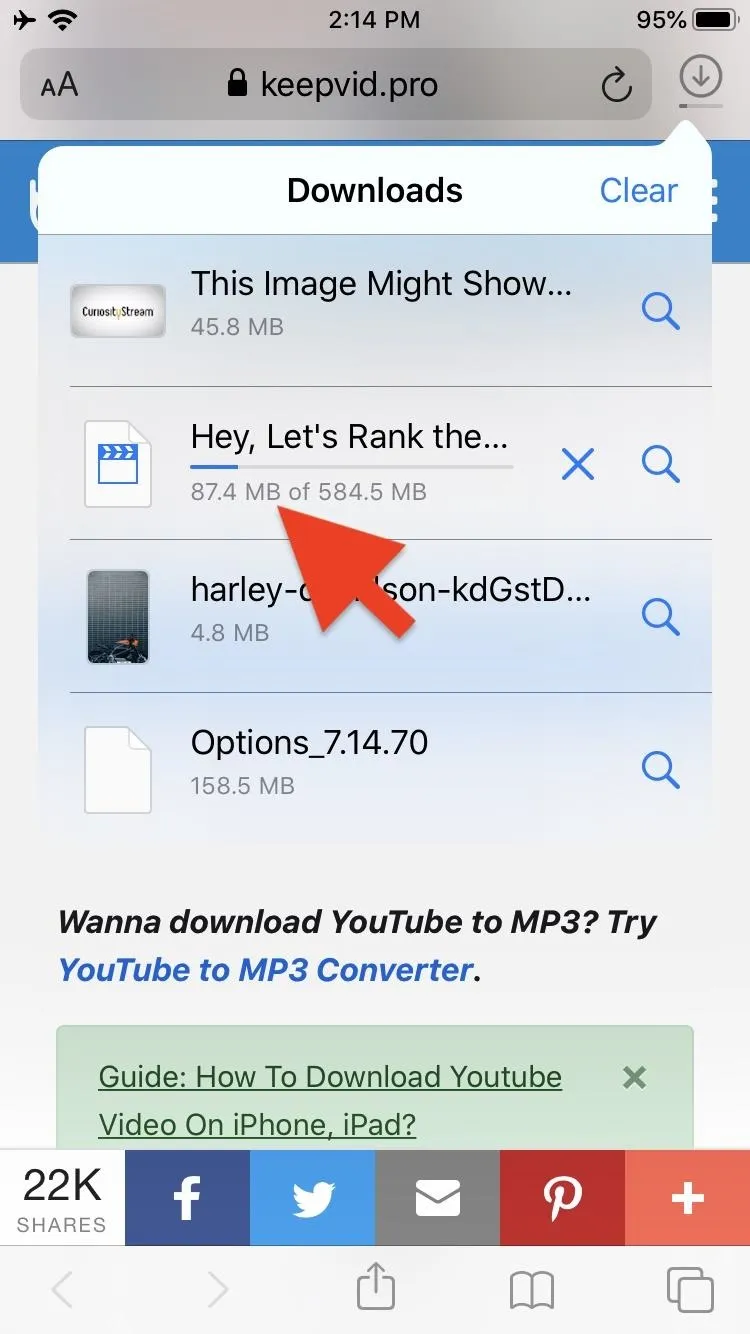


Step 6: Pause, Restart, or Cancel a Download
Tap the blue "X" icon next to the file name to pause the download. When you do, the "X" will be replaced with a circular arrow, which you can tap to continue the download. If you'd like to cancel the download, pause the download, then swipe to the left on the file to reveal a "Delete" button you can tap. Alternatively, long-swipe to the left to cancel immediately.
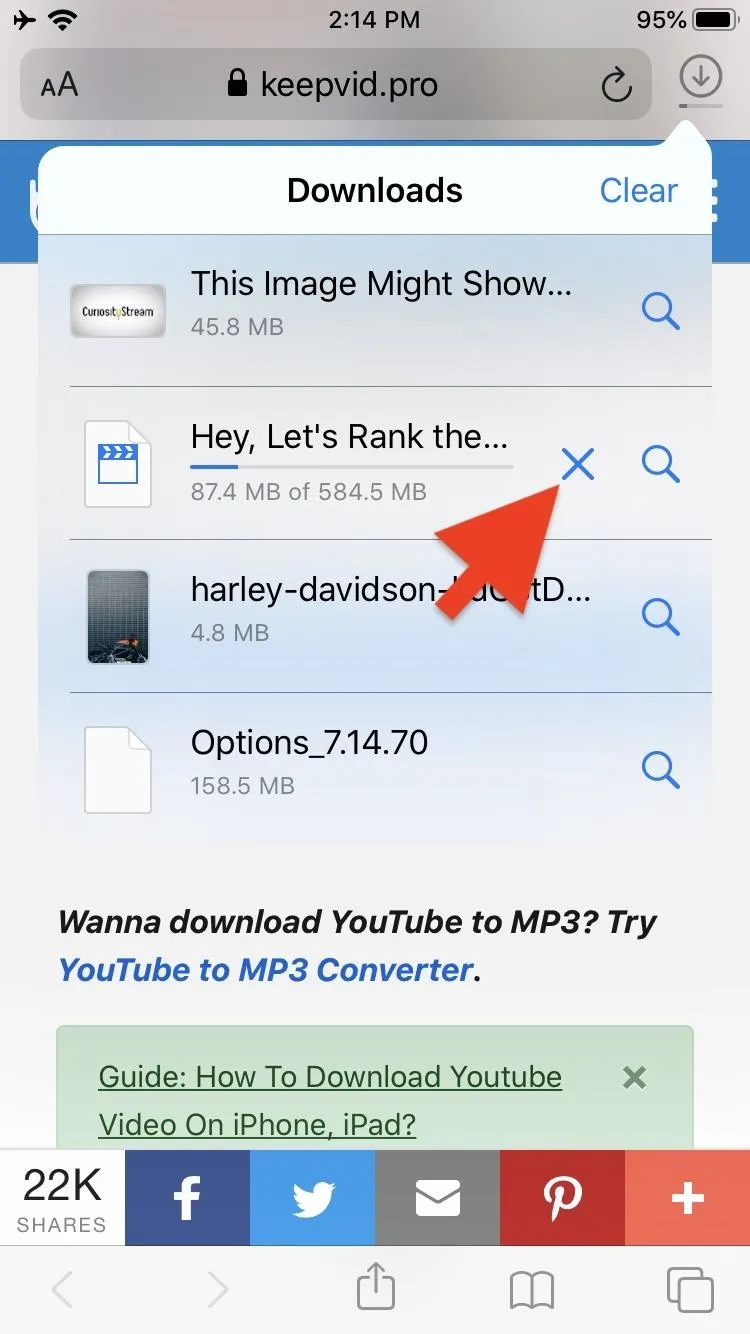
Stop Download
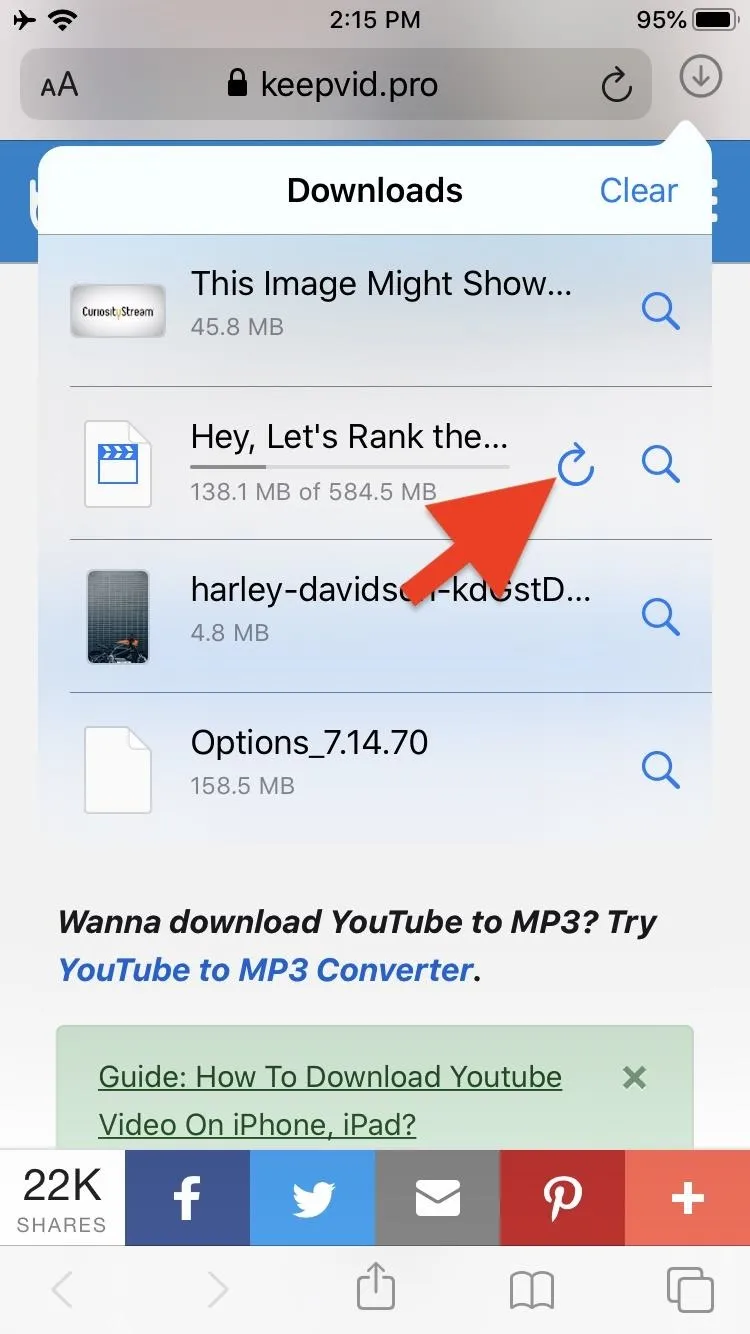
Continue Download

Cancel Download

Stop Download

Continue Download

Cancel Download
Step 7: Preview a Downloaded File
To see a preview of a file after it's downloaded, tap the file in the downloads manager. (Note that not all files can be previewed.) If it has a preview, a new view will open where you can view the file, share it, and even edit it in some cases. For instance, videos can be rotated and trimmed, and you can use the built-in markup tool for images and PDFs. Audio files will automatically play after tapping them, and the only thing you can do besides using basic playback controls is sharing the file.




Step 8: View the File Location in the Files App
The downloads manager will also allow you to jump right to where the file is saved in the Files app. Tap the magnifying glass icon to the right of the file you'd like to go to, and the Files app will open at the file's location. If the file is a type that can't be previewed (for instance, .zip files), tapping the file name will also jump to the file's location in the Files app.
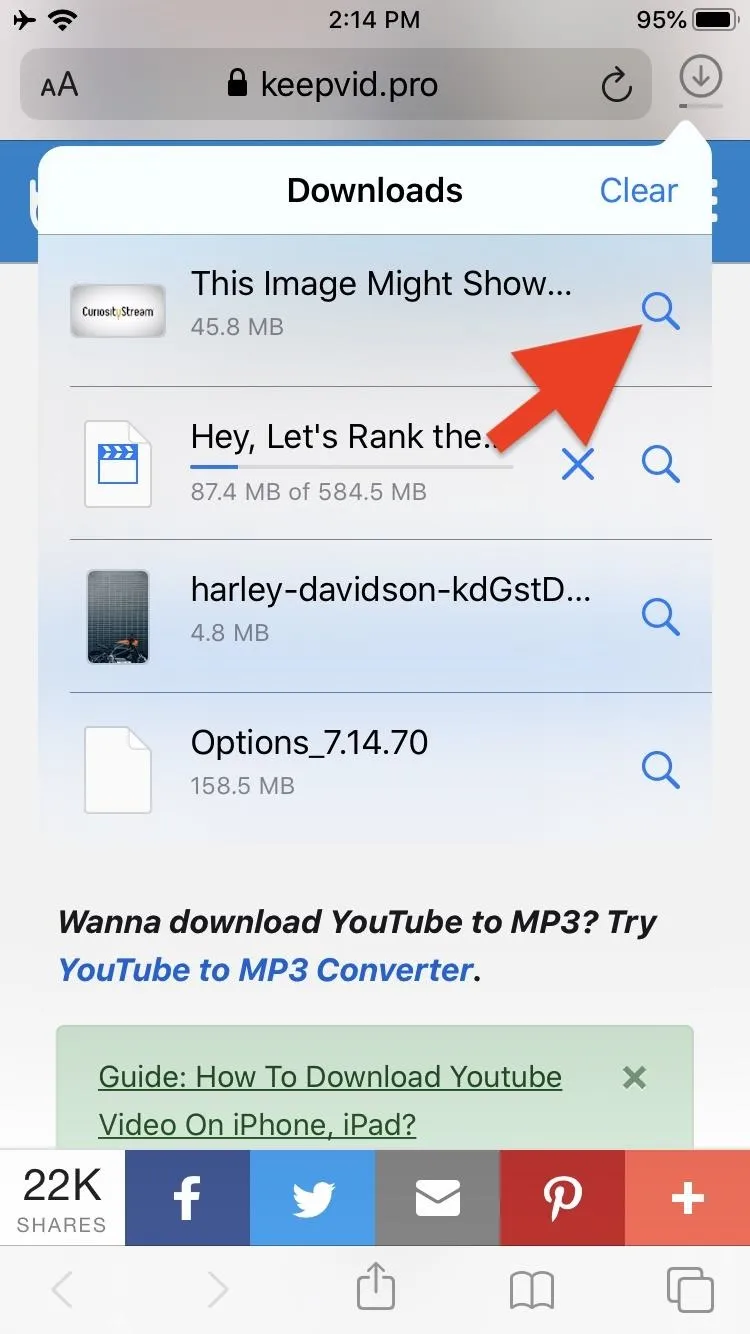


Step 9: Clear Downloads from the Downloads Manager
Files in the downloads manager will be cleaned out based on the option you set in the Safari settings mentioned above. If you selected the "Manual" option, or if you'd like to clear a file out early, either short-swipe left on a file to reveal a "Delete" button that you can tap or long-swipe to the left to remove the file immediately.
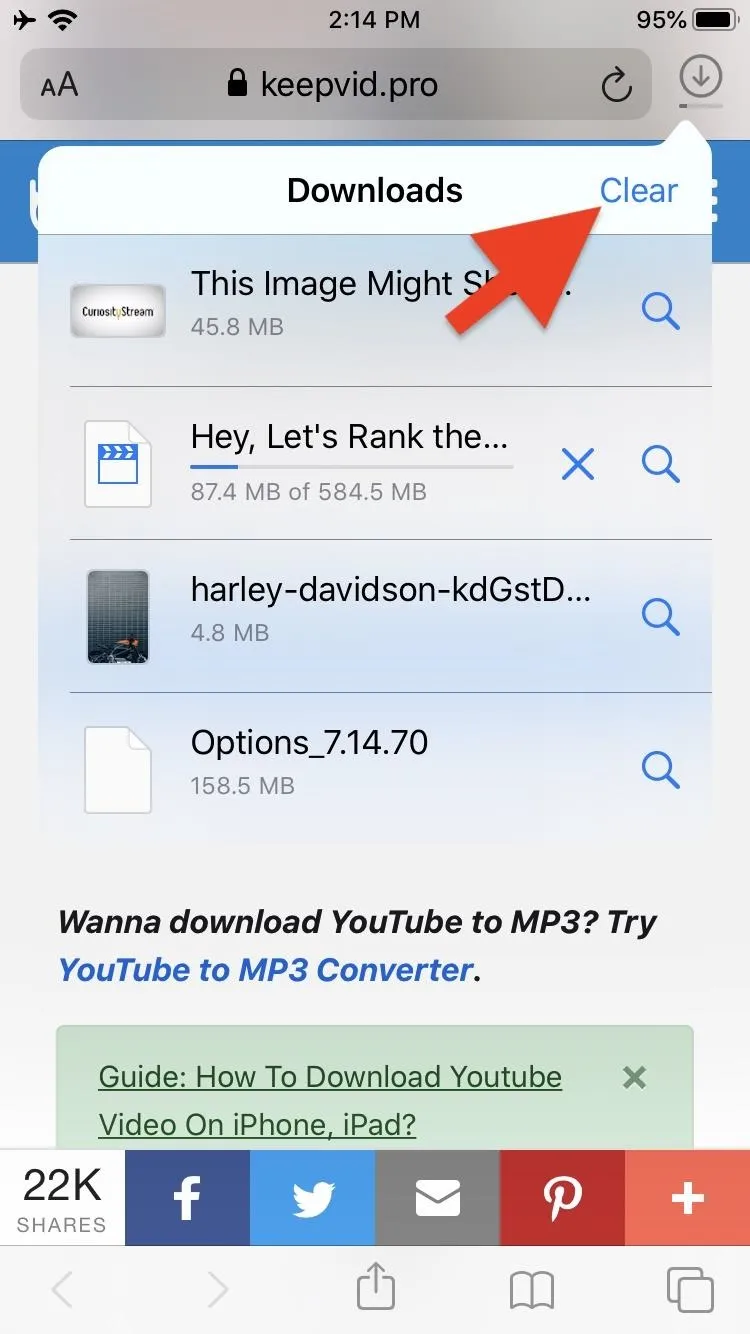
If you'd like to remove all of the files from the downloads manager, tap the "Clear" button in the upper right. Note that clearing the files from the downloads manager will not delete the actual files, only their names in the list. Erasing the file will need to be done from the Files app or a third-party app if stored there.



When the iPhone first came out, it was among the first to finally offer a full HTML web browser in the palm of your hand. With a proper downloads manager, combined with the Files app, the iPhone is finally moving closer to being a full mobile version of Safari on the desktop.
Cover photo, screenshots, and GIFs by Mike Goril/Gadget Hacks


Comments
No Comments Exist
Be the first, drop a comment!