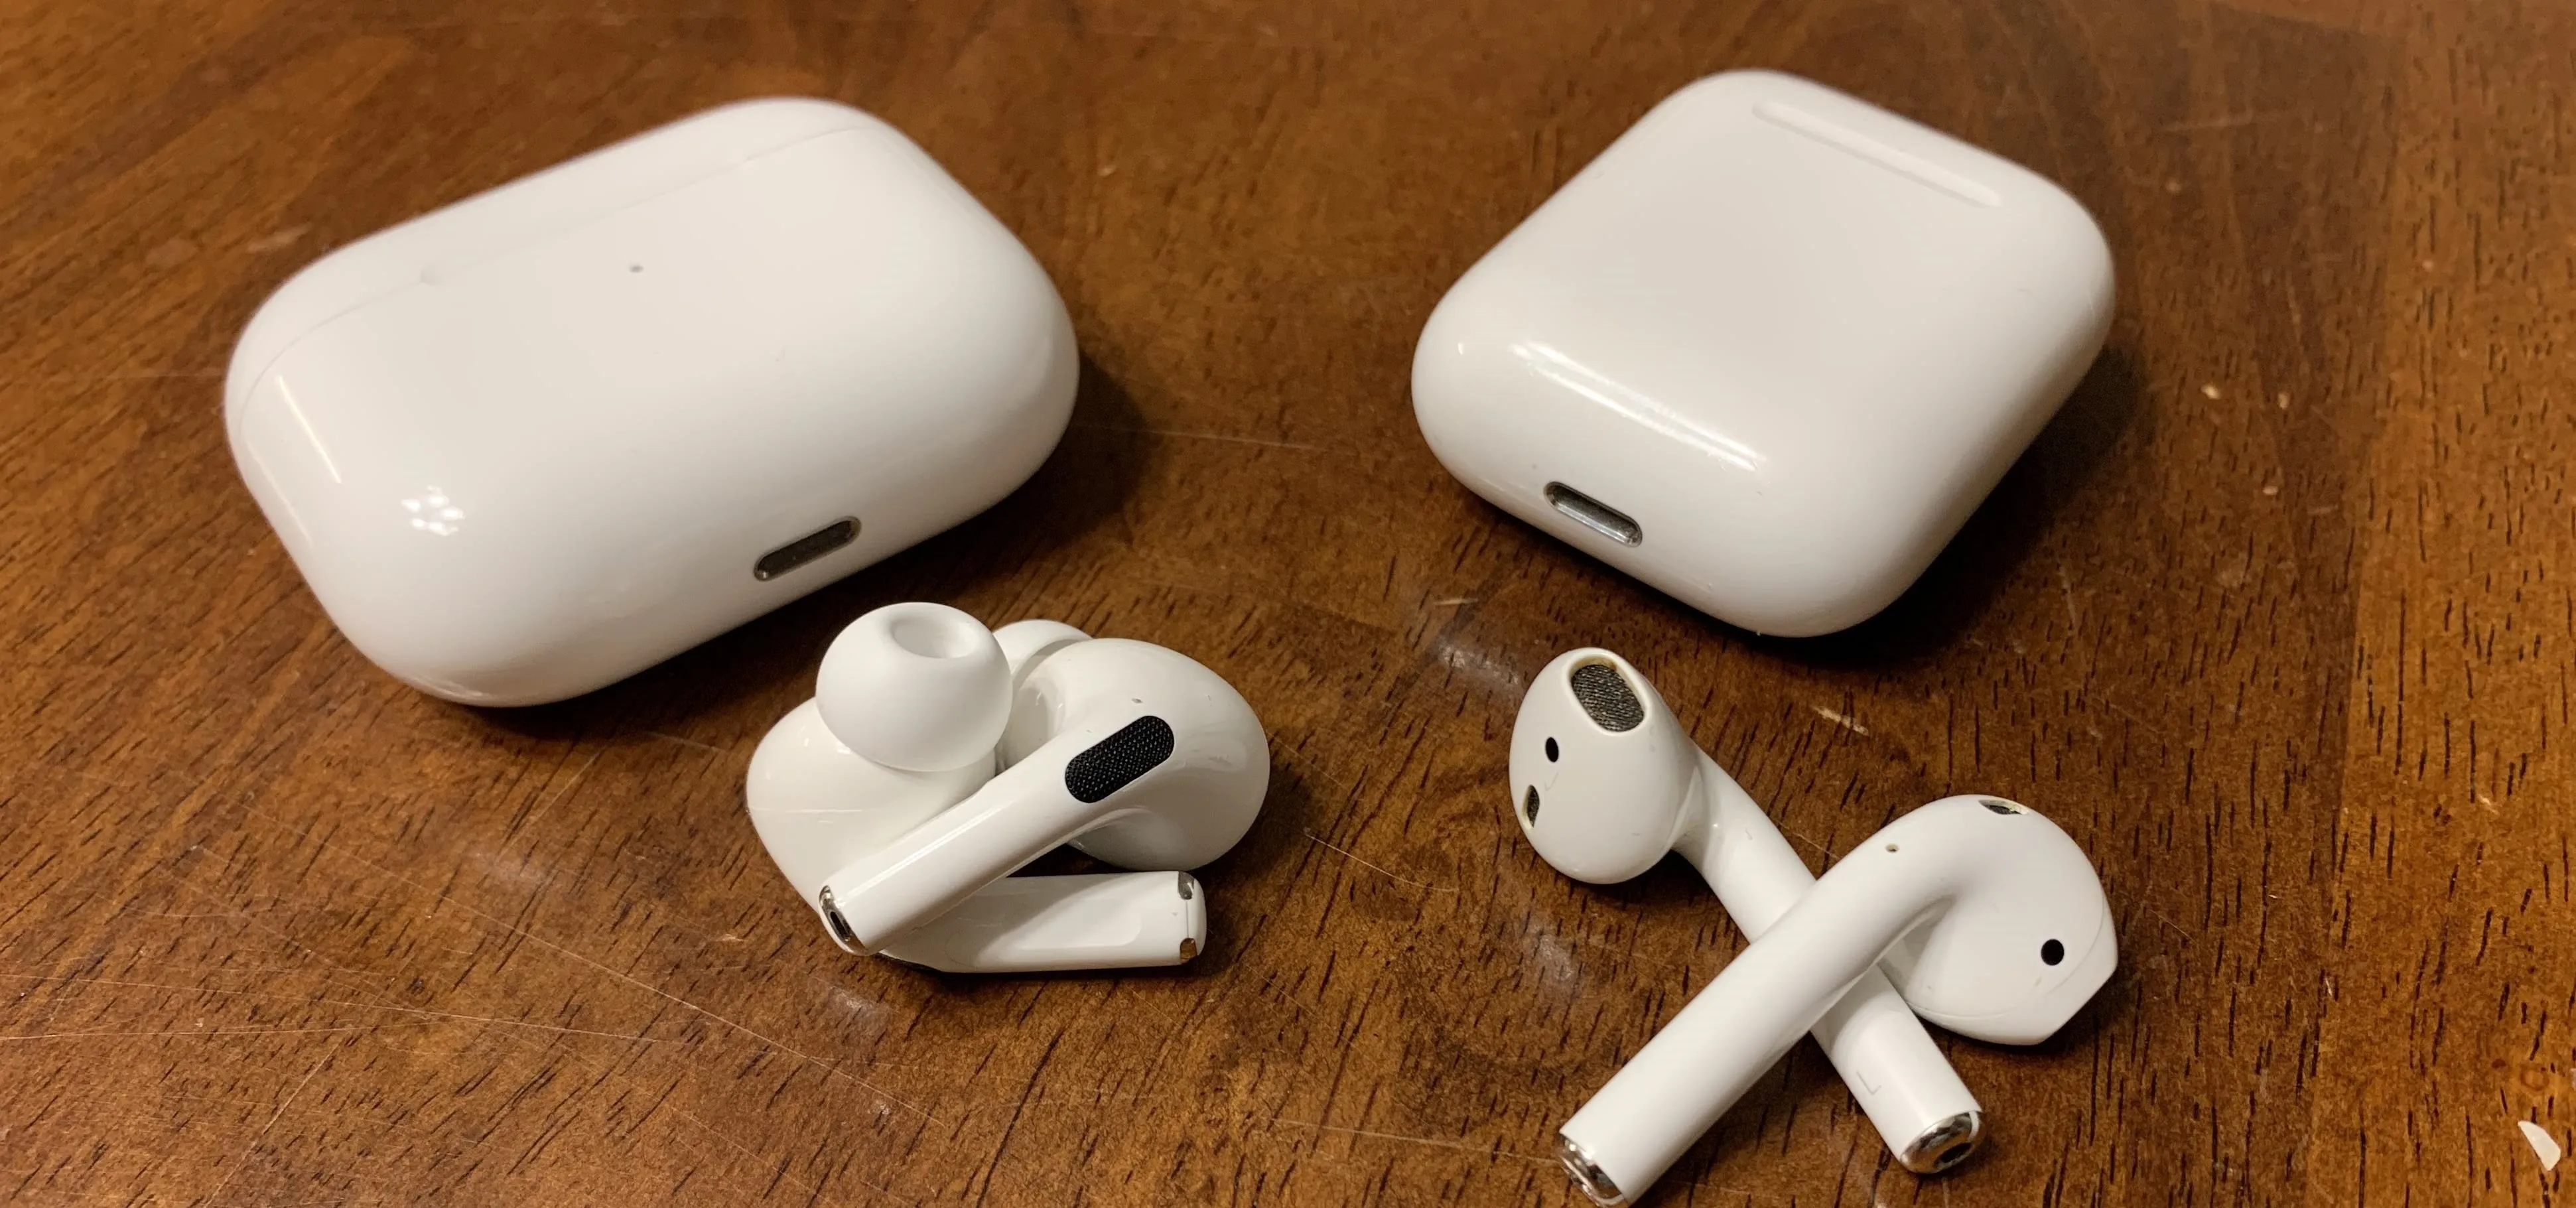
AirPods are not only a great way to listen to music on your iPhone, but you can also use them as a headset for phone calls, videoconference, Siri, voice memos, audio messages, and more. While each 'Pod has a built-in microphone, they aren't used simultaneously, and your AirPods will automatically choose which to use. If you want to only use the mic from one 'Pod or the other, there's a way to do that.
Apple's AirPods (1st and 2nd generations) and AirPods Pro are pretty good at choosing which microphone input to use during audio and video calls. So, for the most part, keeping it at the default setting so that the best one is chosen automatically will be the way to go. But if people can't hear you correctly, Siri doesn't understand you, your voice recordings are unintelligible, and your audio message are out of whack, you may want to switch the mic manually.
If you're only using one AirPod, it's using that mic. So the easy answer there is to swap out the AirPod. But if you have both in and connected to your iPhone, open the Settings app and tap "Bluetooth." You could also use the Control Center shortcut to get there. Next, tap the (i) icon next to your AirPods under My Devices.
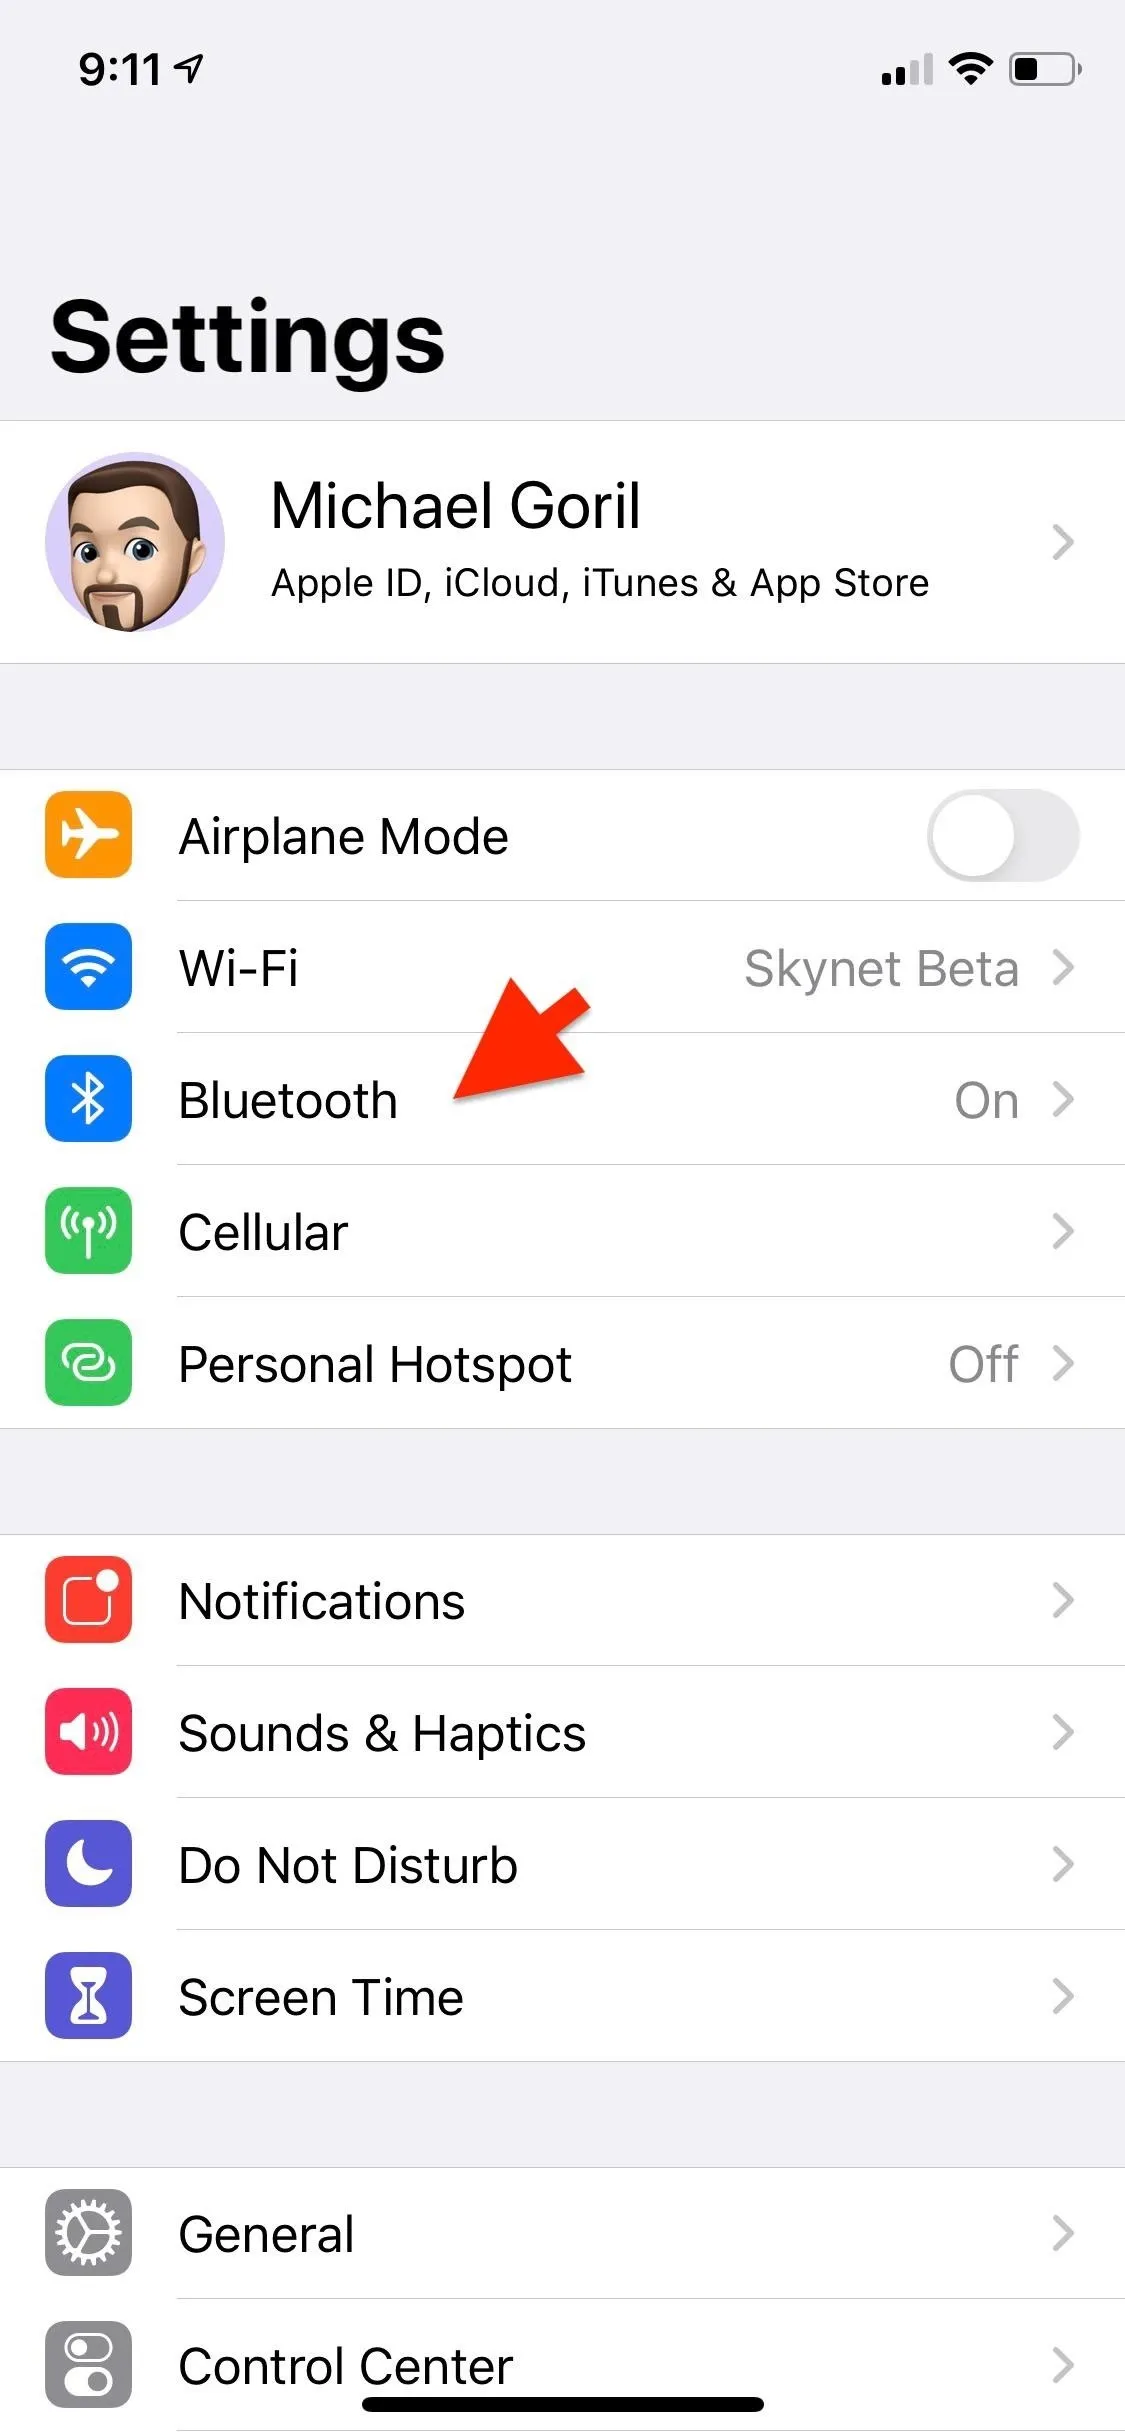
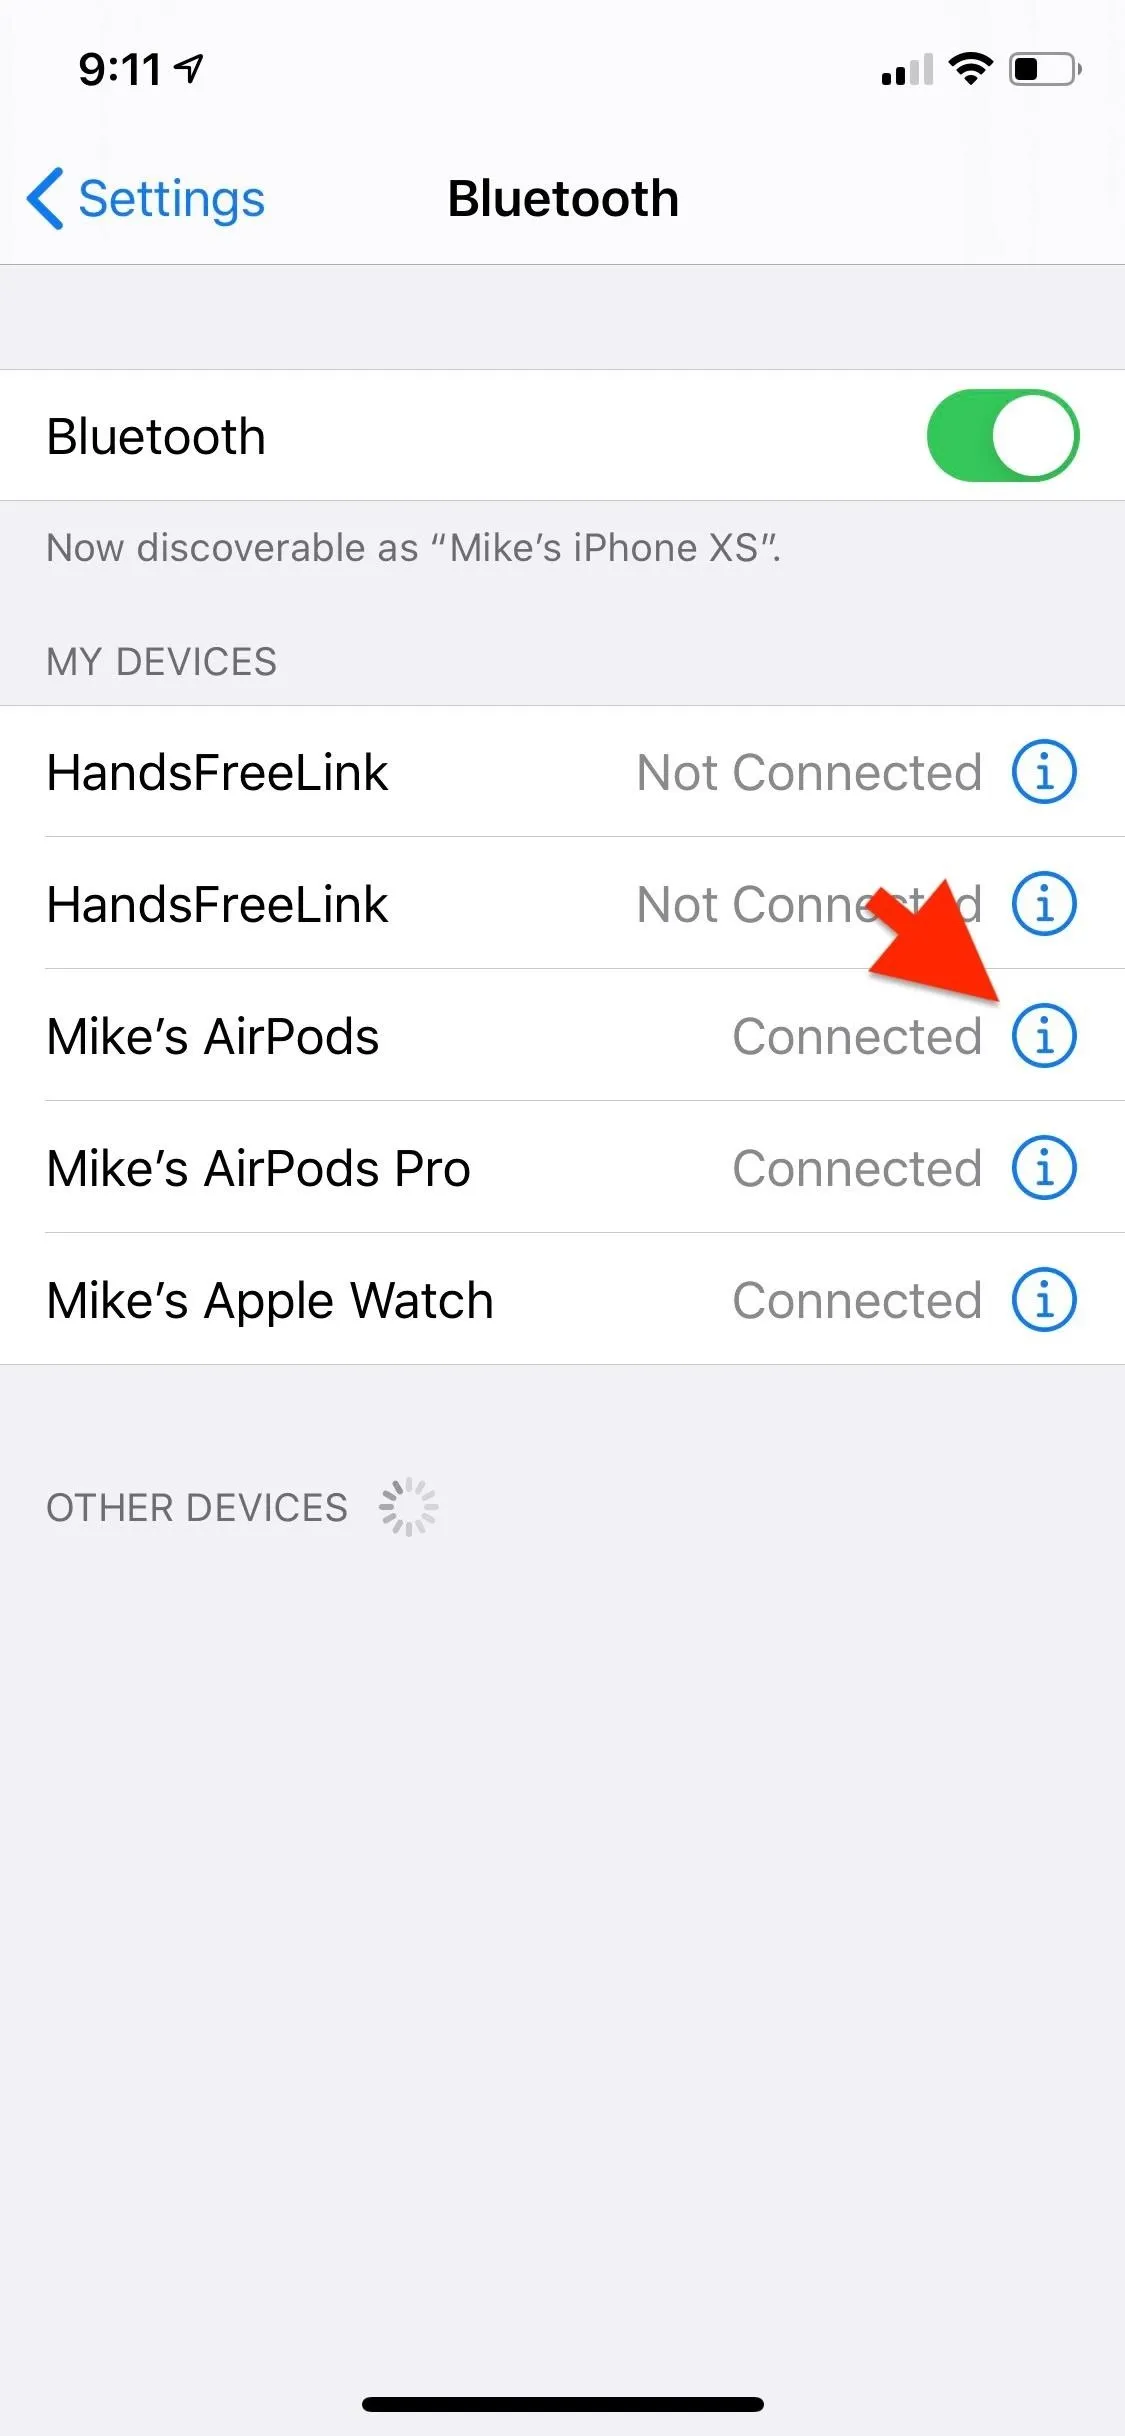


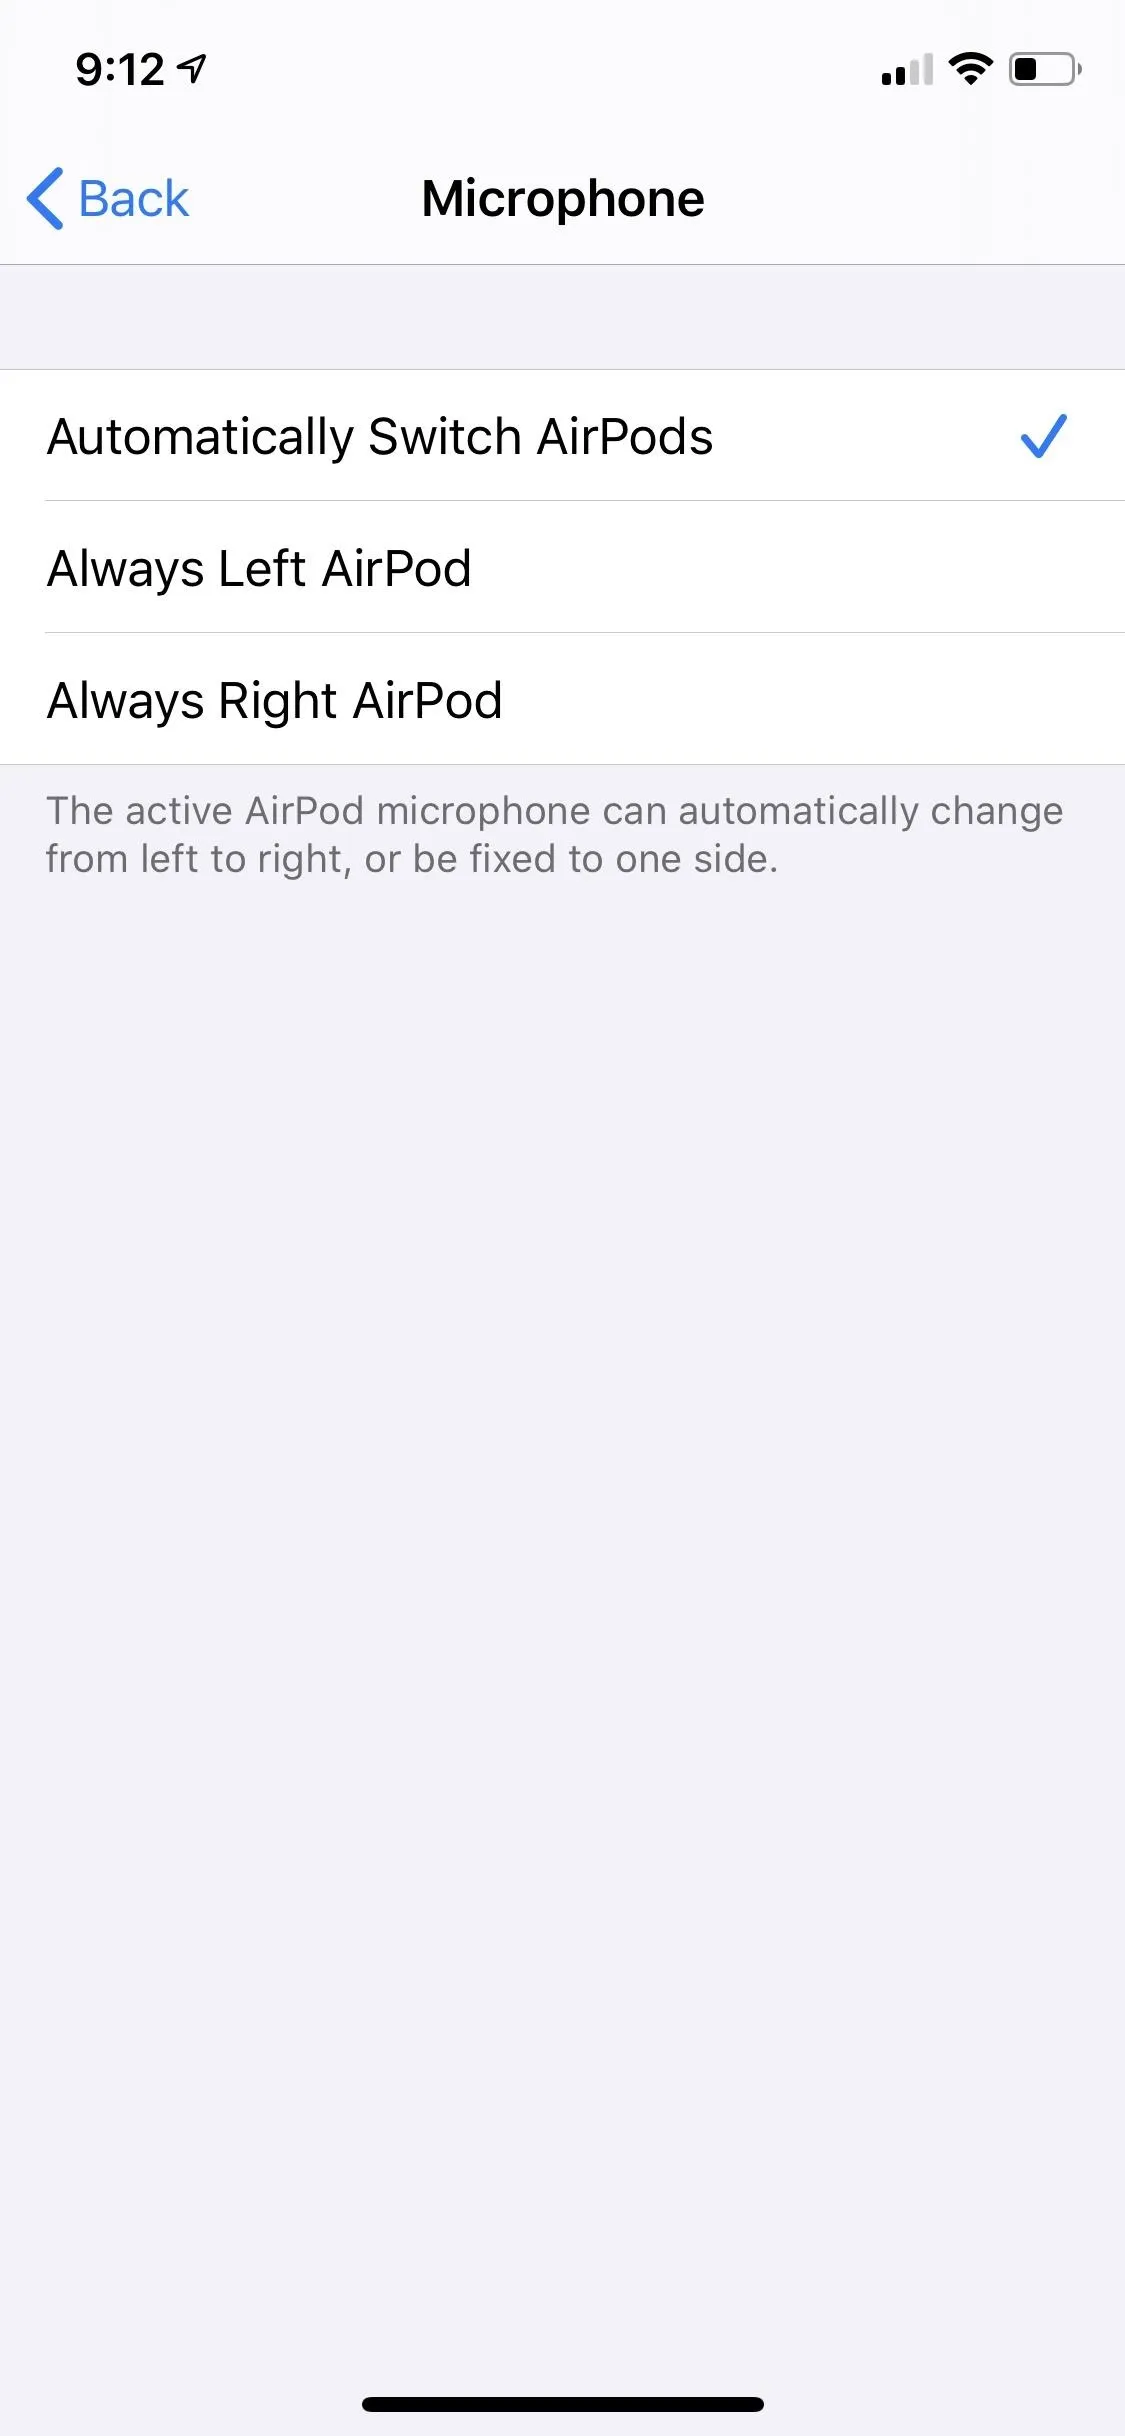
By default, your AirPods will automatically choose which microphone is best when you have both of them in. If, however, you'd only like one to always act as the mic, tap the "Microphone" field, then change it from "Automatically Switch AirPods" to either "Always Left AirPod" or "Always Right AirPod."
Needless to say, if you only have one AirPod in, that microphone will be active no matter what. These settings only apply when you have both 'Pods in.
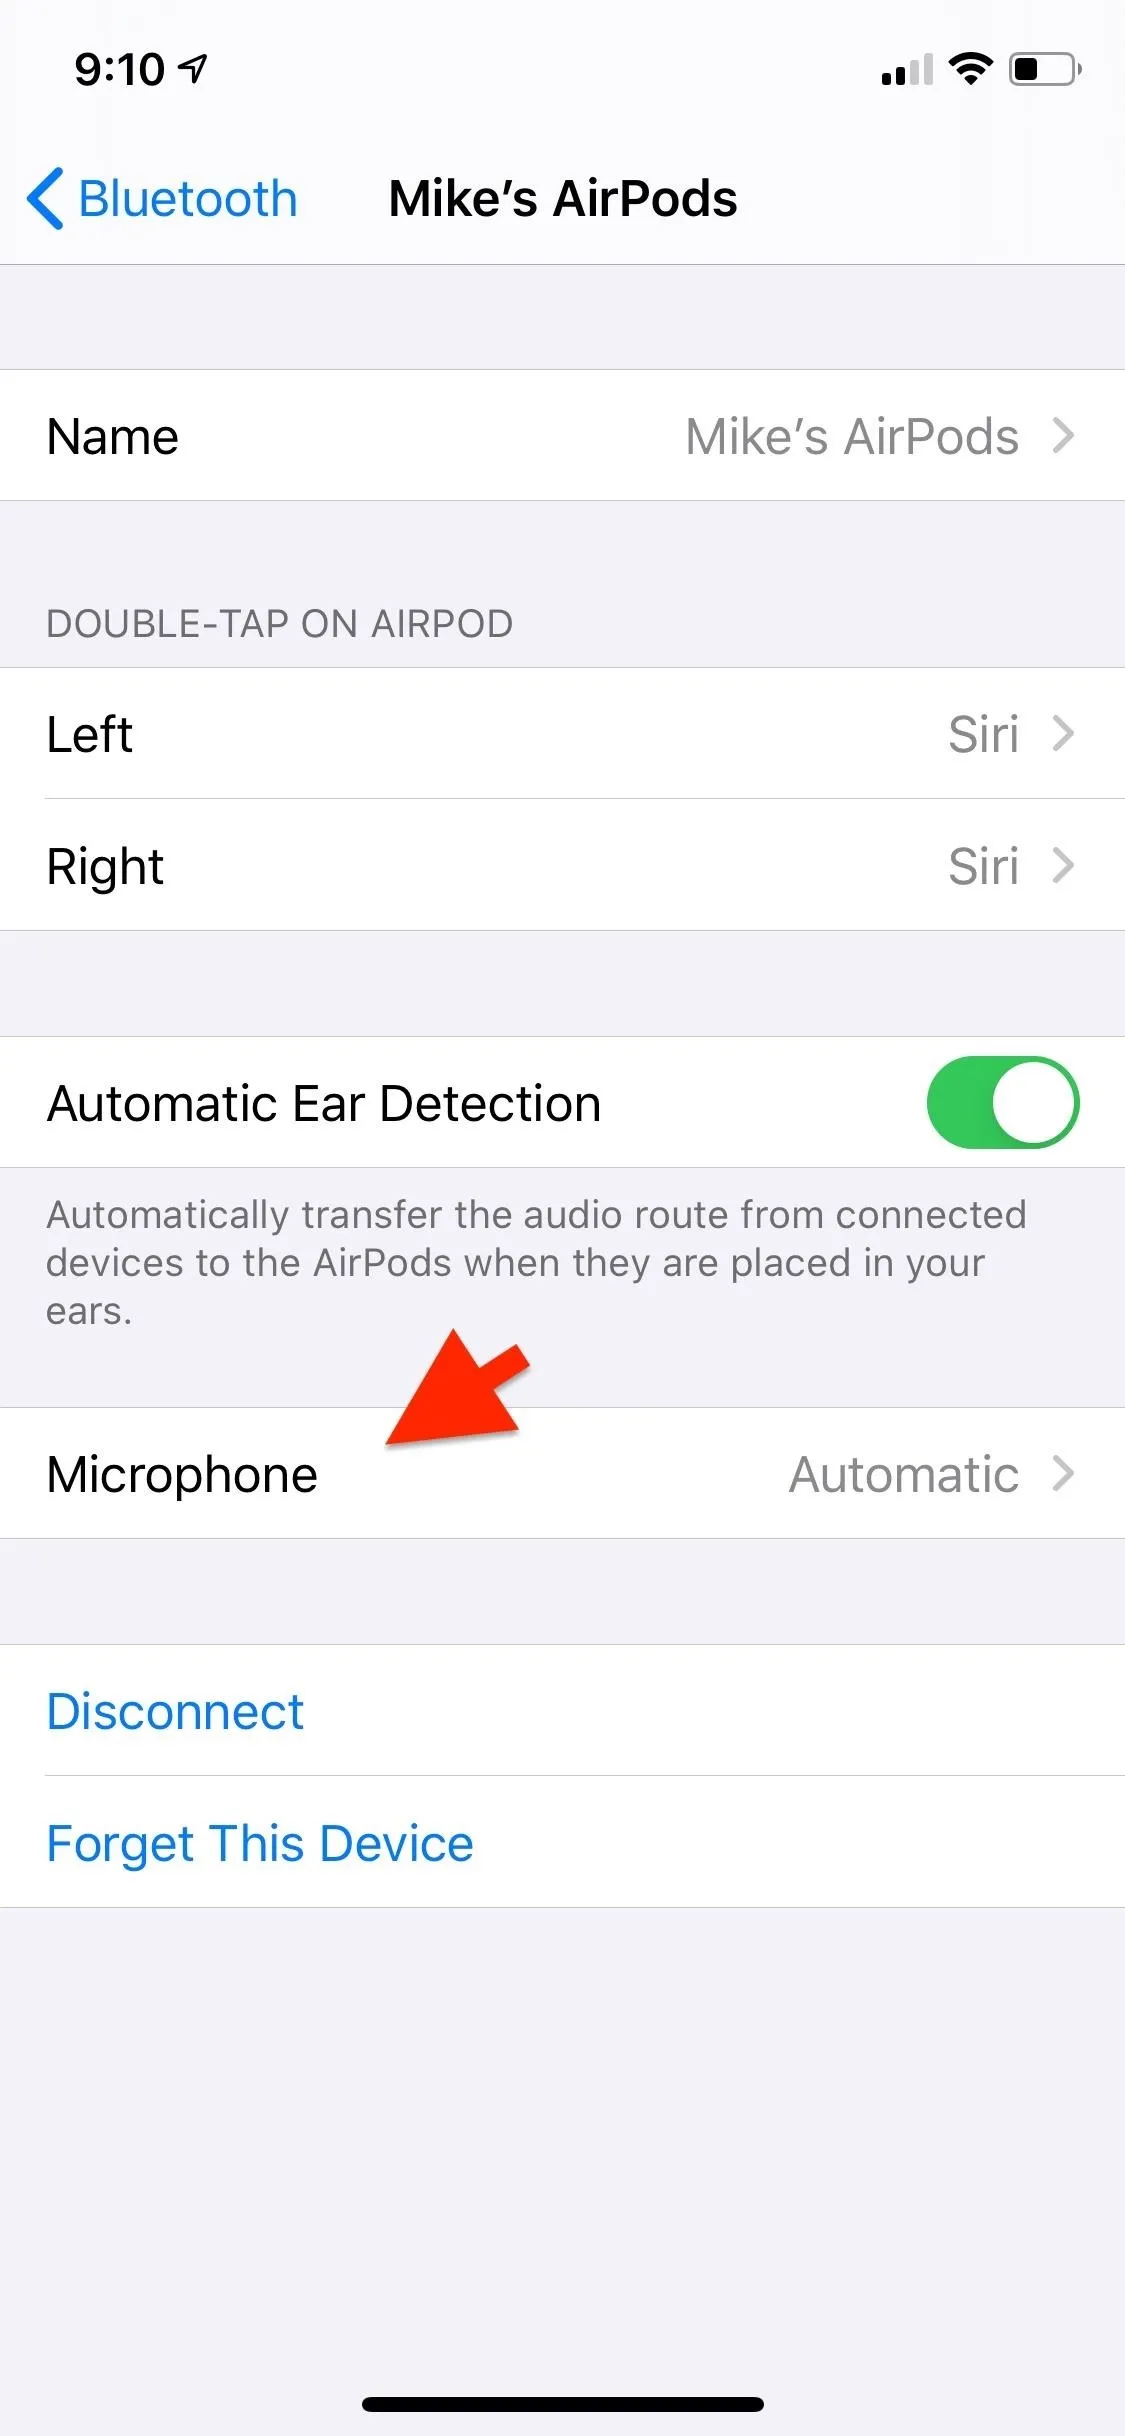


Customizing the default microphone is just one of the ways you can tweak your AirPods to personalize them. From the settings app, you can also do the following:
- Change your double-tap or long-press gesture action
- Change the name of your AirPods
- Turn off automatic ear detection to prevent music from pausing
Cover image and screenshots by Mike Goril/Gadget Hacks



Comments
No Comments Exist
Be the first, drop a comment!