The way you share a group of photos and videos on your iPhone is pretty simple; just select a few items, then choose a service or platform to send them through. Simplicity isn't always the best option, though, and in this case, there's a better way than letting those files send or upload individually, one by one.
If a group of pictures and videos are sent one by one, it can take a while (MMS messages can be very slow), they can fail (if you have bad signal), a lot of data may be consumed (if they're sent and received over mobile data), and the files can fill up a bunch of space (some people may only have 16 GB on their phone).
When any of those issues come up, the best thing to do is to share those hefty images and videos together via a disappearing iCloud link. With one of these links, all of the media will be grouped in a convenient iCloud album that lasts for 30 days. You can even revoke access manually if you want to stop sharing earlier. And if you wish to share just a single photo or video via iCloud, you can do that too.
How iCloud Links Work
Whenever an iCloud link is live for an image or video or group of pictures and videos, whoever you share the link with can view and download your photos and videos until the 30 days are up or until you pull back their access manually.
If a recipient has an iPhone too, and they have photos and videos taken from the same time and place that you've just shared, they may be asked to add those to the album. So iCloud links also serve as a way to push others into sharing the wealth so you can check out all of their cool shots that you're in.
In some cases, iCloud links are generated automatically when sharing from the Photos app. Specifically, if your group of photos and videos is massive, and you're sending the files via Messages as a text or iMessage, iOS may decide that an iCloud link to your media is the best approach for all parties involved. Sometimes it feels random when it happens, and it may seem like there's no way to get an iCloud link every time — not just sporadically — but there is.
Step 1: Enable iCloud Photos (If Necessary)
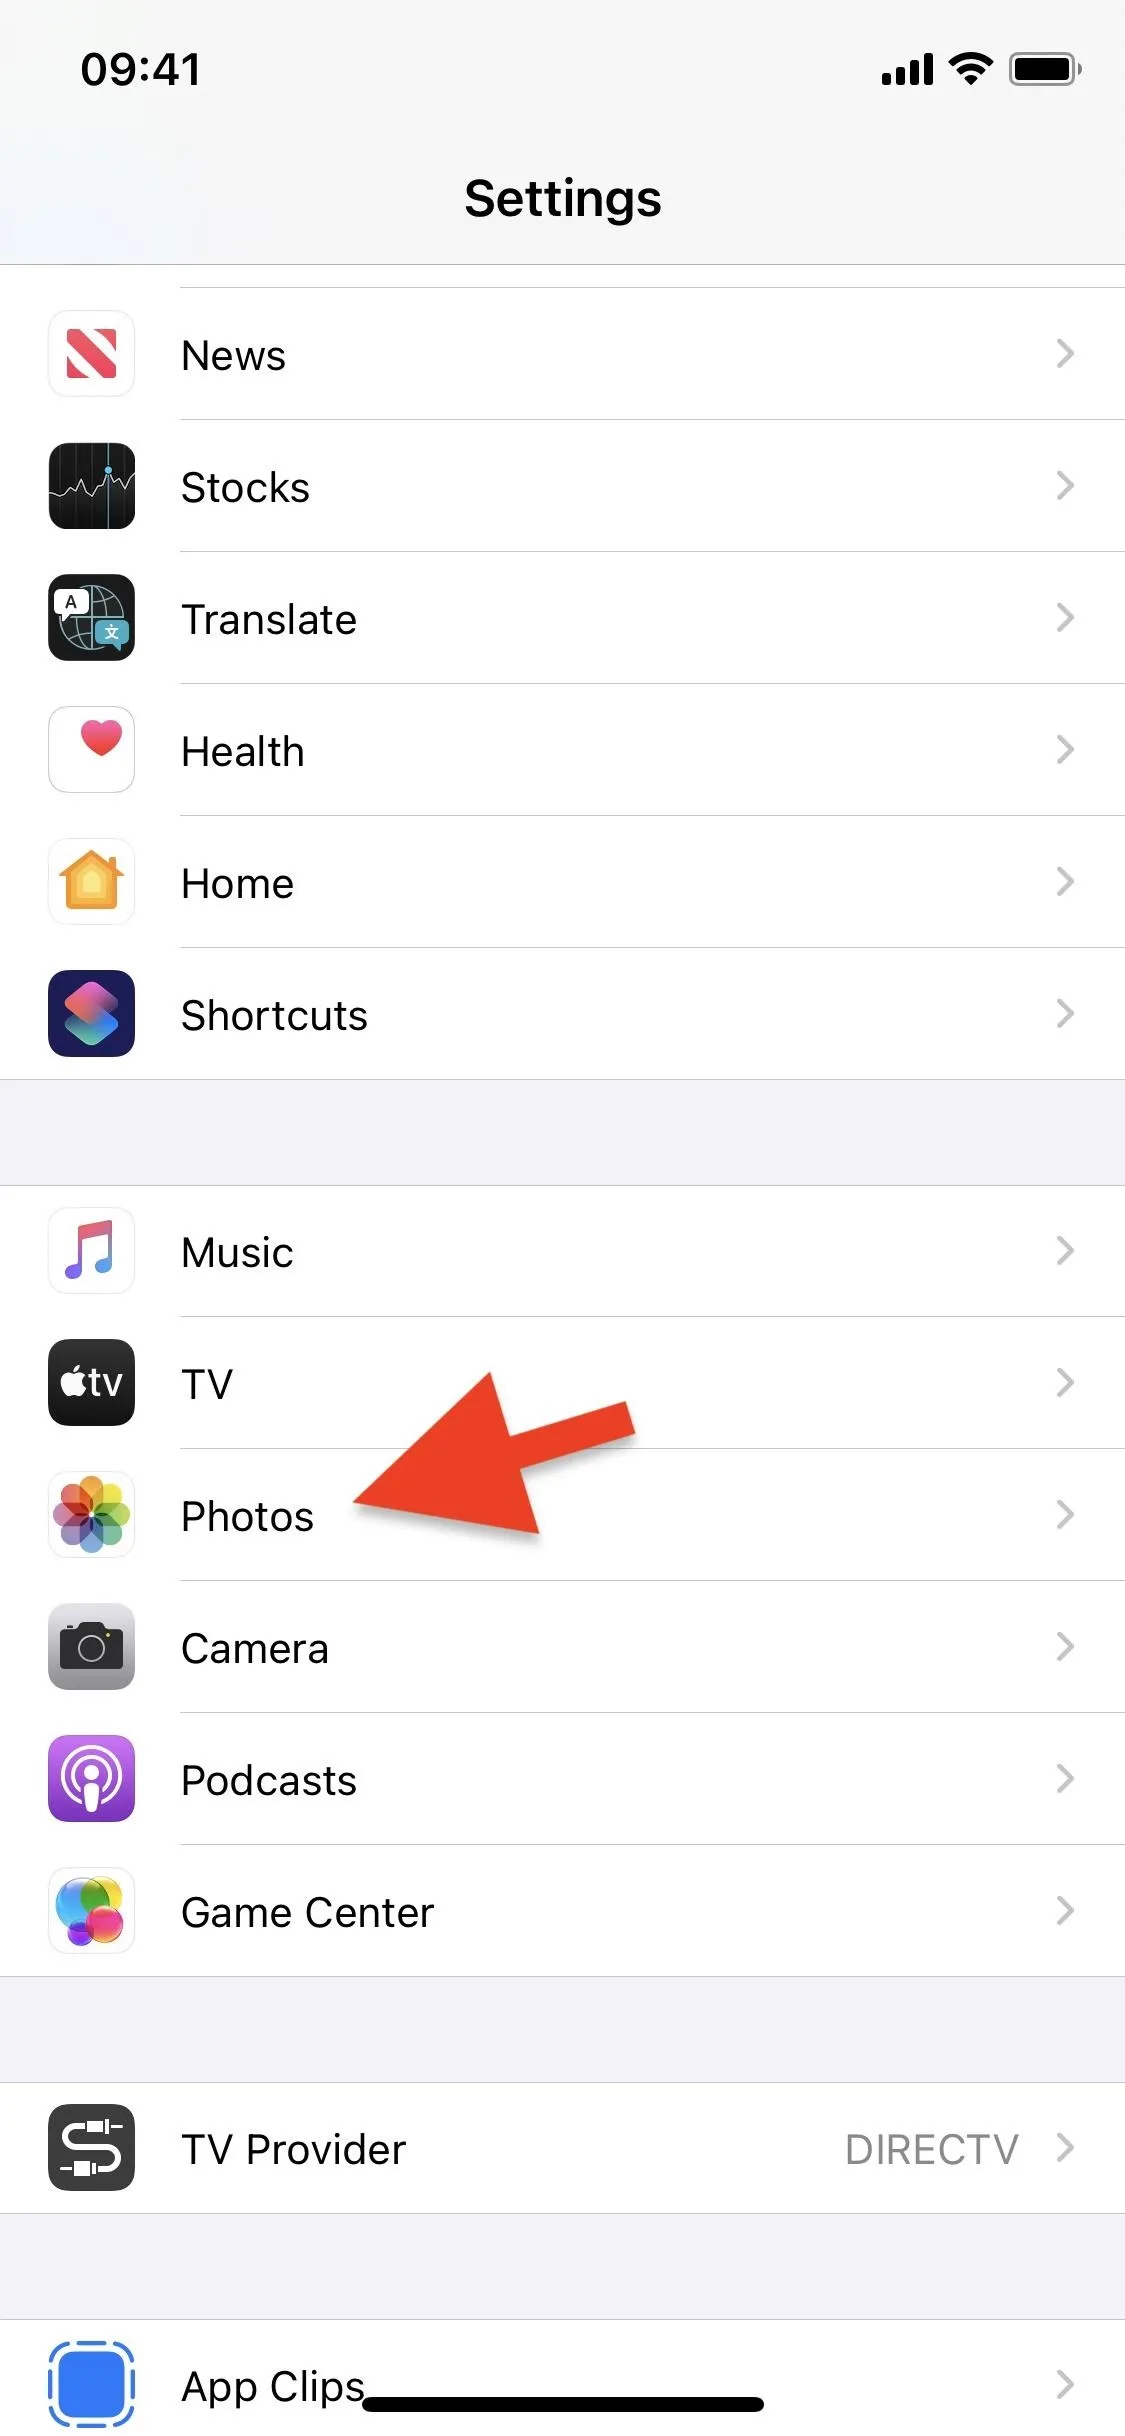
The only way you can share an iCloud link is if you enable iCloud Photos — which uploads your photos and videos to iCloud for safekeeping. Although it's highly likely that you have iCloud Photos enabled, you can still check. In Settings, go to "Photos," and make sure the "iCloud Photos" switch is toggled on.
Alternatively, you can go to Settings, tap your name up top, choose "iCloud," then "Photos," and make sure "iCloud Photos" is on.
With it on, all of your photos and videos will be uploaded automatically to iCloud, and it will all sync across all of your iCloud-connected devices. If you only have a 5 GB free iCloud storage plan, you may need to upgrade to a paid one if you have a lot of media (50 GB is only $0.99 per month).
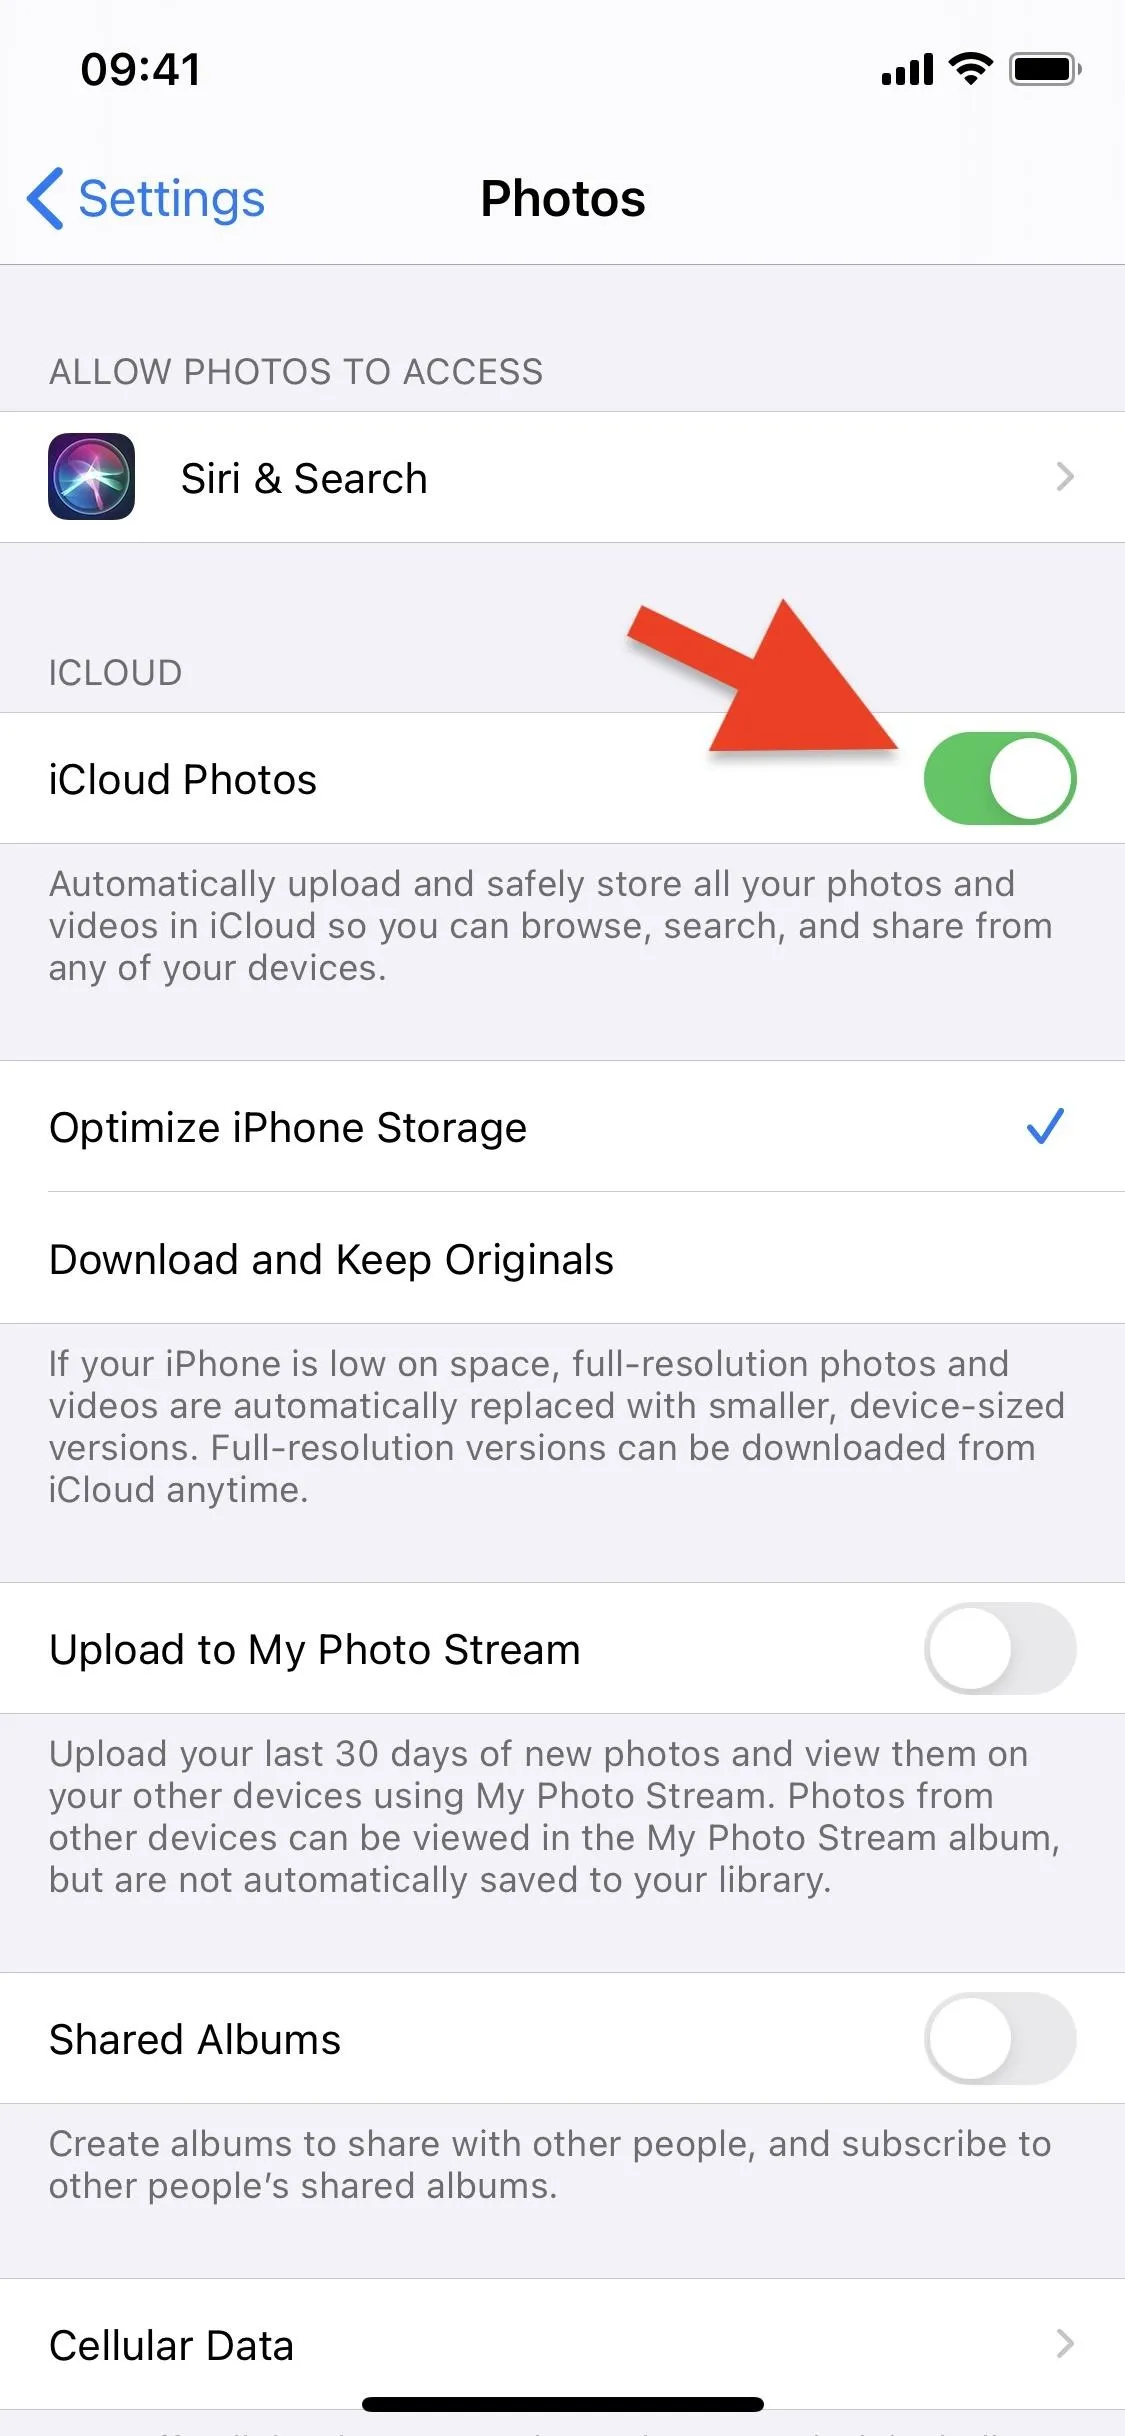


Notice the "Shared Albums" switch above? While we are sharing albums with iCloud links, it's not the same thing as that, so don't worry about if that's off or not.
Step 2: Select Photos & Videos to Share
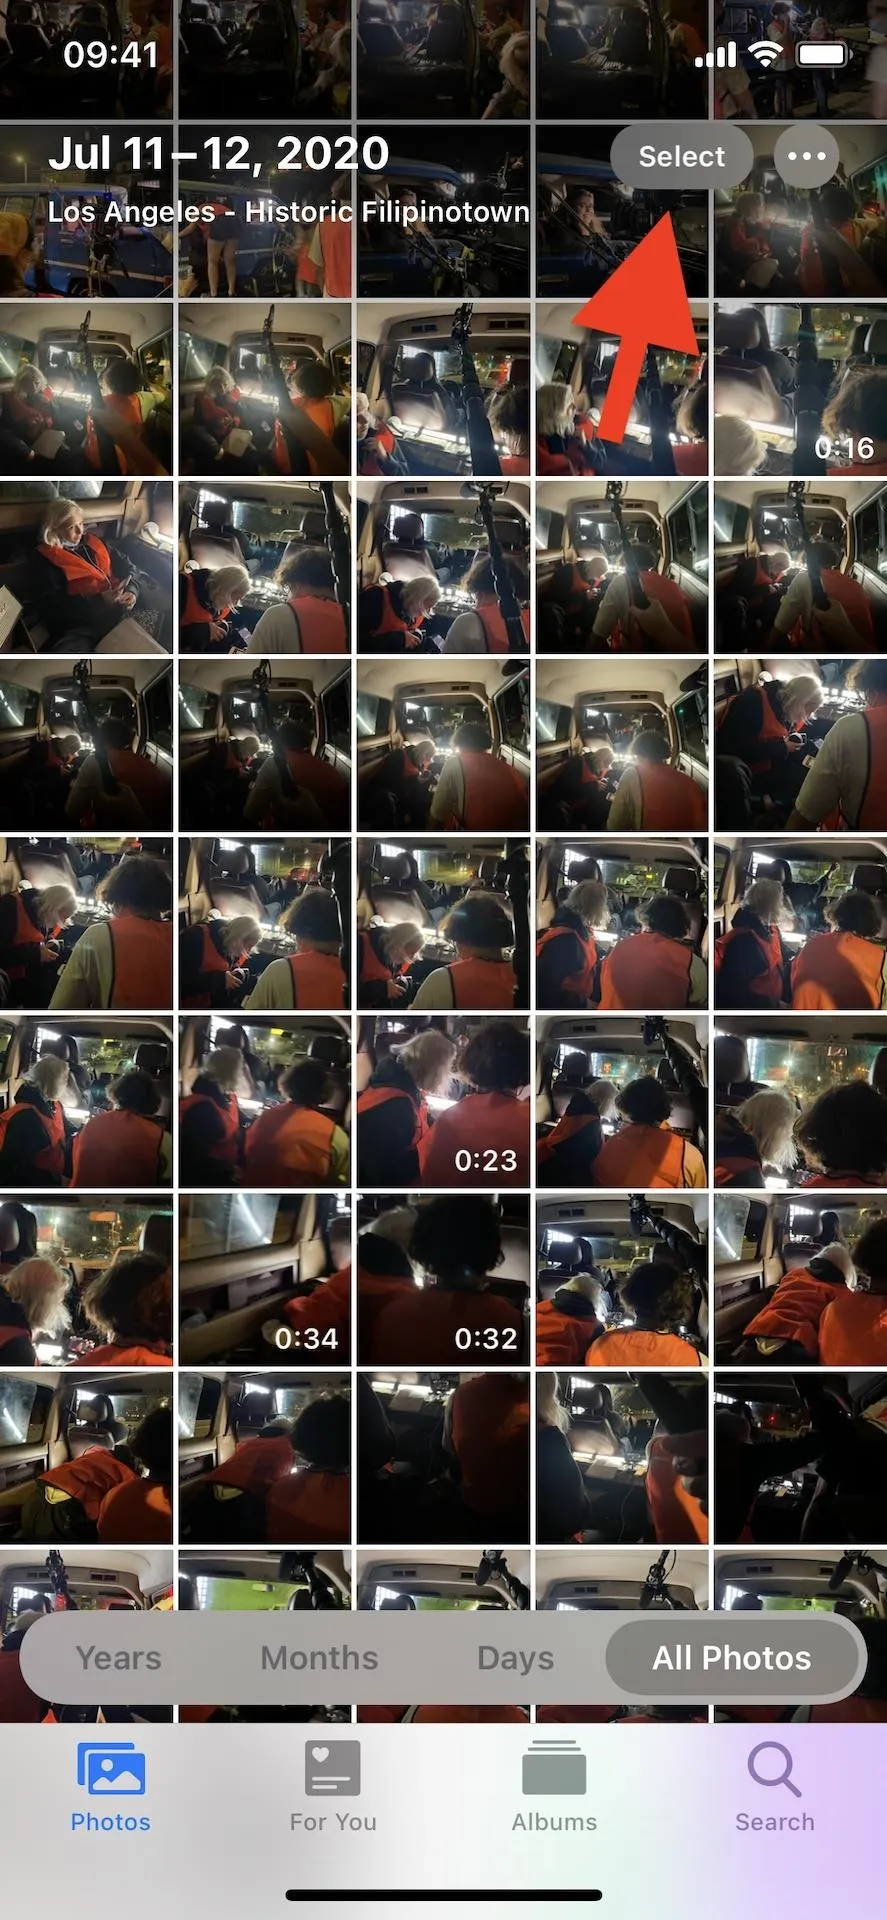
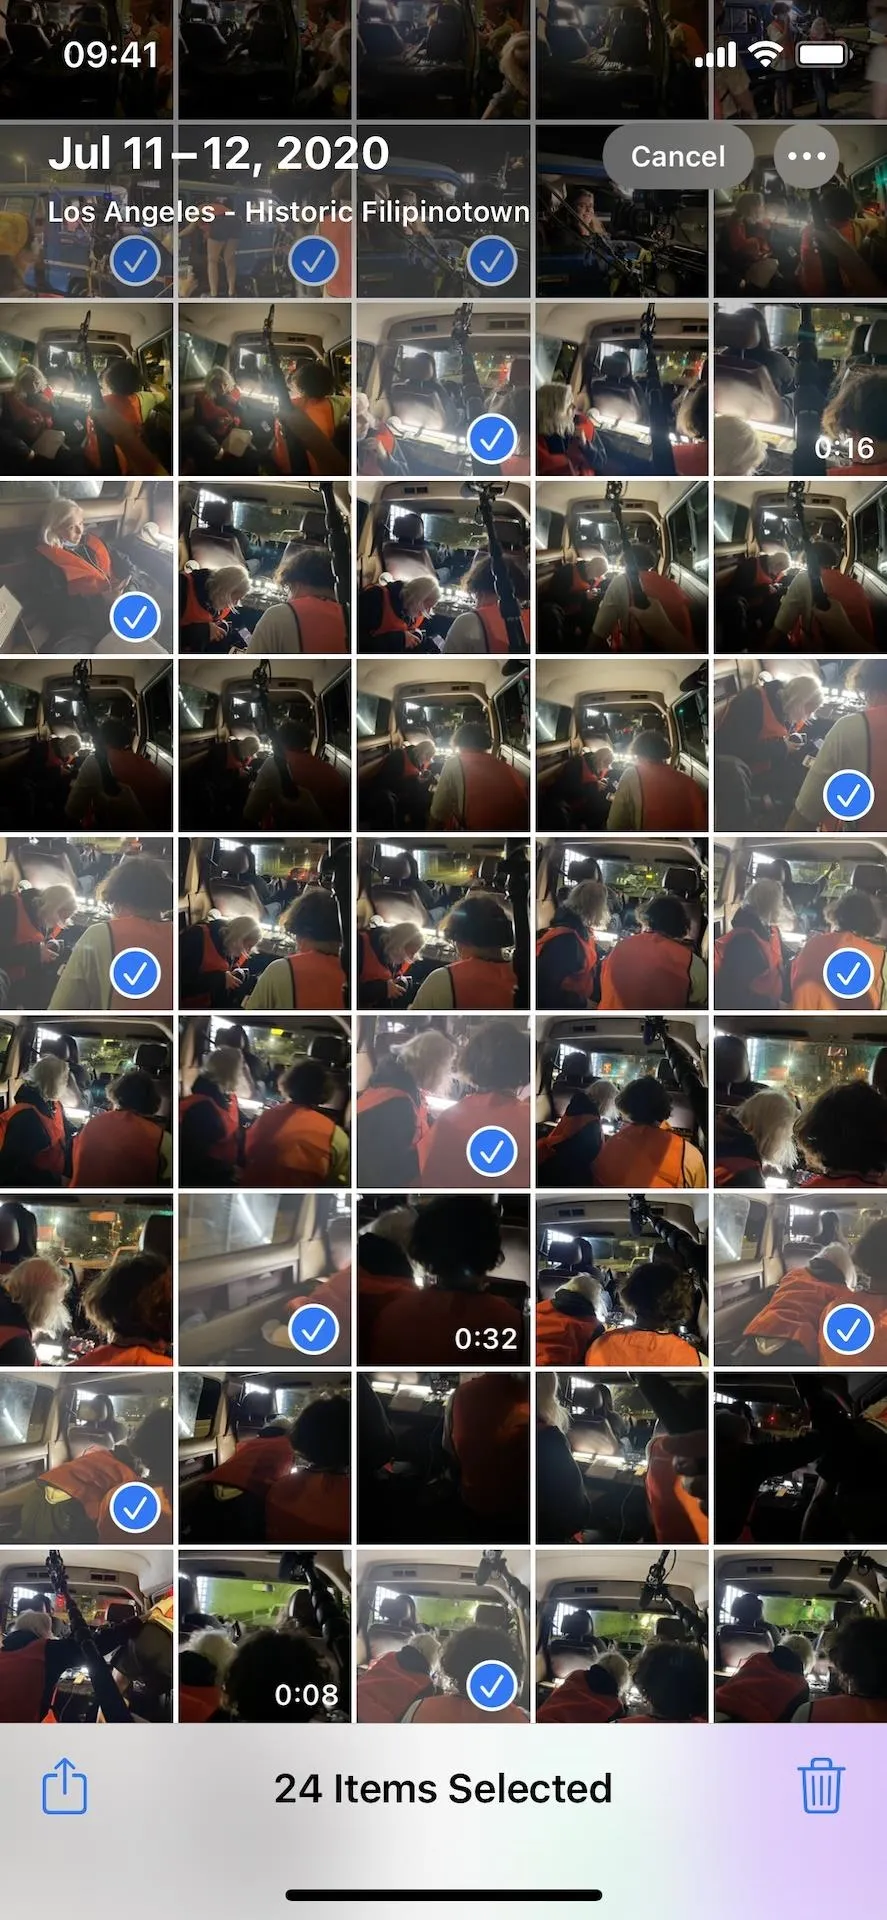
Now it's time to select the photos and videos you want to share temporarily. In Photos, find the content in the "Photos" or "Albums" or "Search" tab that you want to share. In the grid view, tap "Select," then choose each image or video you want in the iCloud album. Alternatively, when you view a single image or video and tap the share button, you can swipe left or right to see more content to select.
There is no limit to how many items you can send via an iCloud link, so go crazy, but it will take longer to create a link if you choose more content.


Step 3: Tap the Share Button
When you've selected all of the media that you want to share from Photos, tap the Share button, which looks like a blank image with an arrow pointing upward.
Step 4: Remove Locations from Your Content (Optional)
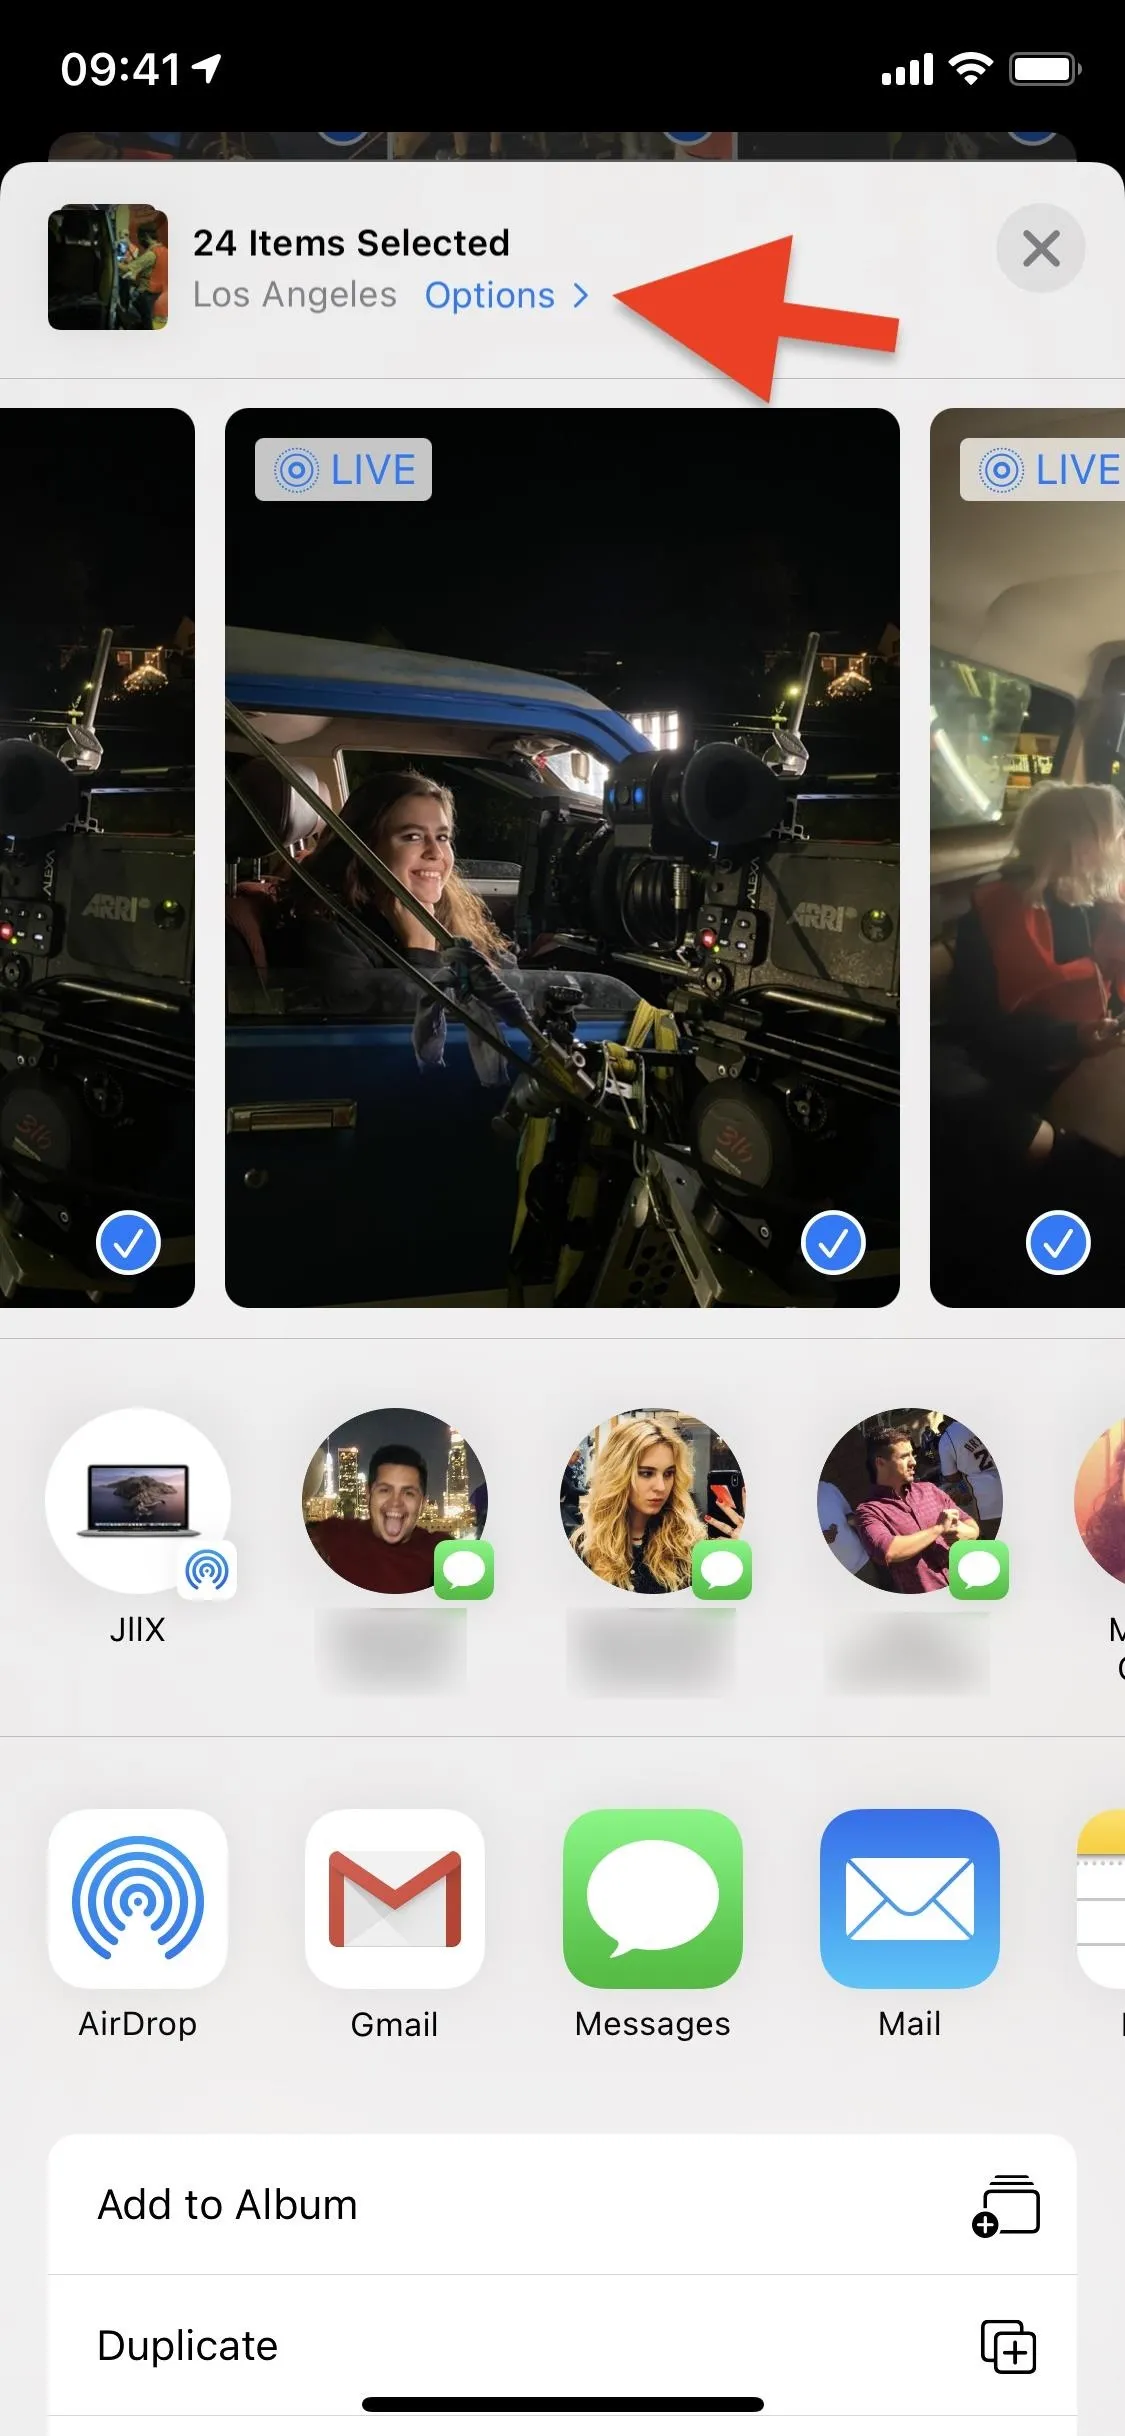
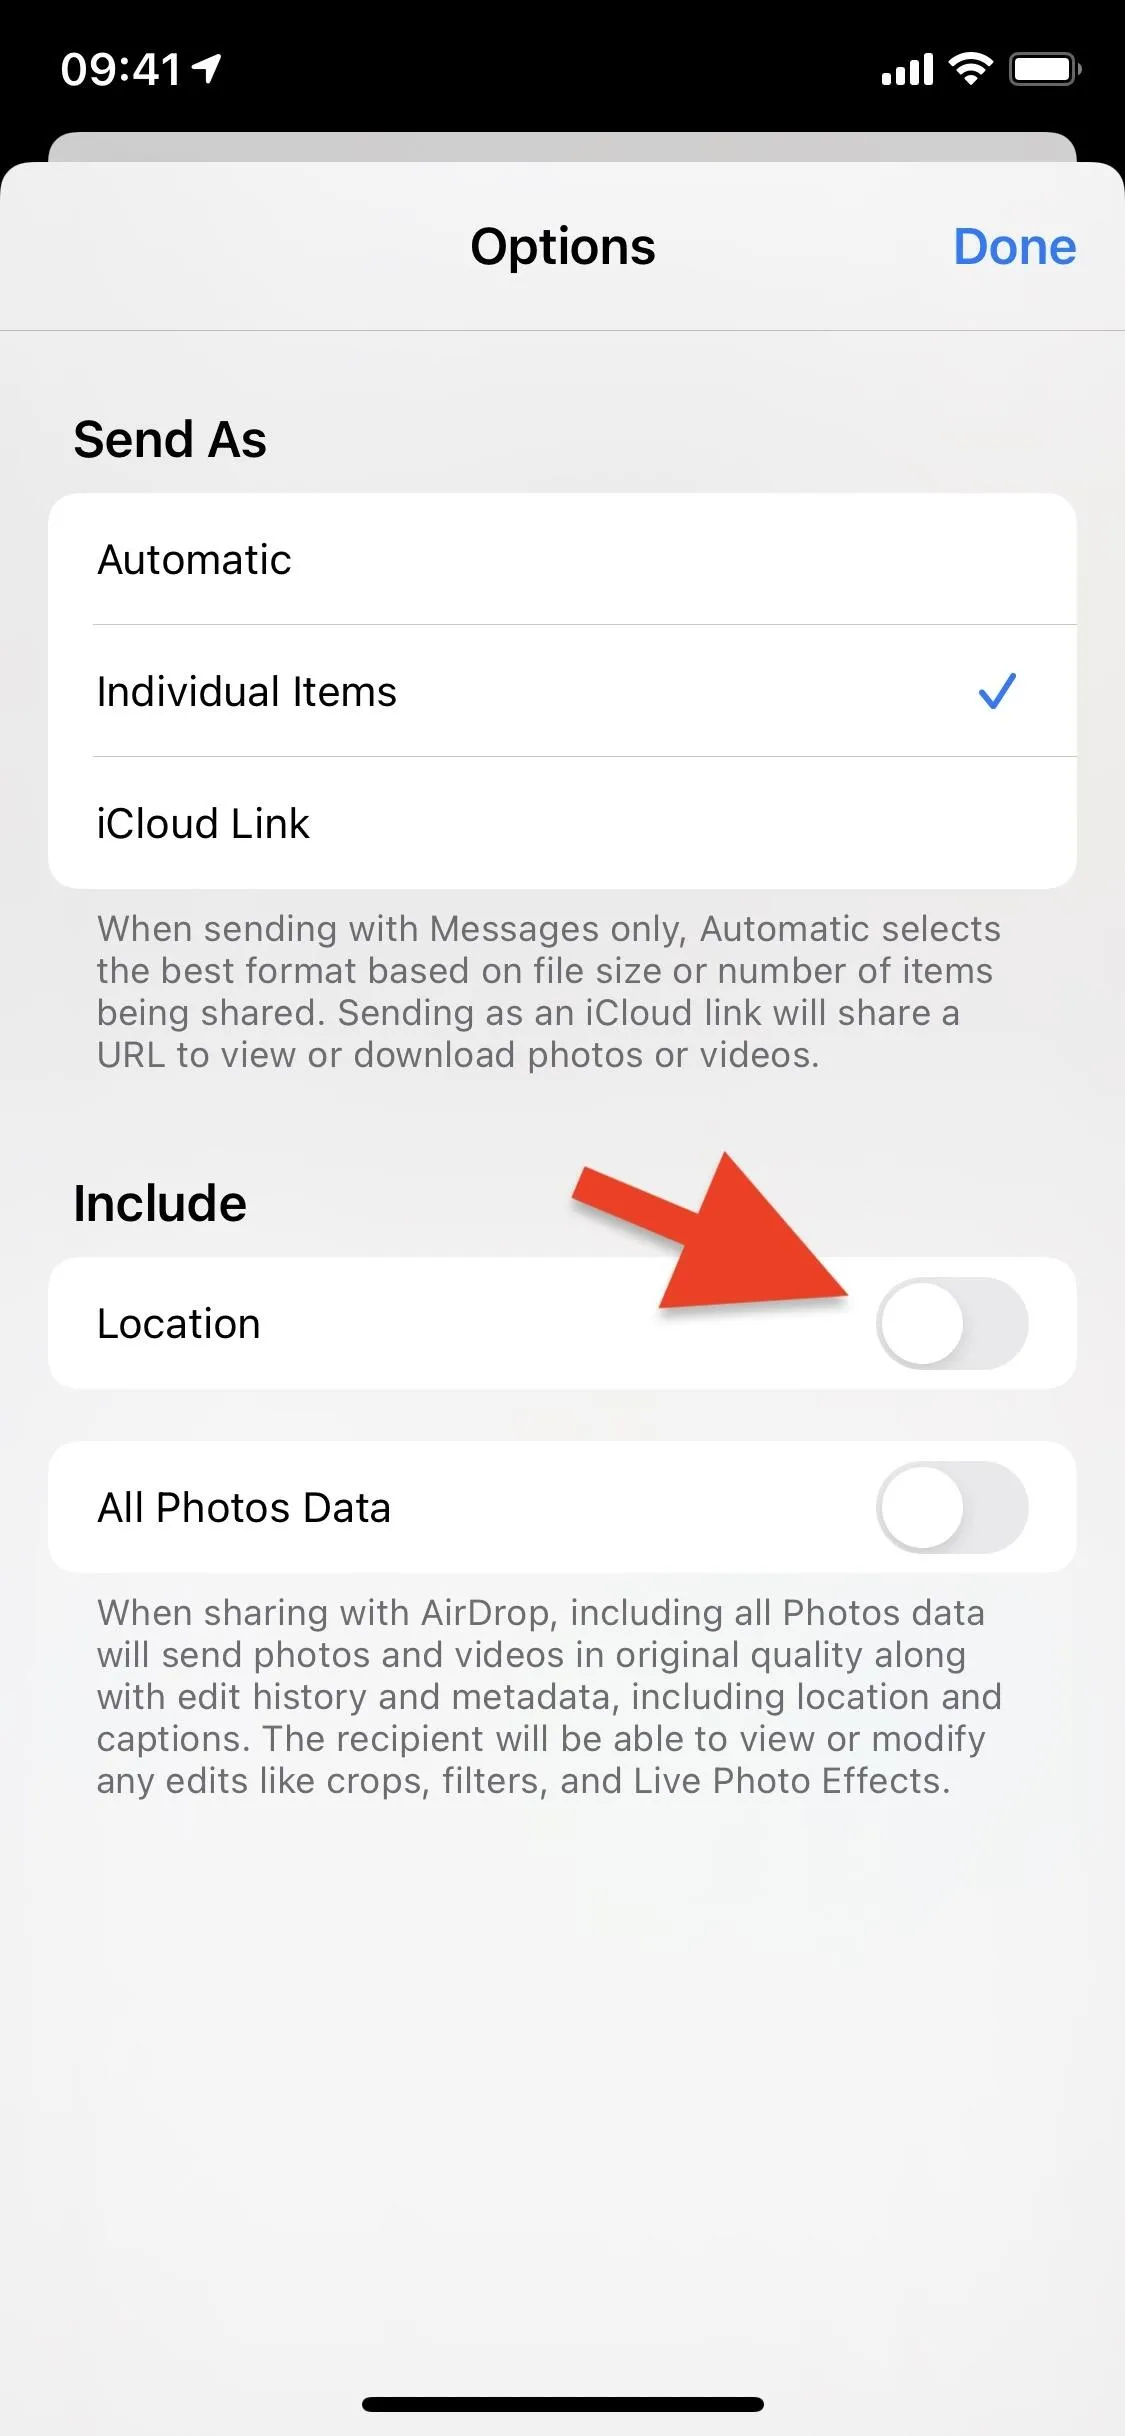
Back when iOS 13 was released, Apple introduced a native feature to easily remove location metadata from any photo or video that you share. That way, others can't track where you were or are. If you don't want geotags included for media in your iCloud link, disable them now.
In the Share sheet, tap "Options," toggle off "Location," then hit "Done," and the metadata will be scrubbed from your media for this instance only.


Step 5: Create the iCloud Link
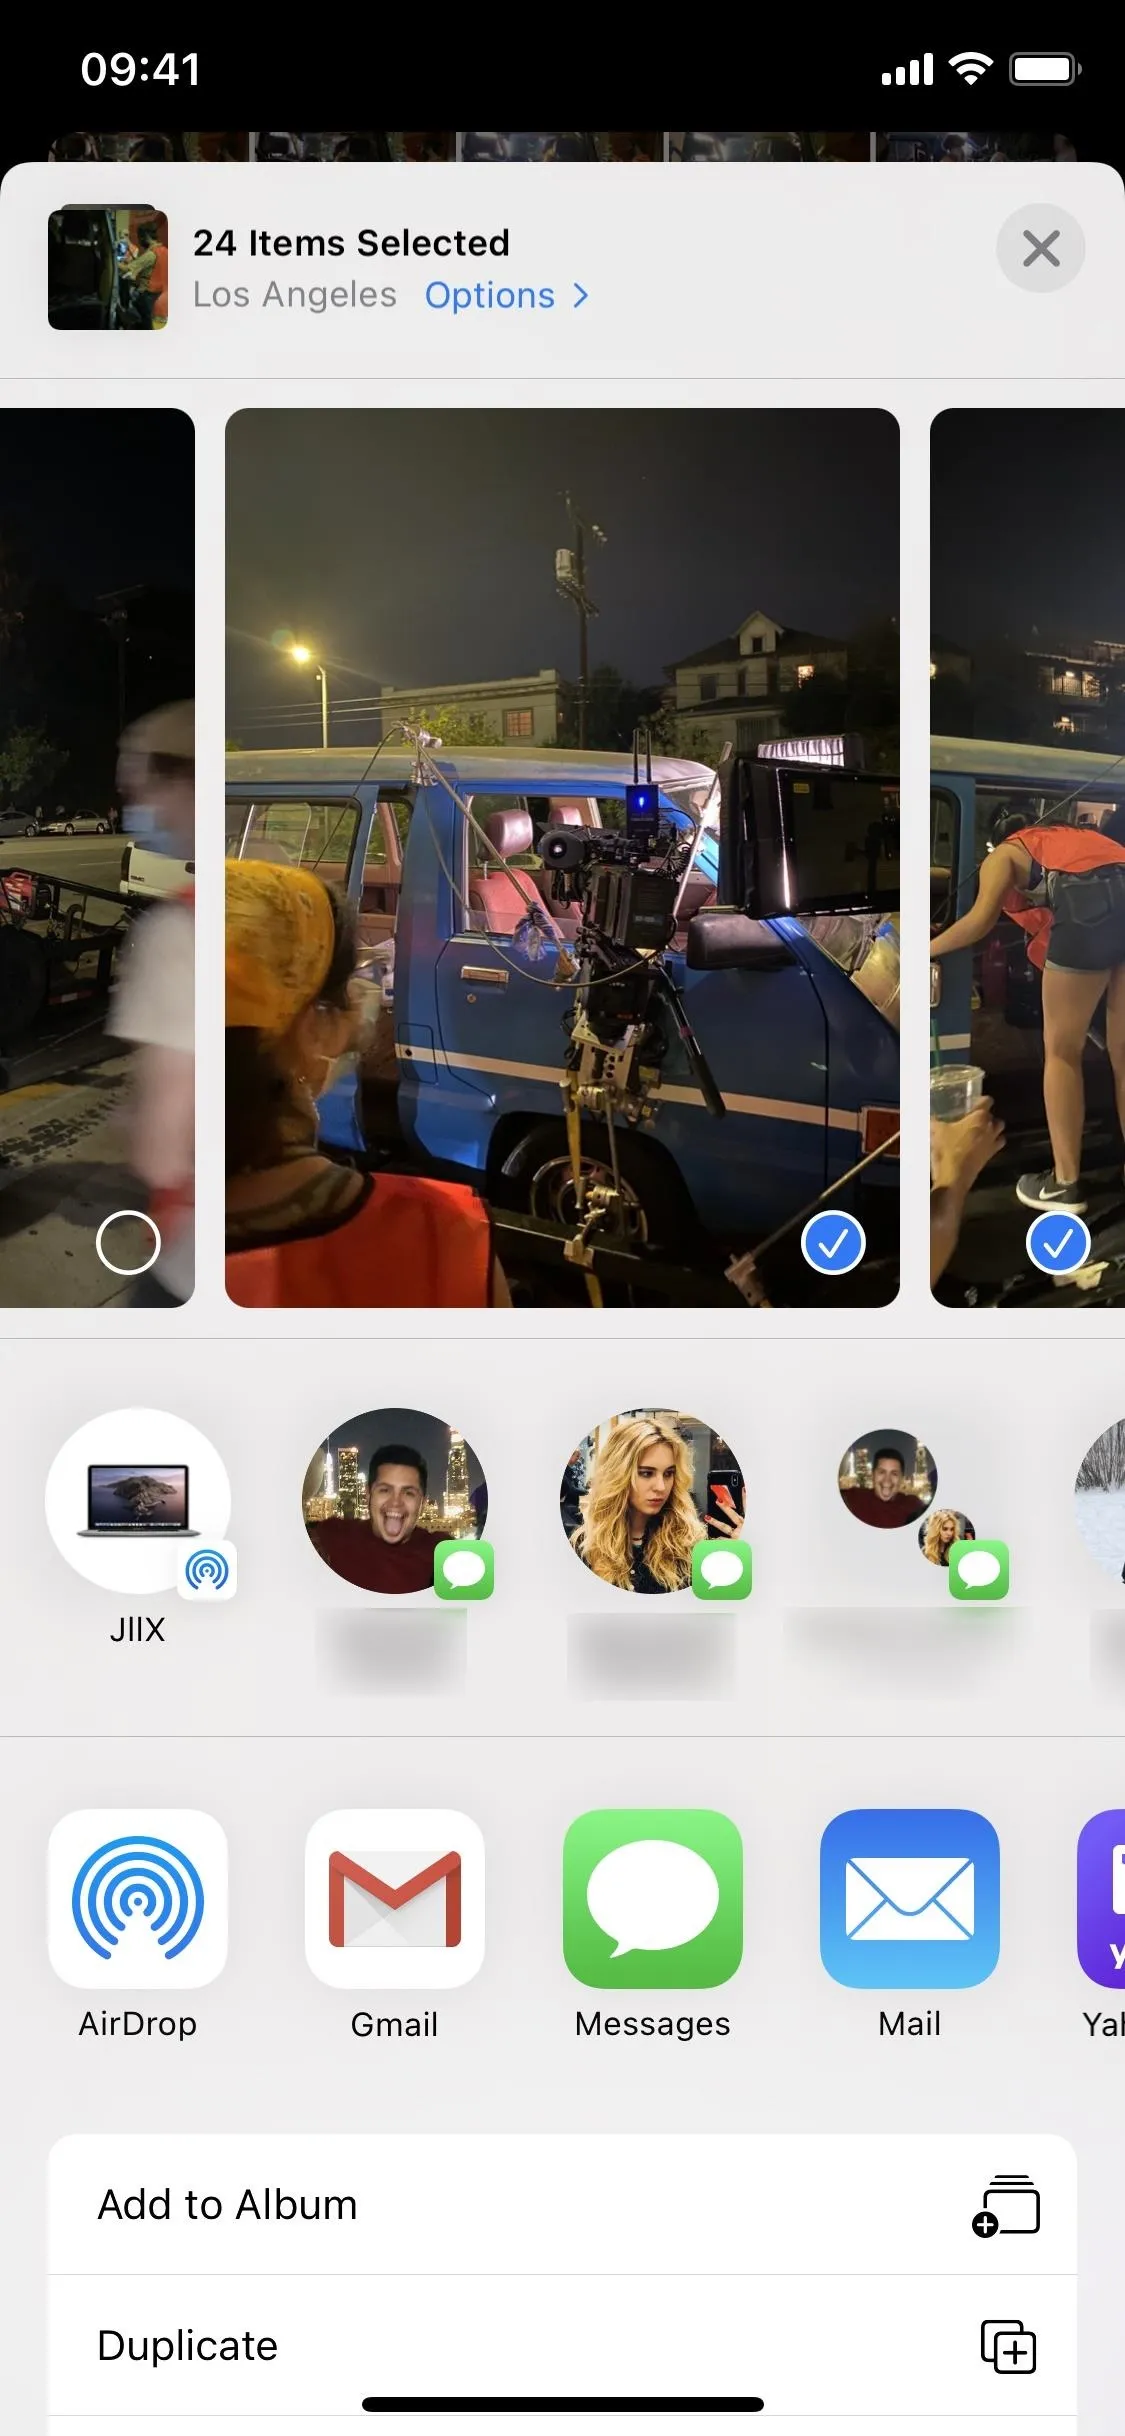
If you're going to send the content via Messages and you've selected enough to share, once you tap "Messages" from the share extensions list, it may create an iCloud link automatically. If not, you can still make one manually.
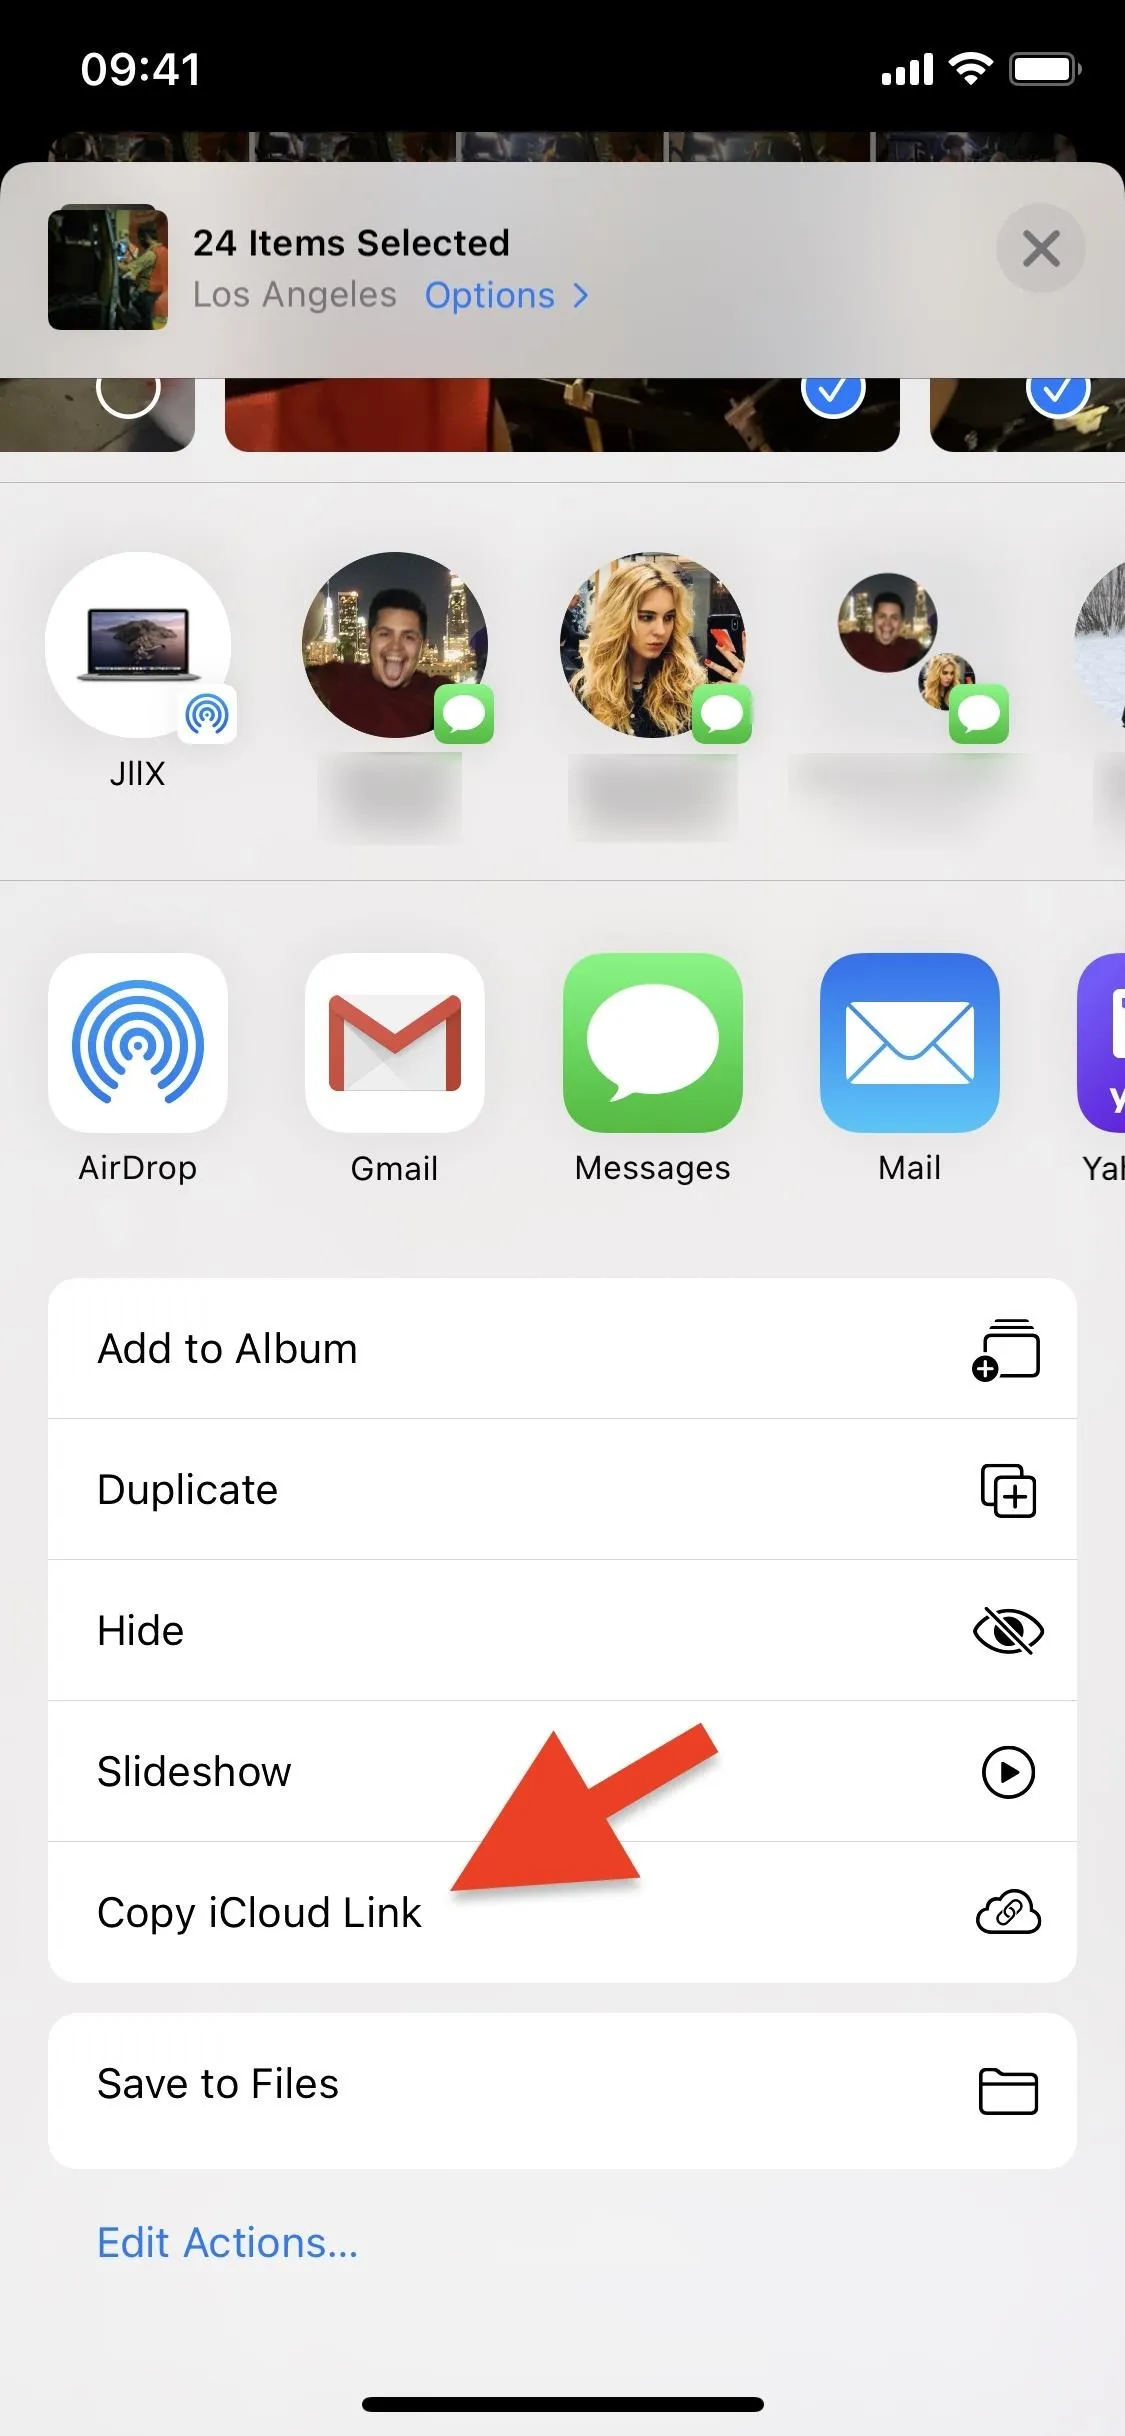
In the Share sheet, scroll down to the list of actions, then choose "Create iCloud Link" to generate an iCloud link for your photos and videos. As mentioned before, the more pictures and videos you share, the longer it will take to create an iCloud link, but it shouldn't be longer than 30 seconds.


Step 6: Share the iCloud Link Any Way You Want
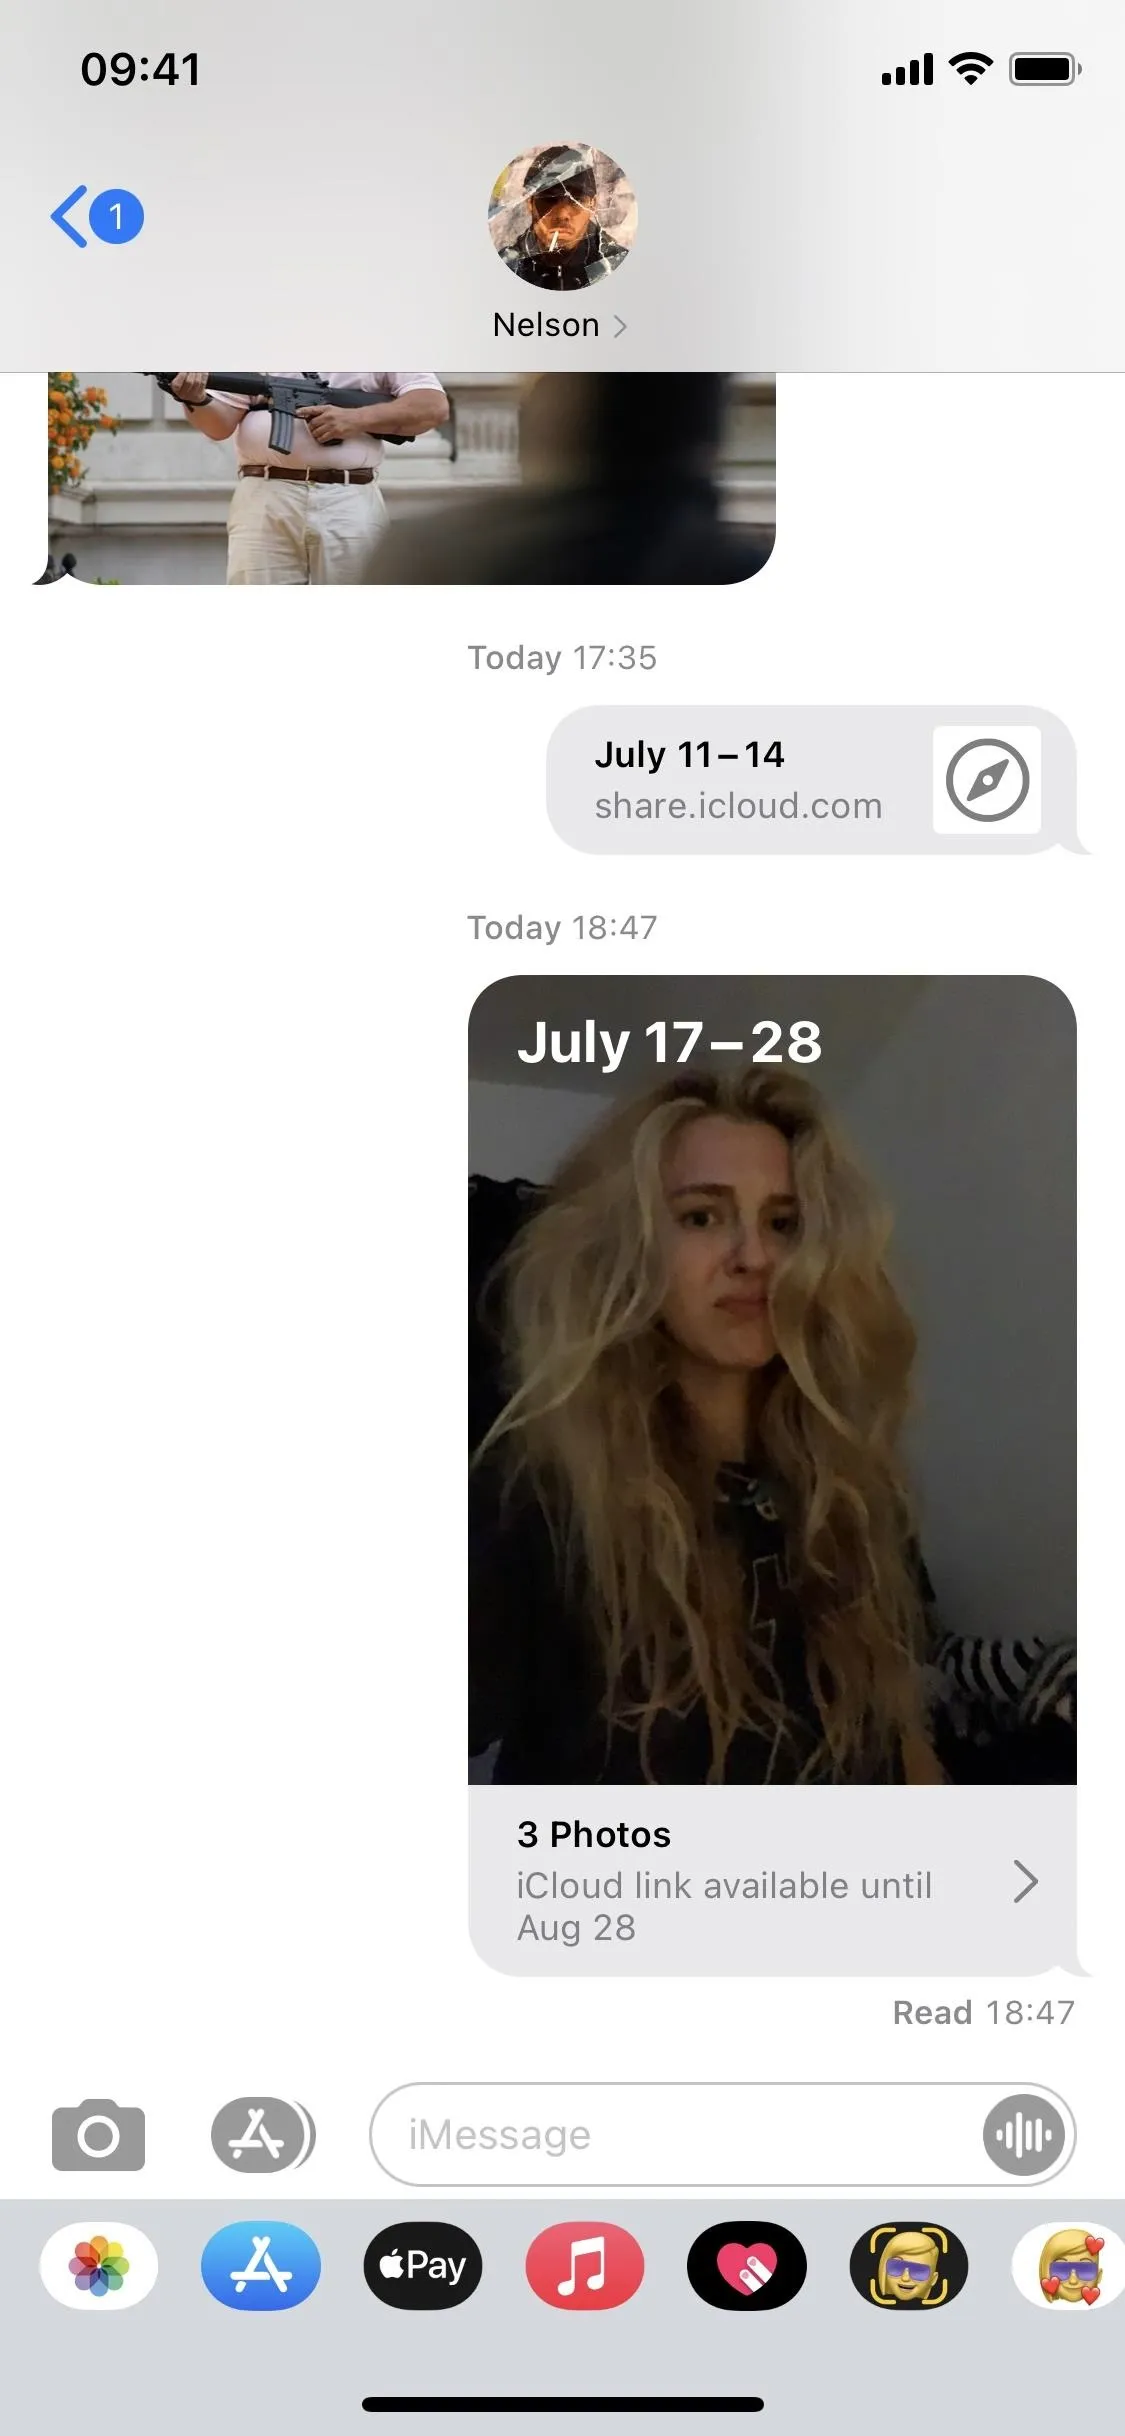
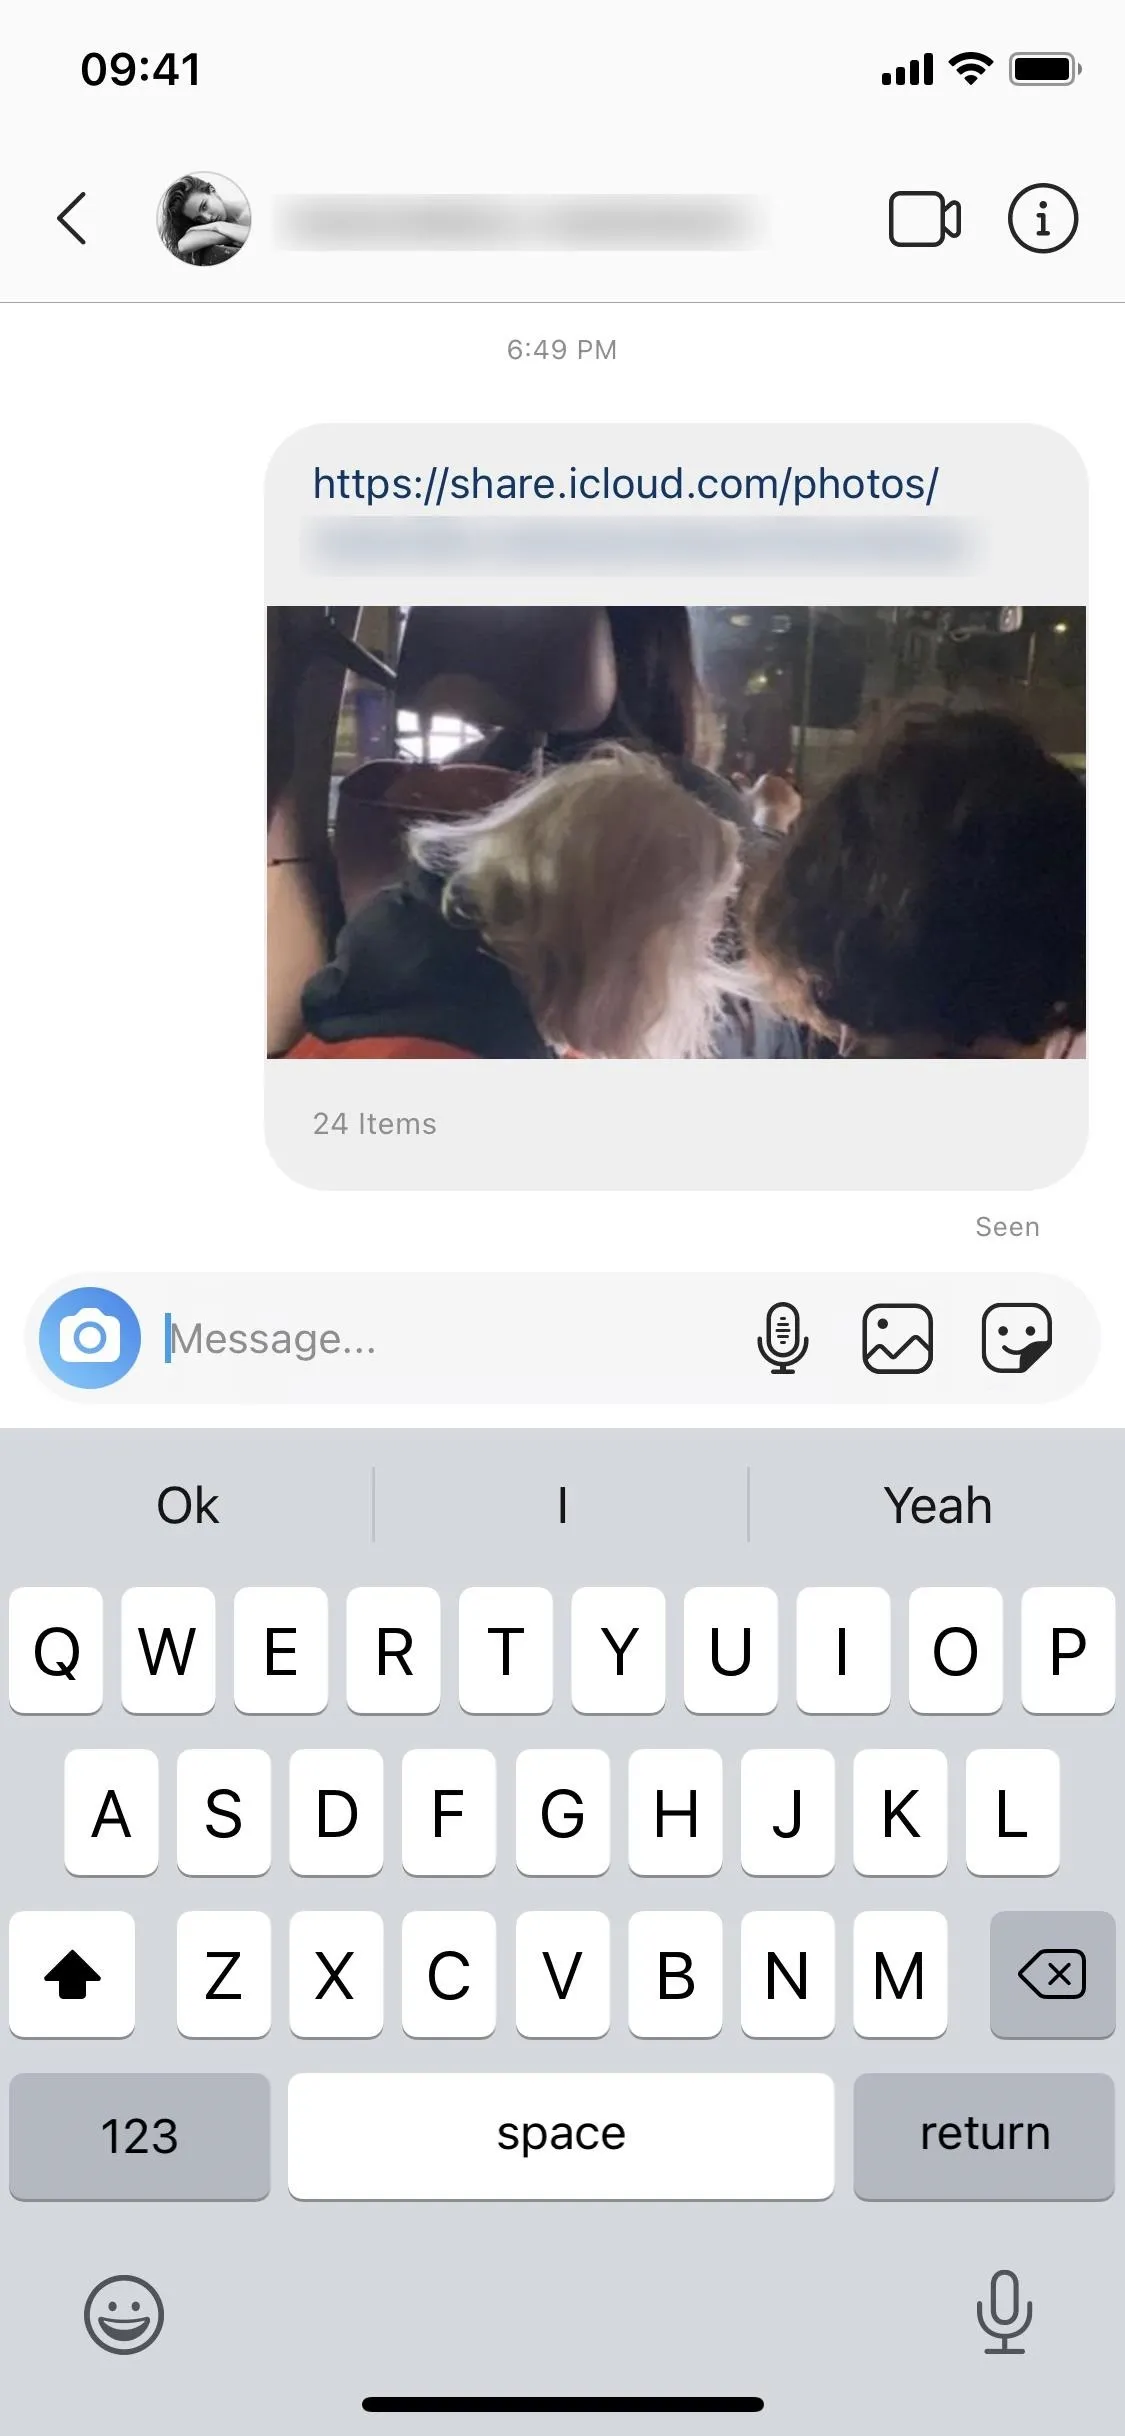
Once the iCloud link is copied to your clipboard, you can share it via a message, an email, social media, and more — even AirDrop if you want. When sharing via Messages, as well as other select apps, you'll get a preview of the photos in the iCloud link when you share it. For most everything else, it'll just appear as a link.


Viewing Things from a Recipient's Perspective
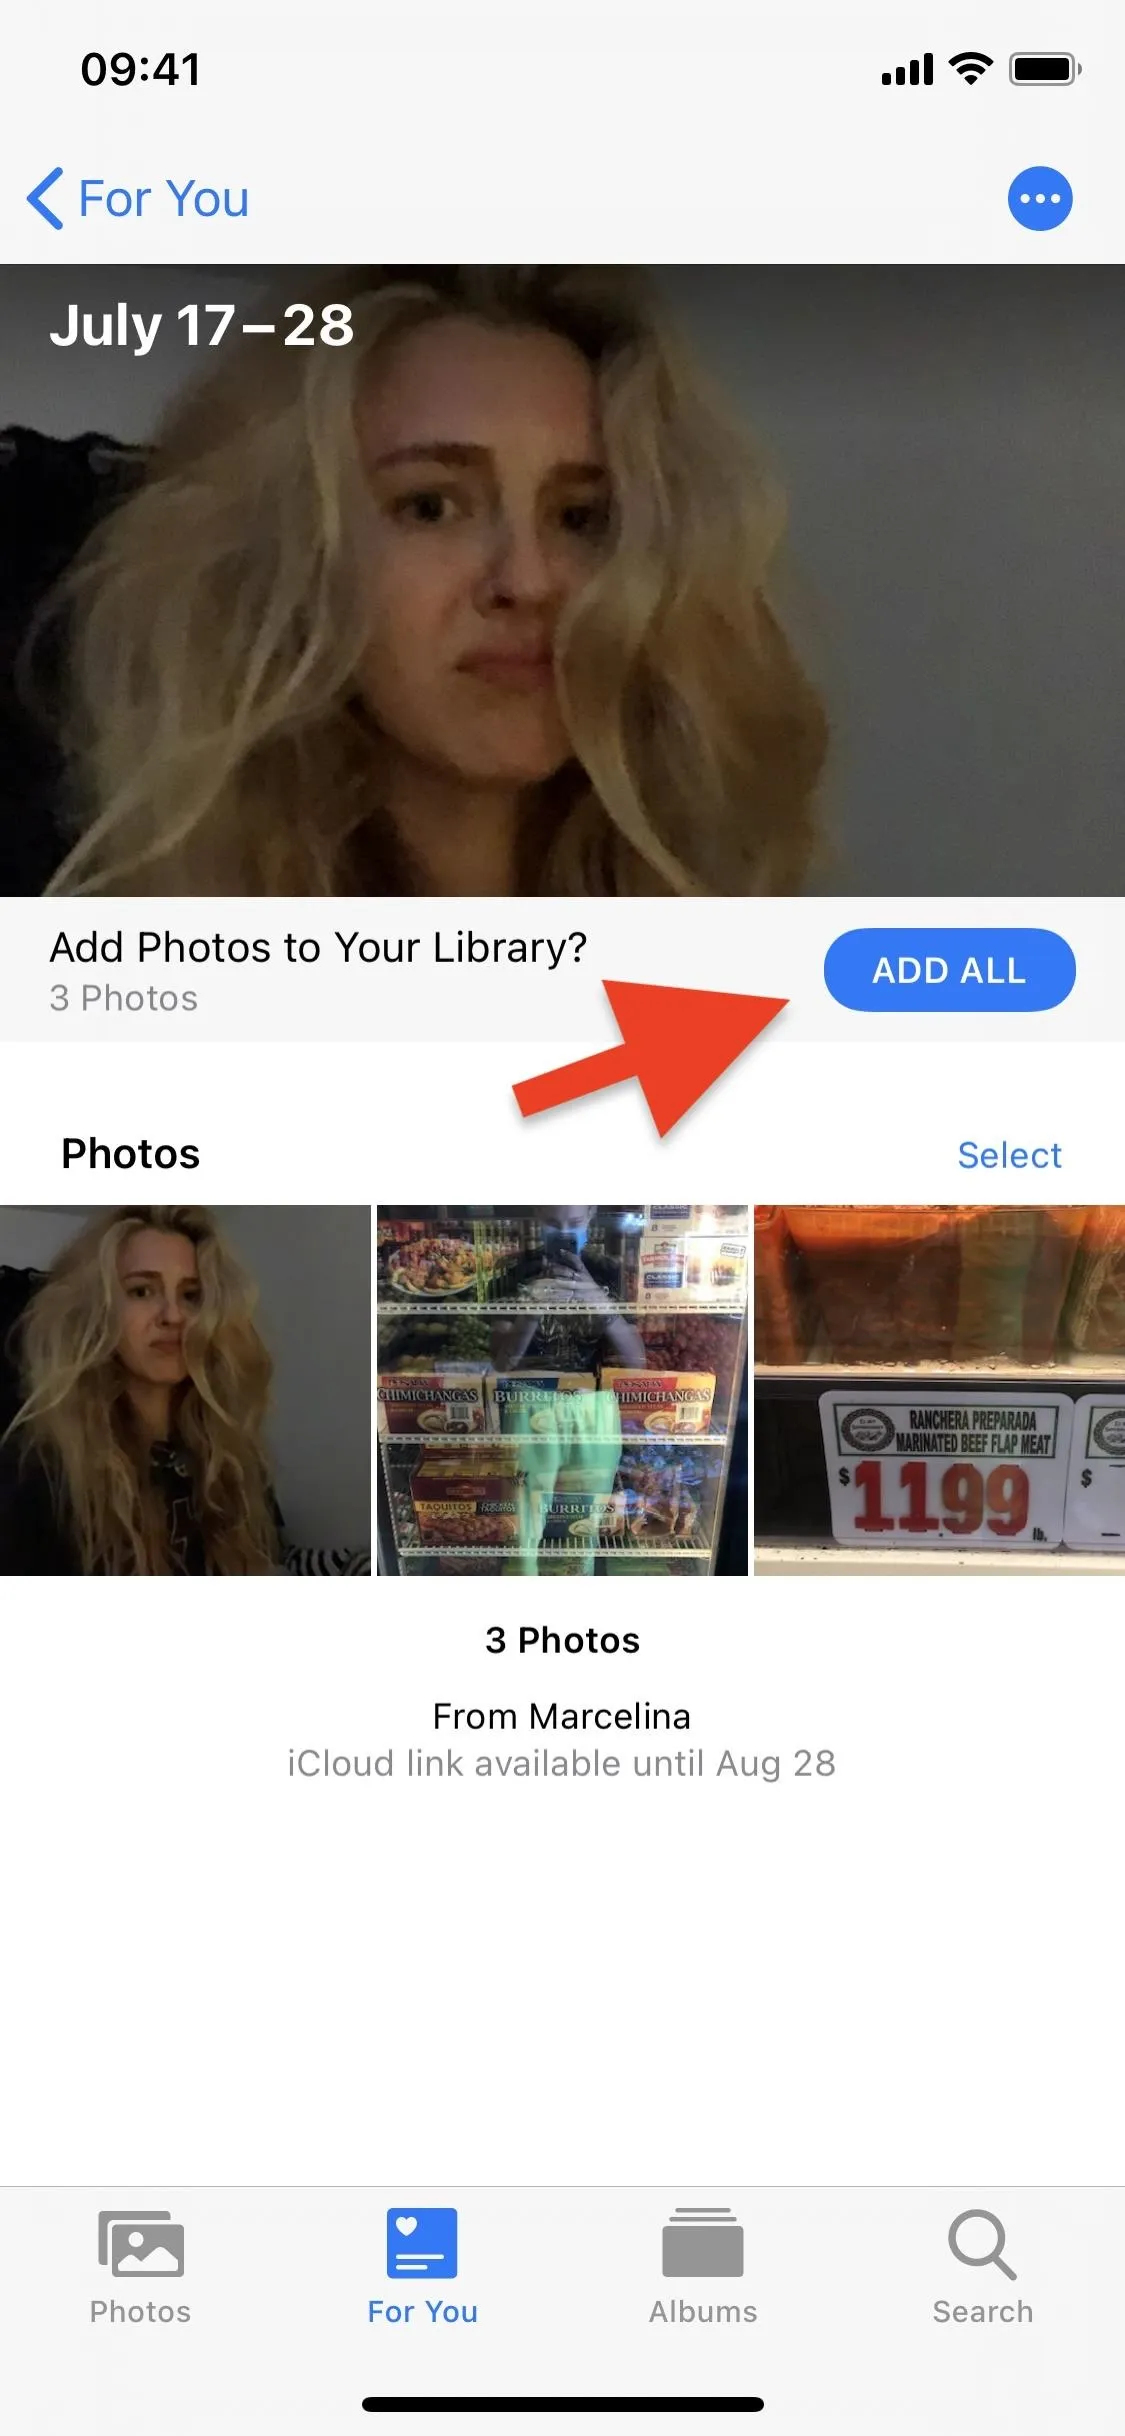
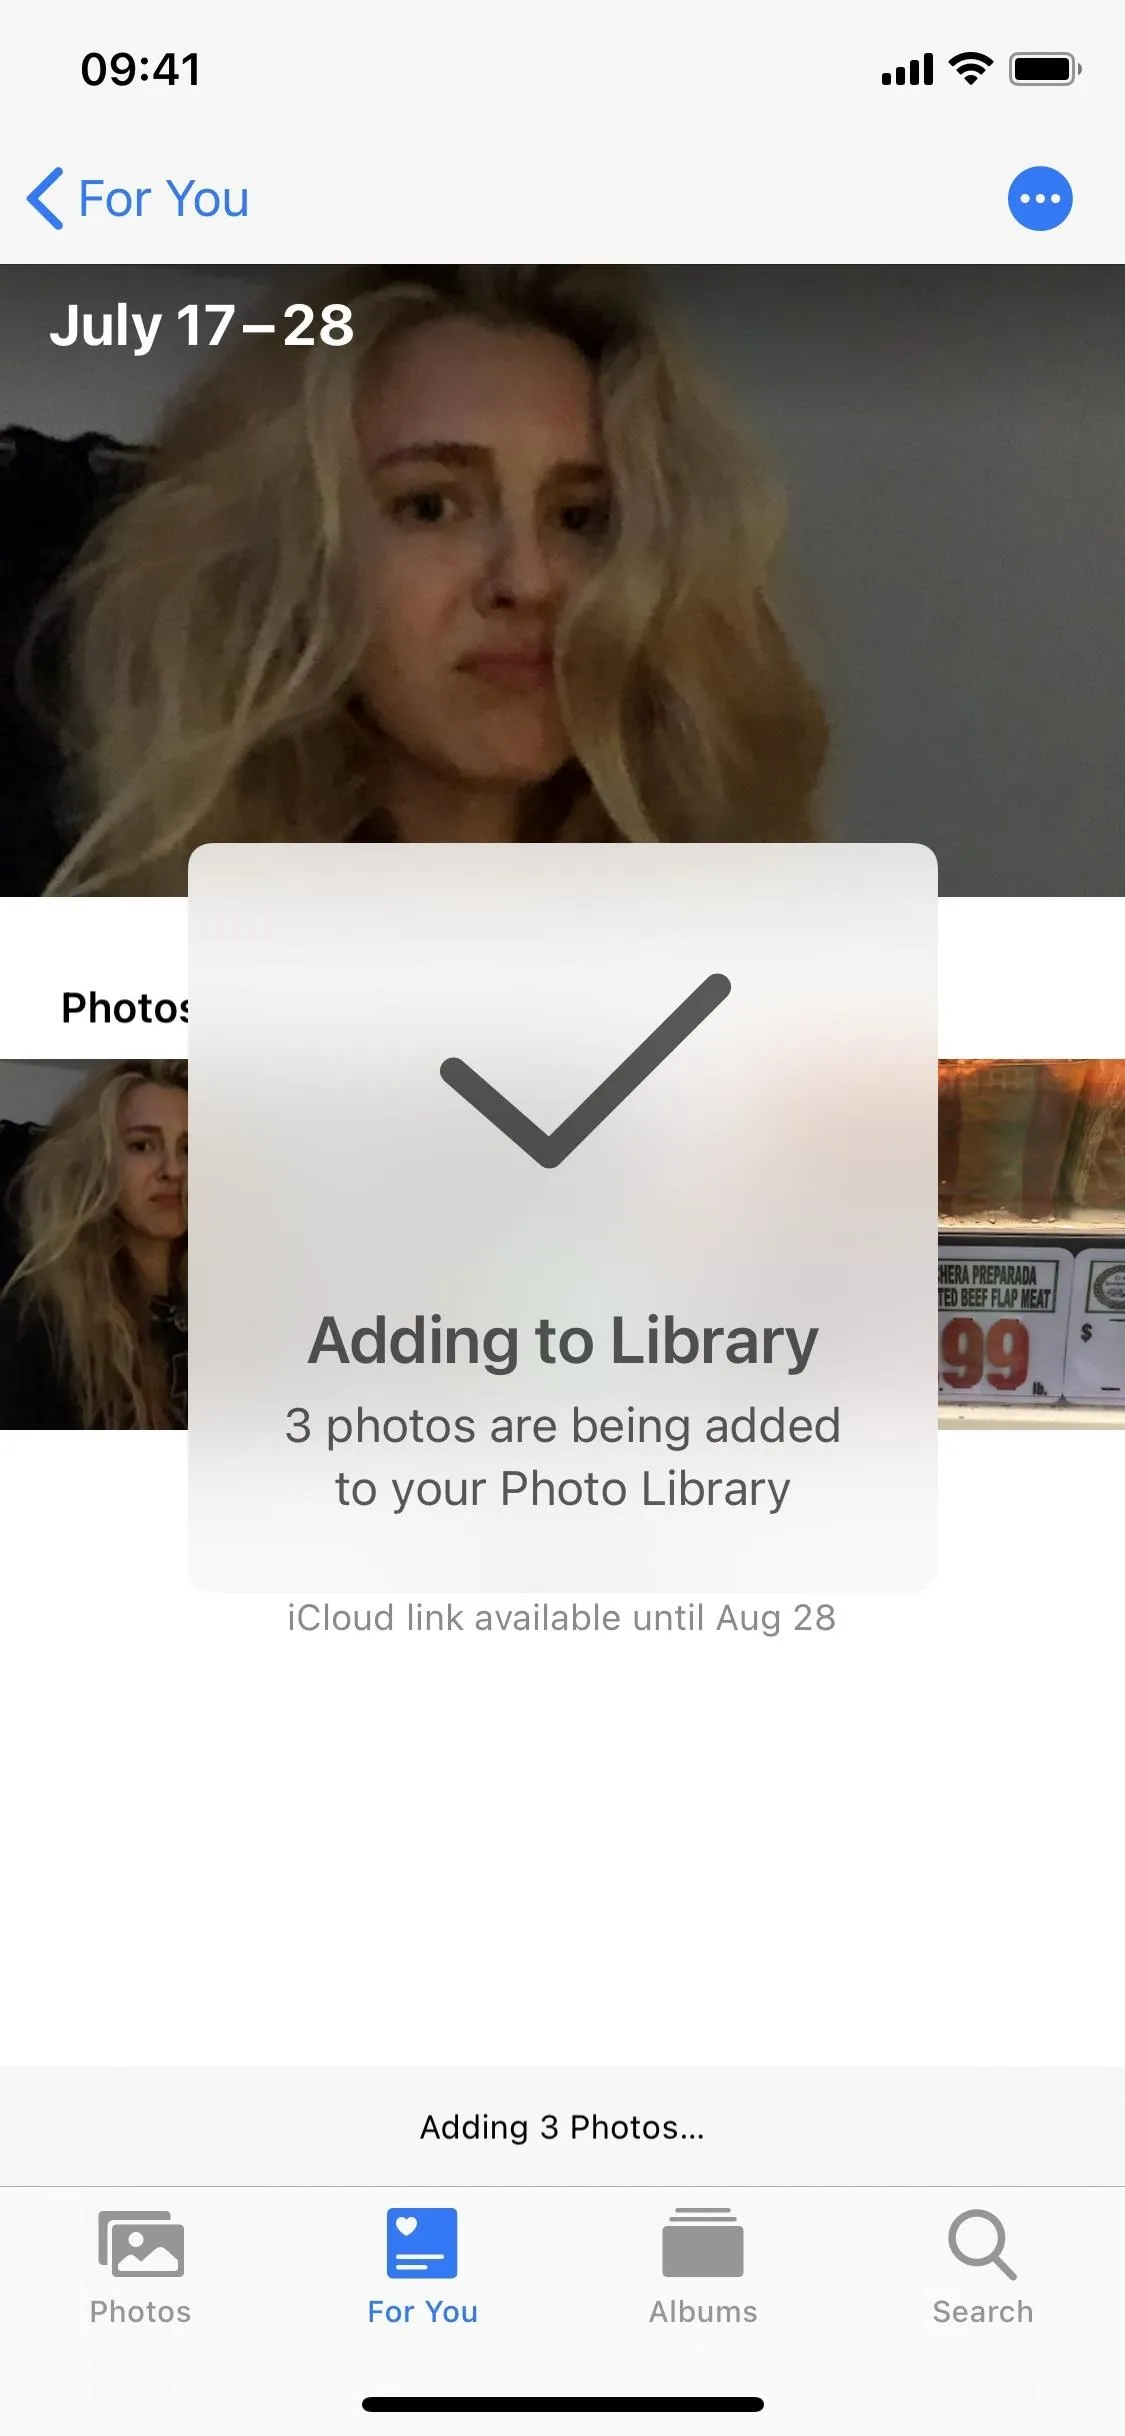
As for the recipient of your iCloud link, they'll be able to easily view your photos and videos and download them to their device. If they're on an iPhone, opening the link will take them directly to the Photos app, where they can go through the album of photos and videos they receive.
For a month, they'll be able to access this folder from the "For You" page in Photos, and if they want to download the photos and videos, they can tap on "Add All" or select individual files to keep them beyond the 30 days. If they have content in their iCloud Photos library that matches the same time and location of your shared media, they may be asked to add those to the shared album so you can see them.


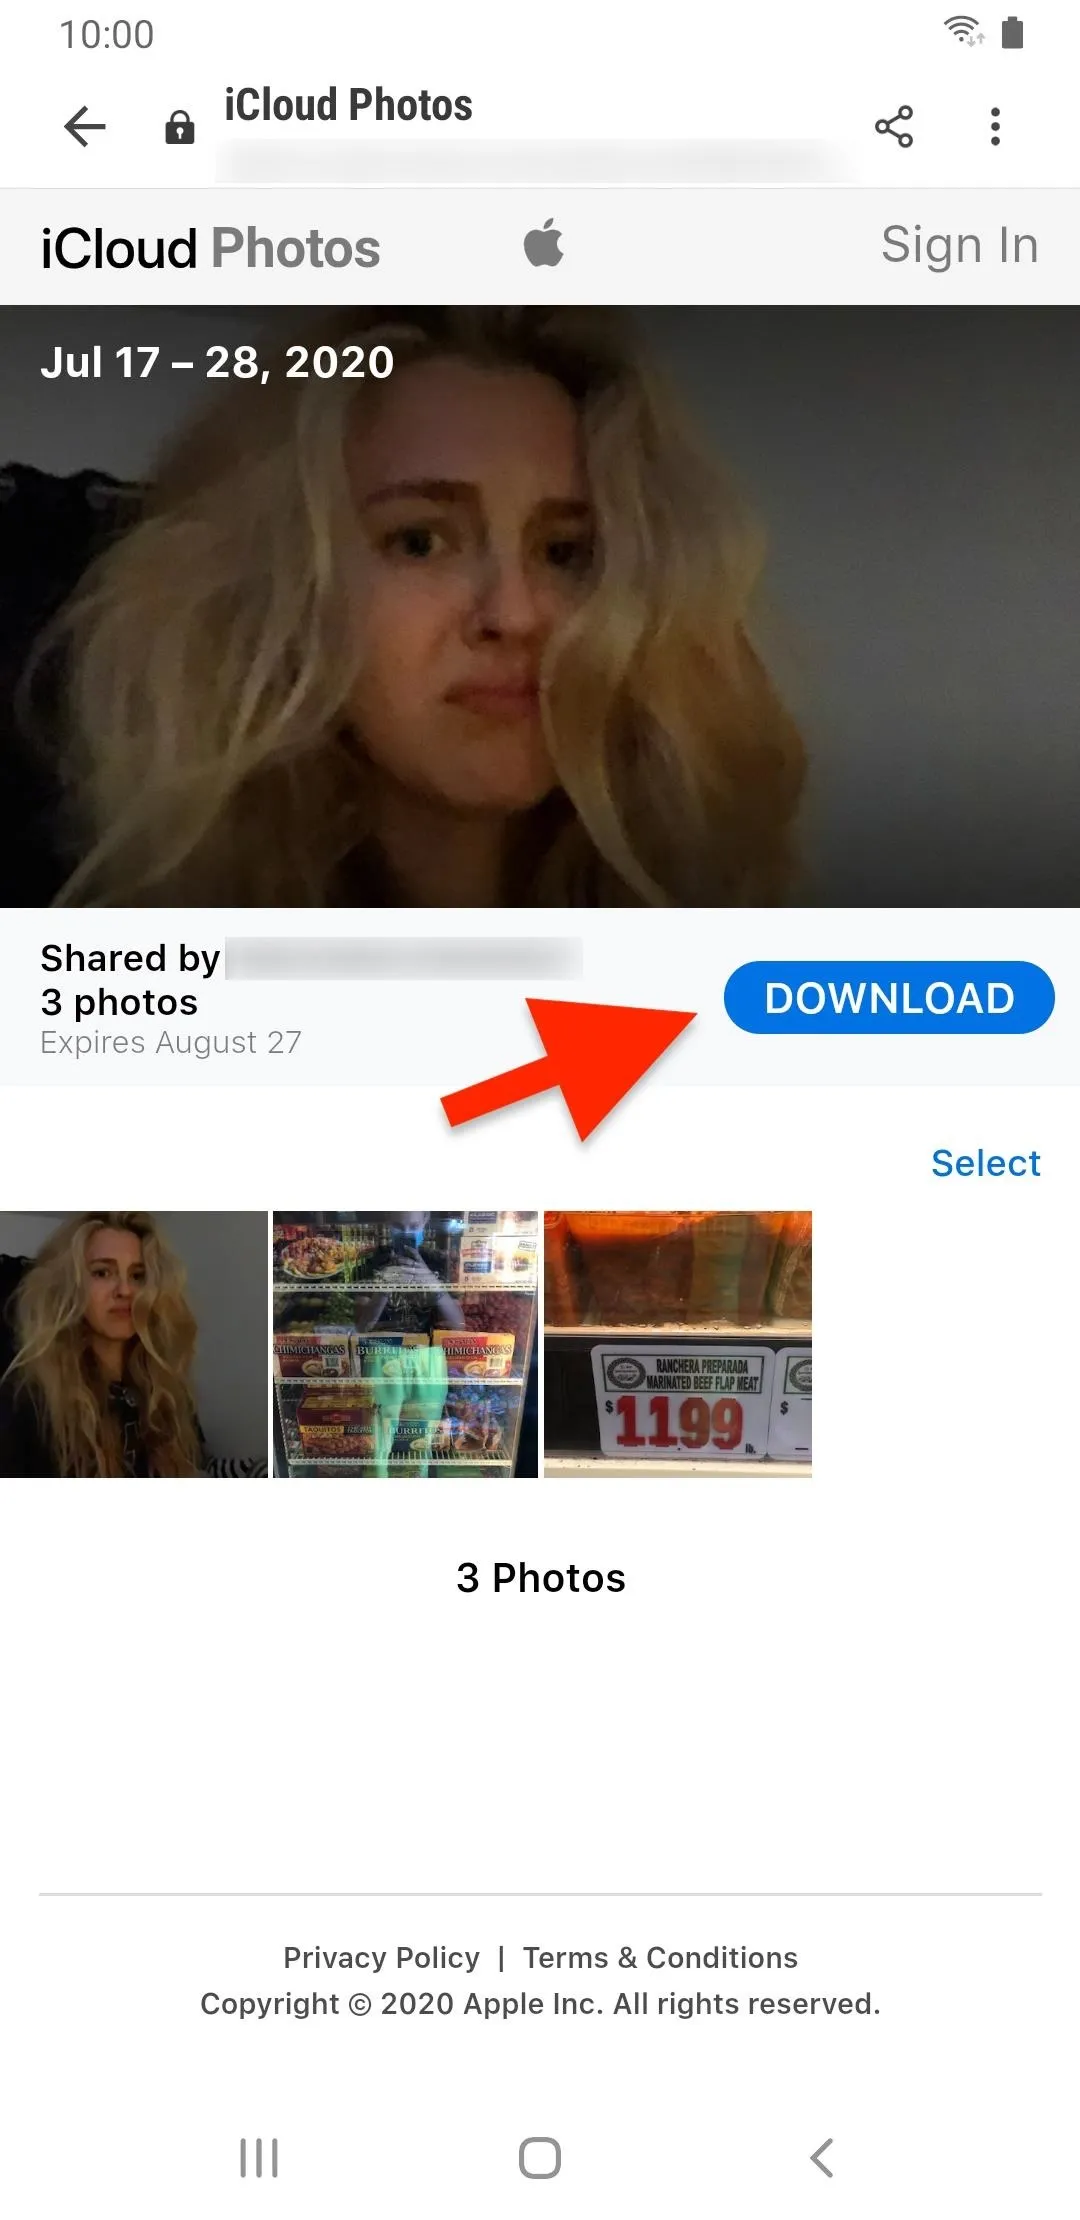
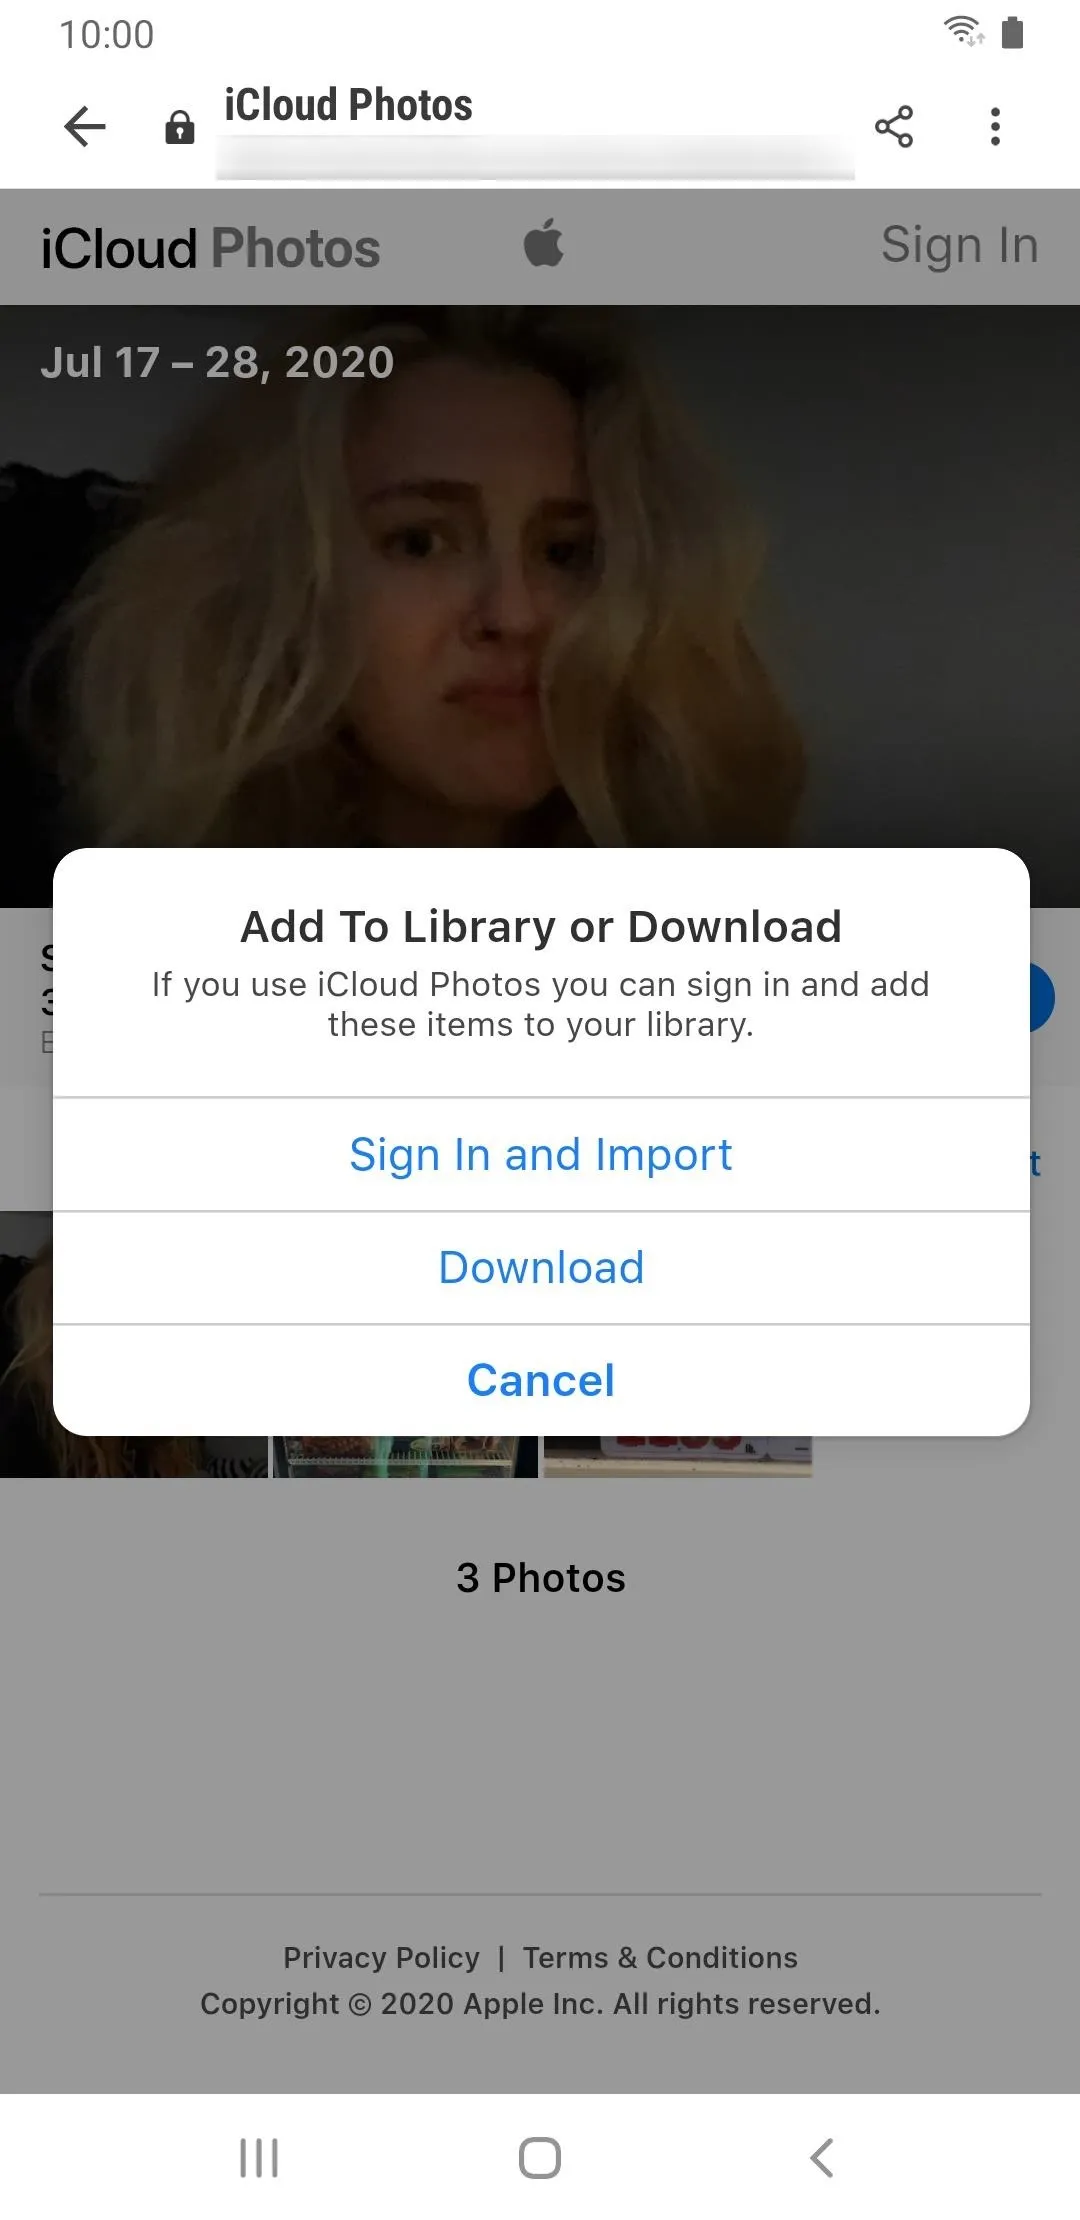
If they're on Android, the process is similar. Once they tap on the iCloud link, they'll be redirected to their preferred web browser. From there, they can tap on "Download" and then either sign in to their iCloud (if they have one) to add the items to their library or download directly to their Android device.
In our experience, downloads on Android always compile as a .zip file, so if your Android recipient doesn't know how to open .zip files on their device, an iCloud link may not be the best option.


Viewing iCloud Album Links You've Shared & Received
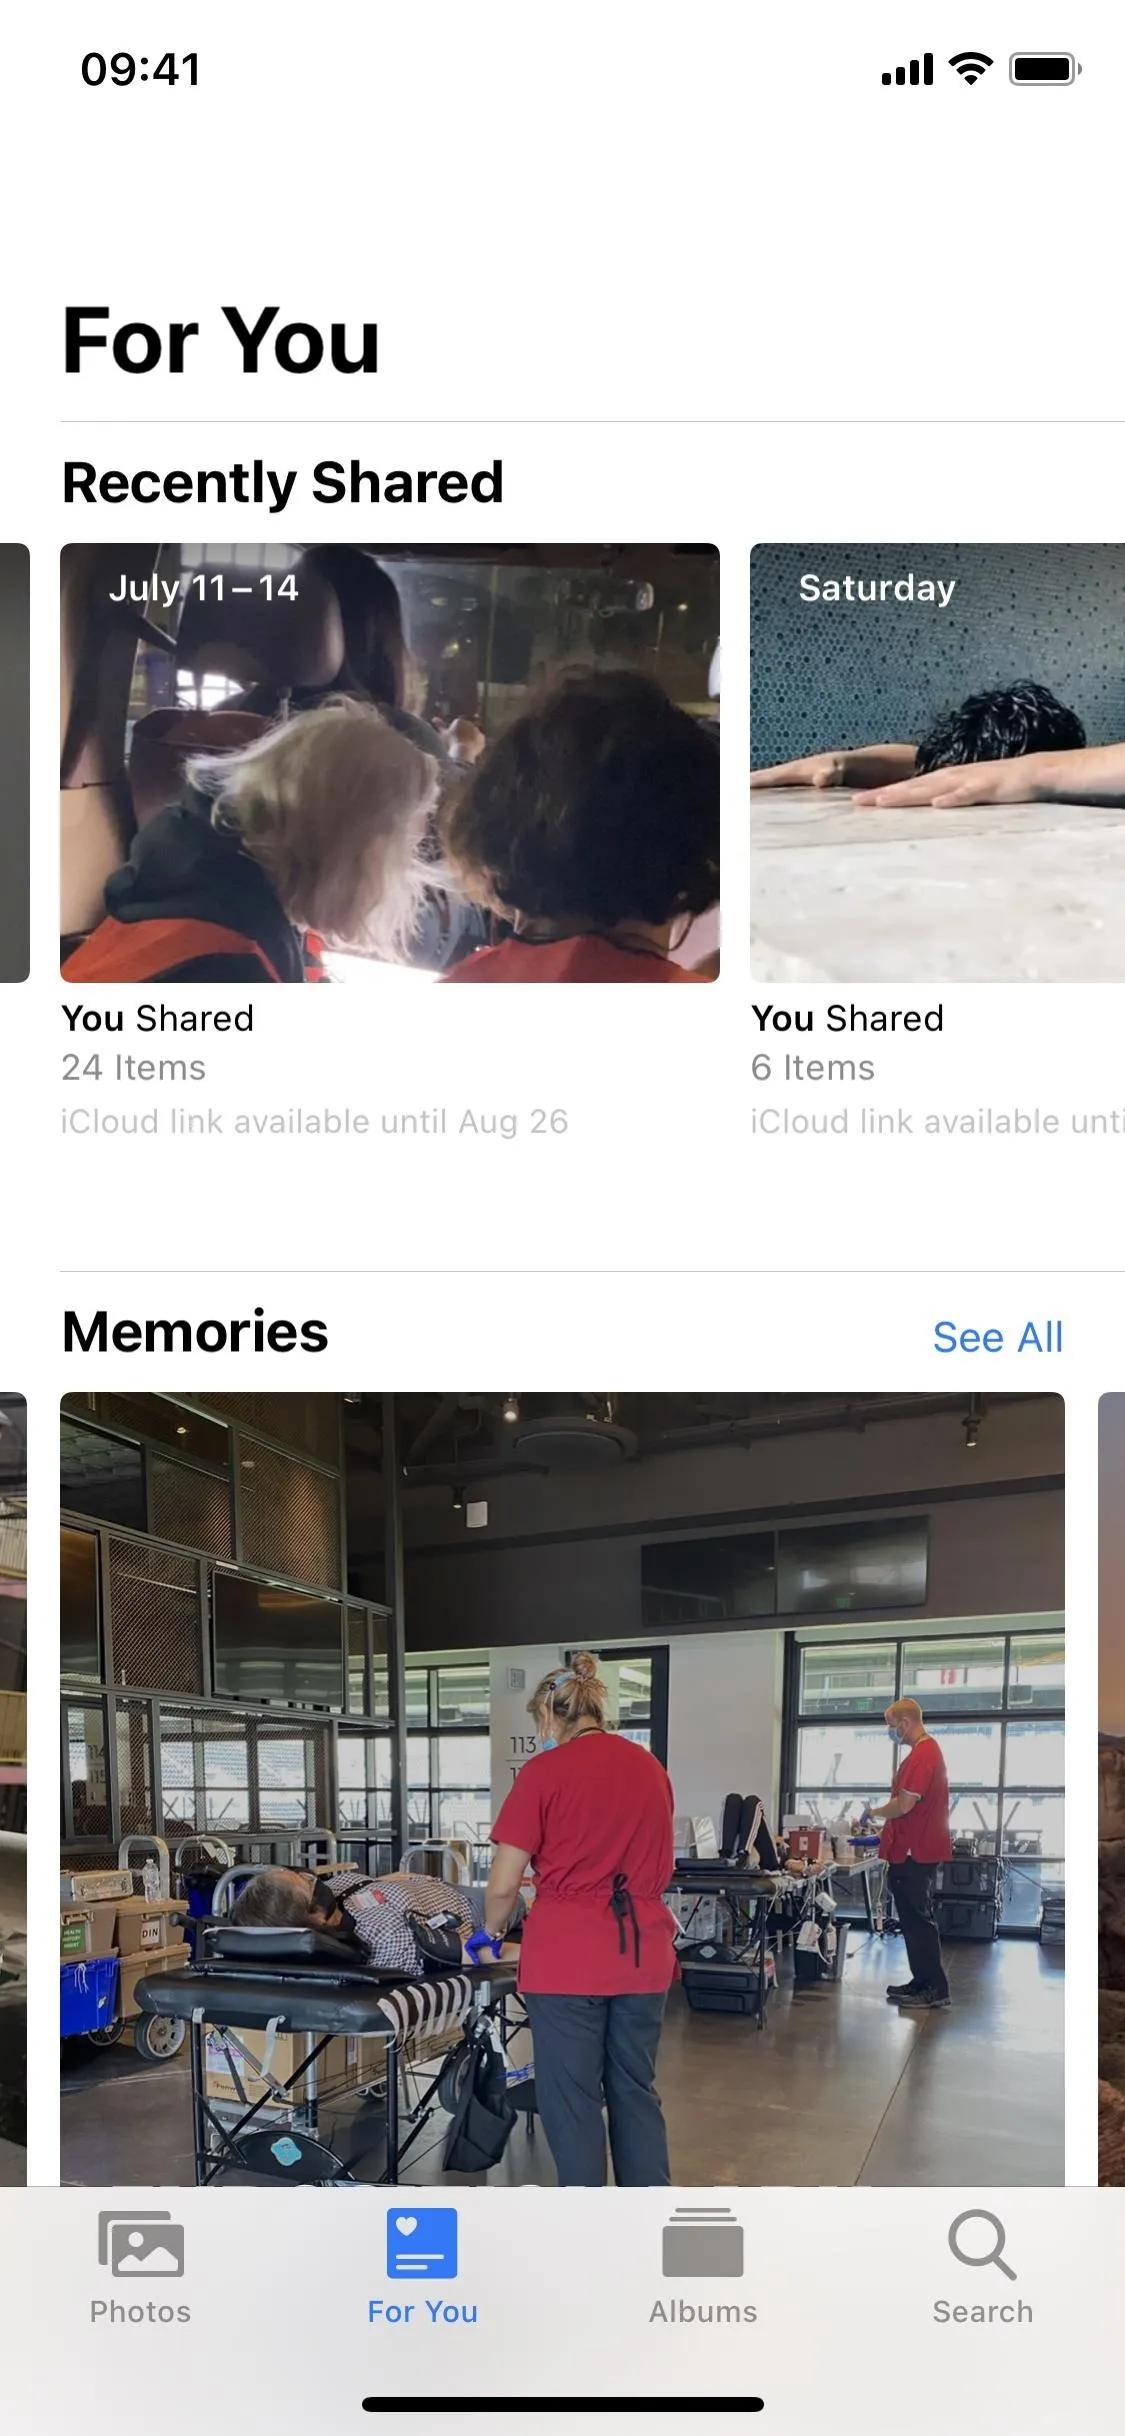
Every live iCloud link that hasn't expired will live as an album in your Photos app. To view your shared iCloud links, go "For You" in Photos, then find the Recently Shared section, which moves around depending on when you last sent or received an iCloud link.
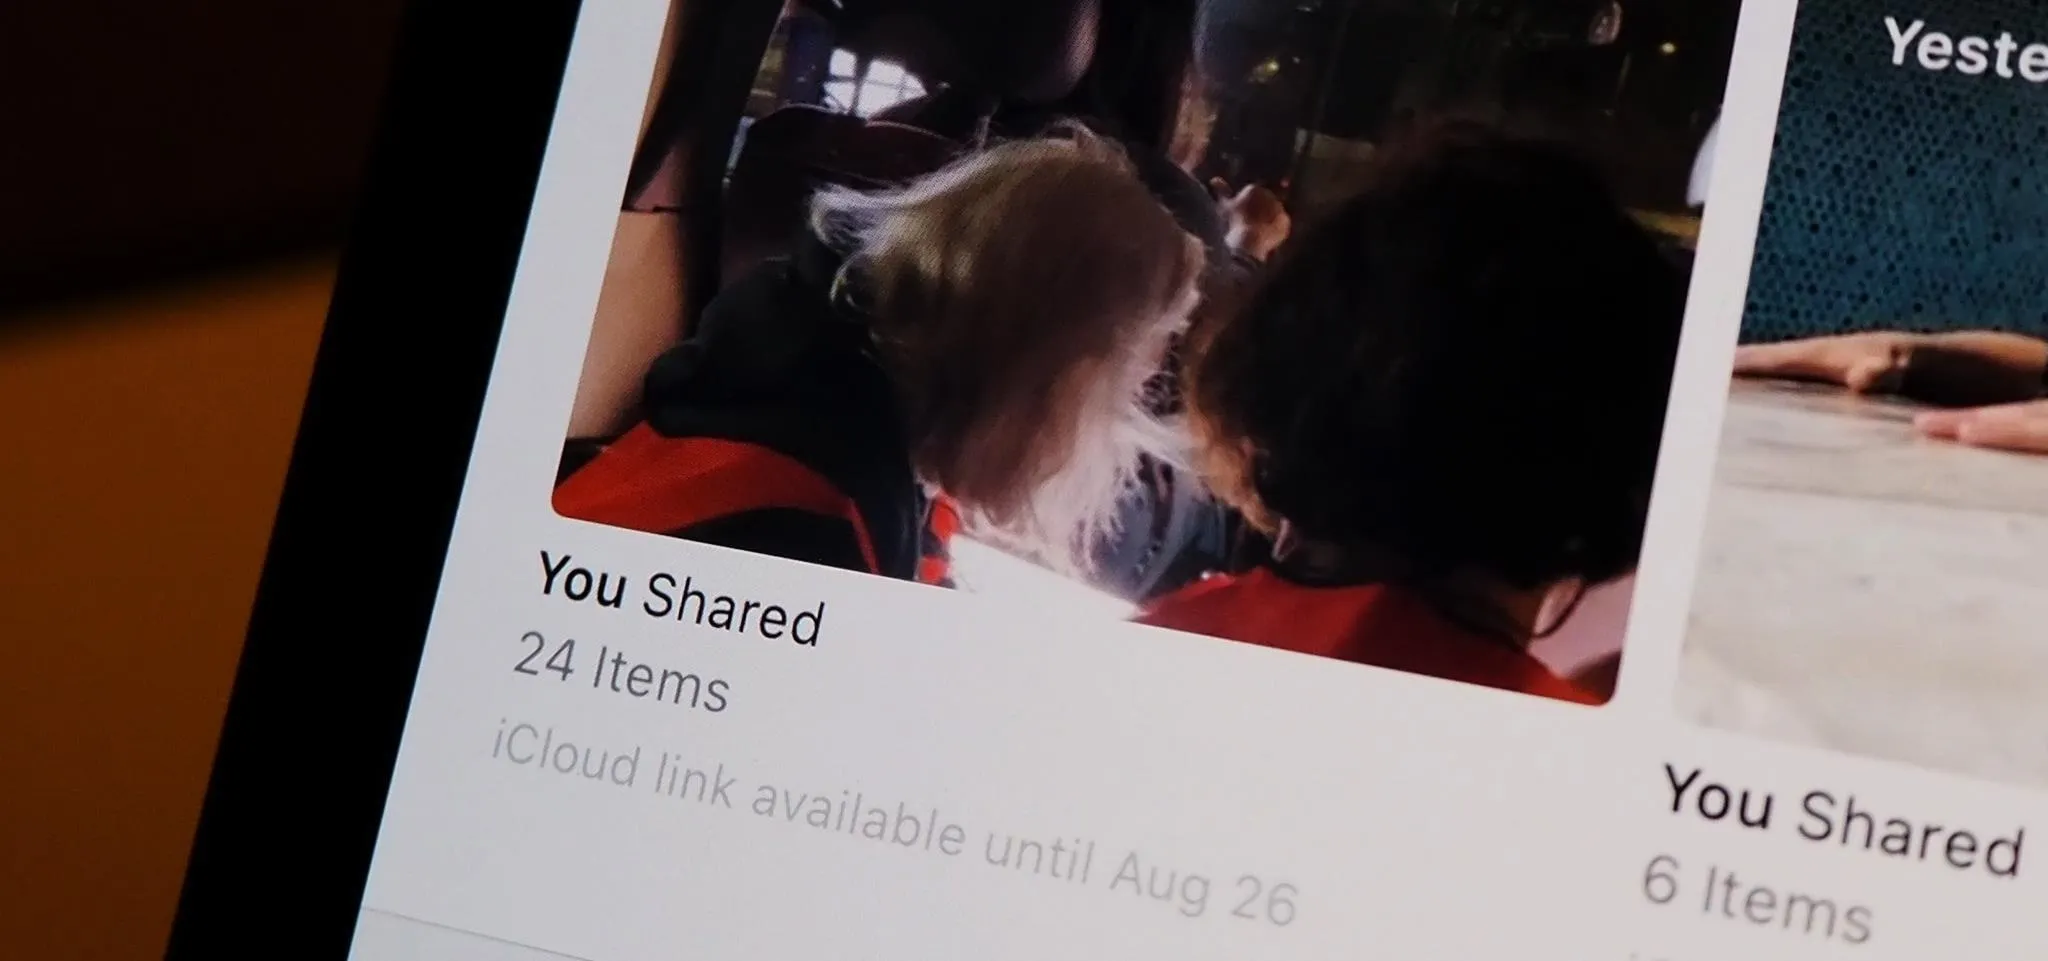
Here, you'll see a preview of your shared photos and videos, the number of items, the dates when the pictures and videos were taken, and when the iCloud link will expire. If someone has shared an iCloud link with you, it will also appear here.
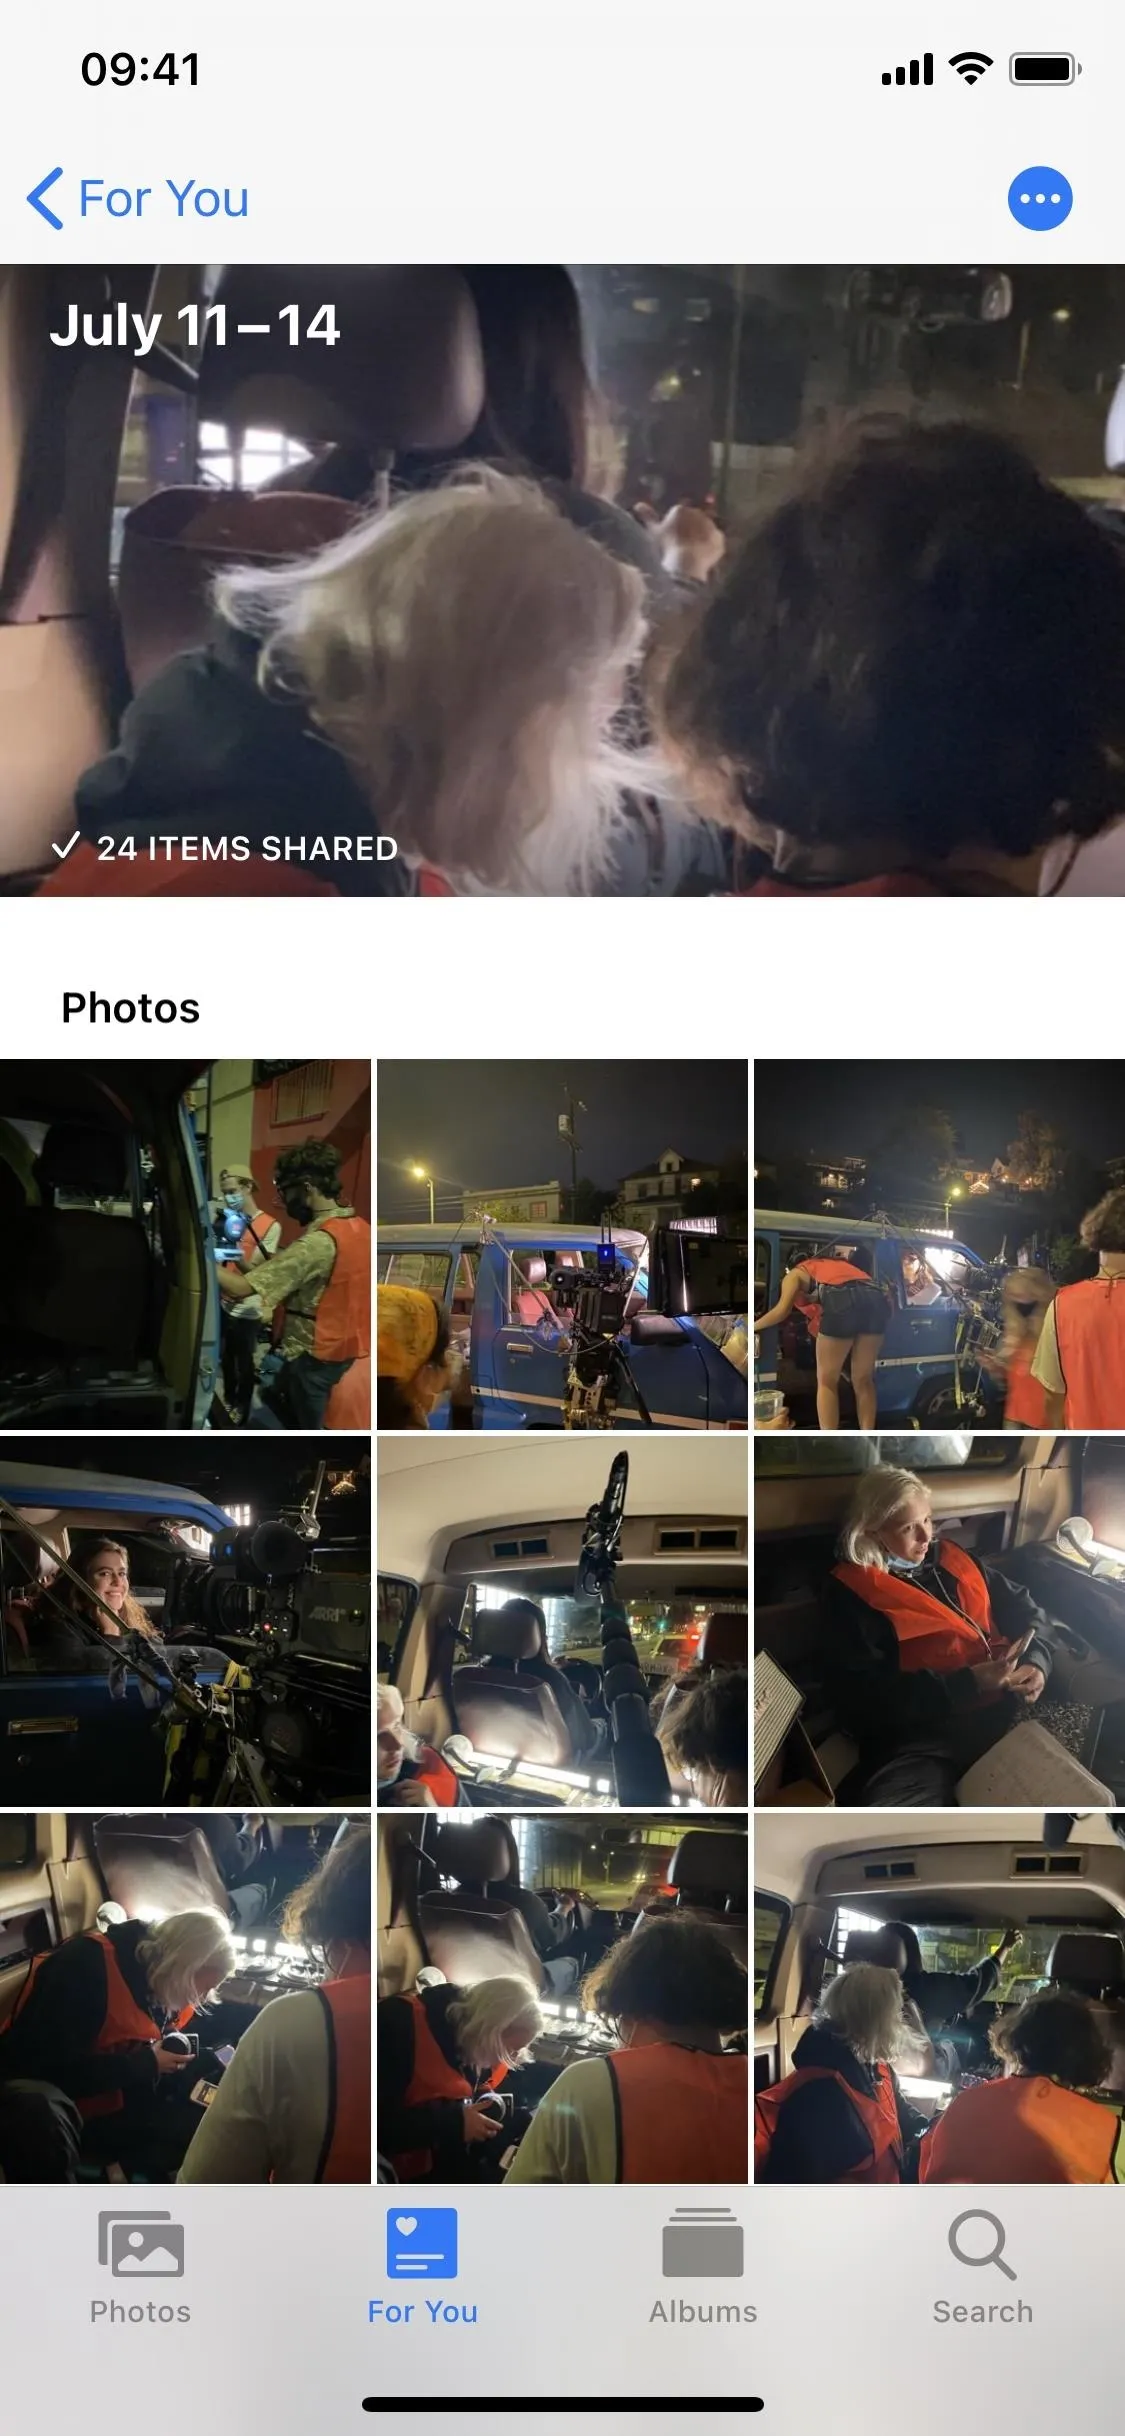
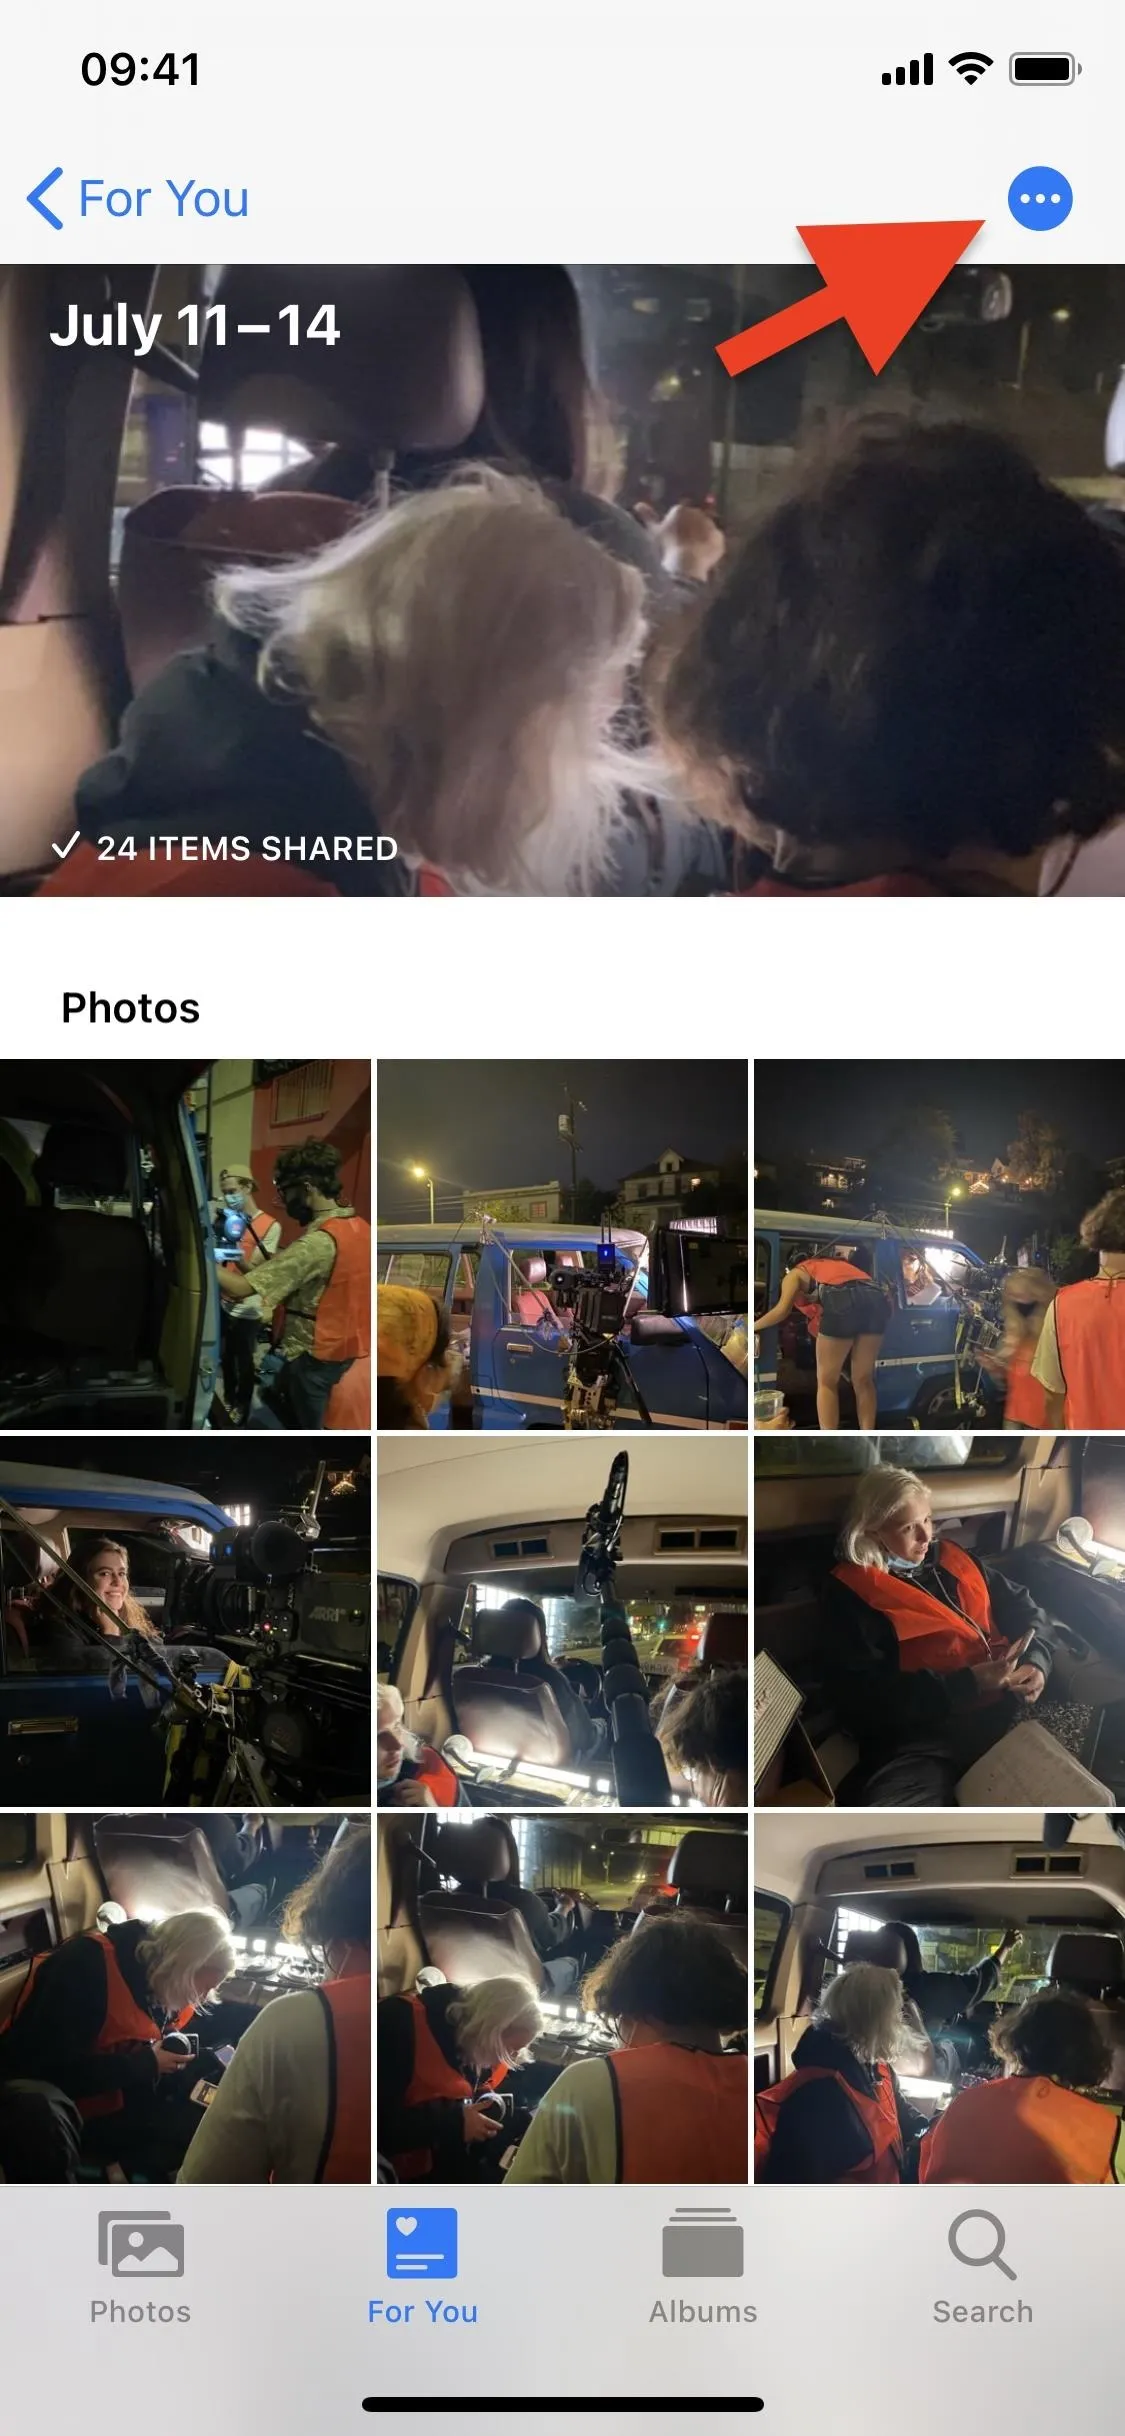
In each album, you'll be able to see all of the linked photos and videos. Plus, you can tap on the ellipsis (•••) button to copy the iCloud link to your clipboard for further sharing (you can also copy the link from the quick actions on the shared album's preview).


Canceling Shared iCloud Album Links Early
By default, any iCloud link you share is live for 30 days. That means that the people who receive it have a month to view and download the photos and videos in the link. Although you can't adjust the 30-day limit, you can stop sharing the link with everyone who has it.
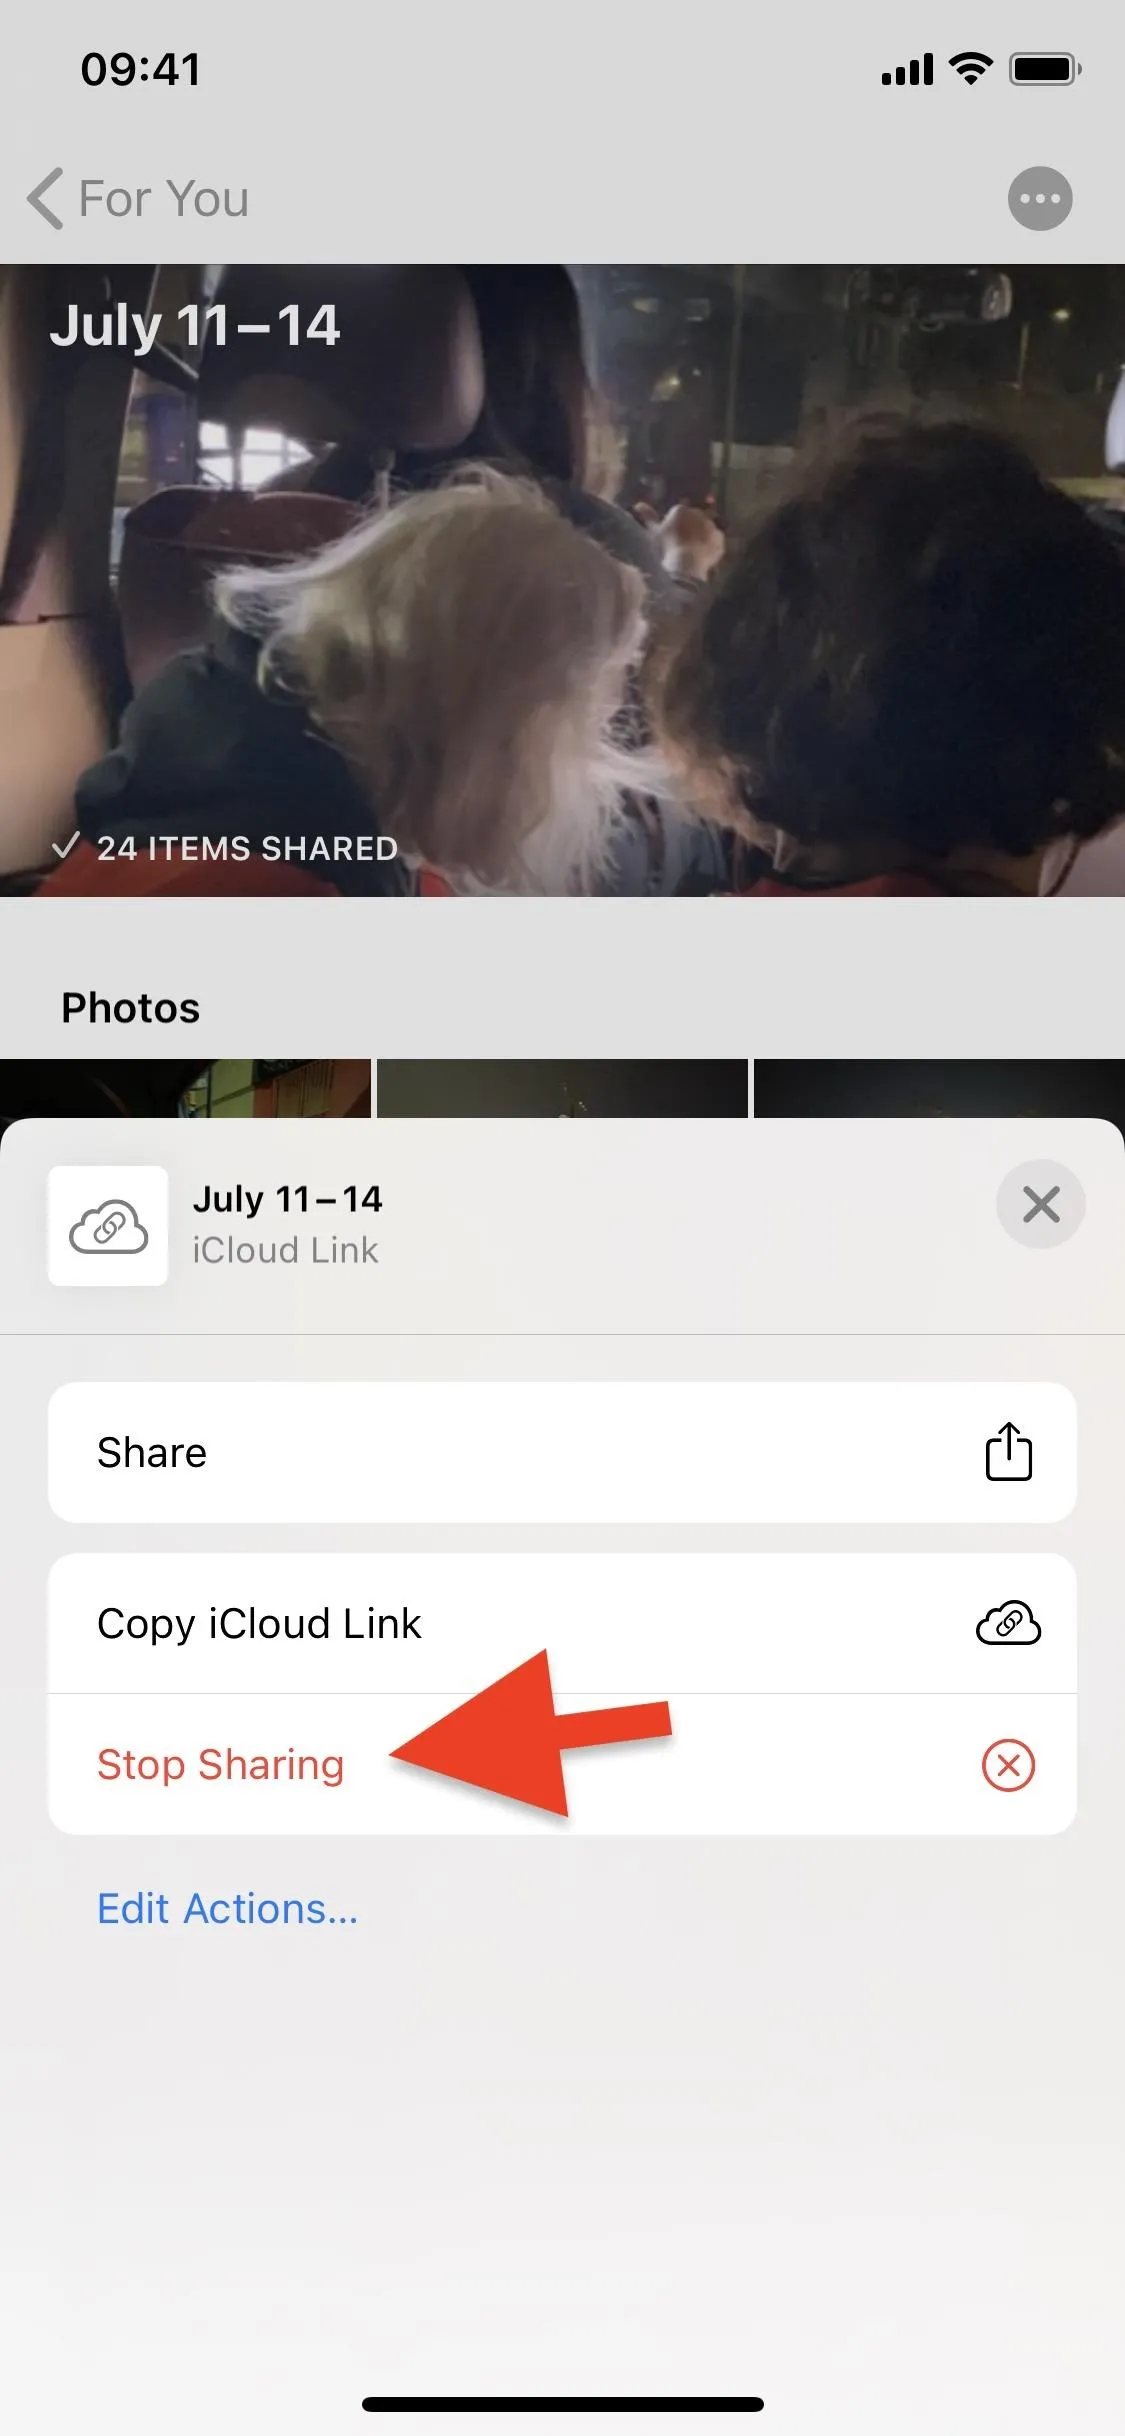
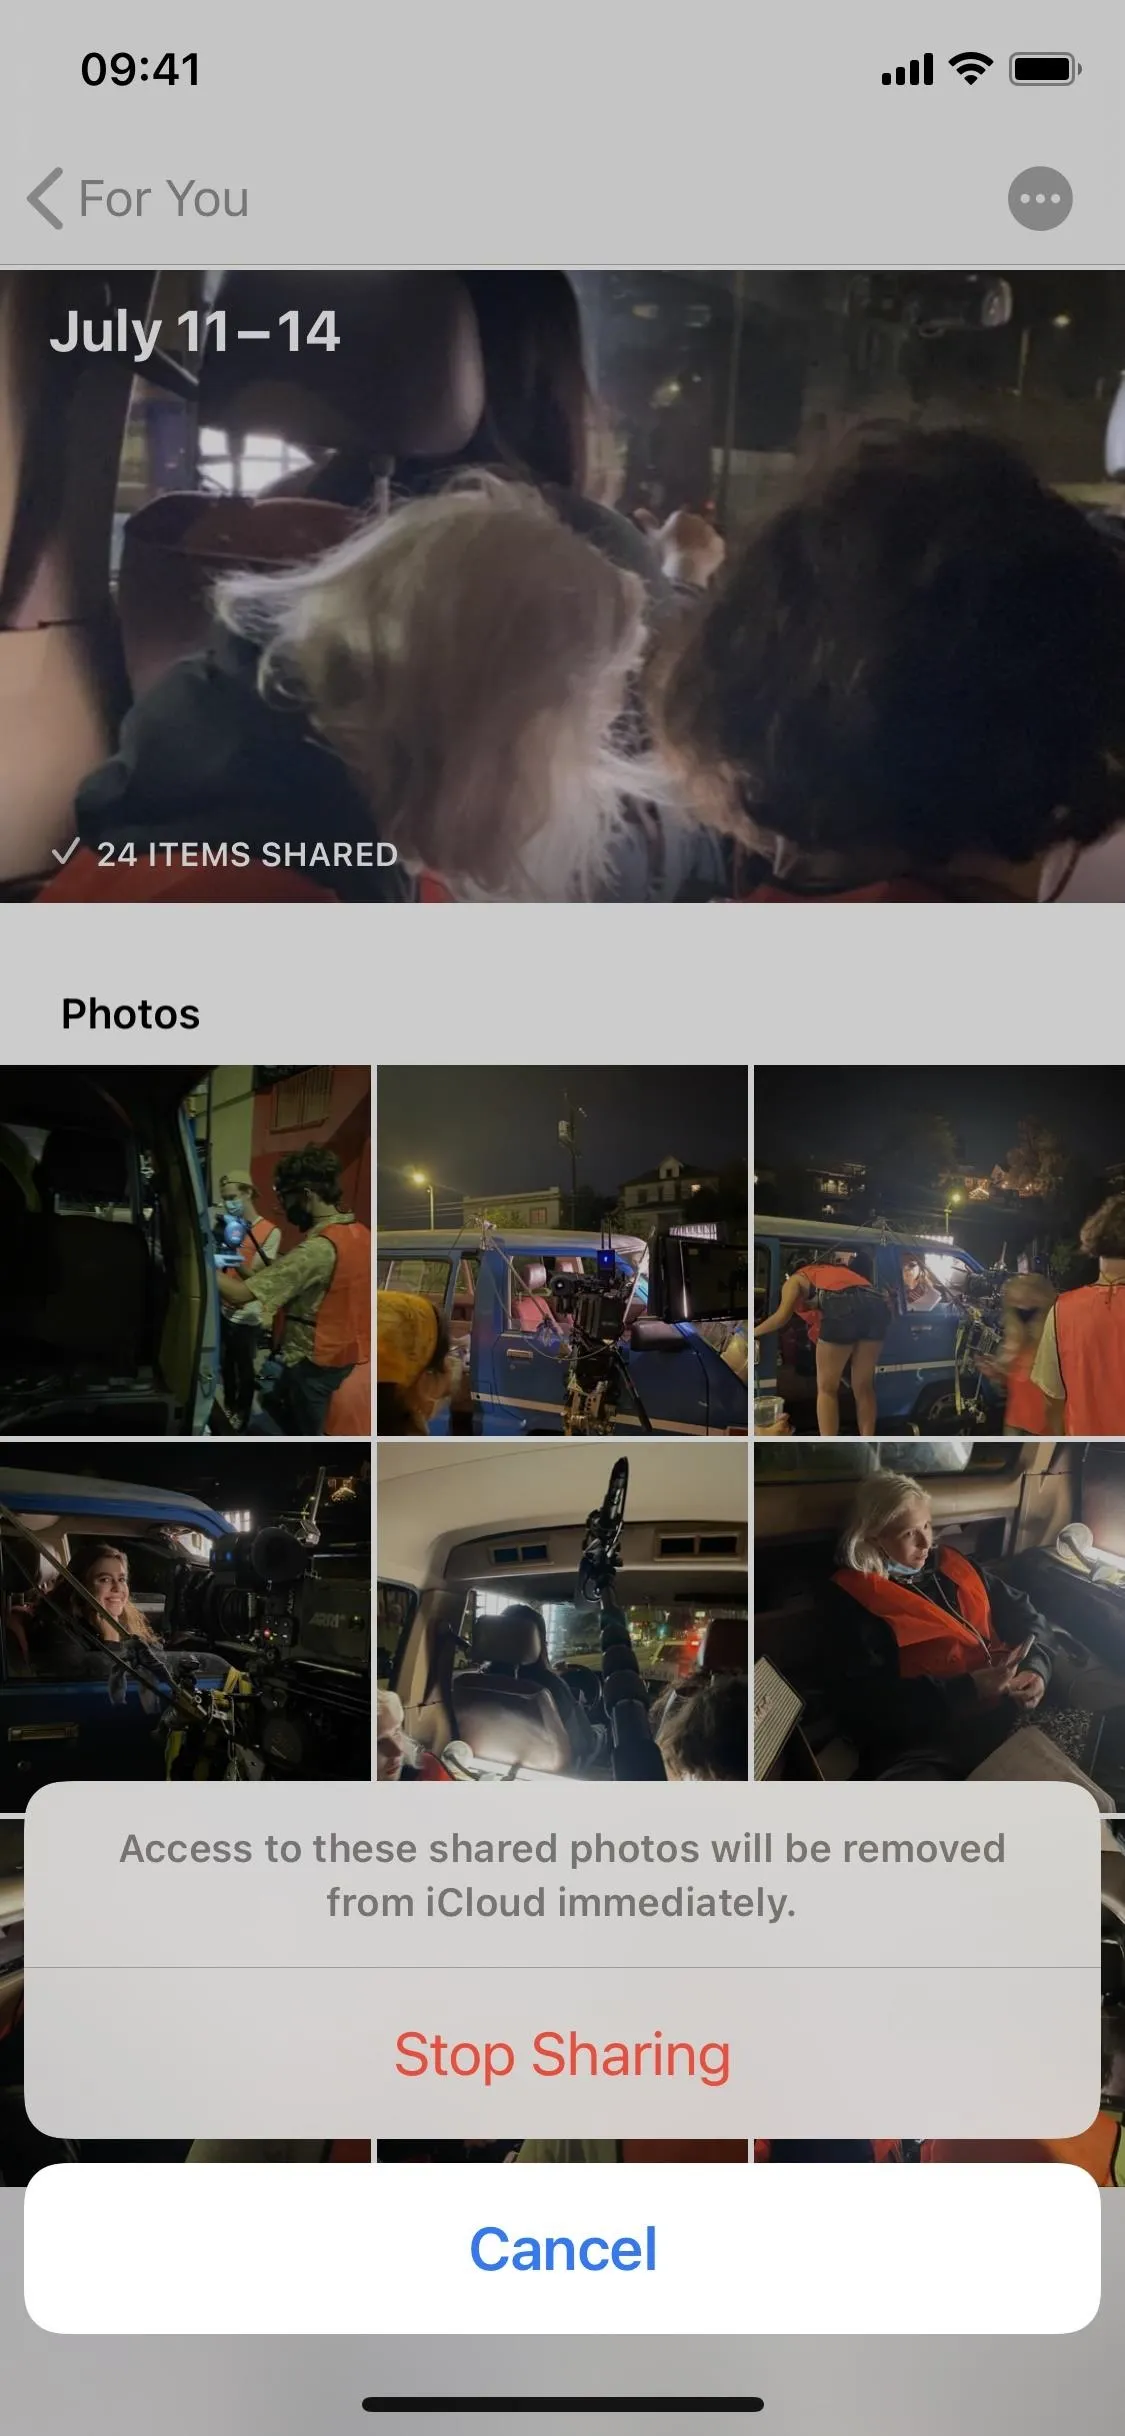
When viewing the shared album's preview from the Recently Shared section in "For You," you can long-press the preview, then choose "Stop Sharing" from the quick actions, then "Stop Sharing" again to confirm. Alternatively, if you have the shared album opened, tap on the ellipsis (•••) button, then select "Stop Sharing" from the action sheet, then "Stop Sharing" again to confirm.
Anyone that has access to your photos and videos via the iCloud link will be removed, and they'll no longer be able to view or download the items.


Cover photo and screenshots by Nelson Aguilar/Gadget Hacks



Comments
No Comments Exist
Be the first, drop a comment!