
Your writing is just that — yours — so the work you do in Apple Pages should remain private until you choose to share it. Apple seems to share this sentiment. As another symbol of its dedication to user privacy and security, the company includes a feature in its word-processing app for iOS that allows you to lock documents behind a password, as well as with Face ID or Touch ID.
However, while biometrics help make accessing locked word documents a breeze, iOS will require you to enter your chosen password should they fail. That means you need to remember your password, as you could go months without having to enter it. Worse yet, there isn't any way to recover the document without that password unless the file has collaboration enabled. Then, the other users may be able to give you the password. It's something to keep in mind before diving into the steps below.
Locking Your Pages Document
Locking a document with a password is pretty straightforward, and doing so will encrypt the file with 128-bit AES encryption. Just be aware that adding a password only affects the current document and subsequent versions, not older versions.
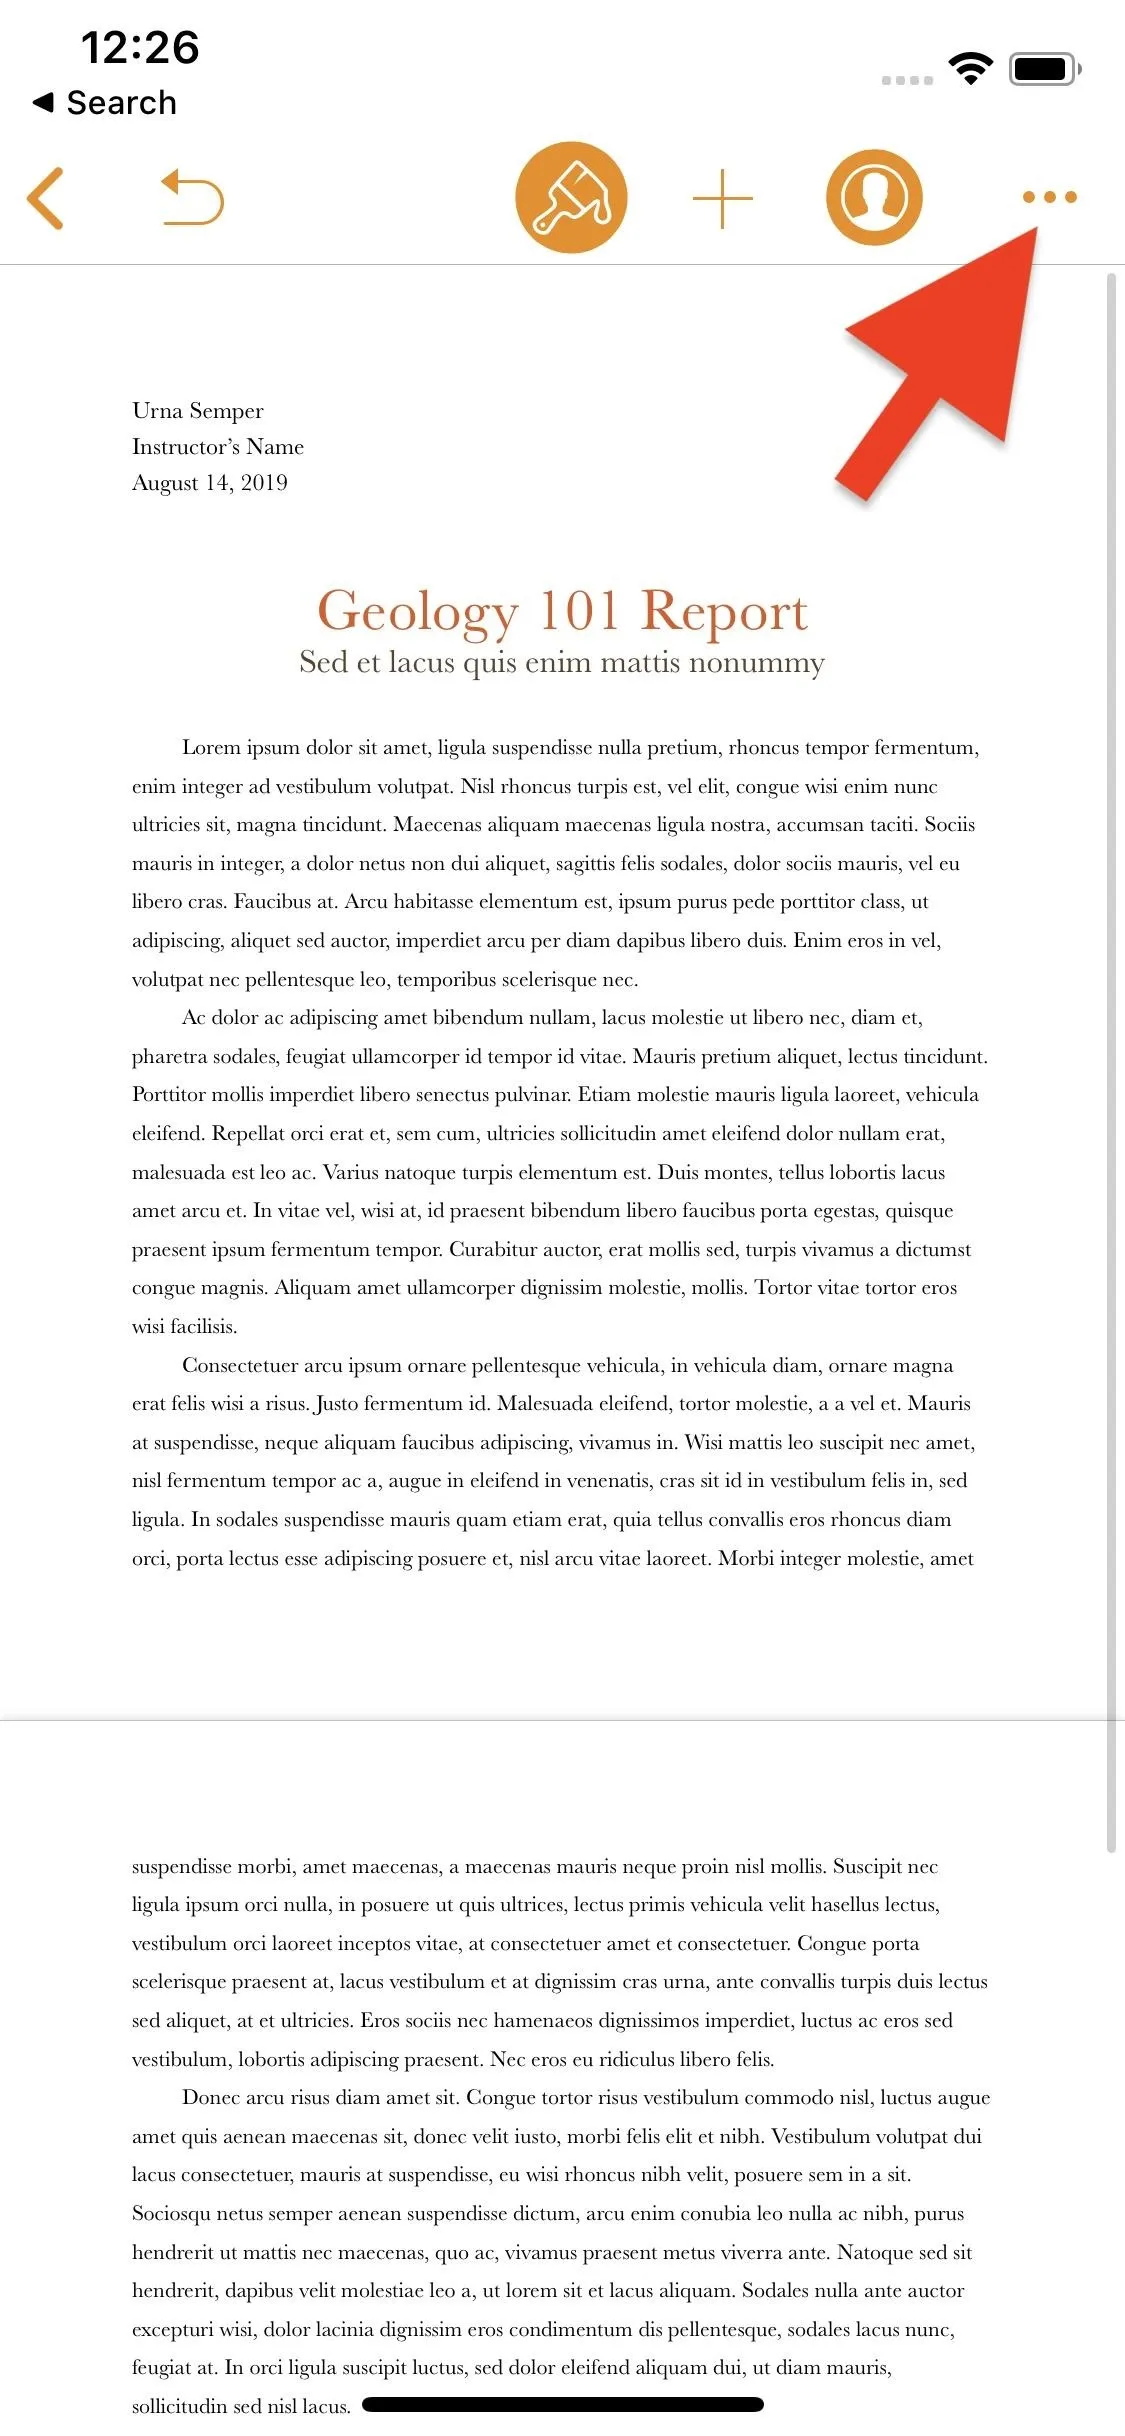
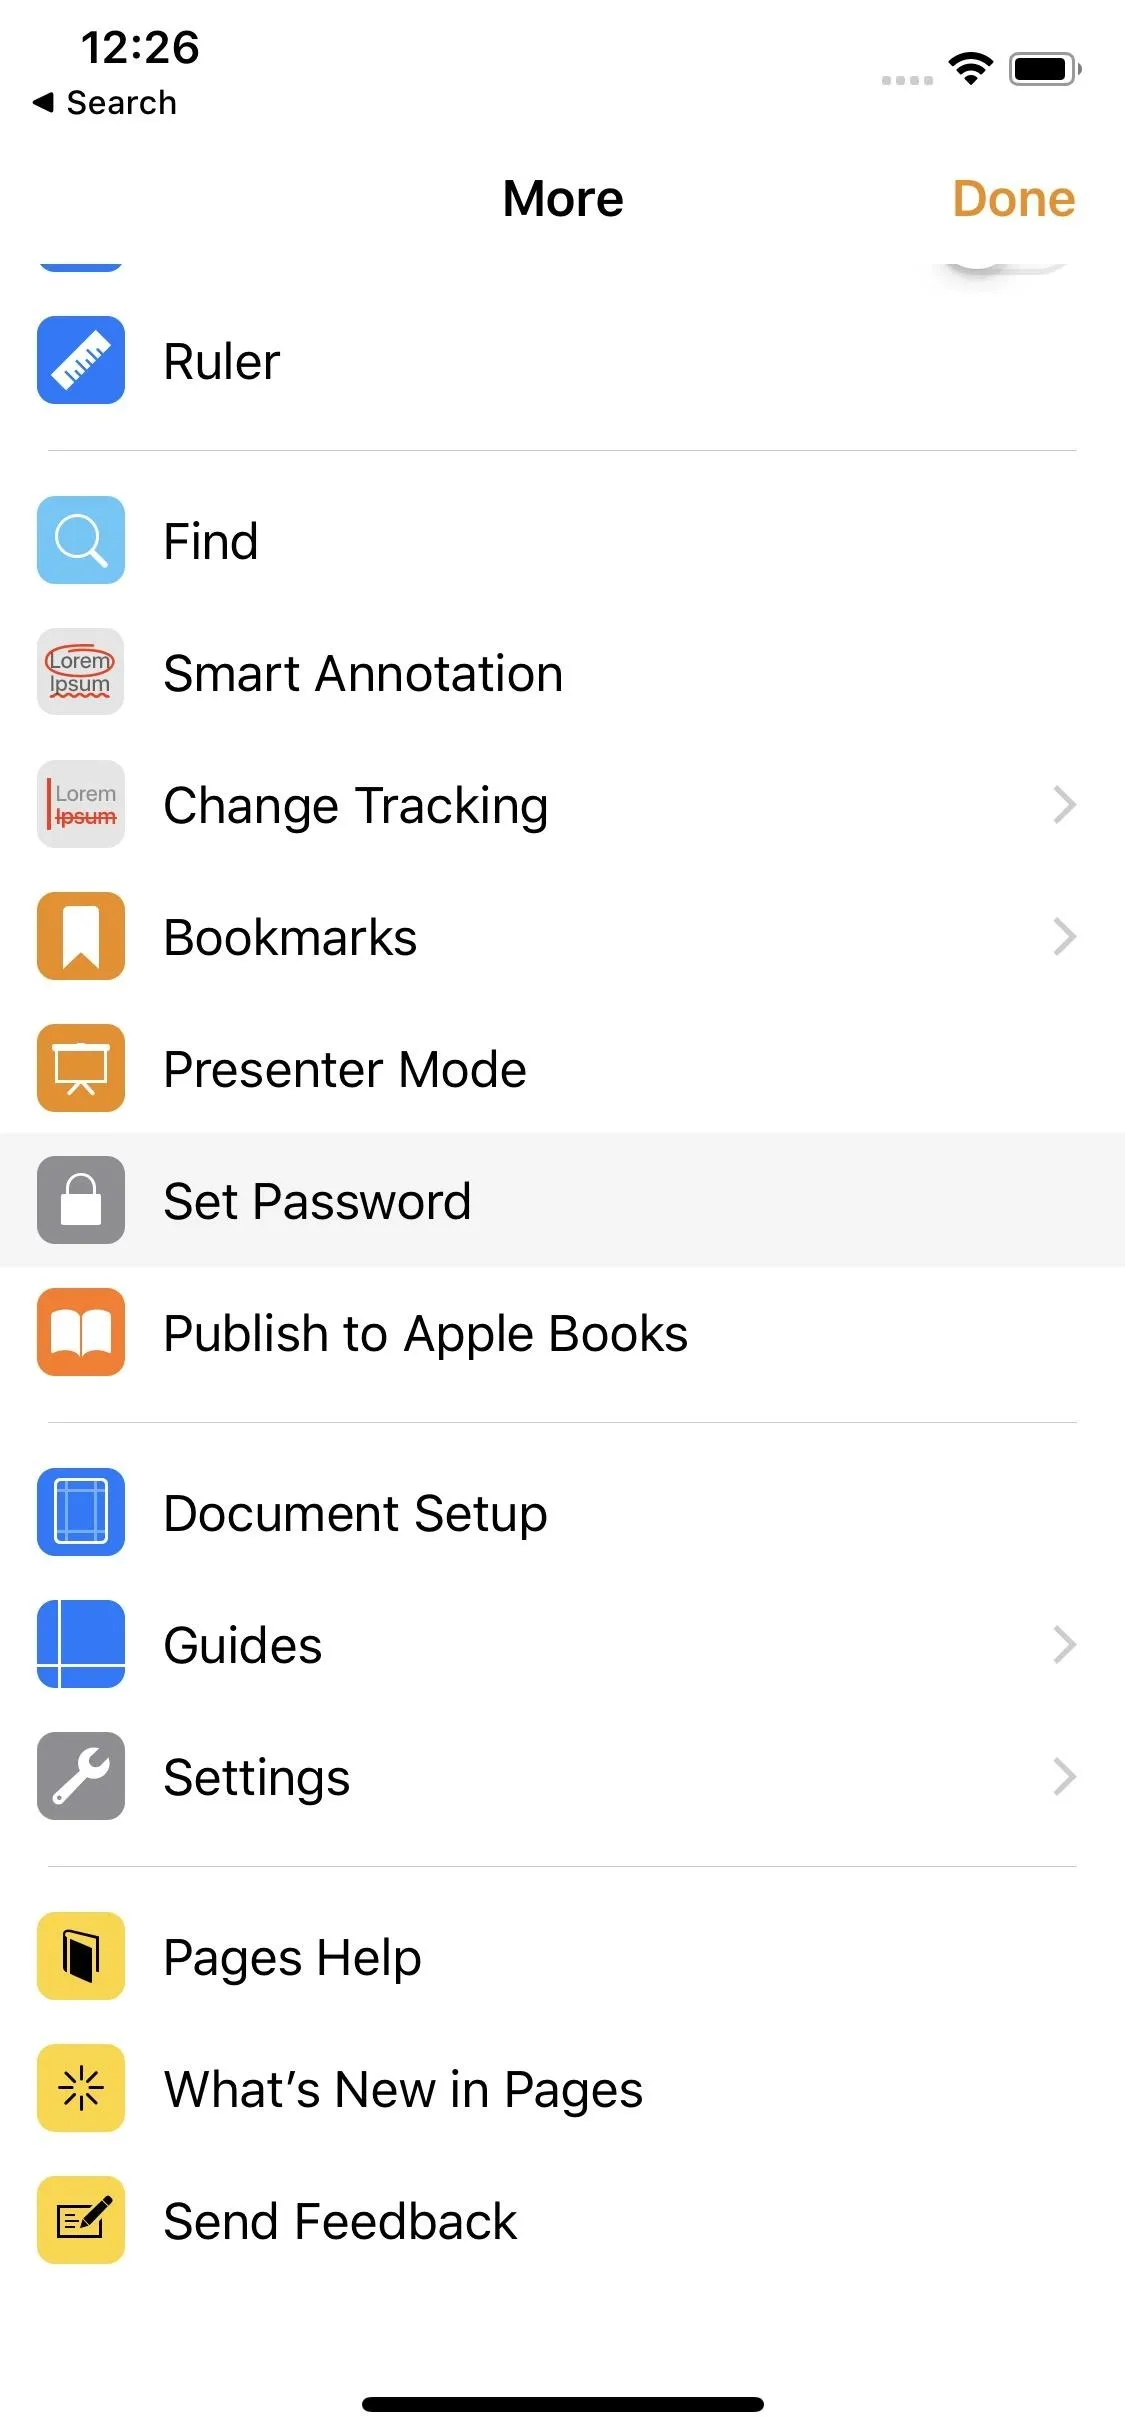
First, open the file in question, then tap the ellipsis (•••) in the top right. Next, tap "Set Password" and fill out the options on the following page. You can also set a password when sharing a document for collaboration via a link anyone can access (but you should stop sharing first to prevent collaborators from opening up an older version, then share the file again).
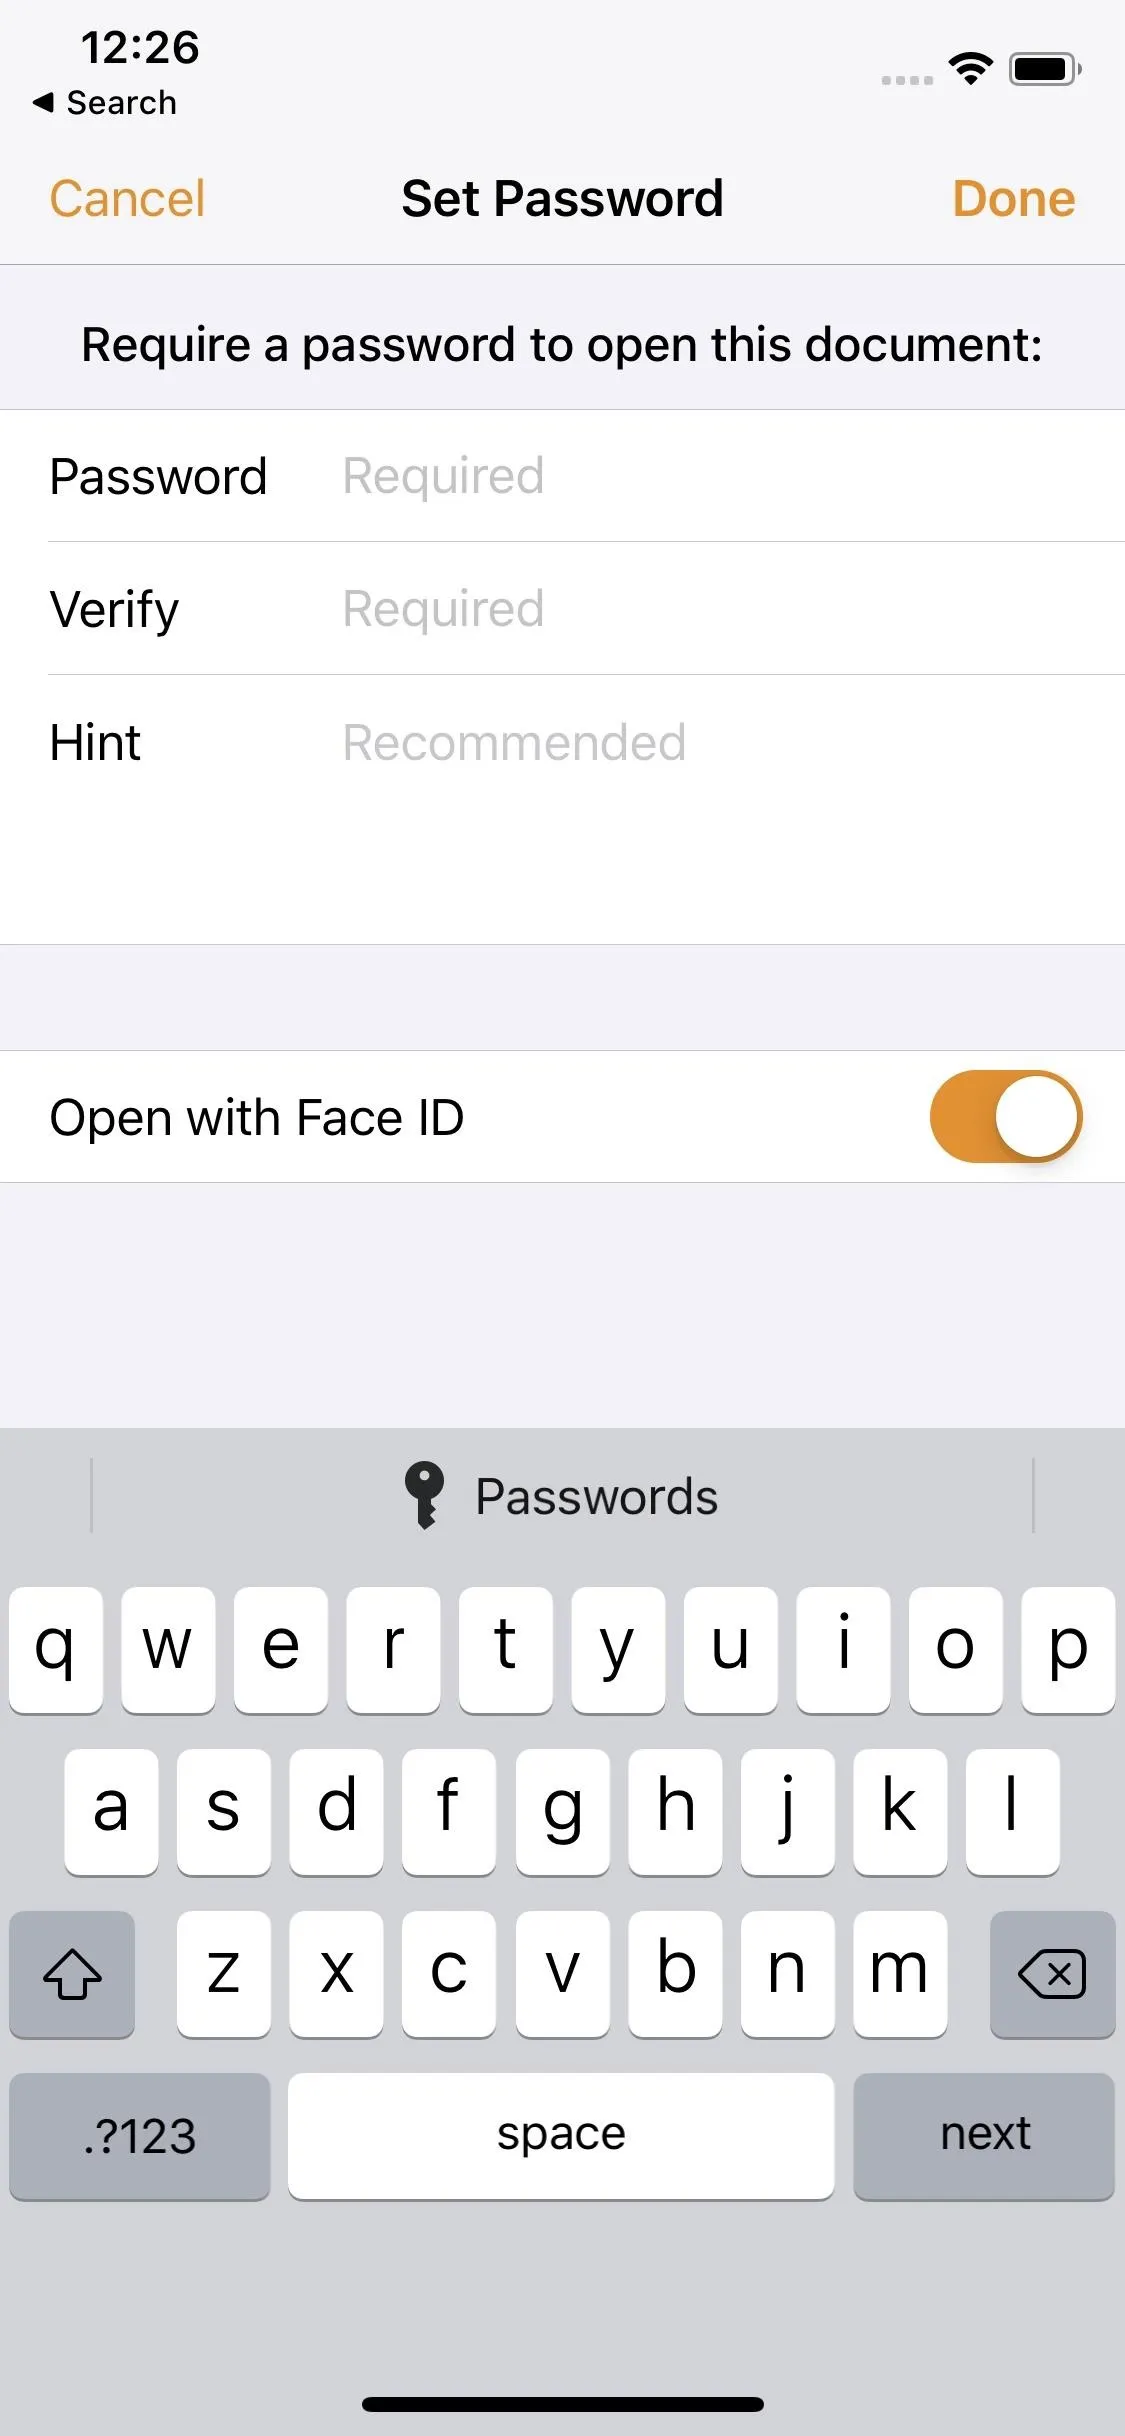
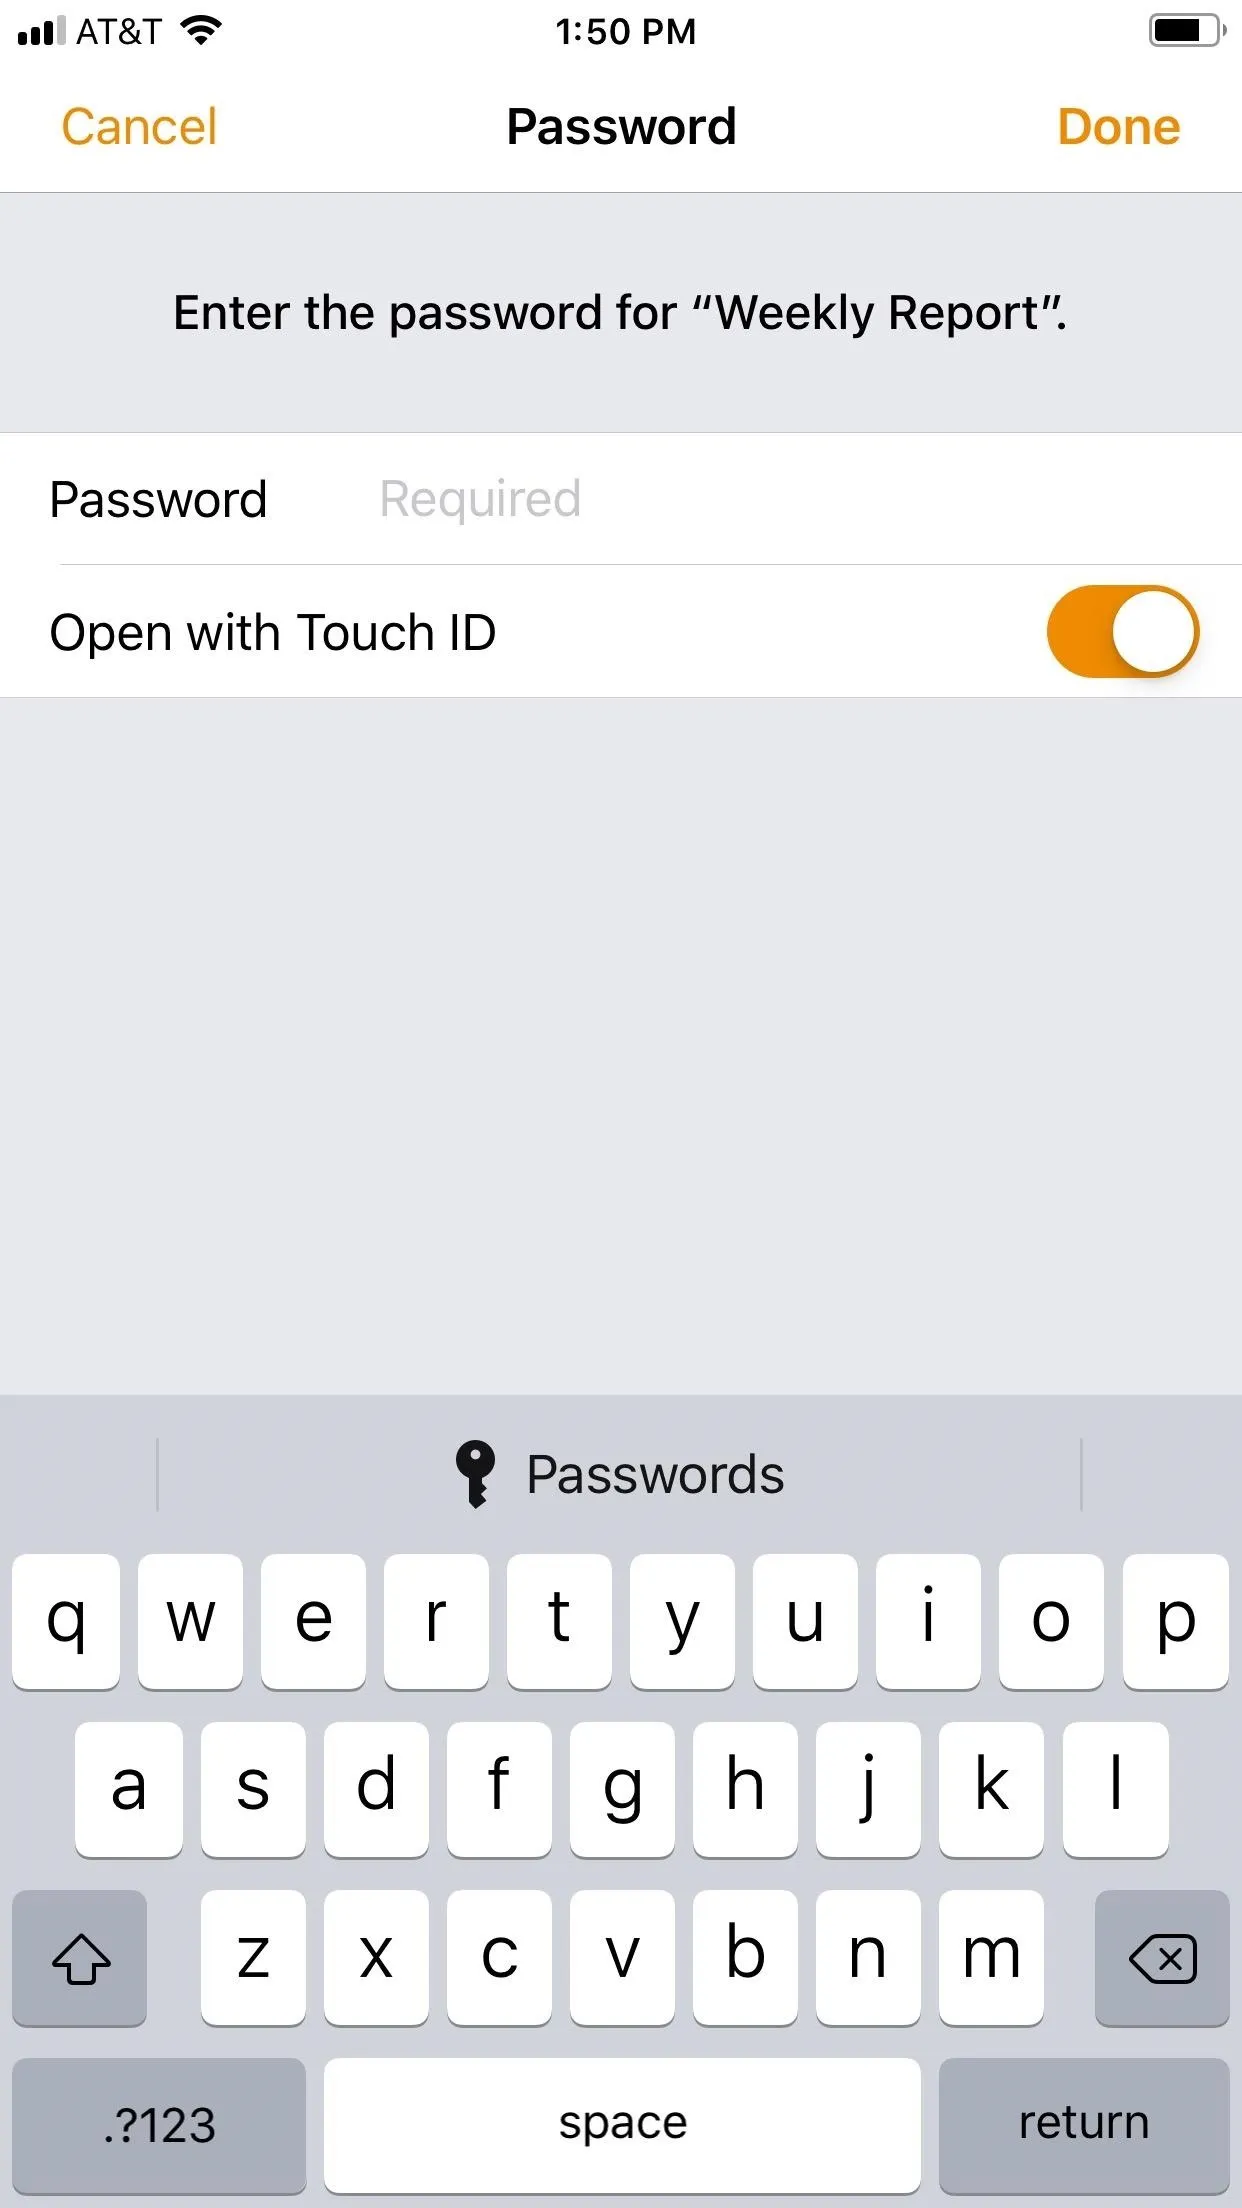
You'll need to enter a password, then verify that password. Passwords can consist of numerals, capital and lowercase letters, and other characters on the keyboard. If you really want your document to be secure, pick a strong password or use a password manager like LastPass to generate one for you to ward off would-be hackers. Hopefully, one day, Apple incorporates its iCloud Keychain into iWork so you can auto-generate strong passwords more easily.
You can also provide a hint for yourself if you'd like, but we'd recommend storing the password in a password manager such as LastPass, 1Password, Dashlane, or Keeper, especially if you're protecting many Pages documents since each gets its own password. If you want to use Face ID or Touch ID to unlock your .pages file, make sure the "Face ID" or "Touch ID" toggle is orange.


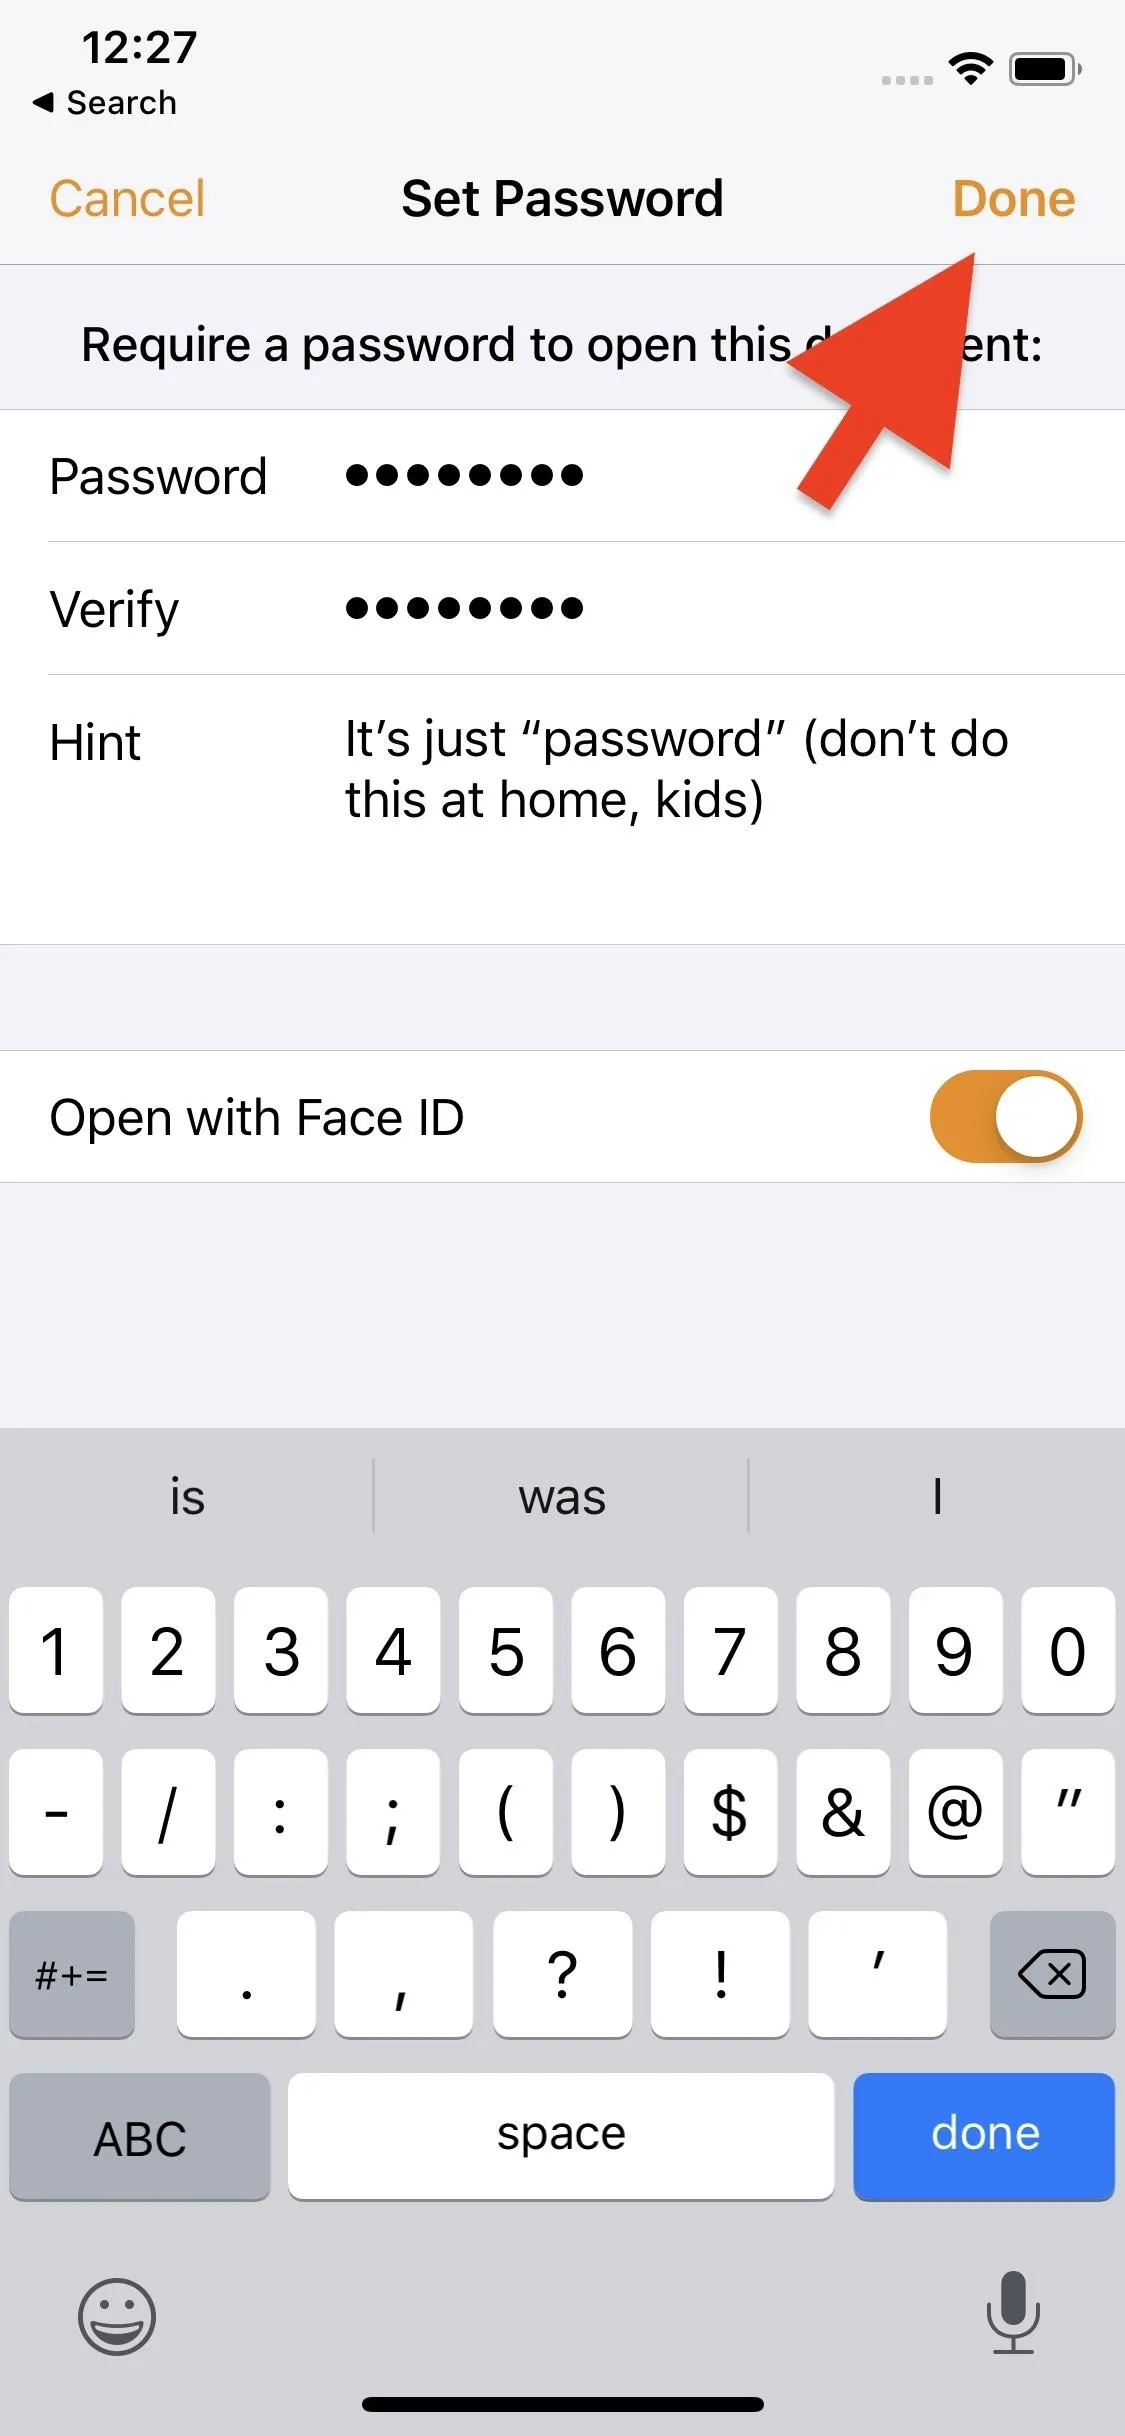
Once all fields are filled, tap "Done" to return to editing the document. Your passwords will need to match before you can move on.
Opening a Locked Pages Document
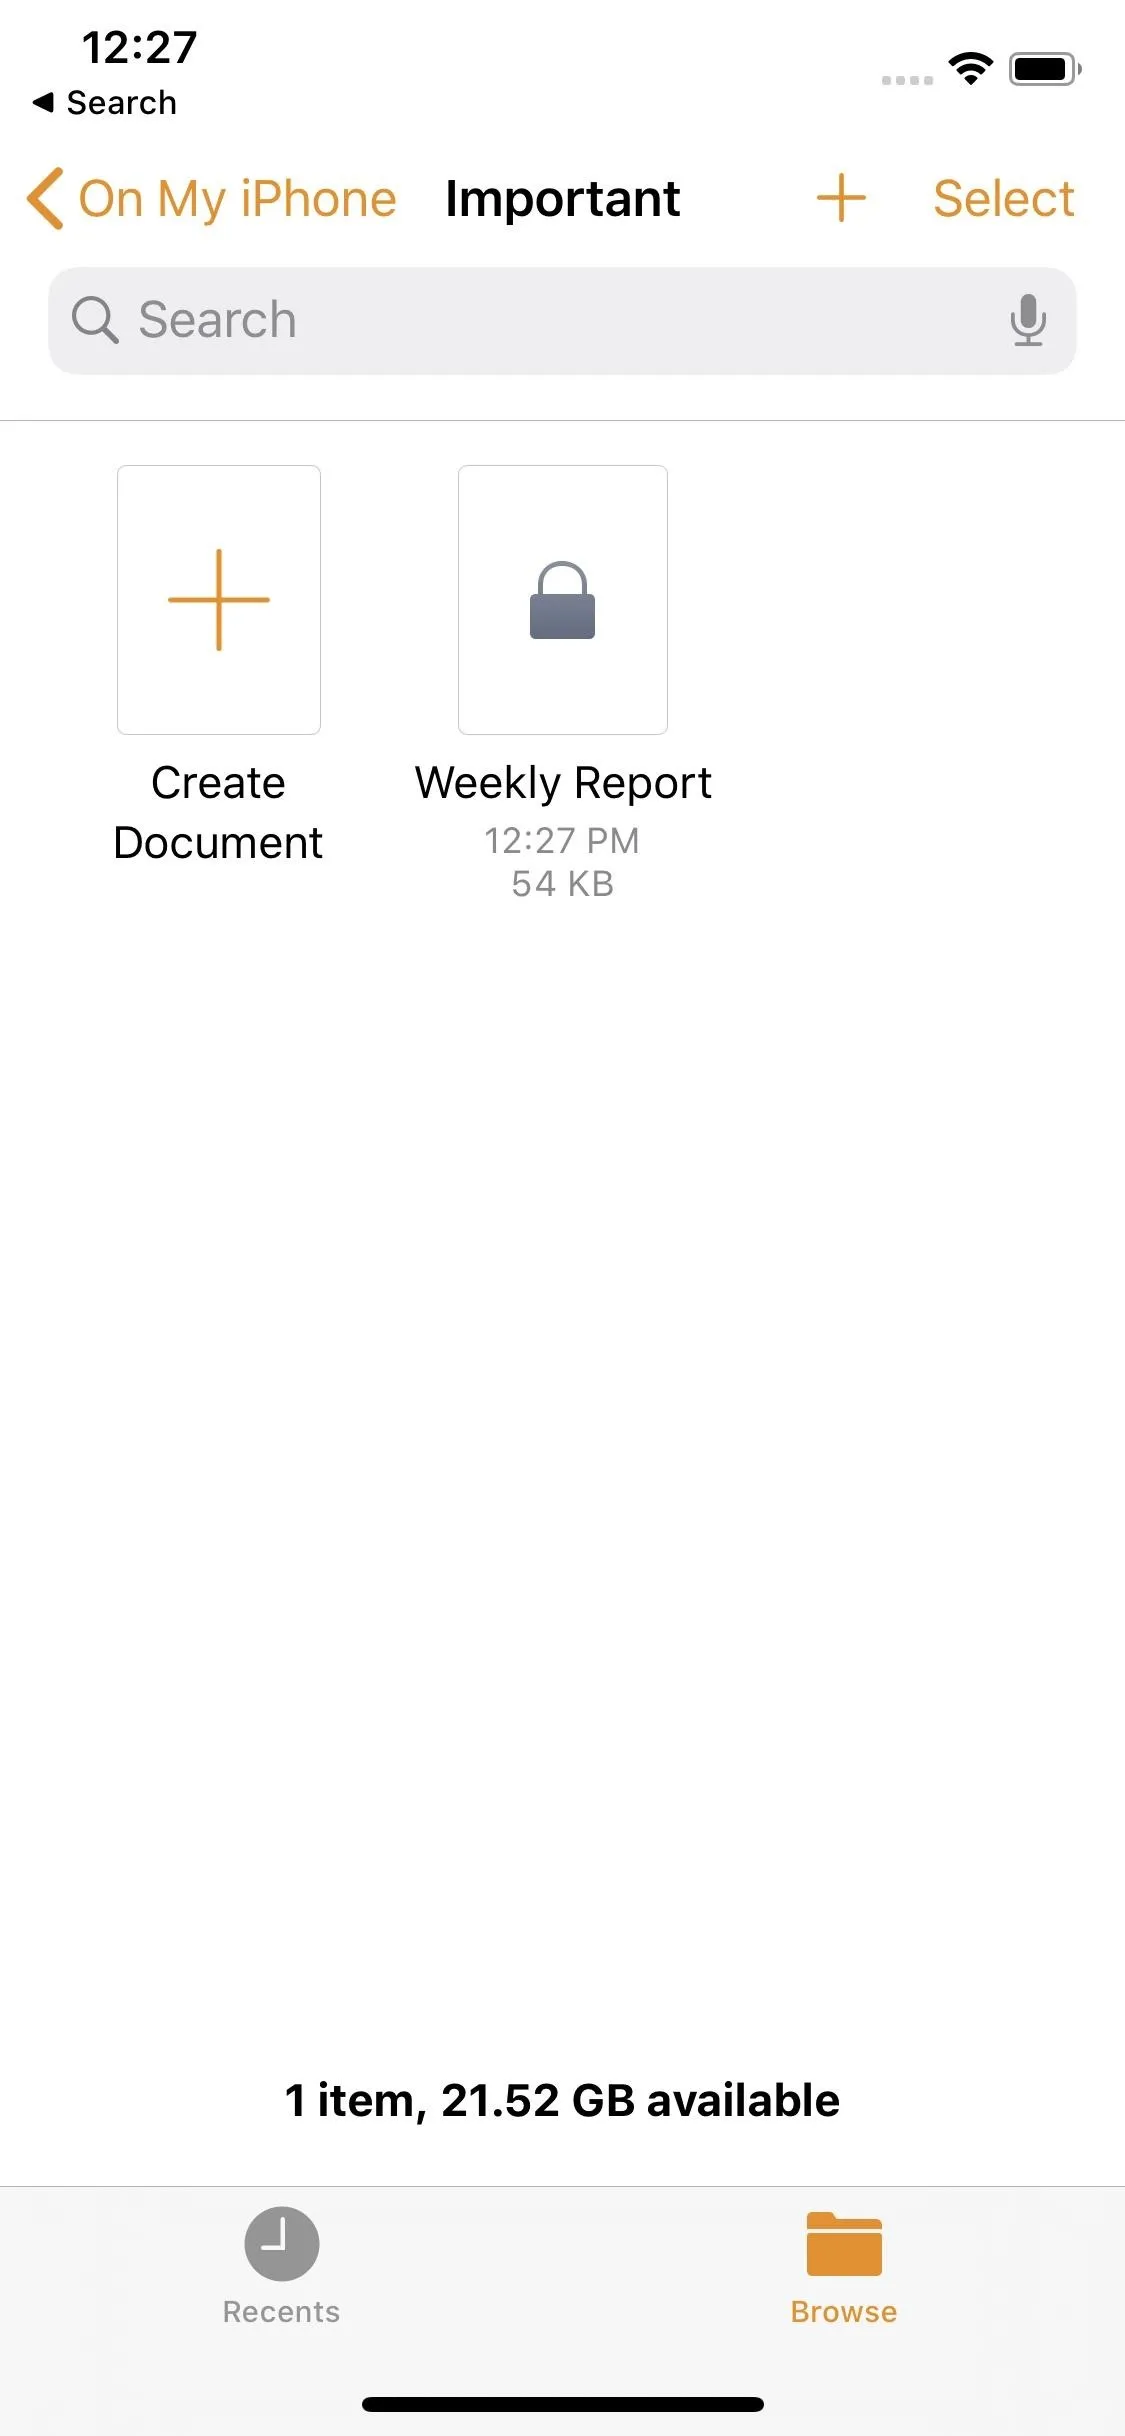
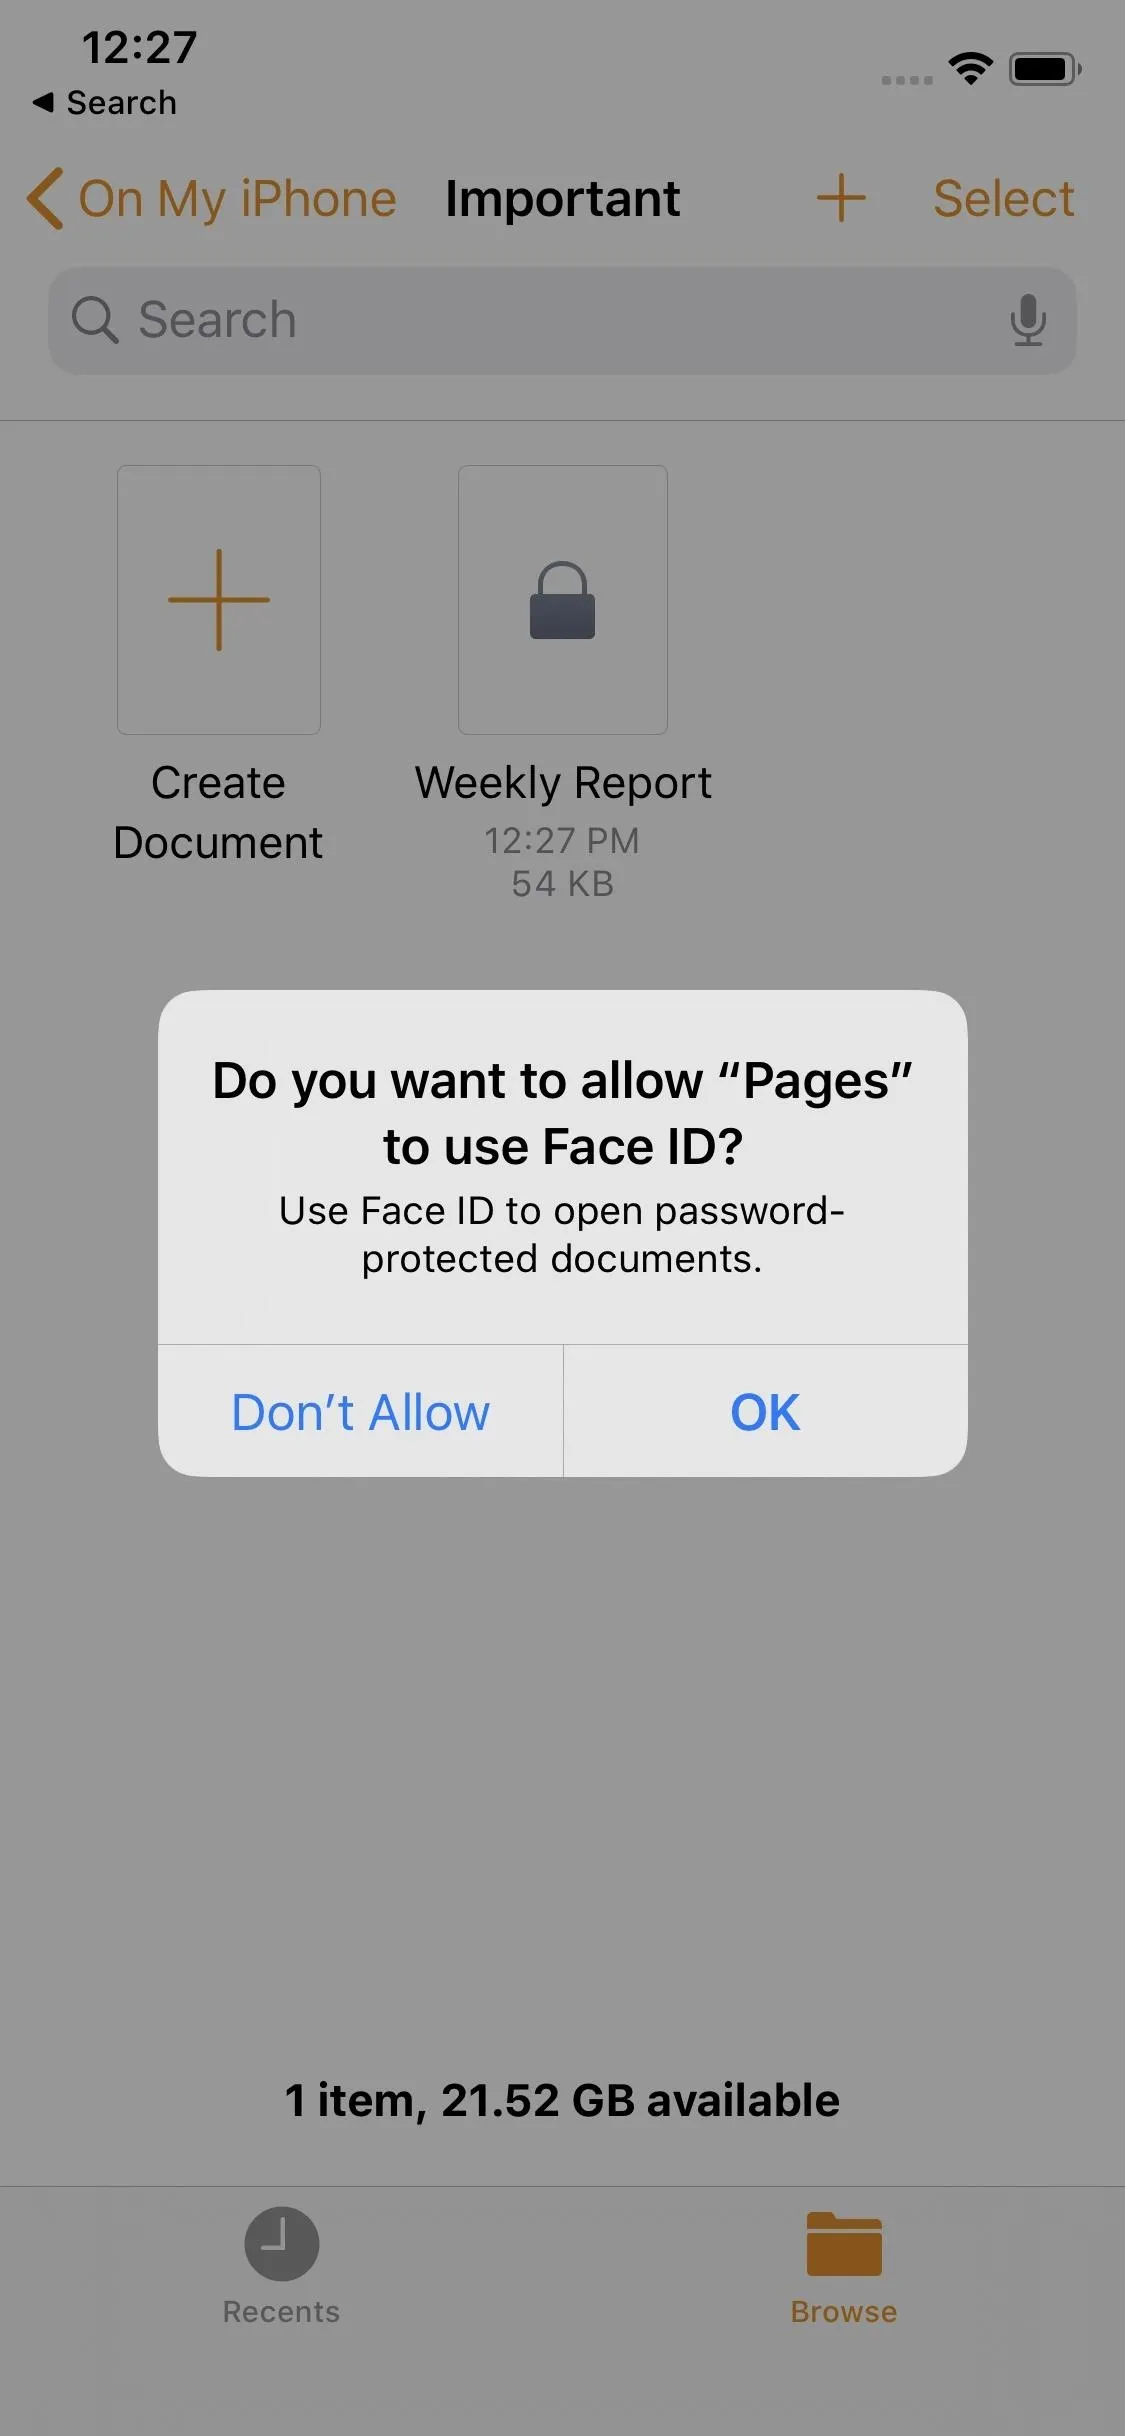
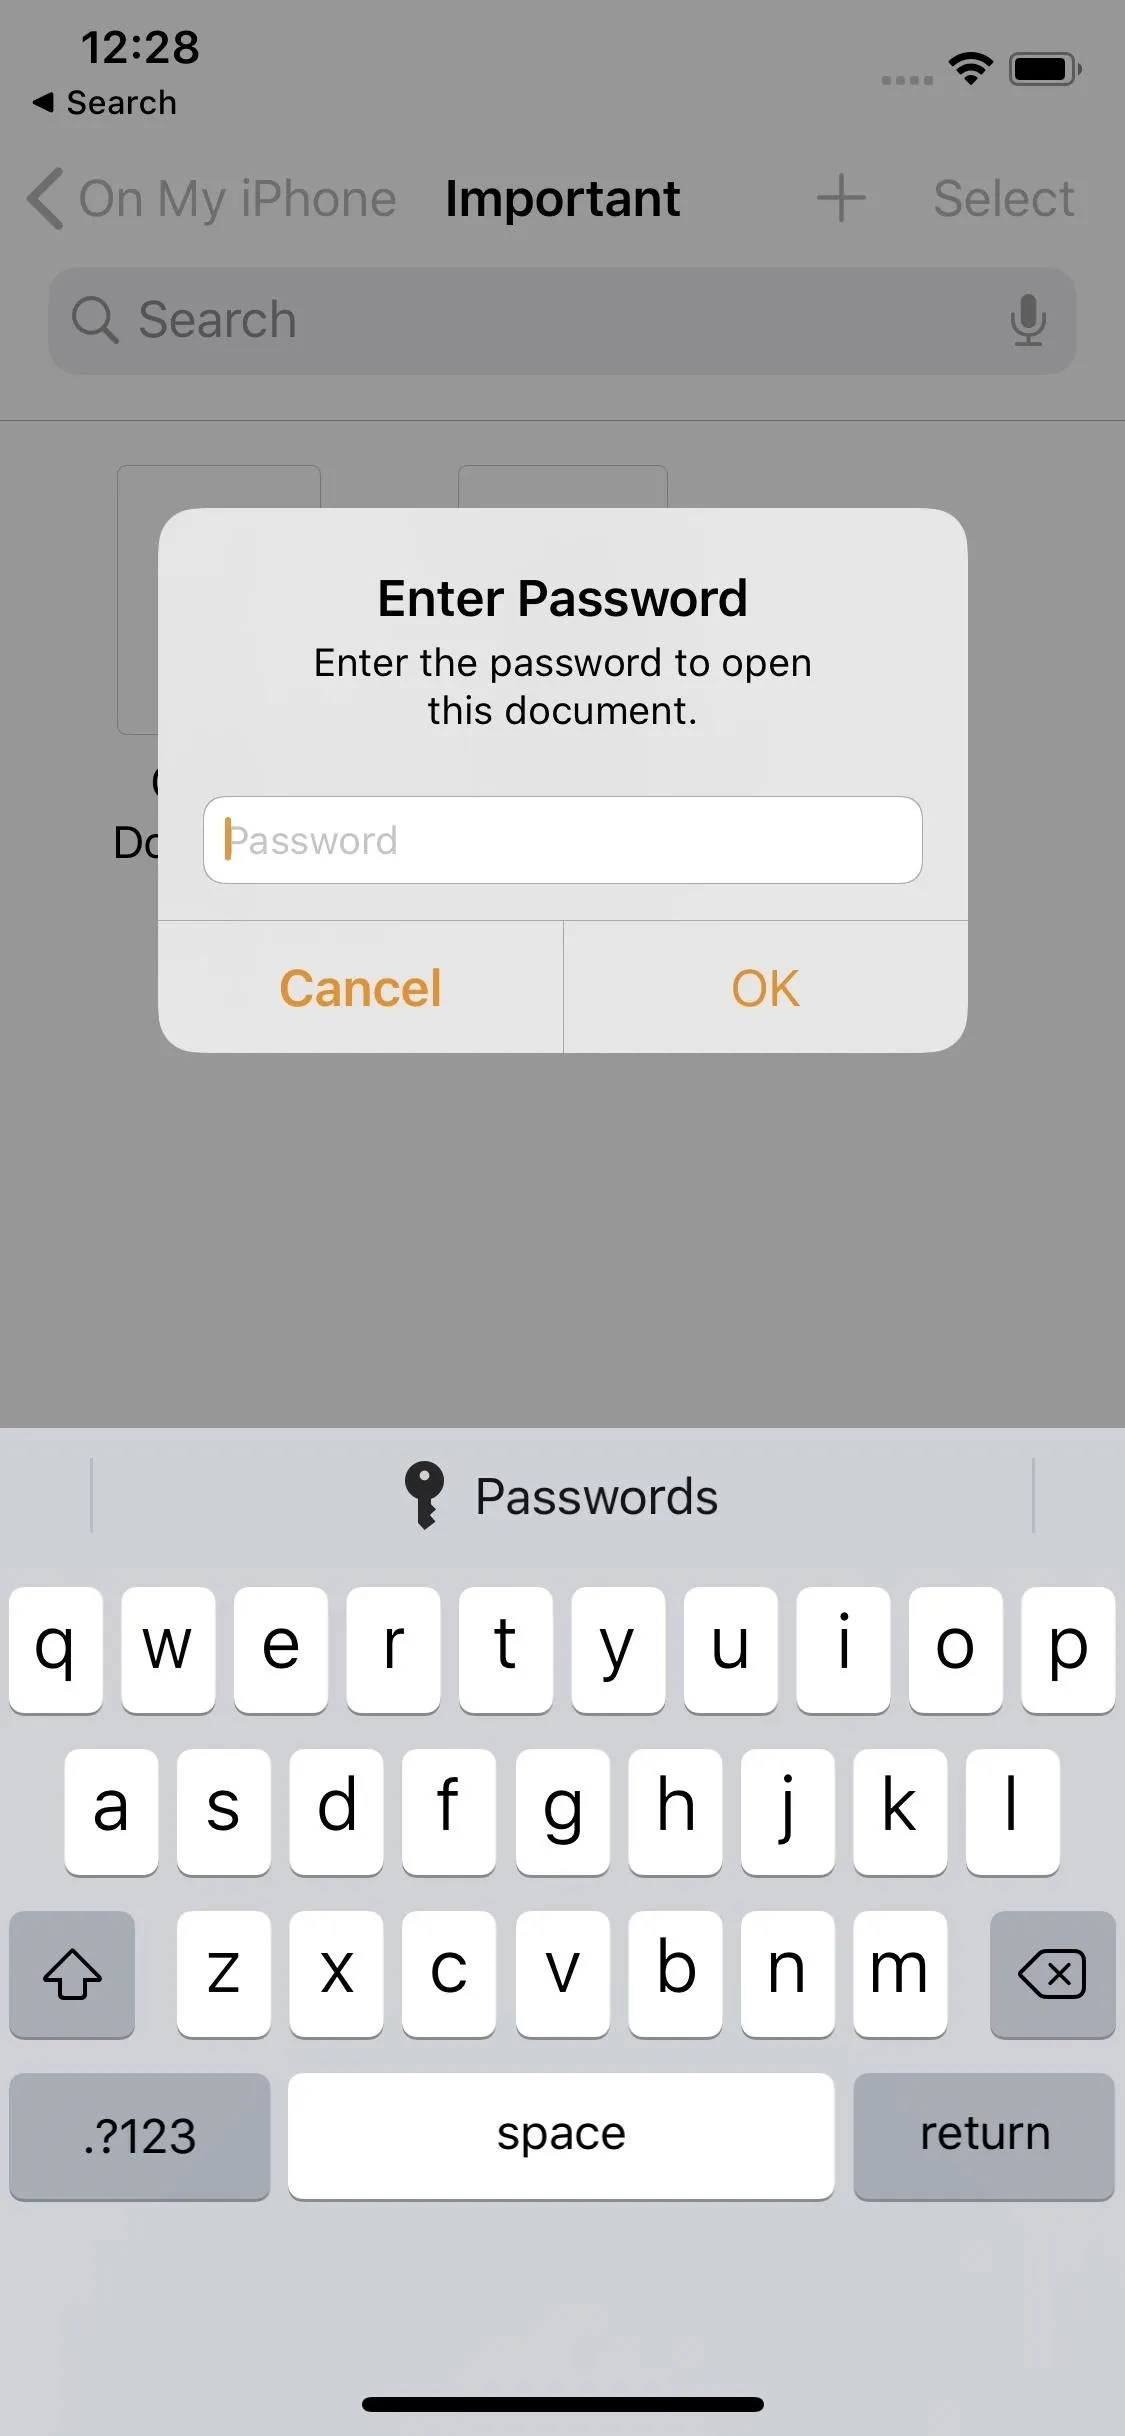
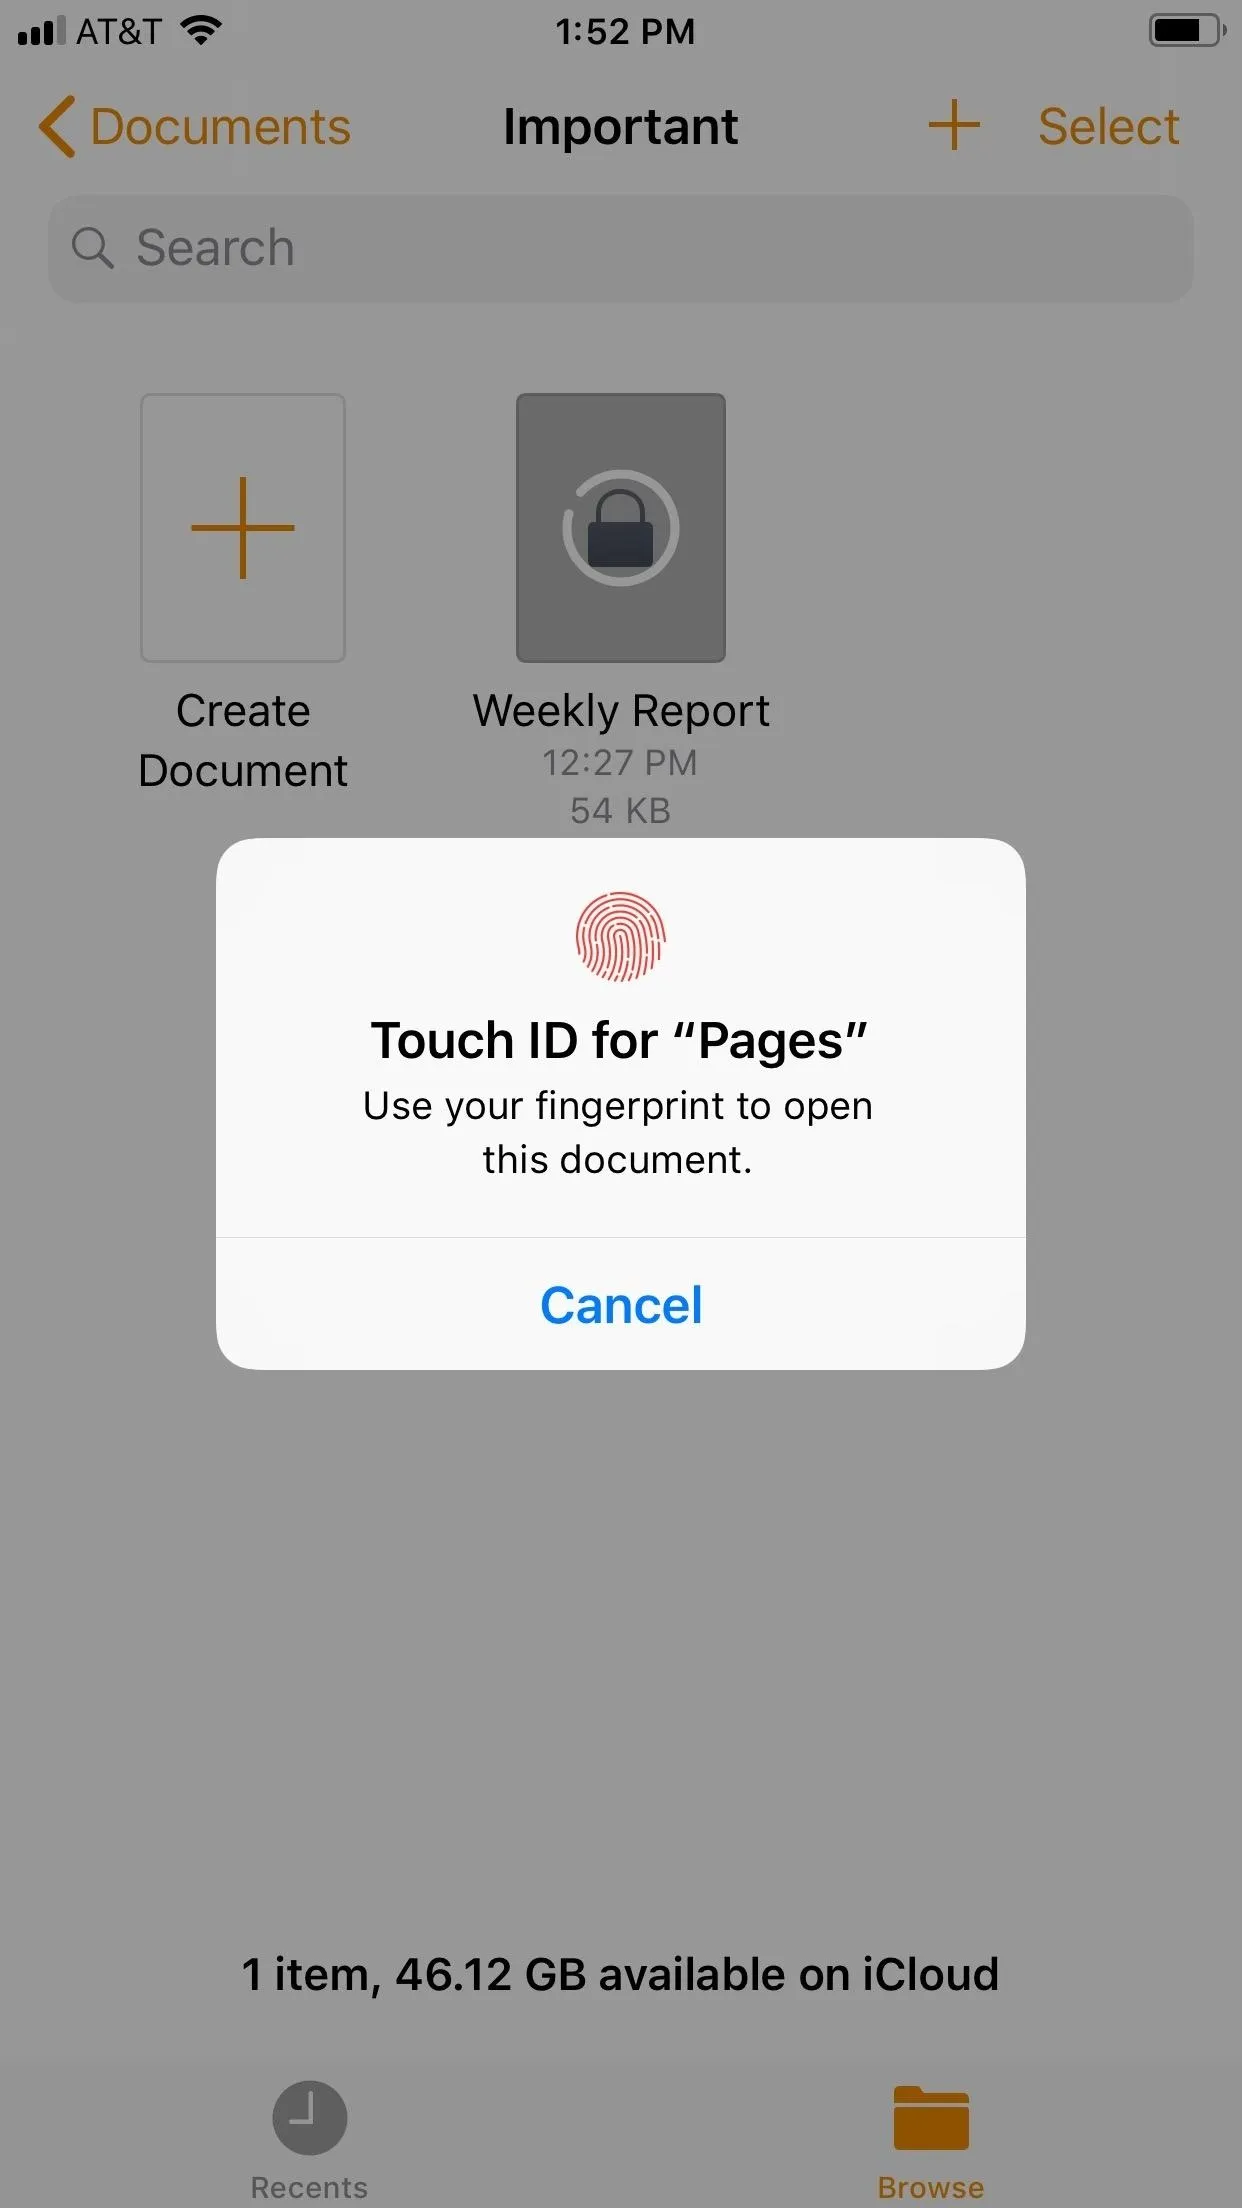
Back in the document browser (or Files app), you'll see that your file's thumbnail now sports a lock. Tap to open it. If you enabled Face ID or Touch ID, you'll need to permit Pages to use Face ID or Touch ID before authentication can begin. If you've previously done that, you should not have to do it again.


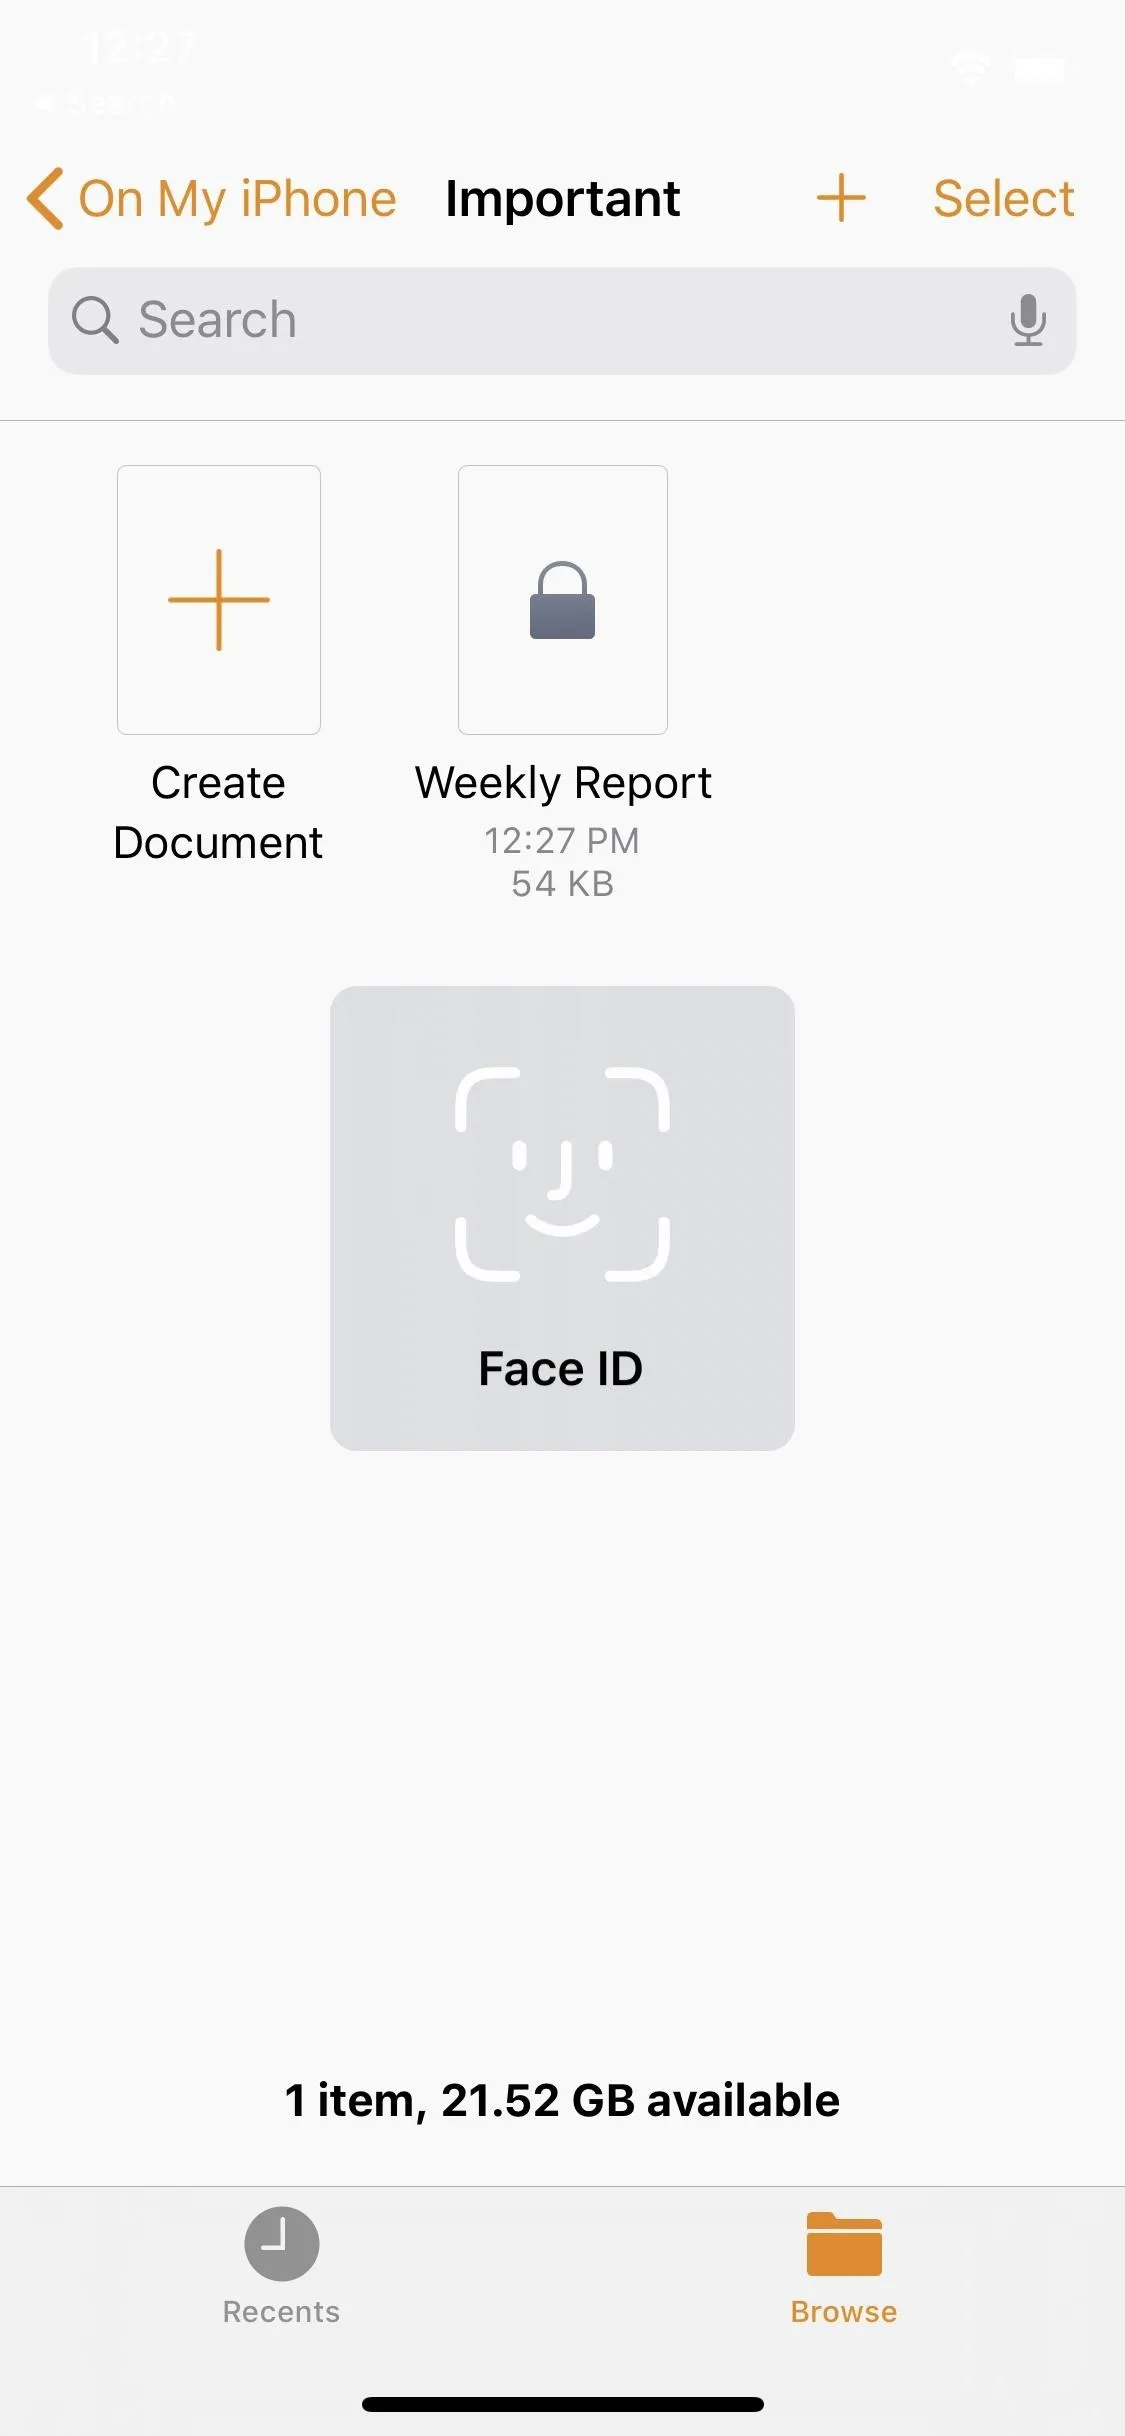
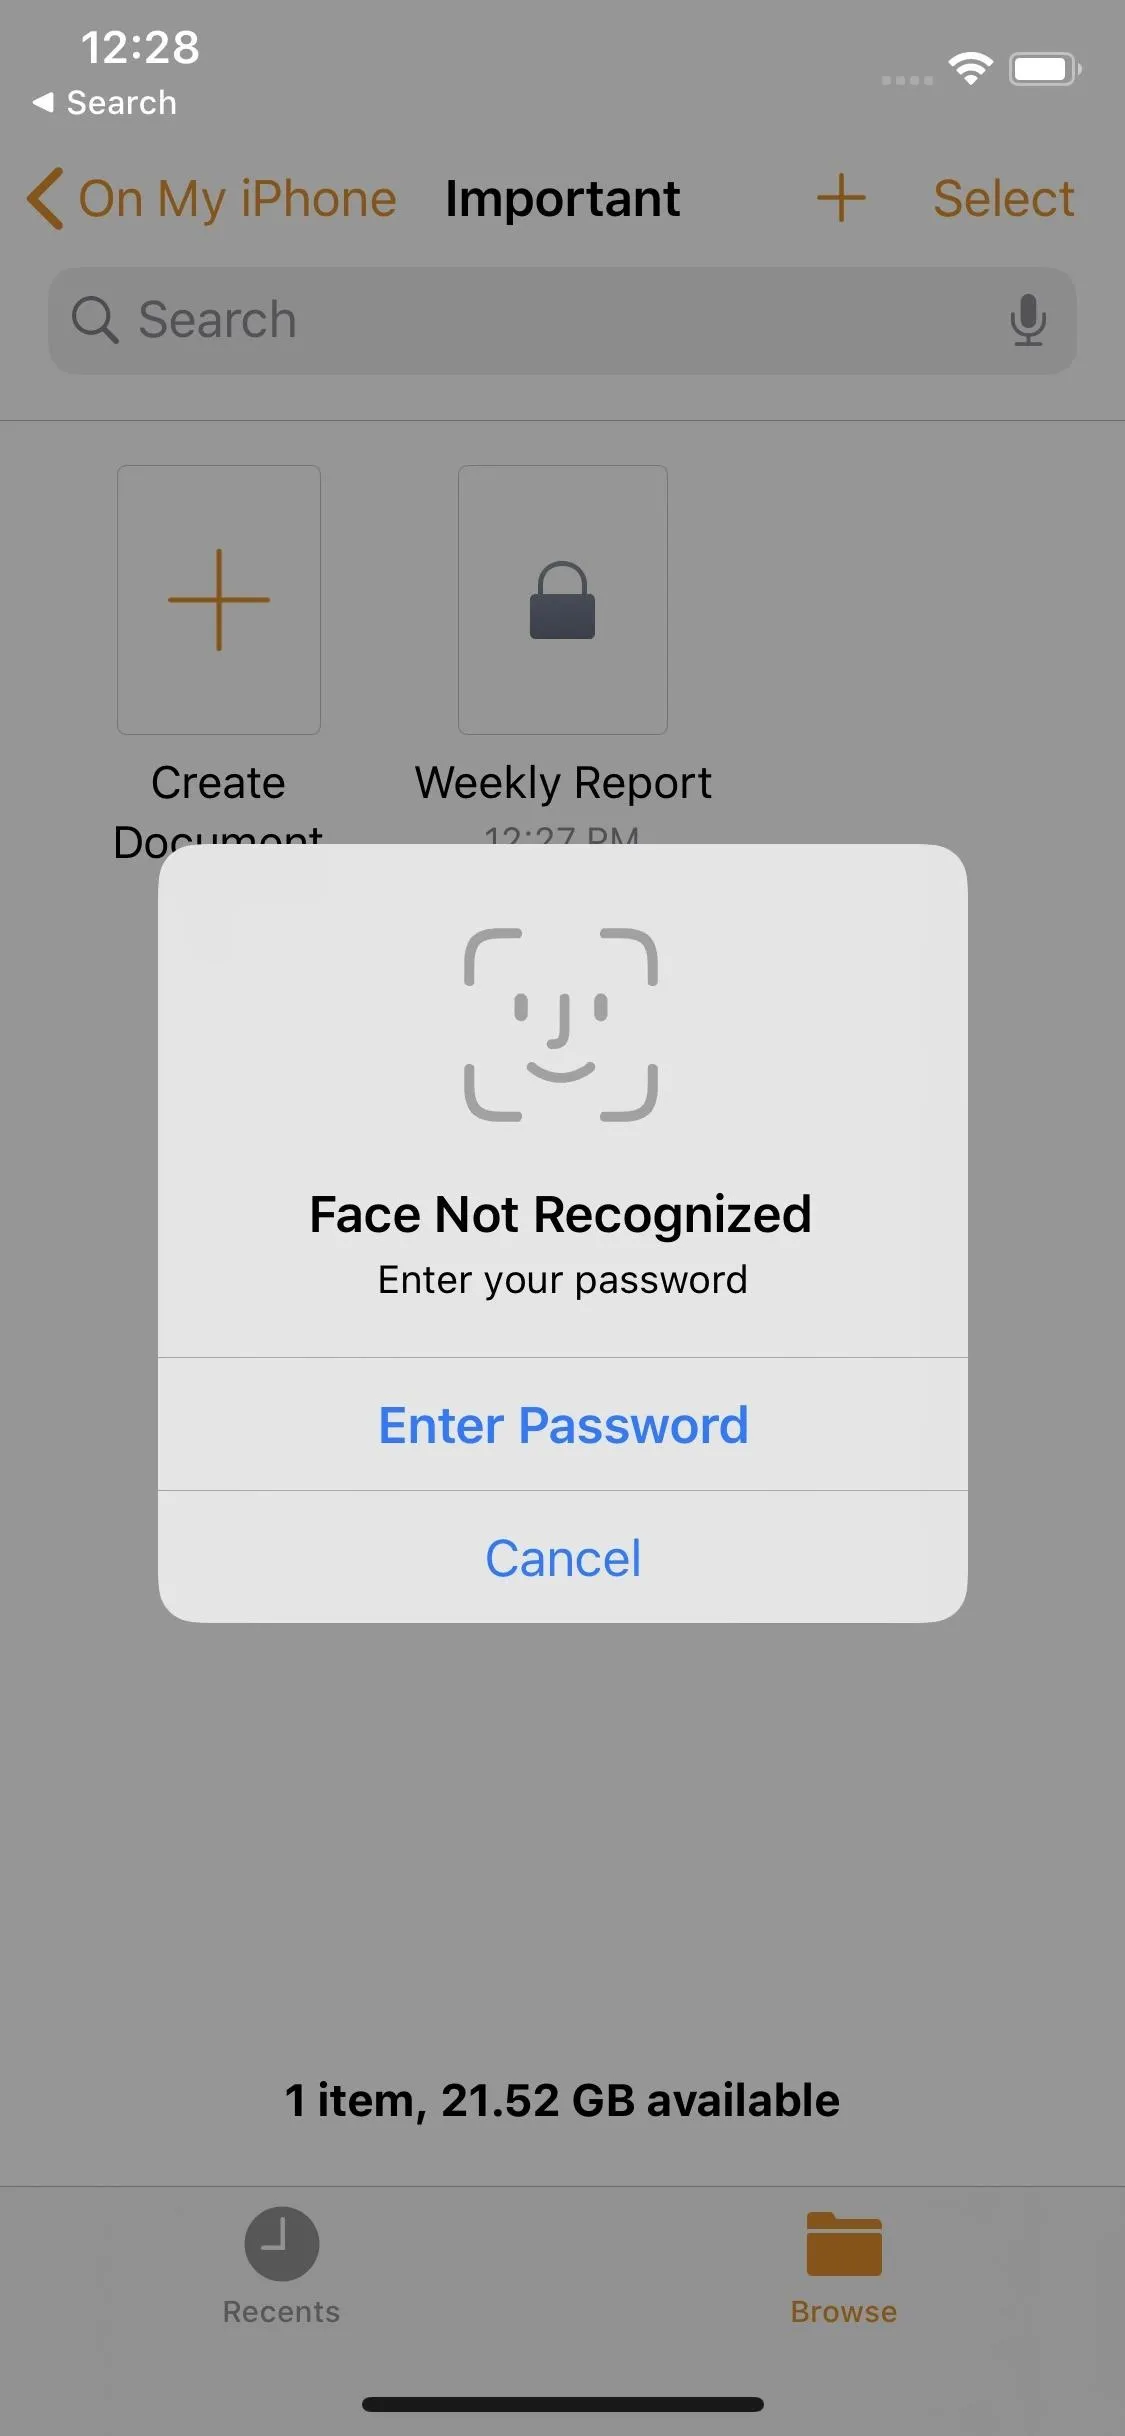
Once you grant the permission, you can use Face ID or Touch ID to unlock the document quickly. Once iOS approves the authentication, your .pages doc will open right up. If Face ID or Touch ID fail more than a few times, however, Pages will require that you enter your password. I hope you remember it!


Opening Locked Documents from Other iOS Devices
Securing a file will affect that document across all of your connected iOS and macOS devices, as well any possible collaborator's devices. If you try to open a password-protected document on your iPad or Mac after locking it on your iPhone, you'll need to enter the password before accessing it. If you locked it via Face ID or Touch ID, and another iOS device supports either authentication method (some Macs support Touch ID), you can add toggle it on when entering the password.


Changing or Removing the Password
If you need to remove or change the password, go back into the document's settings and tap "Change Password." Here, you can disable the password altogether, or you can type in the current password and a new password to change it. Either change will only affect the present document and subsequent versions, not an older file.
Keep in mind, when changing a password on a shared document, it only applies to the current session and subsequent saves. So if collaborators are synced, they won't be able to open it up anymore unless you give them the new password. But if they are viewing an older file (or restored it), they may see the unprotected version. To address the issue, stop sharing the document; add, change, or remove the password; then share it again.
This article was produced during Gadget Hacks' special coverage on using your smartphone to boost productivity. Check out the whole Productivity series.
Cover image and screenshots by Jake Peterson/Gadget Hacks


Comments
No Comments Exist
Be the first, drop a comment!