Leaving your computer unattended, whether at home, work, or a coffee shop, even for just a short while, is enough time for someone to steal it or look at your personal files. While there are ways to deter thieves, it's a little harder to keep snoops away.
You could put your computer to sleep and require a password immediately afterward, but who remembers to do that every time? And who wants to keep inputting their password to get back in? Instead, just use your iPhone to automatically lock your MacBook down, and unlock it when you return.
Step 1: Install Near Lock for iOS & Mac OS X
Near Lock, from developer Filip Divnjak, turns your iPhone into a wireless key for your Mac, automatically locking your computer when you walk away and unlocking it when you come back. Before you jump right in, make sure your devices are compatible with Bluetooth 4.0 LE (Low Energy) first below.
- iPhone 4S or later
- iMac late 2012 or later
- MacBook Air 2011 or later
- MacBook Pro 2012 or later
- Mac mini 2011 or later
- Mac Pro late 2013 or later
If you're good to go there, download the Near Lock app on both your iPhone and Mac using the links below. Make sure you've allowed the installation of apps from unidentified developers in Mac OS X first.
Step 2: Connect Your iPhone & Mac with Near Lock
After everything is installed, open up the app on your Mac, followed by your iPhone. Near Lock on your iPhone will automatically begin scanning for your computer via Bluetooth.
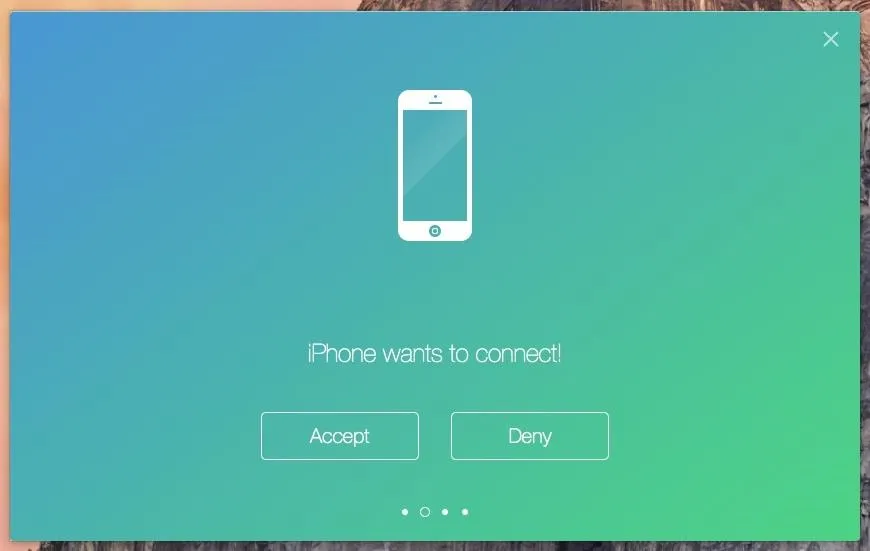
Once your iPhone finds your computer, a window saying "iPhone wants to connect!" will appear on your desktop; click on "Accept" to proceed.
On your iPhone, you'll be asked to enter the login password for your Mac. None of the information is sent to Near Lock's servers, so don't worry; it's all kept locally on your device. When you tap on "Connect," everything will be set up.
Step 3: Choose Your Distance for Near Lock
After the connection is established, you'll be asked to enable both "Near Lock" and "Fast Lock."
- Near Lock locks your computer when you walk away and unlocks it when you approach.
- Fast Lock locks your computer any time you tap the the center icon on your iPhone.
Set the distance your iPhone must be from your Mac in order to initiate the lock. I chose 1.5 meters for the distance, so that means my computer will lock anytime my iPhone is 1.5 meters or farther from my computer, and unlock anytime I'm inside of that distance.
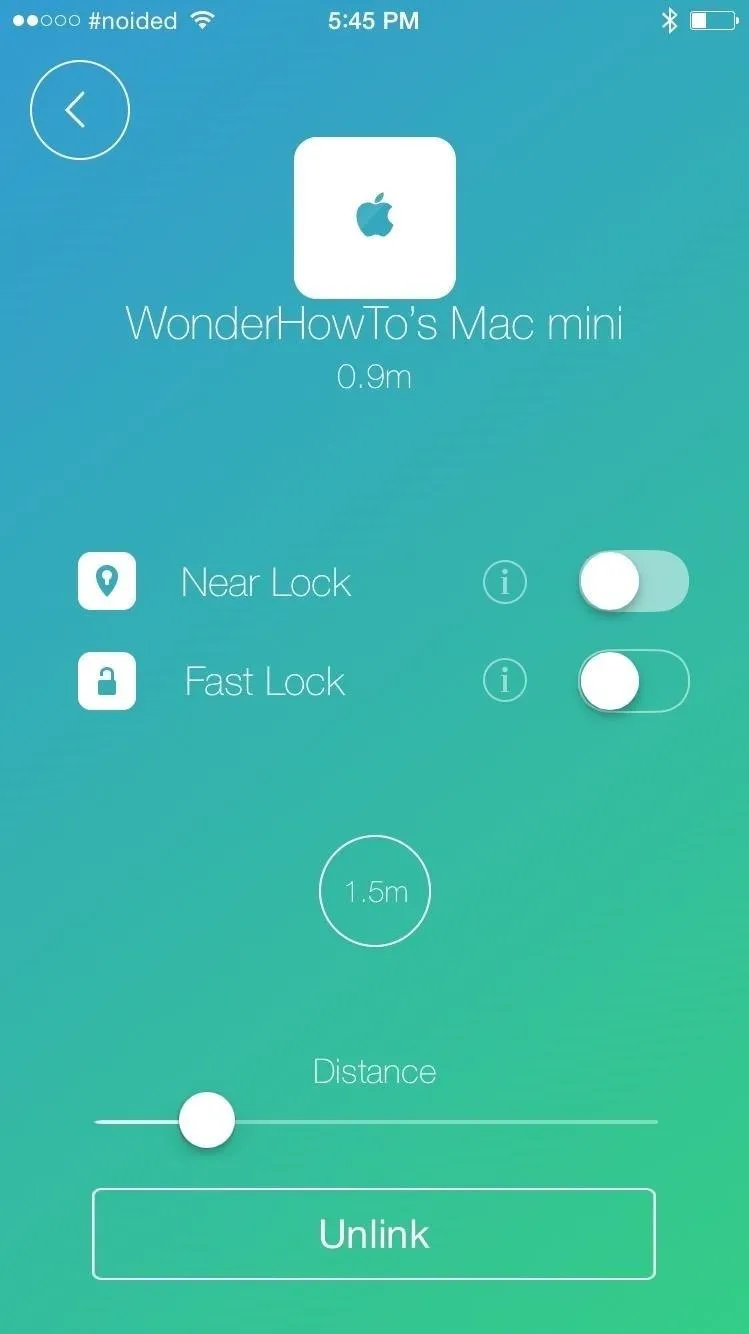
Setting your distance.
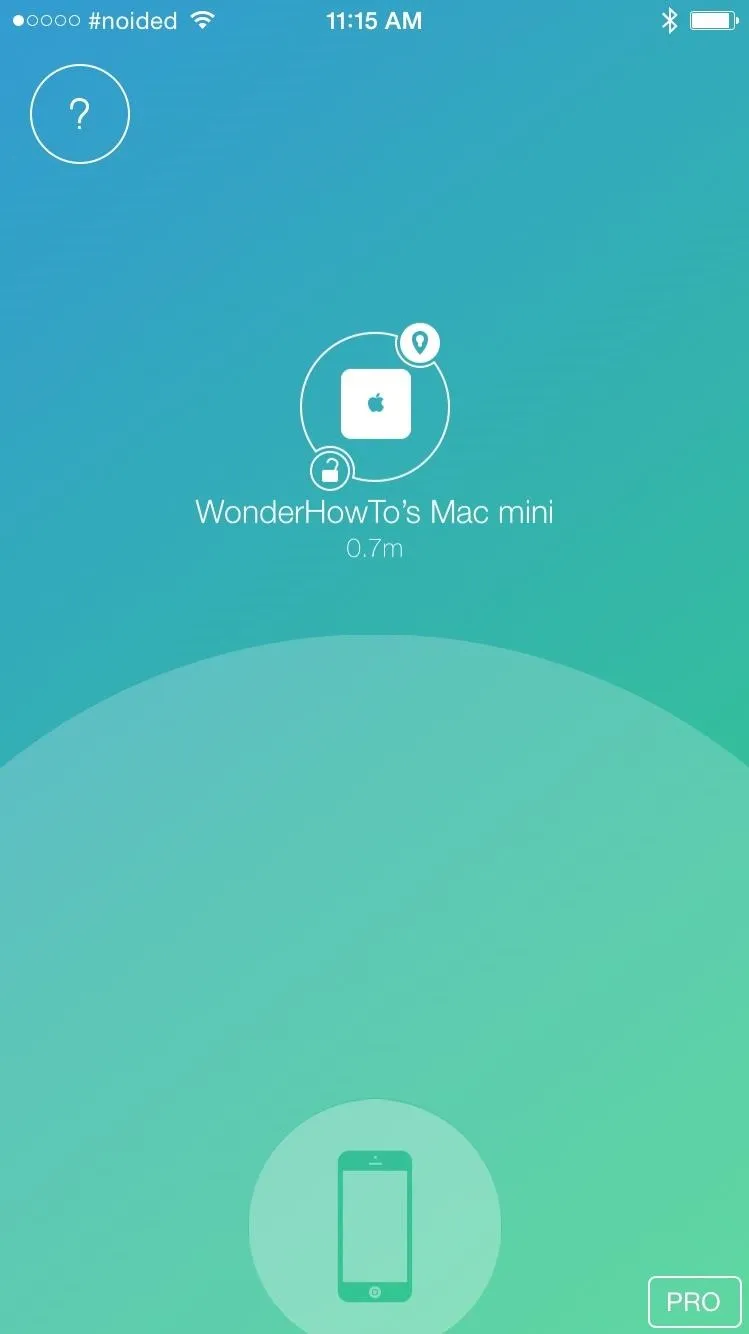
Unlocked at 0.7 meters.
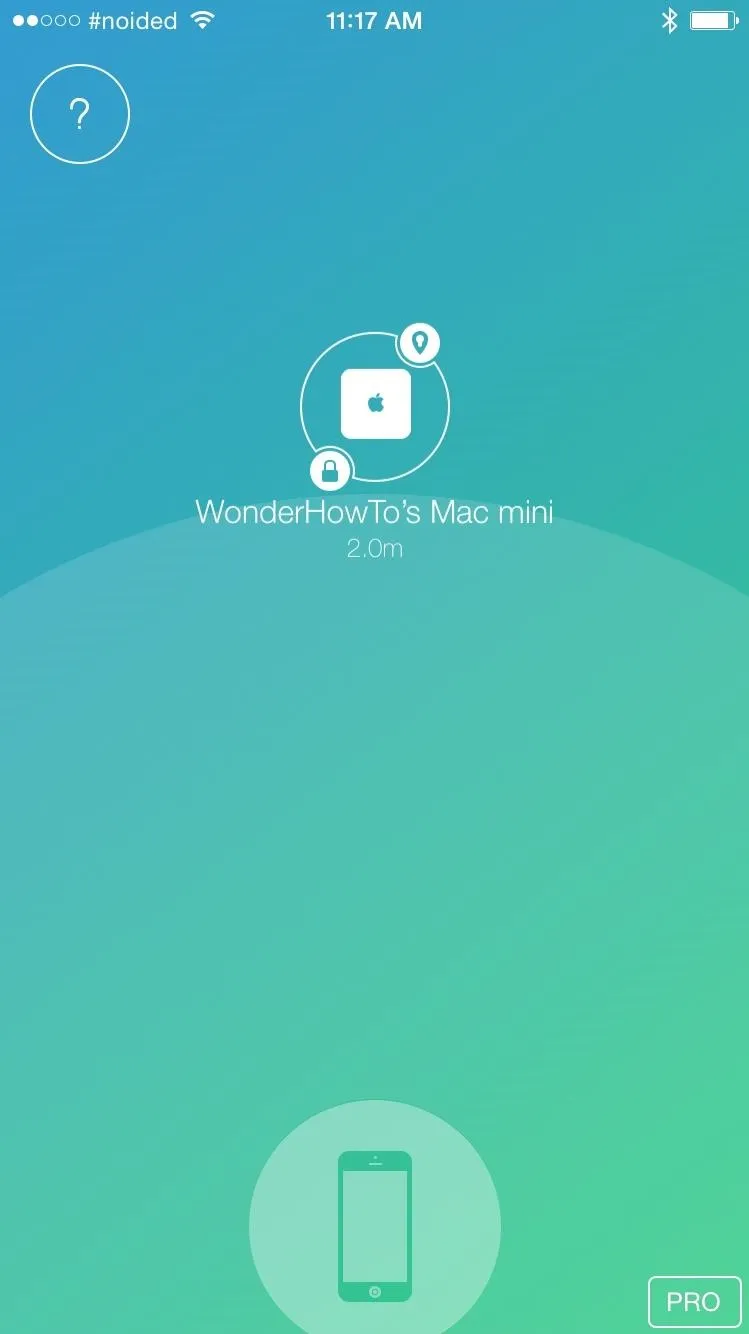
Locked at 2.0 meters.

Setting your distance.

Unlocked at 0.7 meters.

Locked at 2.0 meters.
In the middle screenshot above, you can see the iPhone is 0.7 meters away from my computer, which is well inside the 1.5 meters proximity, so my Mac stays unlocked. In the far right screenshot, you can see my iPhone at 2.0 meters away from my Mac, so the computer is now locked and can only be entered if I walk inside of 1.5 meters, or if my password is entered manually.
Note that the distance may not be exact based on the current environment based on the building materials and any possible wireless obstructions.
Near Lock's User Preferences
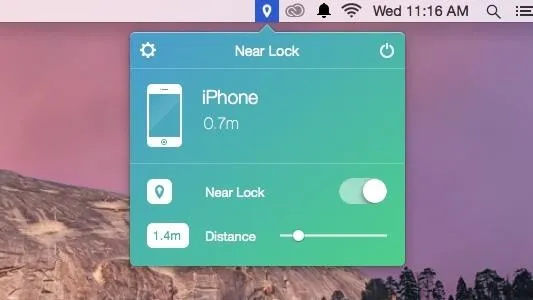
You can also toggle the "Near Lock" feature from the menu bar icon on your computer, as well as set the distance and disable the whole application. You can access more settings through the gear icon, where you can enable start on boot, set what happens when a connection is lost, choose logout actions, and check for updates.
Making the Most Out of Near Lock
Unfortunately, you'll need to have Near Lock open on your iPhone for it to work using the free app. With the "Pro Mode" version, available for $3.99 through an in-app purchase, you'll be able to run the app in the background on your iPhone, which might be well worth it if you're constantly leaving your computer alone. And since Near Lock uses Bluetooth LE, you can pretty much leave the app running in the background all day long without noticing any significant battery drain on your iPhone.
Combine Near Lock with Laplock, which sounds off a loud alarm anytime someone unplugs the charger from your MacBook, and you'll have quite the security setup for your workspace.
Let us know how well Near Lock works for you in the comment section below, or via Facebook, Google+, or Twitter.


Comments
No Comments Exist
Be the first, drop a comment!