Night mode, which helps you snap great photographs in low-light environments, is a feature available only on the iPhone 11 and iPhone 12 lineups. It's a useful tool to have in your arsenal, especially if you're fond of nightlife photography. Still, you don't have to purchase a newer iPhone to get Night mode shooting capabilities.
"BlackSight" is an iOS camera by FoxfortMobile that uses long-exposure algorithms to capture high-quality photos in low-light conditions. Much like Apple's Night mode, BlackSight takes a series of images at different exposures and merges them using computational photography. The resulting image is brighter and sharper than one you would take with the stock Camera app sans Night mode.
- Don't Miss: Can't Find Night Mode on Your iPhone? Here's Why
BlackSight vs. Night Mode
While Apple's own Night mode takes advantage of newer wide-angle lenses with bigger sensors to suck in more light, as well as more powerful processors to compose images from multiple exposures, BlackSight can use any camera on almost all iPhones with A9 and newer processors.
To make that even clearer: BlackSight works on all lenses, not just some. Night mode selfies are only possible on the iPhone 12 lineup, but BlackSight gets "night mode" quality selfies for any supported iPhone's front-facing camera.
BlackSight also has several features you won't find in the native Camera app, such as a more refined manual focus, soft torch for lighting up especially dim objects, manual white focus controls for cooling down or warming up a picture, tripod mode for even better quality results, and more.
This app is most useful on iPhone models since they don't have Apple's own Night mode built-in, though you can still use it on an iPhone 11 or 12 model. Since BlackSight works on iOS 13 and iOS 14, that means it'll give your iPhone 6S, 6S Plus, SE 1, 7, 7 Plus, 8, 8 Plus, X, XS, XS Max, XR, and SE 2 an improved nighttime shooter without having to fork over hundreds to upgrade.
Installing 'BlackSight' from the App Store
As already stated, BlackSight requires iOS 13 and later and works on the iPhone 6S and newer. While it says that it is "compatible with all cameras," it also states an exception to the front-facing cameras on the iPhone 6S and 6S Plus models.
It's also important to note that the free version of BlackSight does include large watermarks centered in the middle of all photos captured. With a $3.99 in-app purchase, you can remove the watermark. But you should test it out to see if it works well on your iPhone before you commit to buying because different iPhone models will have different results.
- App Store Link: BlackSight: Night mode camera (free)
Using BlackSight to Take Night Mode Photos
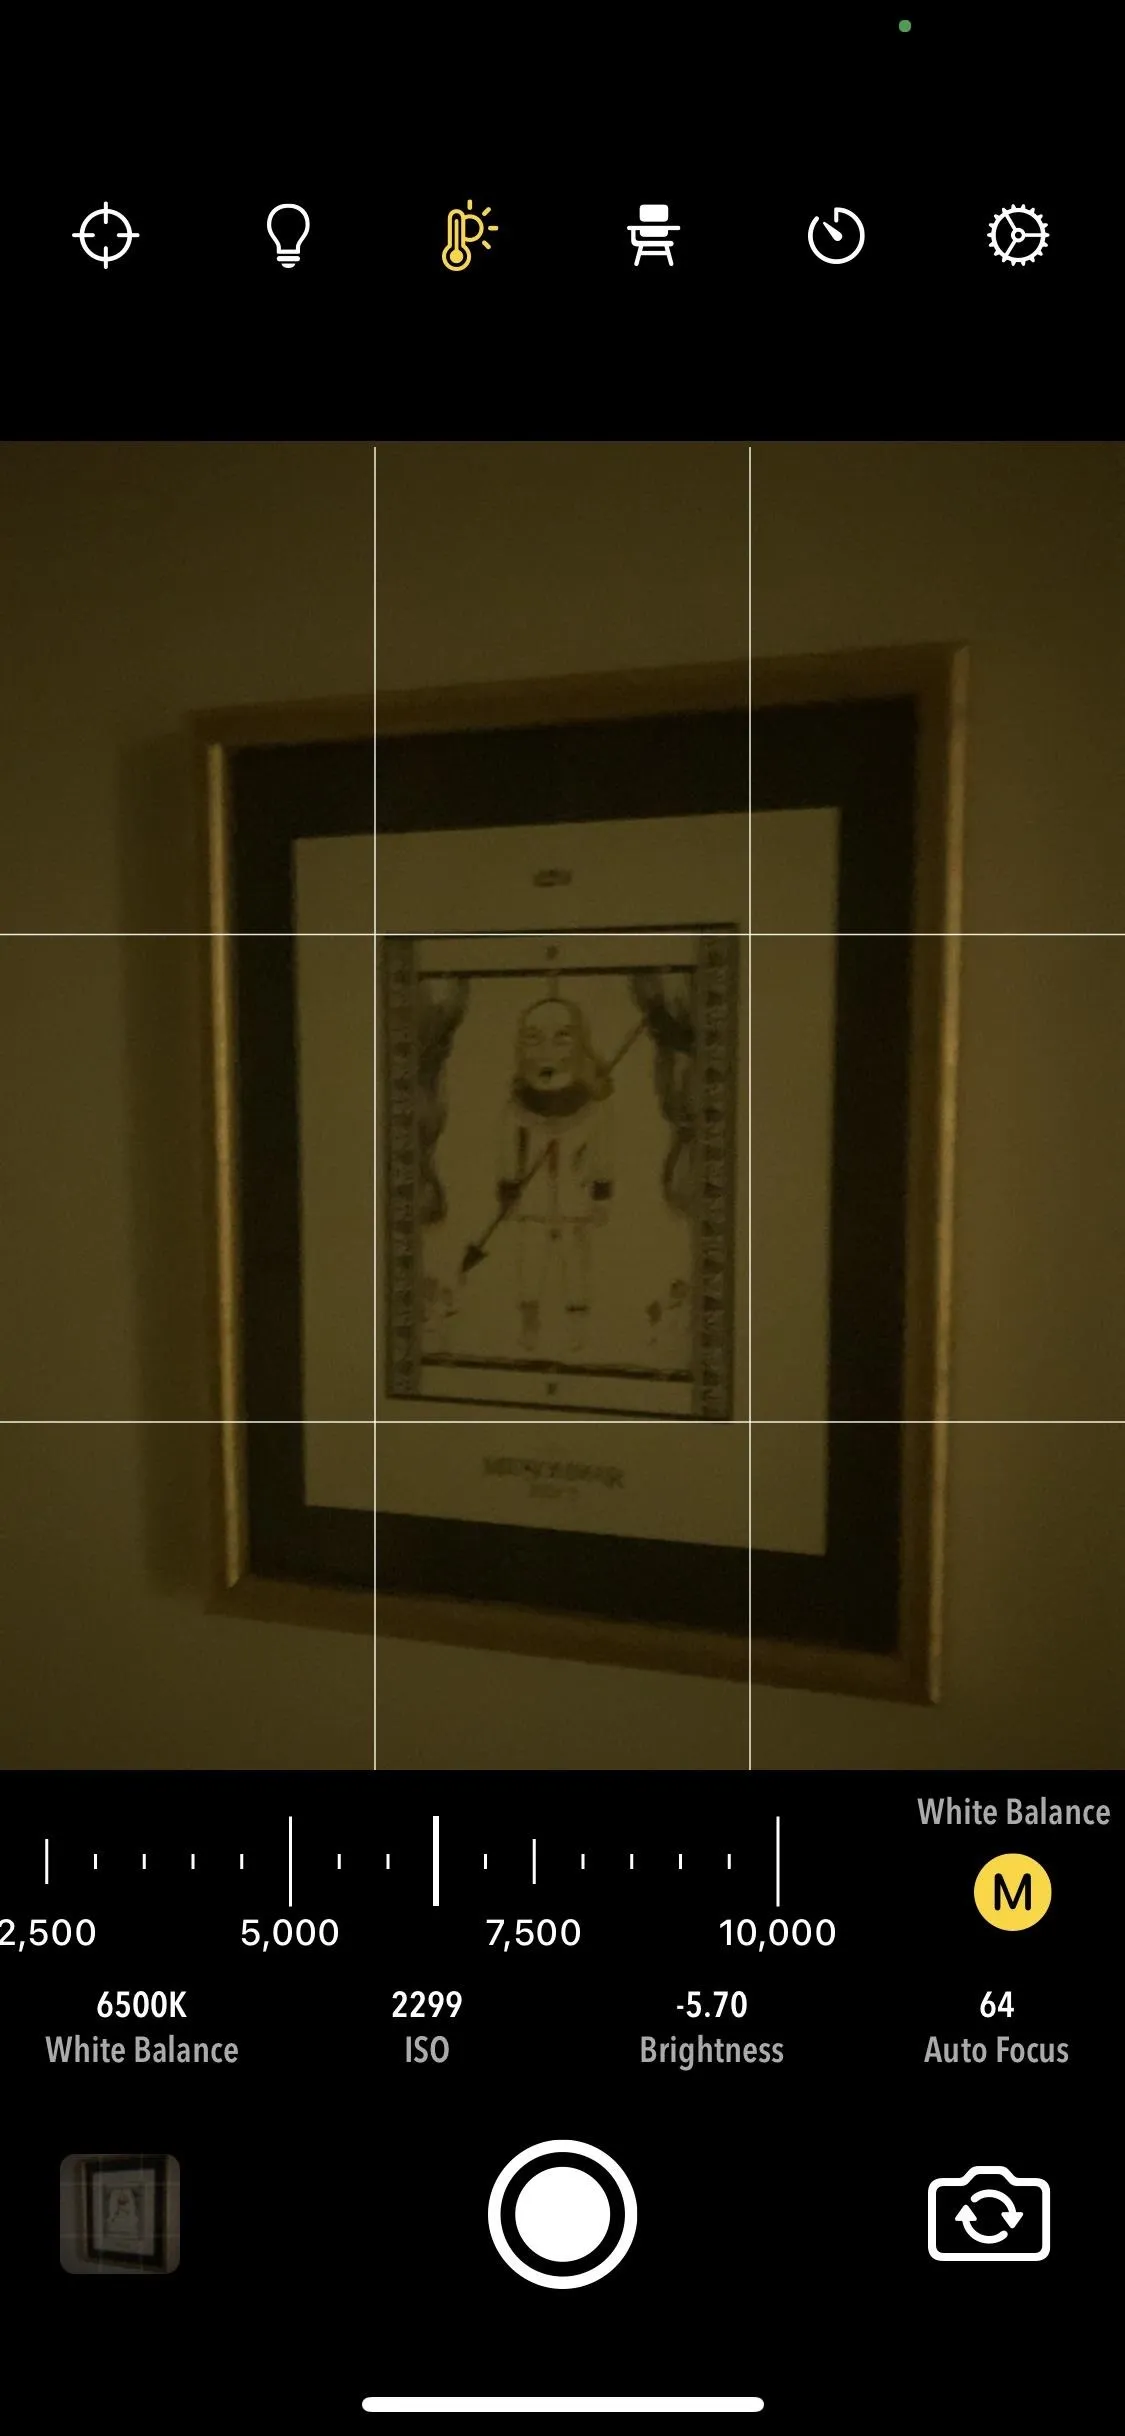
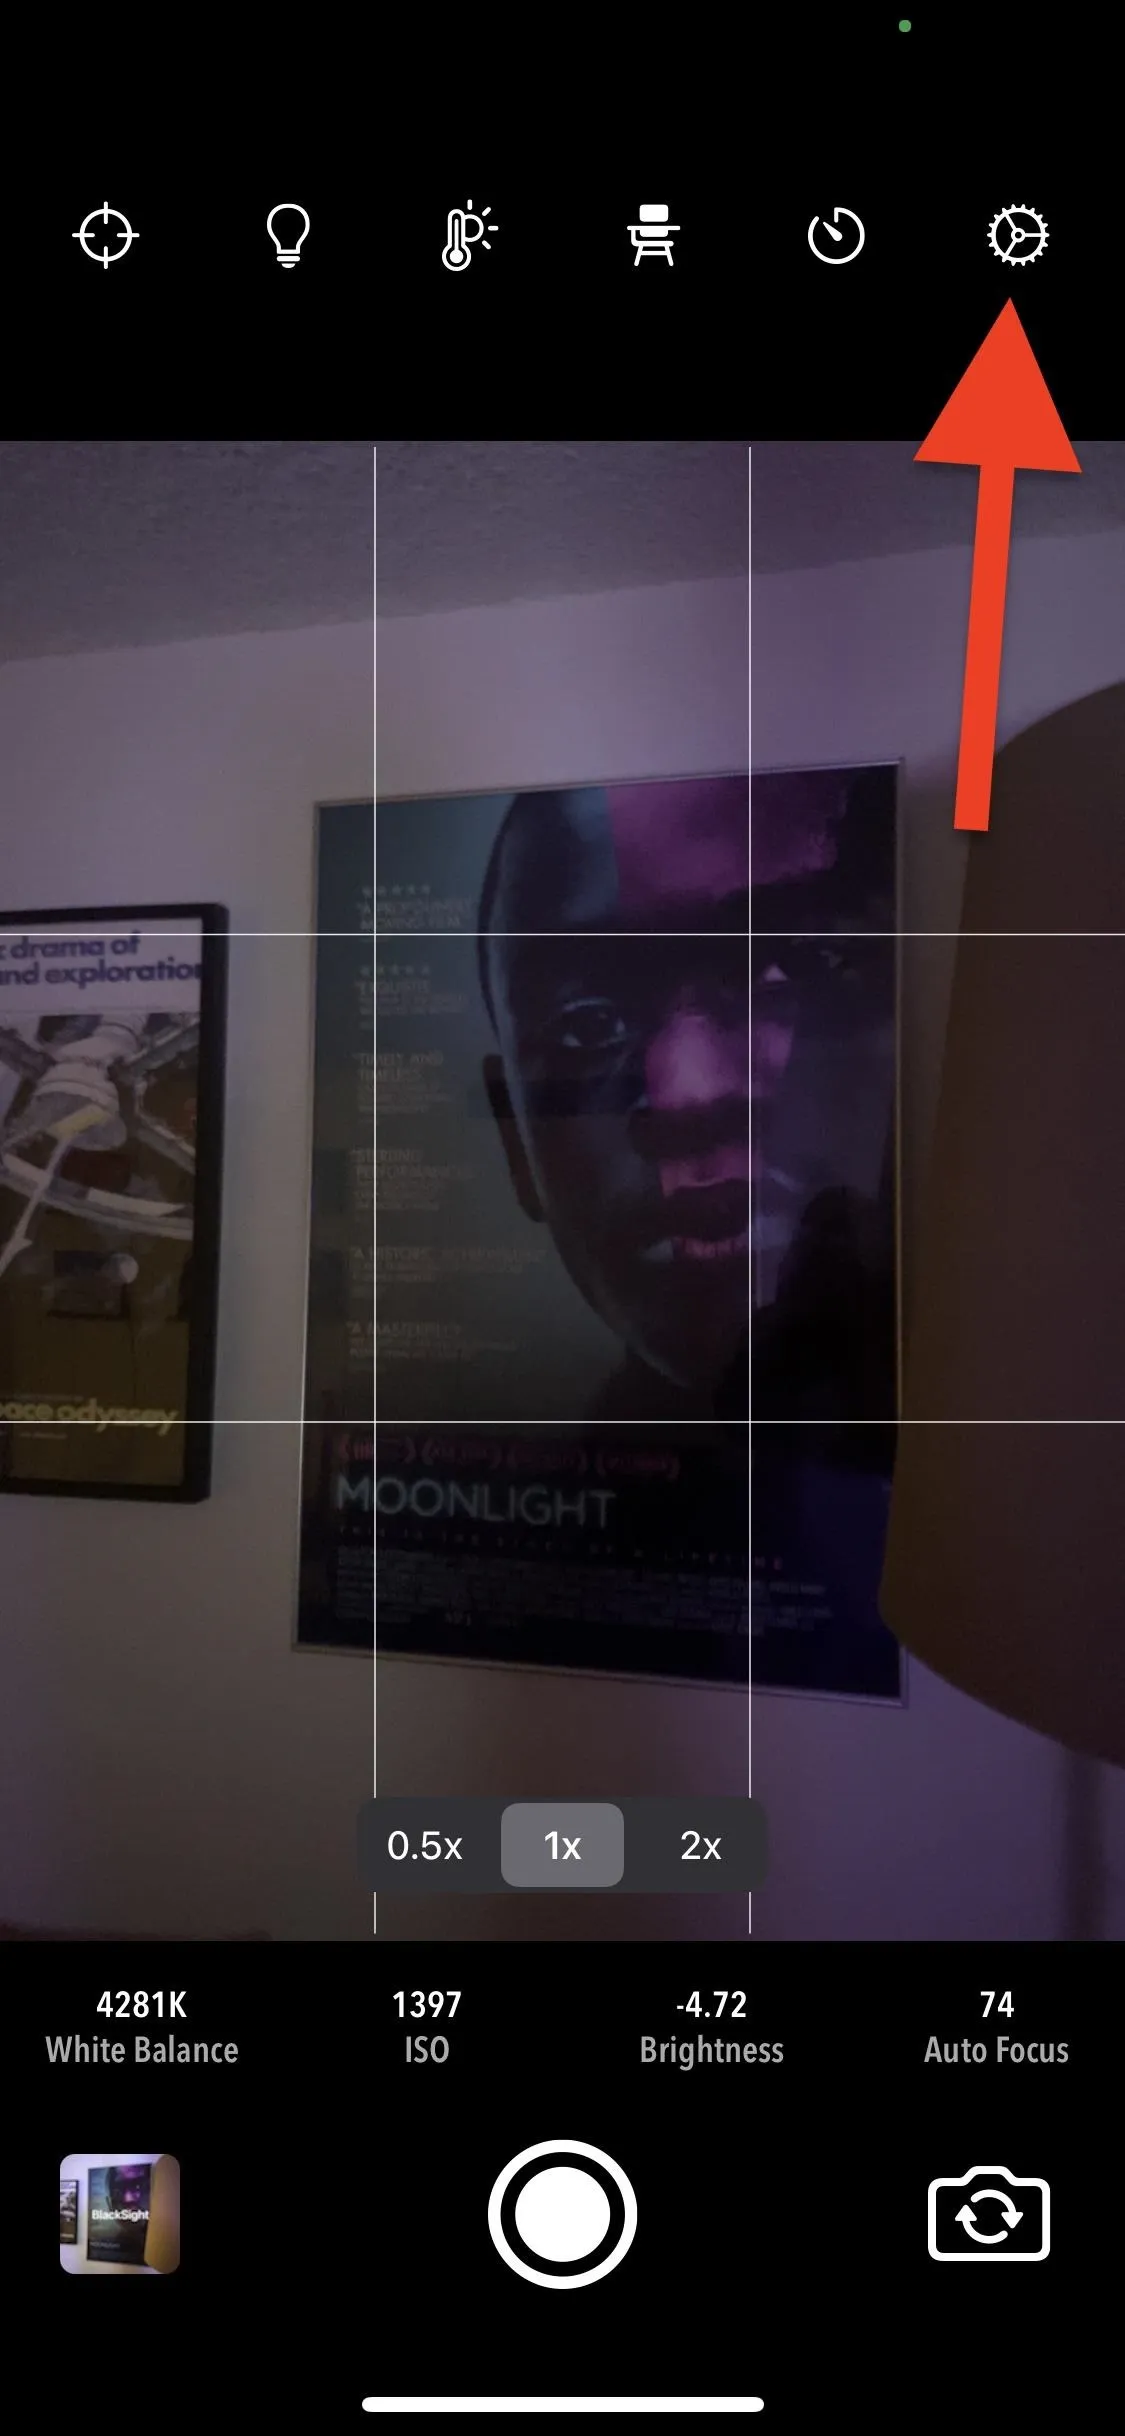
BlackSight is like many other camera apps, featuring a simple viewfinder with a grid and zoom buttons, as well as buttons across the bottom of the screen to view your photos, snap a picture, and flip your camera around.
The first difference you'll notice is the set of numbers right above the shutter, featuring real-time information about several important controls like white balance, ISO, brightness, and automatic focus.

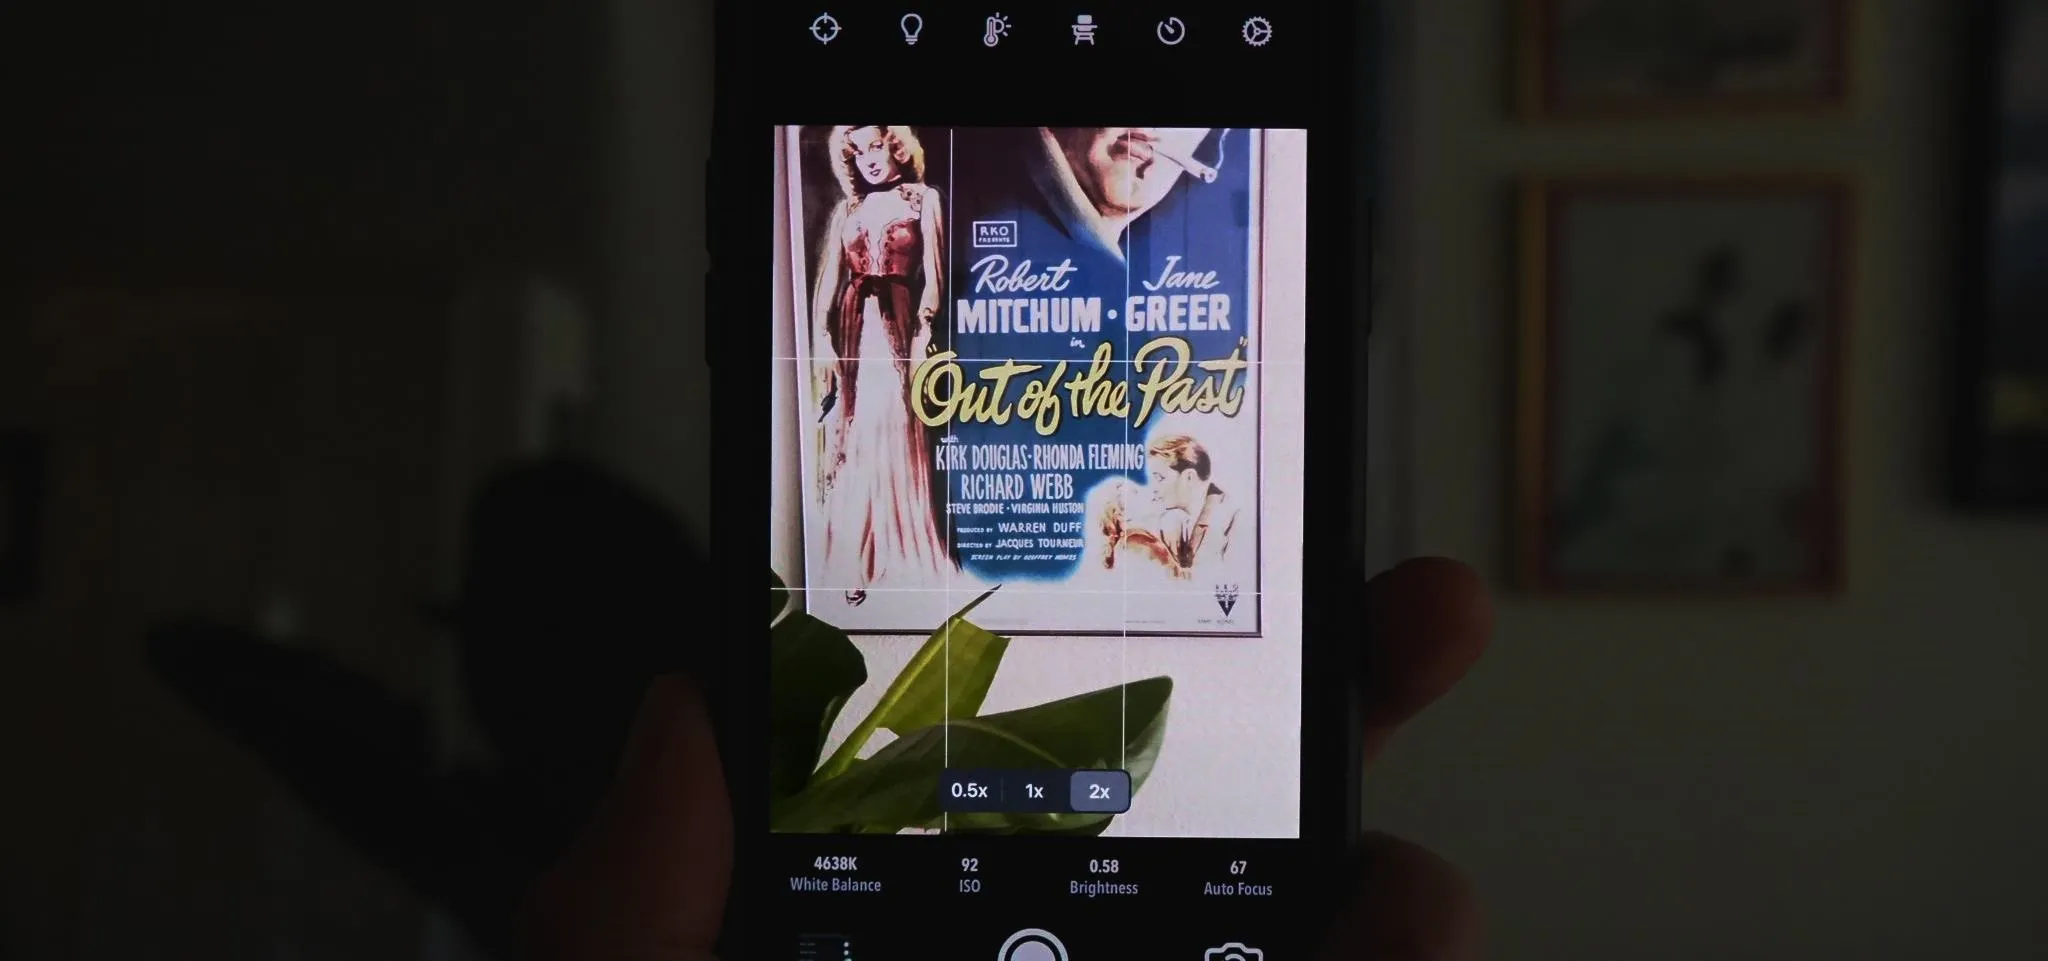
You will also see that the frame rate in the viewfinder is rather slow, and that's done on purpose across all supported devices, new or old:
This happens because BlackSight increases exposure time, rather than using the default general frame rate. Doing so enables brighter previews, thereby allowing focusing in darker environments. Without this, the camera would see very dark scenes and autofocus would fail, resulting in blurry images.
At the interface's top, you'll see several icons, which is where you can control the camera's settings and enable a few unique features.

Starting from the top left, these are the tools available:
- Focus: By default, autofocus is enabled. Tapping the crosshairs opens the focusing meter above the shutter, where you can see the current level. Tapping the yellow (A) button will switch you over to manual focus, where you can slide the meter to where you need it (manual focus doesn't work for every lens).
- Soft torch: Tapping the lightbulb enables the rear LED light on a low setting "to gently illuminate the scene so that it can be used as a focus aid in very dark environments." It can even be used during shooting, especially dark situations, giving you less hard light artifacts than a bright flash would.
- White balance: By default, automatic white balance is enabled. Tapping the temperature icon gives you a meter above the shutter to see the current color temperature. Tapping the yellow (A) button will switch you over to manual white balance, where you can slide the meter to where you need it, making it warmer or cooler.
- Tripod mode: Tapping the desk-looking icon will give you better photos when using a tripod. The camera "uses the maximum exposure ... to get brighter images with less noise." This works best in really dark scenes to capture more detail. A tripod is needed to avoid blurring because the shutter speed is much longer. It "will have [a] better effect on iPhone XR and above since those devices can shoot up to 1-second exposure duration. The result will be less noticeable on iPhone X and below due to the 1/3 seconds limitation of the camera sensors. As a workaround, the app [uses] experimental processing for iPhone X/8/8+/SE 2."
- Timer: Tapping the timer icon will cause a three-second countdown before an image is captured after tapping the shutter button. In the settings, you can make it five seconds instead.
- Settings: Tapping the cog lets you view the camera's settings. You can set a higher-resolution capture; disable white balance correction; turn on mirrored selfies, shutter sounds, and grid overlays; save photos to a "BlackSight" album; change the timer's duration; switch between JPEG and HEIC format; and purchase the full version of BlackSight. (See below for more details on these settings.)
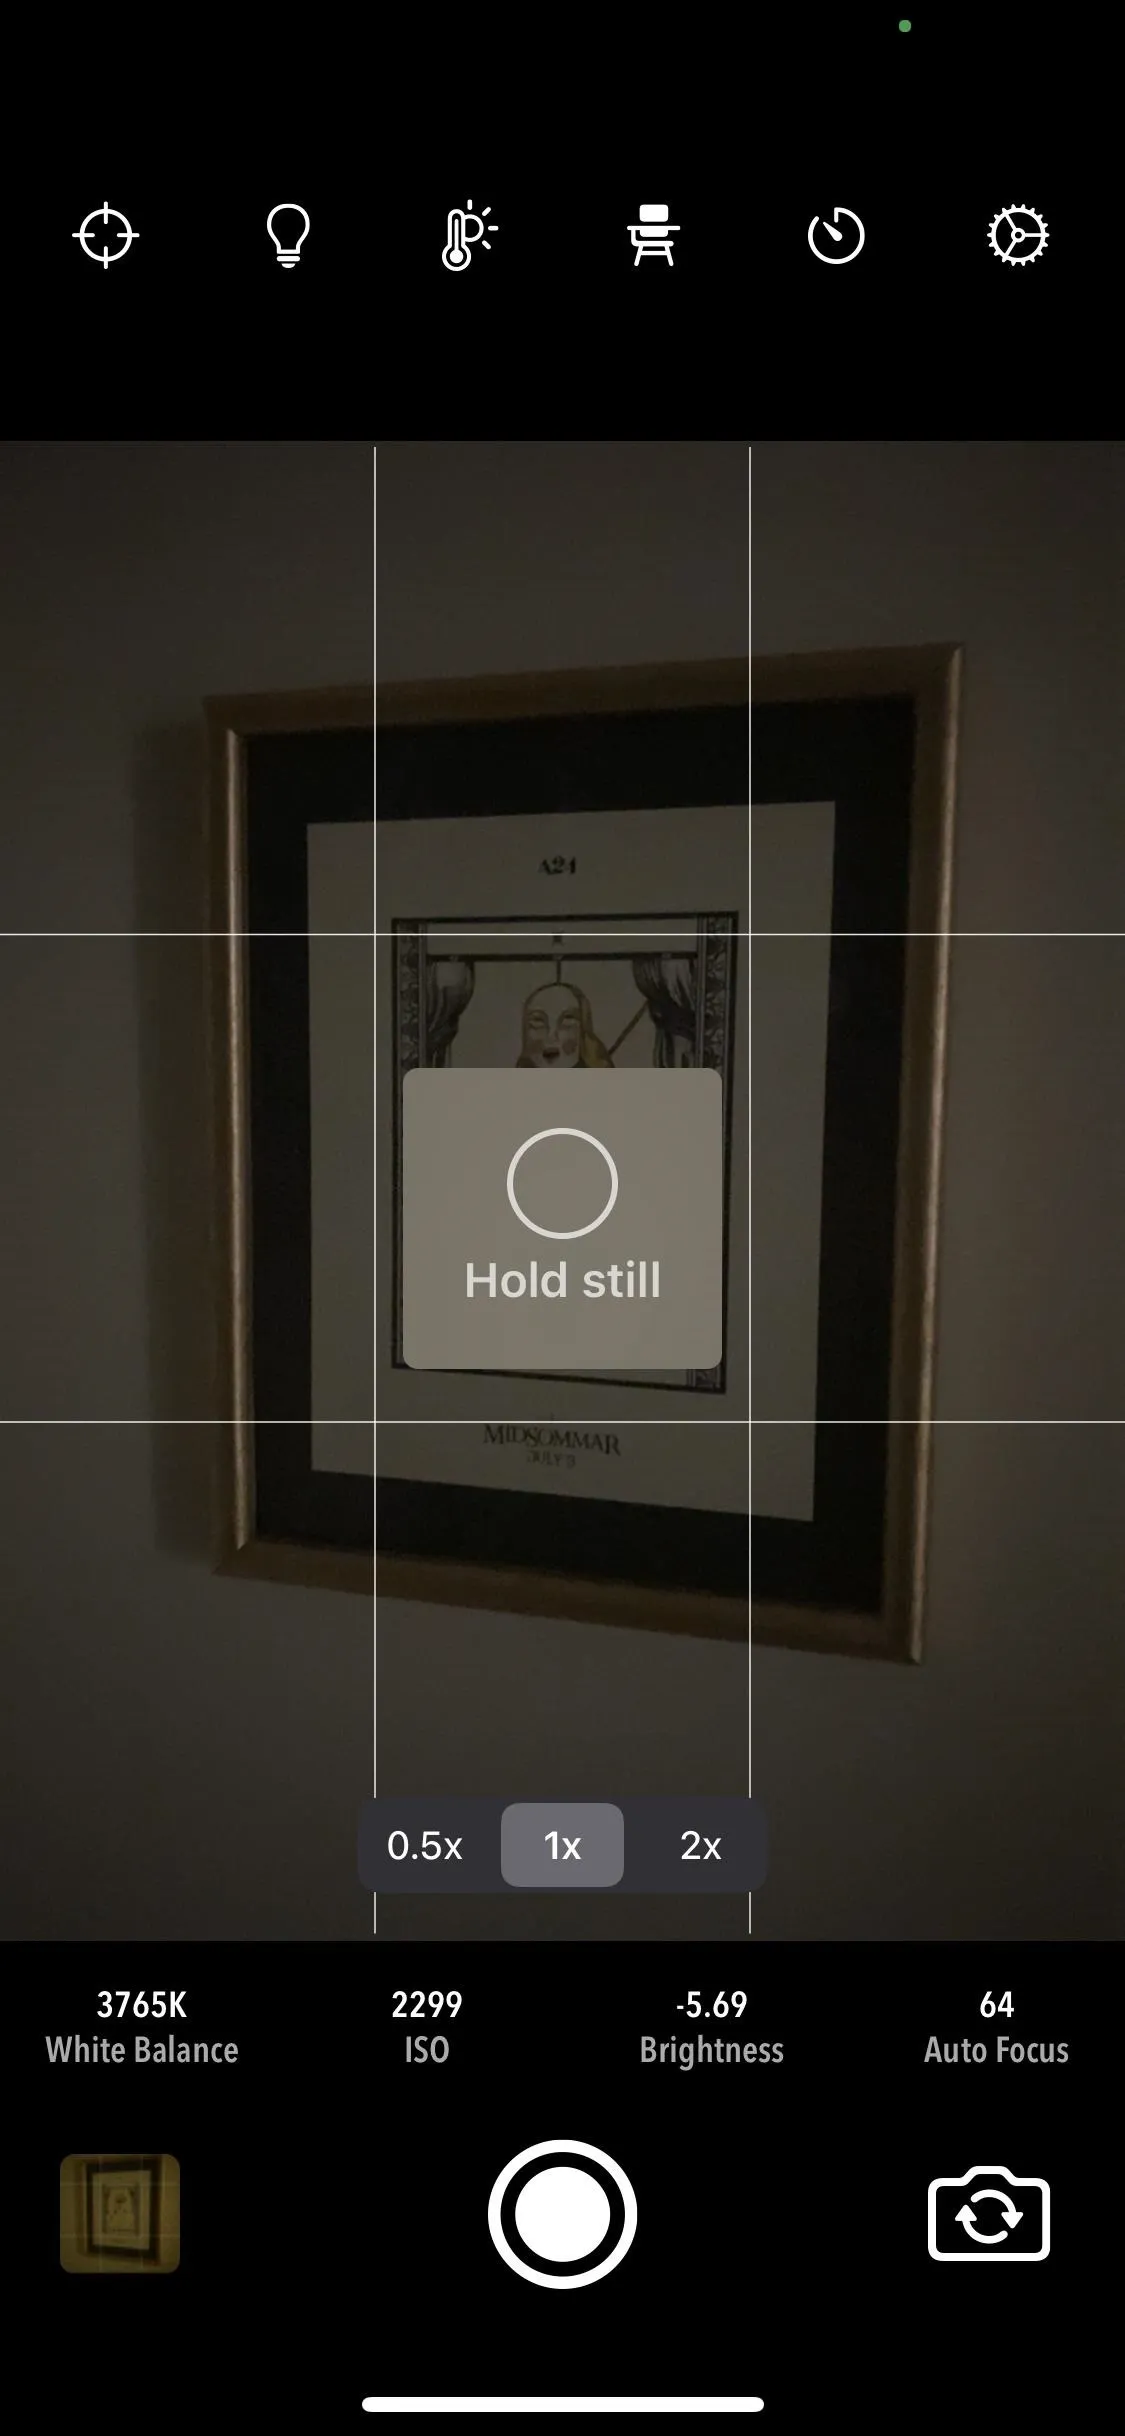
When you're ready to snap a pic, tap on the shutter button and hold your iPhone as still as you possibly can. Whether using Tripod mode or not, a tripod is encouraged, or at least a steady surface to rest the iPhone on.
A pop-up will appear in the middle of the viewfinder, reminding you to hold still while it captures all of the images it needs. The darker the location, the longer you may need to hold your iPhone still. In my experience, it was never more than a few seconds, but it can get up to five or six depending on your iPhone model and how dark the scene is.


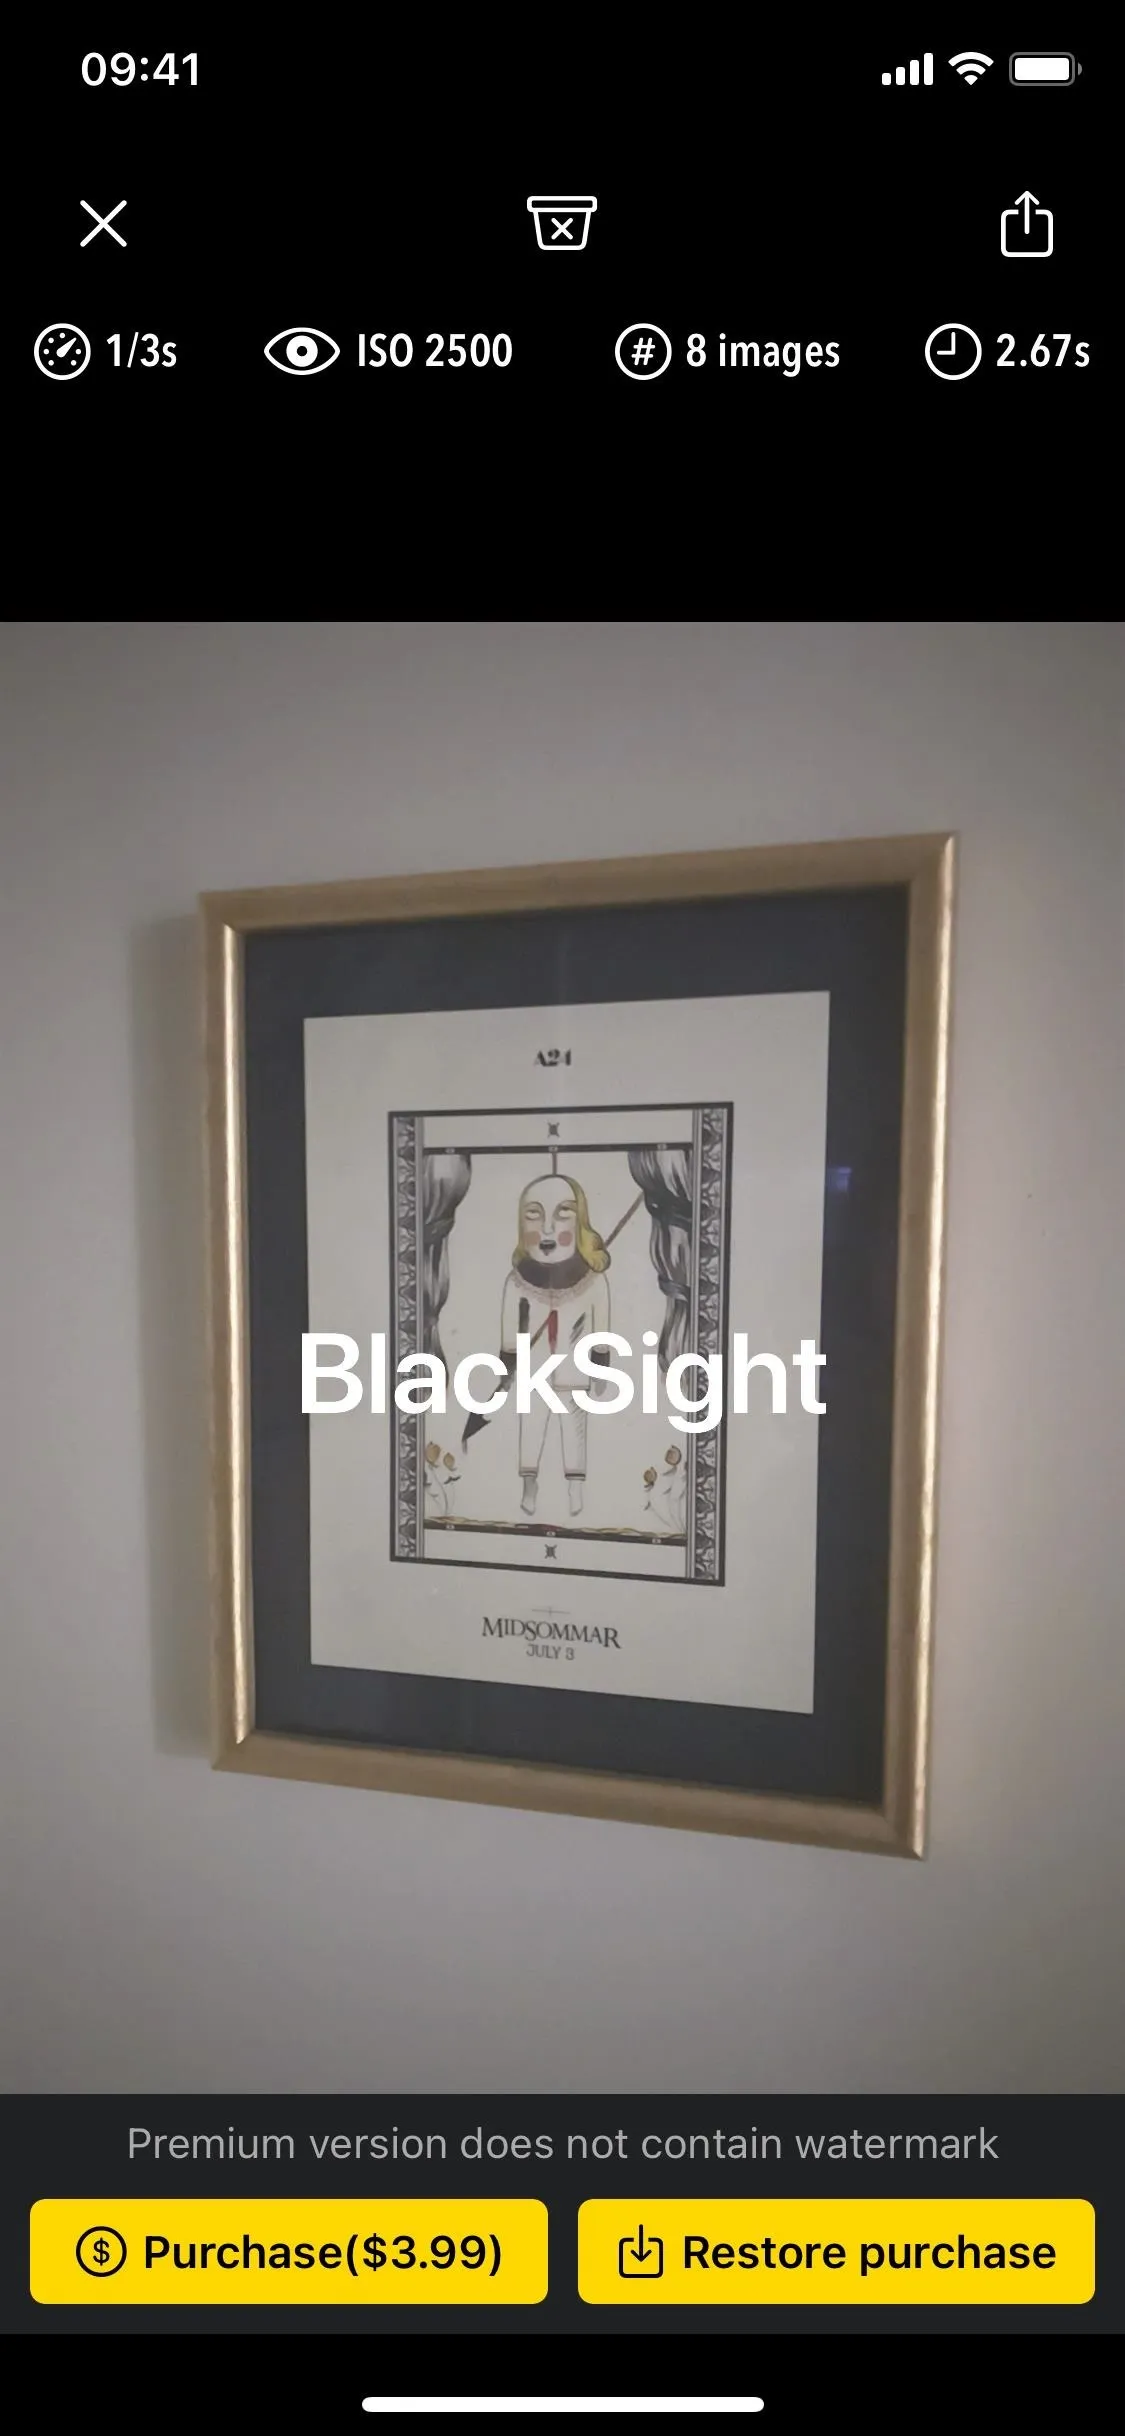
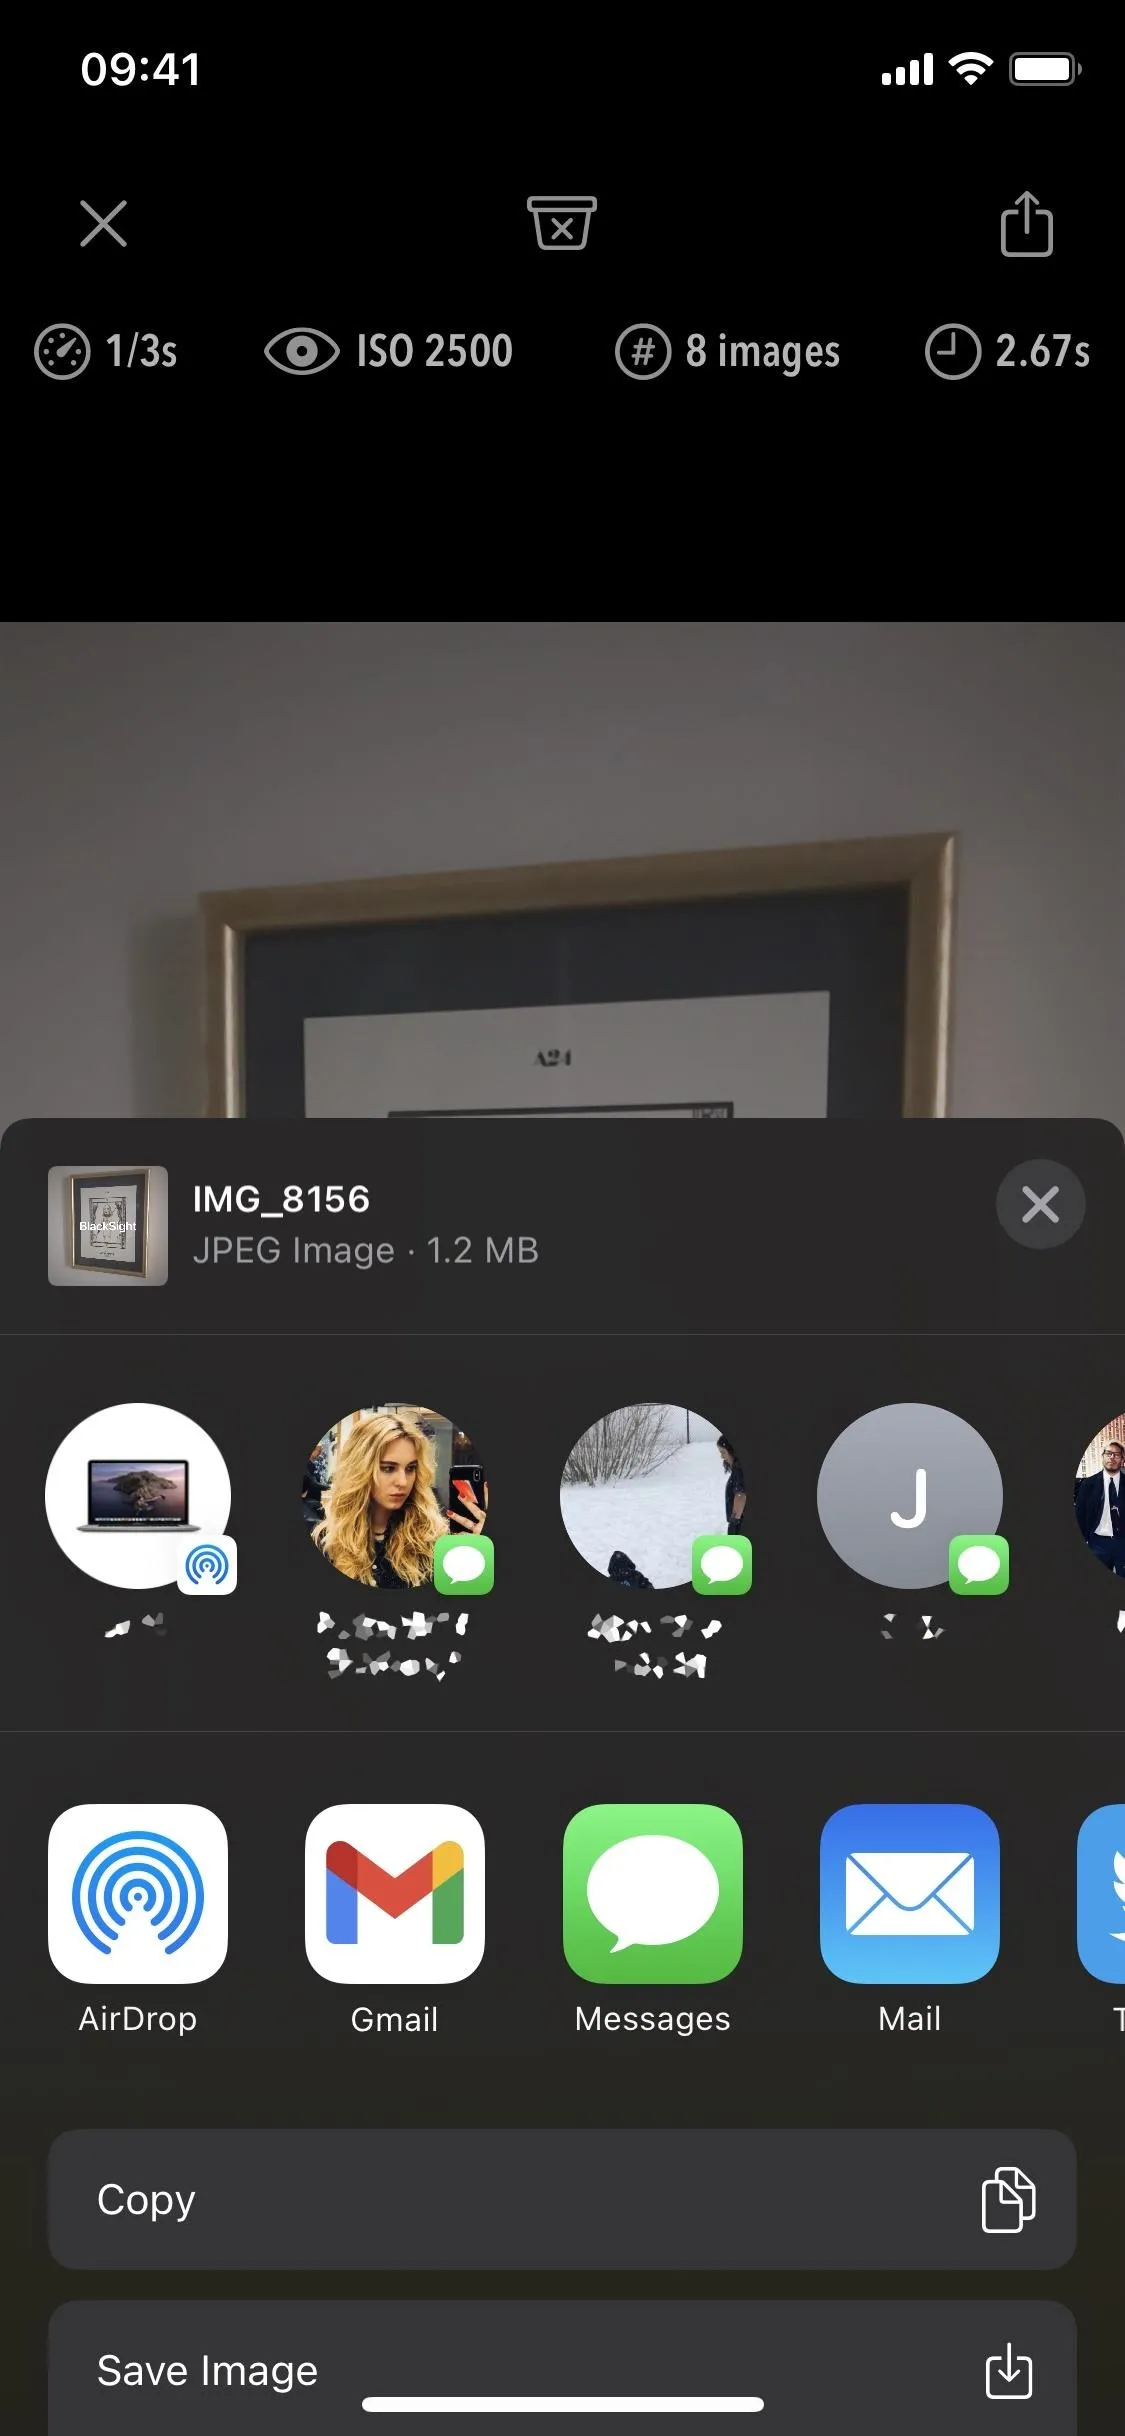
Once BlackSight is done taking pictures, it'll show you the final product with the watermark in the center. At the top, you'll see various metrics, including the shutter speed, ISO, number of exposures used, and length required to process the final image.
The photo below was taken in a nearly pitch-black room, with only minimal light peeking in from the doorway. As you can see, the image looks as if it was taken in a well-lit room and doesn't have too much grain or blurriness that's indicative of low-light situations. The image is automatically saved to Photos as soon as you take it, but you can use the Share button in the top right to send the photo via Messages, third-party apps, AirDrop, etc.


Adjusting Settings & Using Additional Features
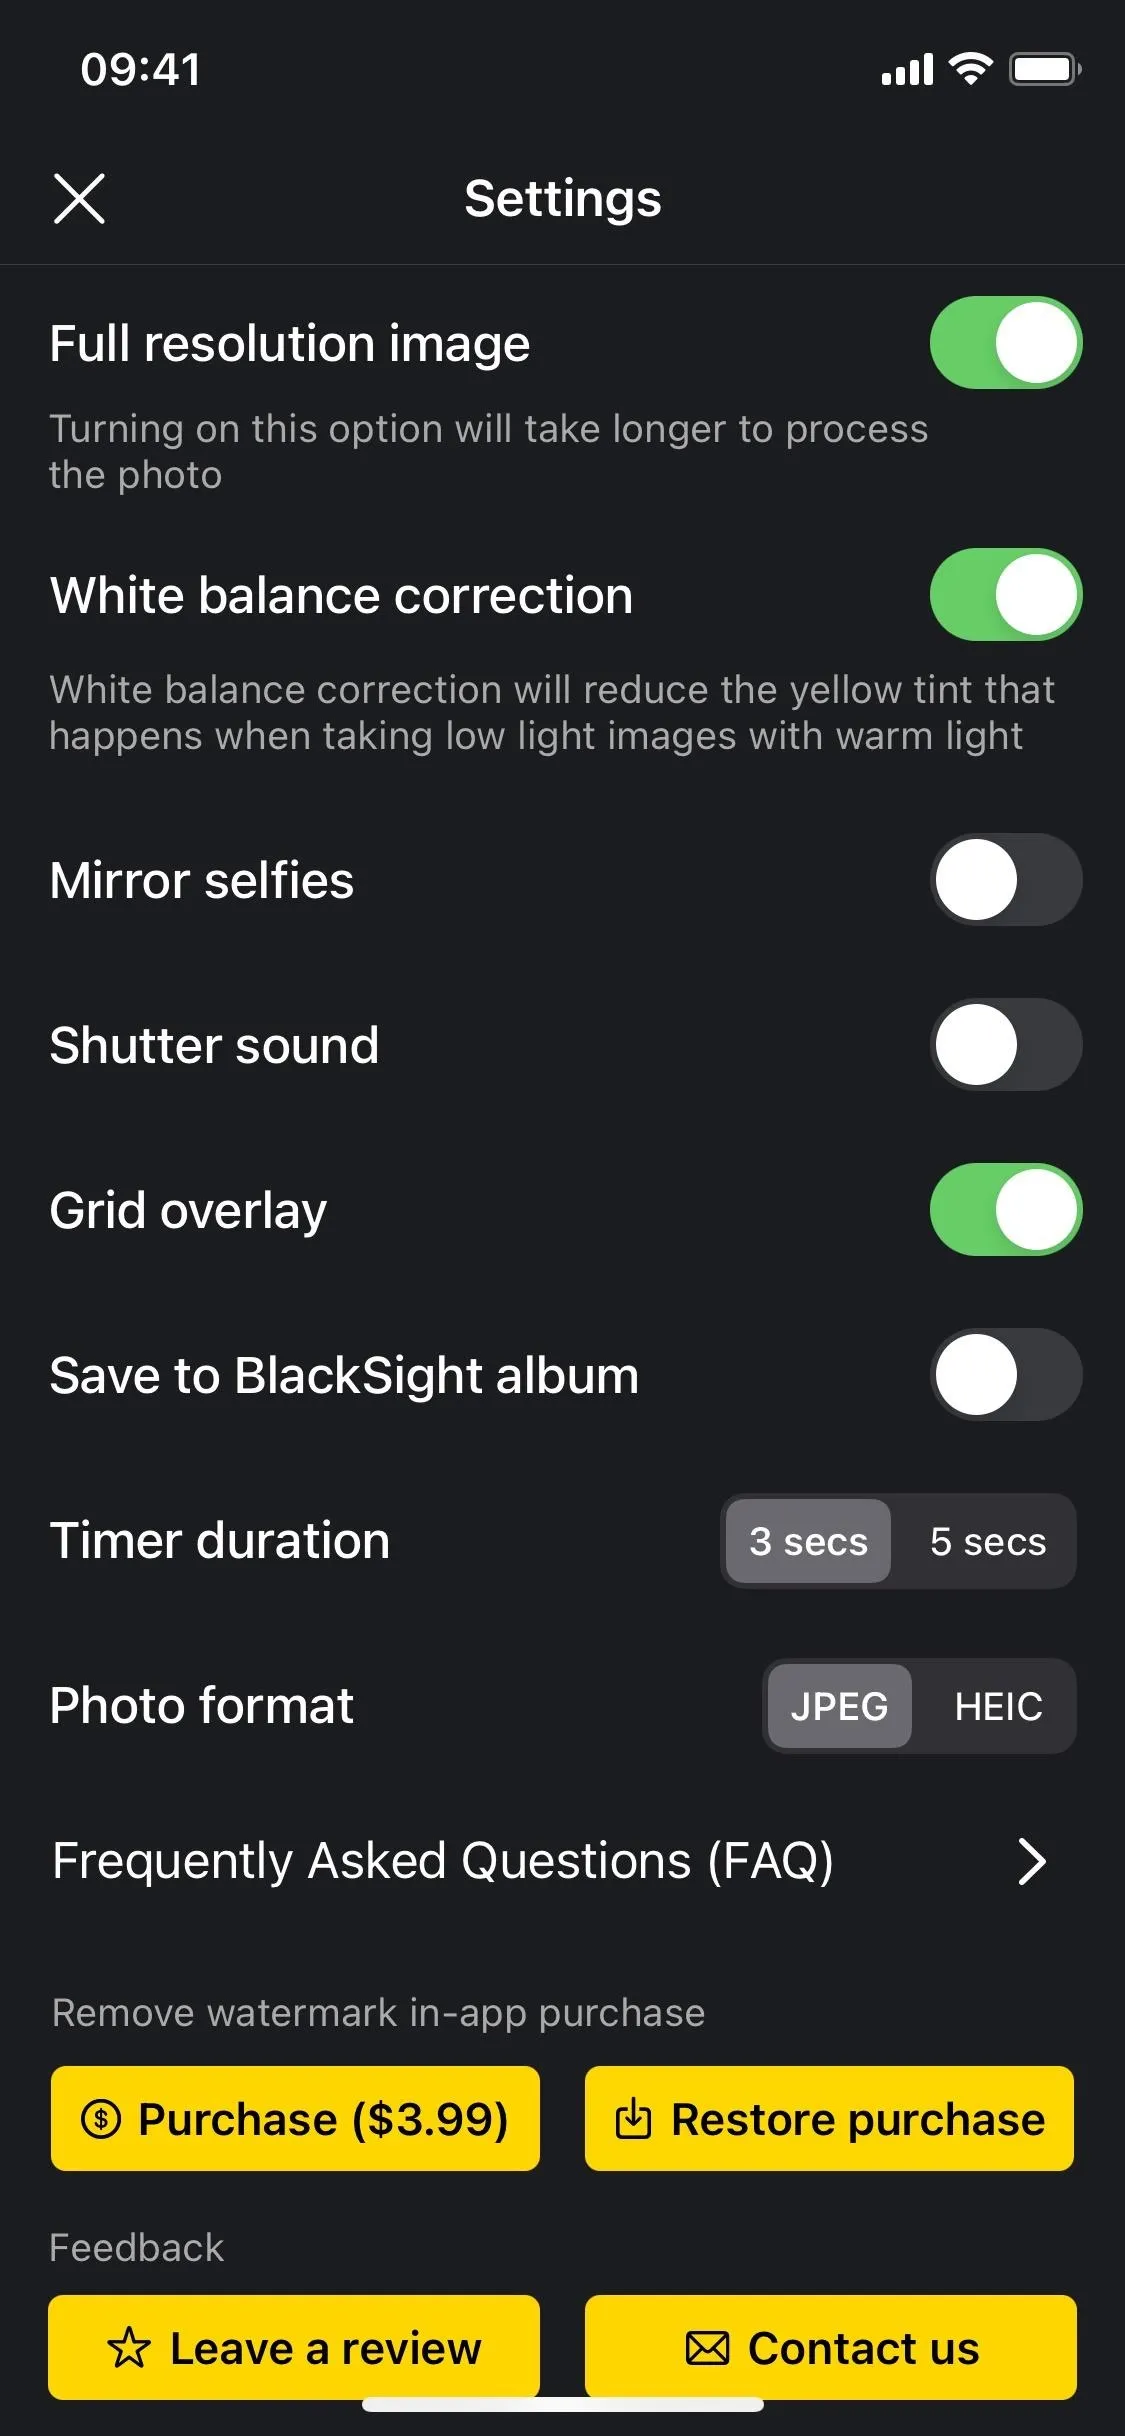
In the Settings page, which you can access by tapping on the gear icon in the top right, you can configure several different settings. We already talked about that, but let's go over it in detail:
- Full resolution image: This lets you take higher-resolution photos, but it does take longer to process them, so the iPhone will need to be completely still for a longer time.
- White balance correction: This reduces the yellow tint that may appear when taking images in low light. You can toggle it off to see if it makes things look better or worse.
- Mirror selfies: This will make the viewfinder show you a mirrored version of yourself in the front-facing camera, and it saves it that way as well.
- Shutter sound: This lets you toggle on or off the shutter sound when snapping pictures. This may not appear on all iPhone models.
- Grid overlay: This adds a grid to the viewfinder for better positioning.
- Save to BlackSight album: Saves photos to a BlackSight album created in Photos, not just the "Recents."
- Timer duration: This lets you choose between three and five seconds.
- Photo Format: This lets you choose to save photos as JPEG (more compatible) or HEIC (higher quality).
Additionally, you can tap on "Purchase ($3.99)" to buy the premium version of BlackSight and remove watermarks from all your future photos.


More Information About BlackSight
BlackSight actually started as a jailbreak tweak called "Lumi," and it finally hit the App Store in January 2021. When it was first being developed, the creator said:
The [app] has been written from scratch using low level Objective-C frameworks and does not use any Apple private API or anything related to stock Night mode. [BlackSight] is actually the result of 9 months of hard work by reading many technical research papers (including those by Google team) and implementing fast algorithms optimized for mobile phones.
It's also stated that BlackSight is not intended for the iPhone 12 series since it will always be "inferior" to the default Camera app's Night mode. "Apple's Night mode is a lot more powerful because they have low-level access to the ISP [image signal processor] and camera hardware which is not available for third-party devs," according to the developer.
One important thing the developer has talked about is how well it works on the iPhone SE (1st generation):
iPhone SE 1 has the same camera as iPhone 6s and no stabilizer. Since that camera is not very good for low light (low ISO, noisy sensor), it cannot use [the] full 1/3 shutter speed handheld. So the results are only decent in dim light. For darker scenes, you can turn on tripod mode. But honestly, don't expect wonders from a 5-year-old camera.
Cover photo and screenshots by Nelson Aguilar/Gadget Hacks



Comments
No Comments Exist
Be the first, drop a comment!