The iPhone XS, XS Max, and XR aren't the newest devices from Apple Inc., but all three have a serious problem in Messages. When sending a friend an SMS/MMS text rather than an iMessage, the phrase "Number changed to Primary" appears in front of every message. What gives? If this issue is driving you mad, there are a few tricks that may exterminate the bug until Apple gets around to issuing a patch.
First of all, astute observers or those complaining to friends will see this is only affecting iPhone XS, XS Max, and XR models. All other models, including the iPhone 8, 8 Plus, and X, remain immune to this annoying message. However, it may also affect the newer iPhone 11, 11 Pro, and 11 Pro Max in rare cases.
This bug is somehow caused by the dual-SIM capabilities of the iPhone XS and newer. Apple touted dual-SIM support during its September 2018 presentation, but dual-SIM functionality didn't start working until iOS 12.1. Other than that, there doesn't appear to be much of an explanation for how this bug originated. Apple doesn't offer much official help on its end, so all that we can do is follow some steps that have helped others with the same issue.
Option 1: Update to the Latest iOS Version
Dual-SIM functionality came to iPhone XS, iPhone XS Max, and iPhone XR as an update in iOS 12.1. If your iPhone isn't yet running that version of iOS, make sure to update ASAP. However, even if you are running iOS 12.1, you'll want to ensure your iPhone is updated to iOS 12.4.1 or iOS 13.1.2, the latest versions for each. Keeping your iPhone updated is a great way to fight off bugs, as Apple includes patches to address issues with each iOS release.
Option 2: Eject Your SIM Tray
Sometimes, the simplest solution is the right one. We've seen successful scenarios where iPhone owners plagued by this bug fix the issue by ejecting their SIM tray and reinserting it back into the iPhone. Why this works is anyone's guess, but we assume it has something to do with why turning a computer on and off can solve certain bugs — a reset can do wonders.
Grab a SIM eject tool, and push it into the little hold on the right side of the device. Once the tray pops out, just push it back in. All there is to it. If you don't have a SIM eject tool, any thin yet durable wire will do the trick. Just make sure it can withstand the pressure of popping out the SIM tray or else you could risk it breaking off inside the opening.
Option 3: Reset iMessage & FaceTime
We've seen reports that resetting iMessage and FaceTime settings can solve the "Number changed to Primary" issue, even though this problem is occurring exclusively with non-iMessage text messages. Still, it's worth a shot.
To reset iMessage, jump over to "Messages" in the Settings, then tap the toggle next to "iMessage" so that it's off. To reset FaceTime, go to "FaceTime" in the Settings, then tap the toggle next to "FaceTime" so that it's off. Next, wait for 30–60 seconds, then enable both toggles again.
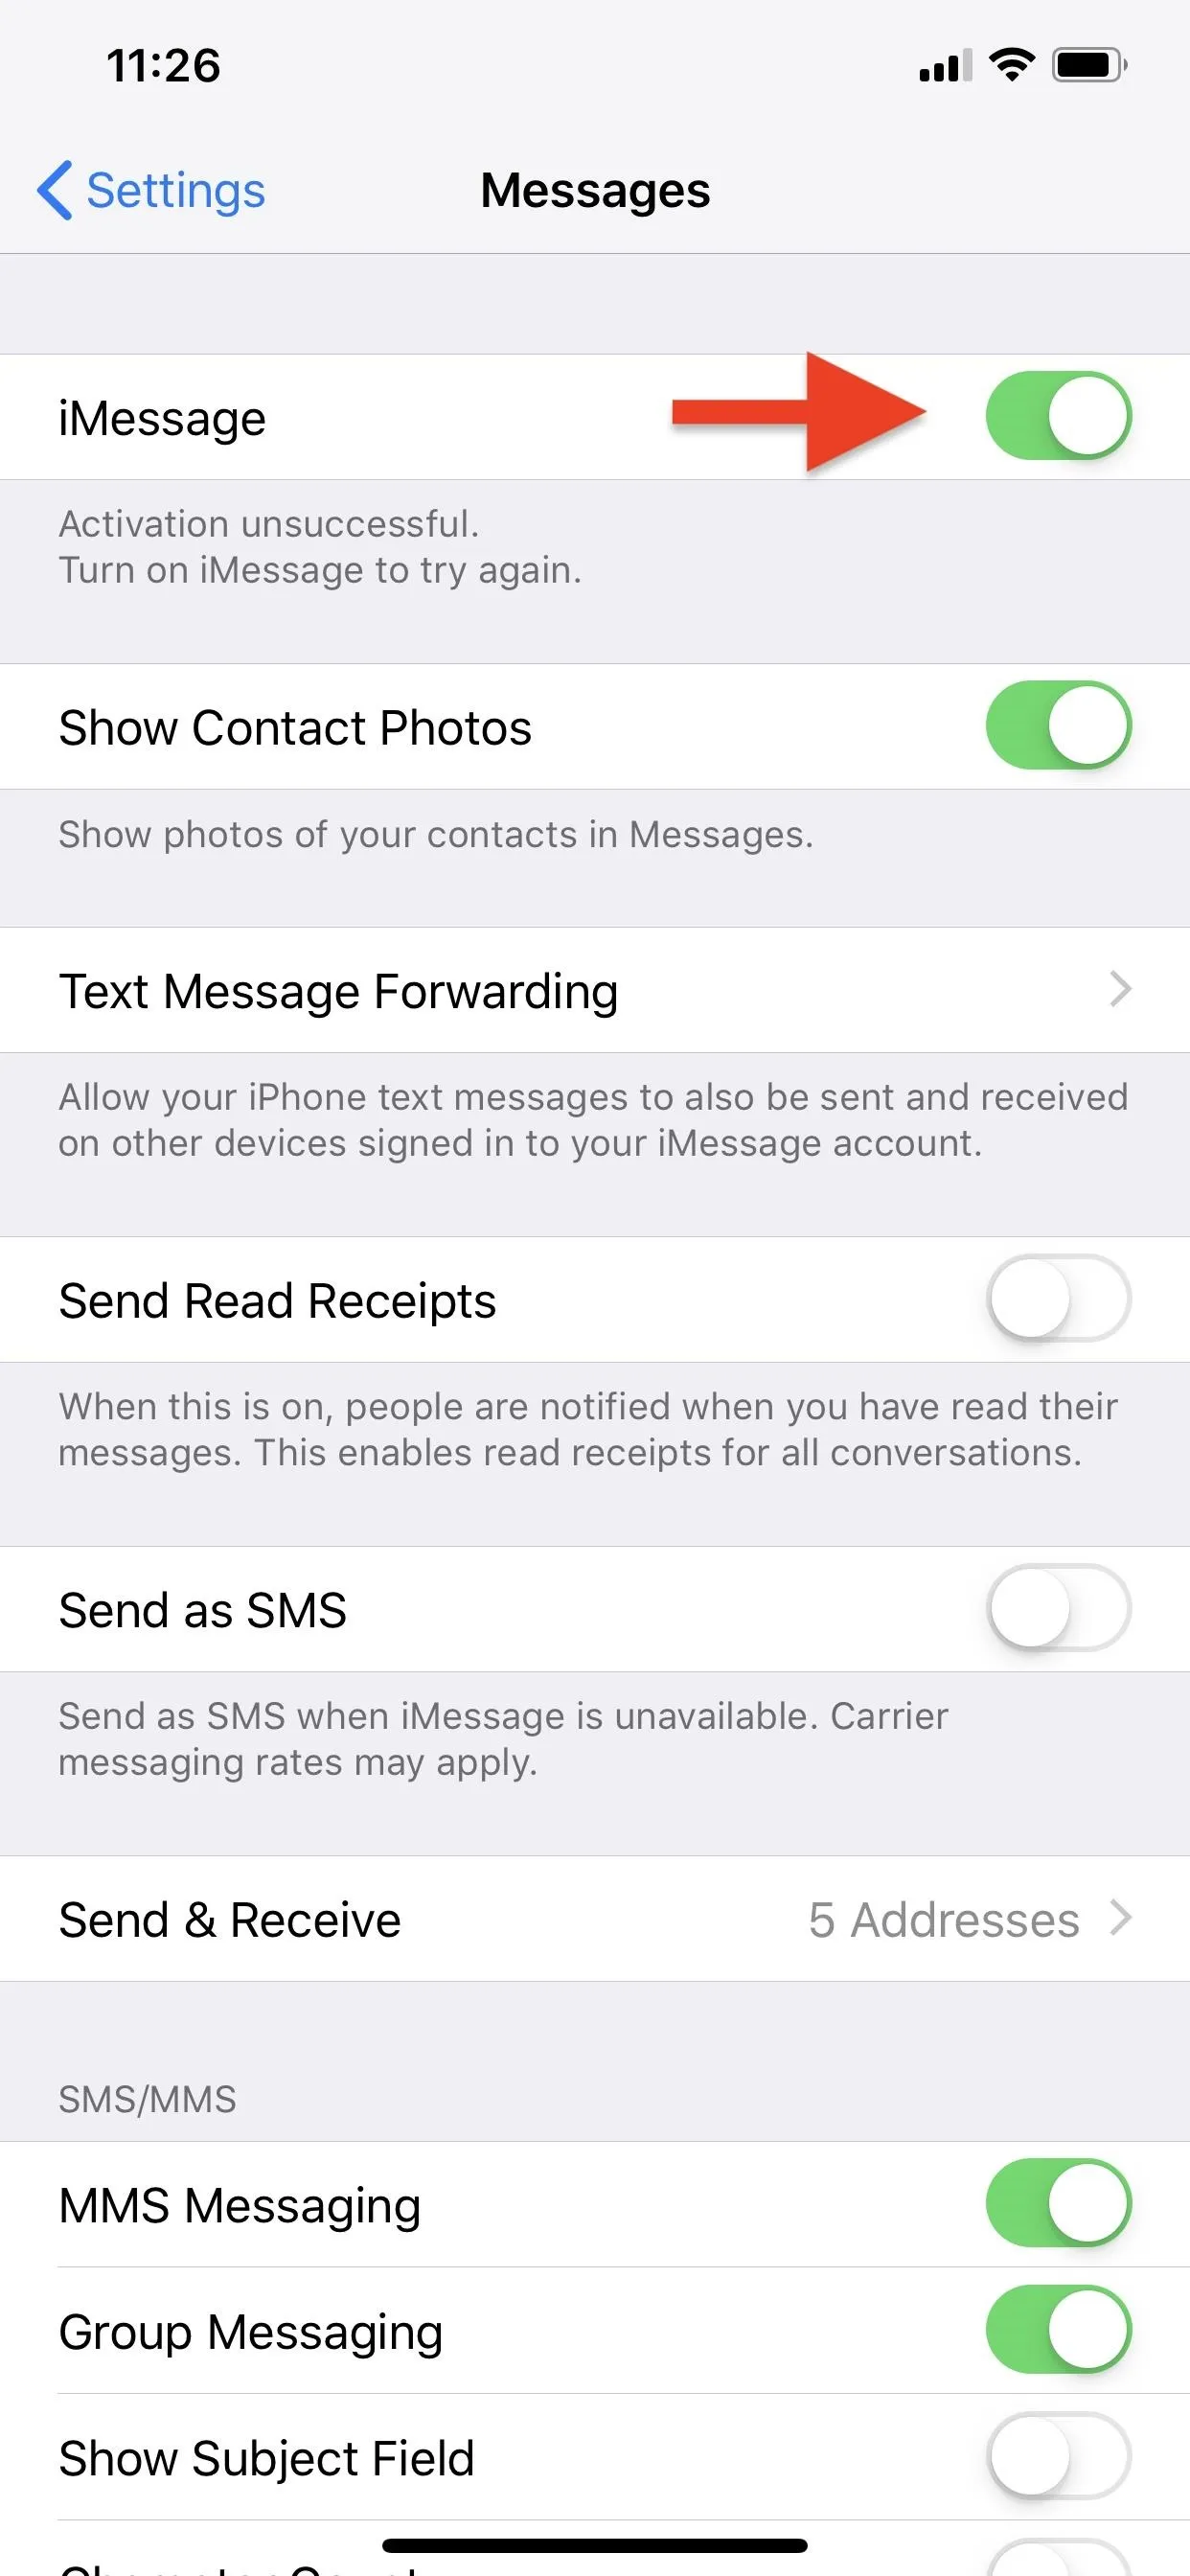
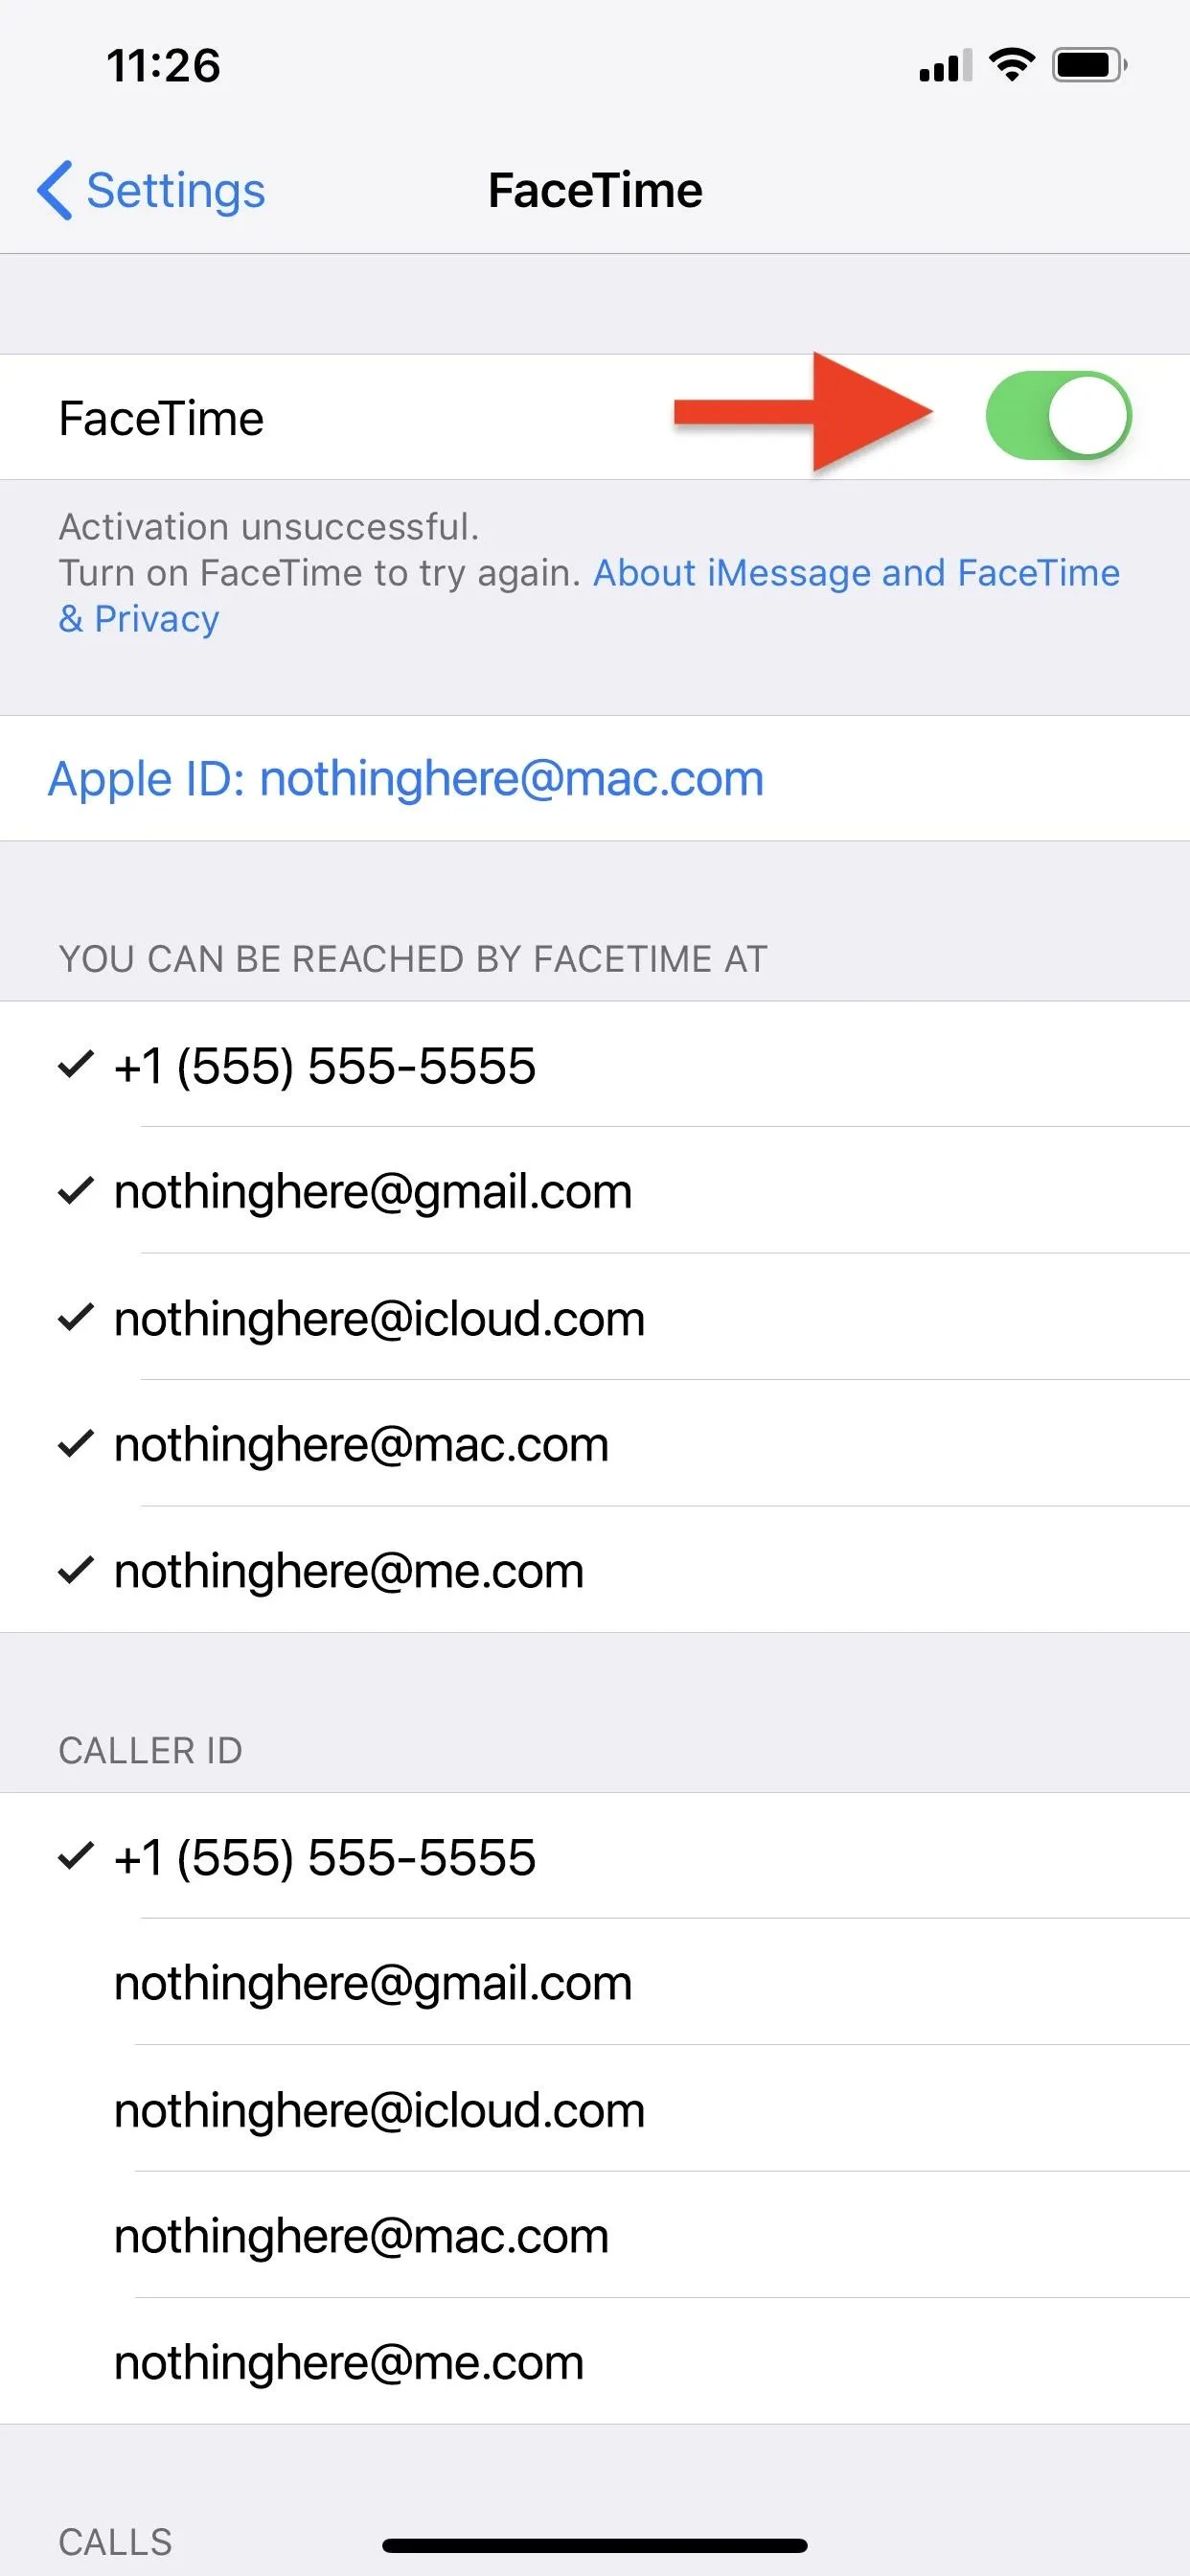


Now, go back to your non-iMessage chat and send another message. Are you still seeing this annoying message? Try deleting the thread altogether after this reset. While it can be a nuisance to lose messages, one user claims it solved the issue for them. However, if you continue to receive the "Number changed to Primary" statement, move onto the next possible fix below.
Option 4: Soft Reset Your iPhone
Your iPhone is really just a computer. Sometimes, computers get jammed up and need to power cycle to solve issues. It's not likely, but try a soft reset on your iPhone, i.e., power down and then back up, to see if your problem goes away.
Option 5: Hard Reset Your iPhone
This part's never fun; When you have a bug that won't shake itself loose, performing a hard reset (aka force restart) on your iPhone is a solemn but necessary nuclear option. This reset will wipe all data from your iPhone — photos, messages, notes, and anything and everything you do on your device. If you want to proceed, make sure you have all your essential data backed up. Anything not saved will be lost after the restore.
We recommend you keep all app data you can tied to iCloud since, to truly ensure your iPhone's software is responsible for the bug, you're not going to want to restore your iPhone to a previous backup. Having your data stuck to iCloud means, once you sign in to your iCloud account on your restored iPhone, your data will come back.
You can make sure your data is saved to iCloud by going to Settings, tapping on your name at the top of the display, select "iCloud," then ensure all relevant data is enabled under the Apps Using iCloud section.
To completely reset your iPhone, open Settings, tap "General," then scroll down and tap "Reset." Here, select "Erase All Content and Settings." If your iPhone hasn't been backed up recently, you might get a reminder to back up. To keep going, tap "Erase Now," enter your passcode, then tap "Erase iPhone" when prompted.
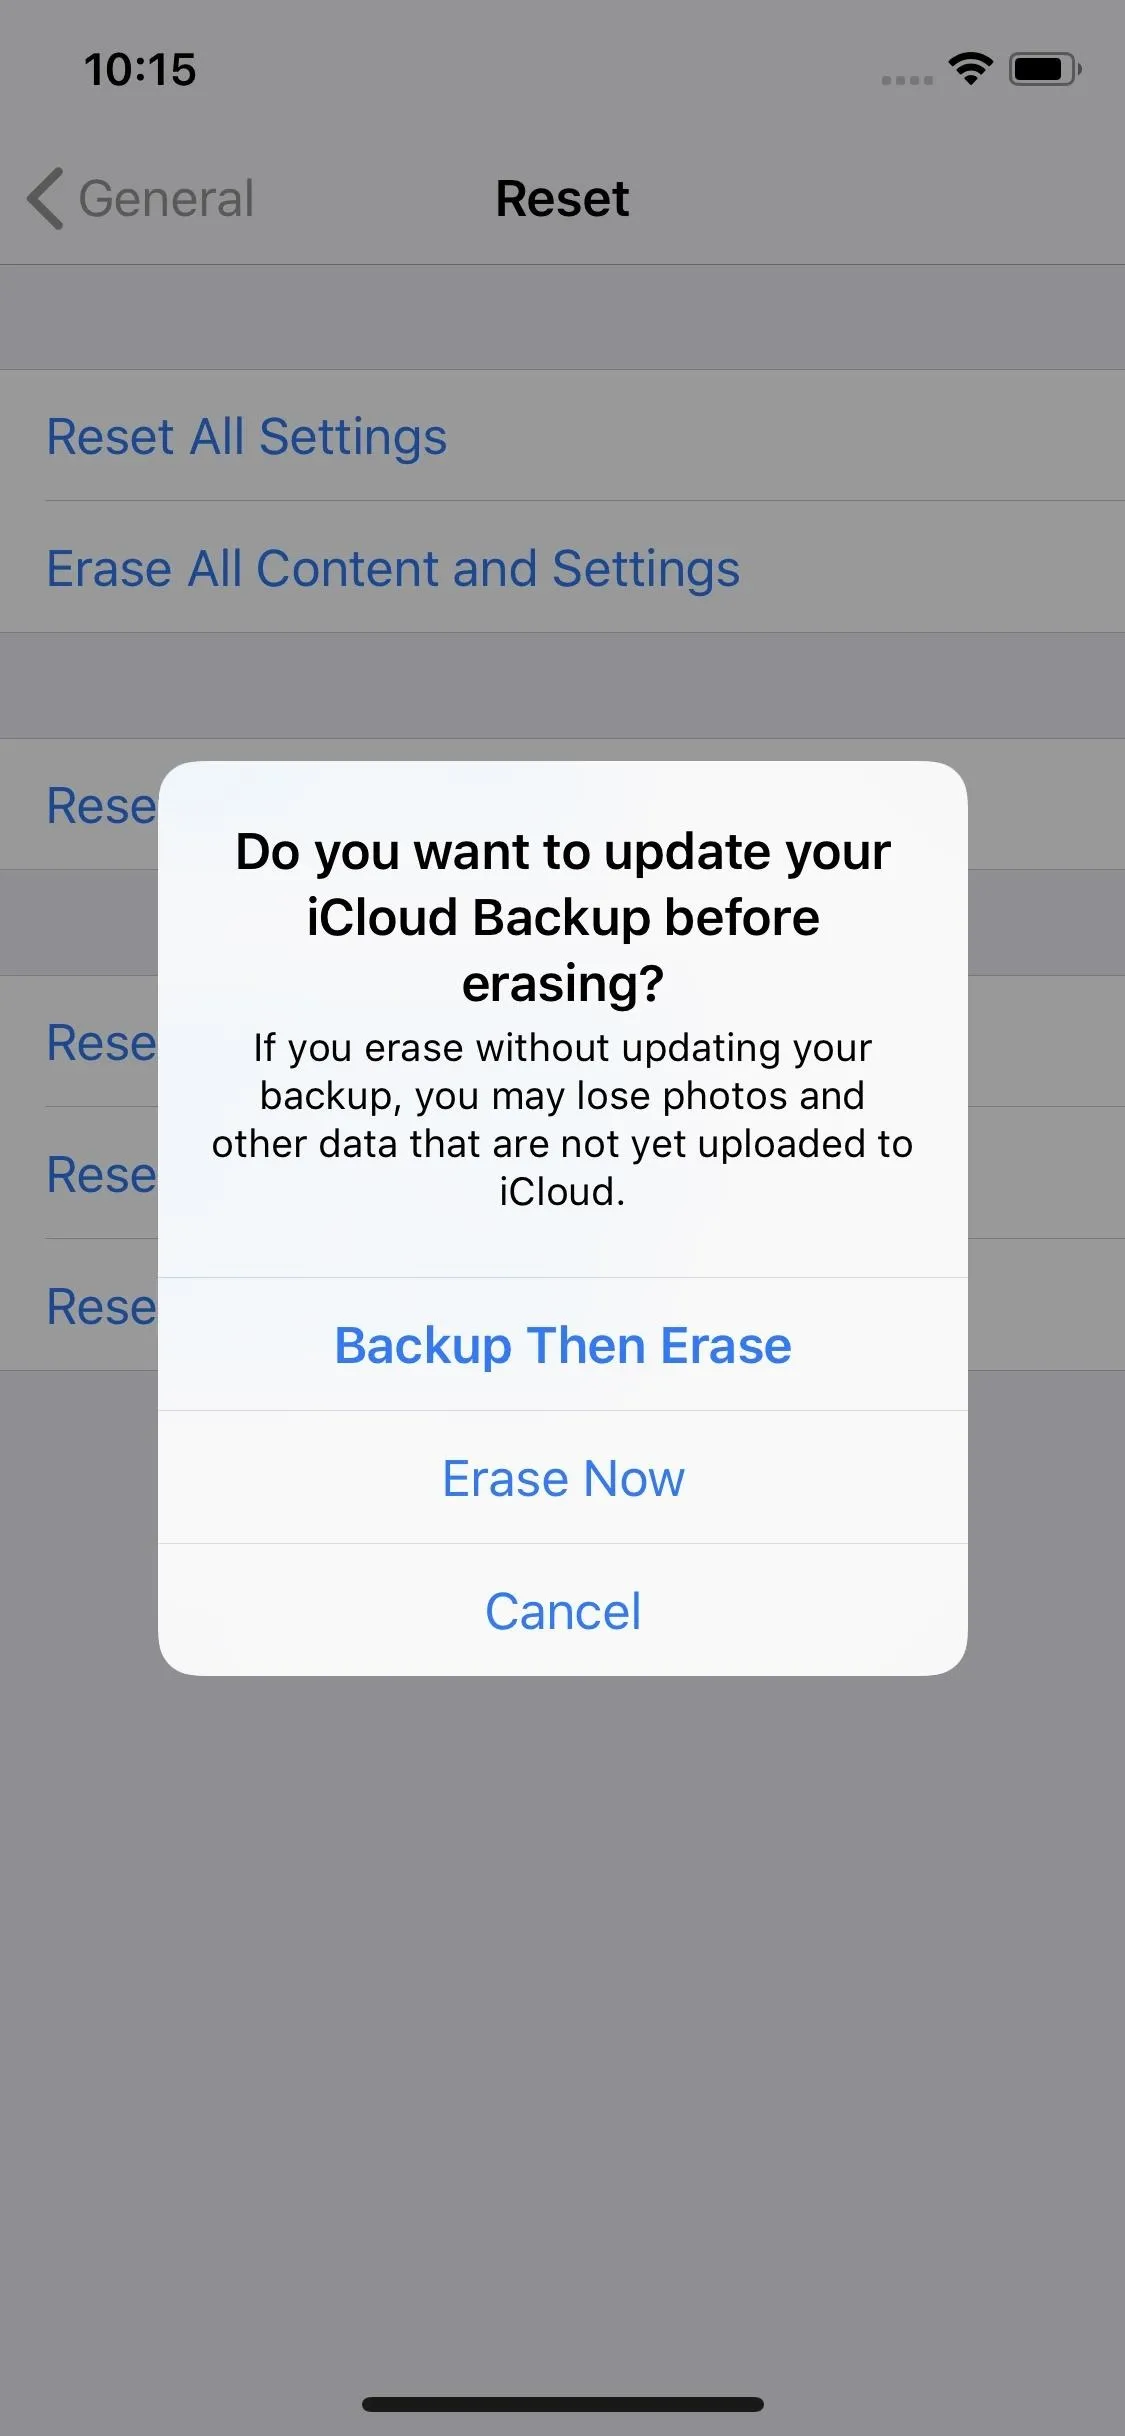
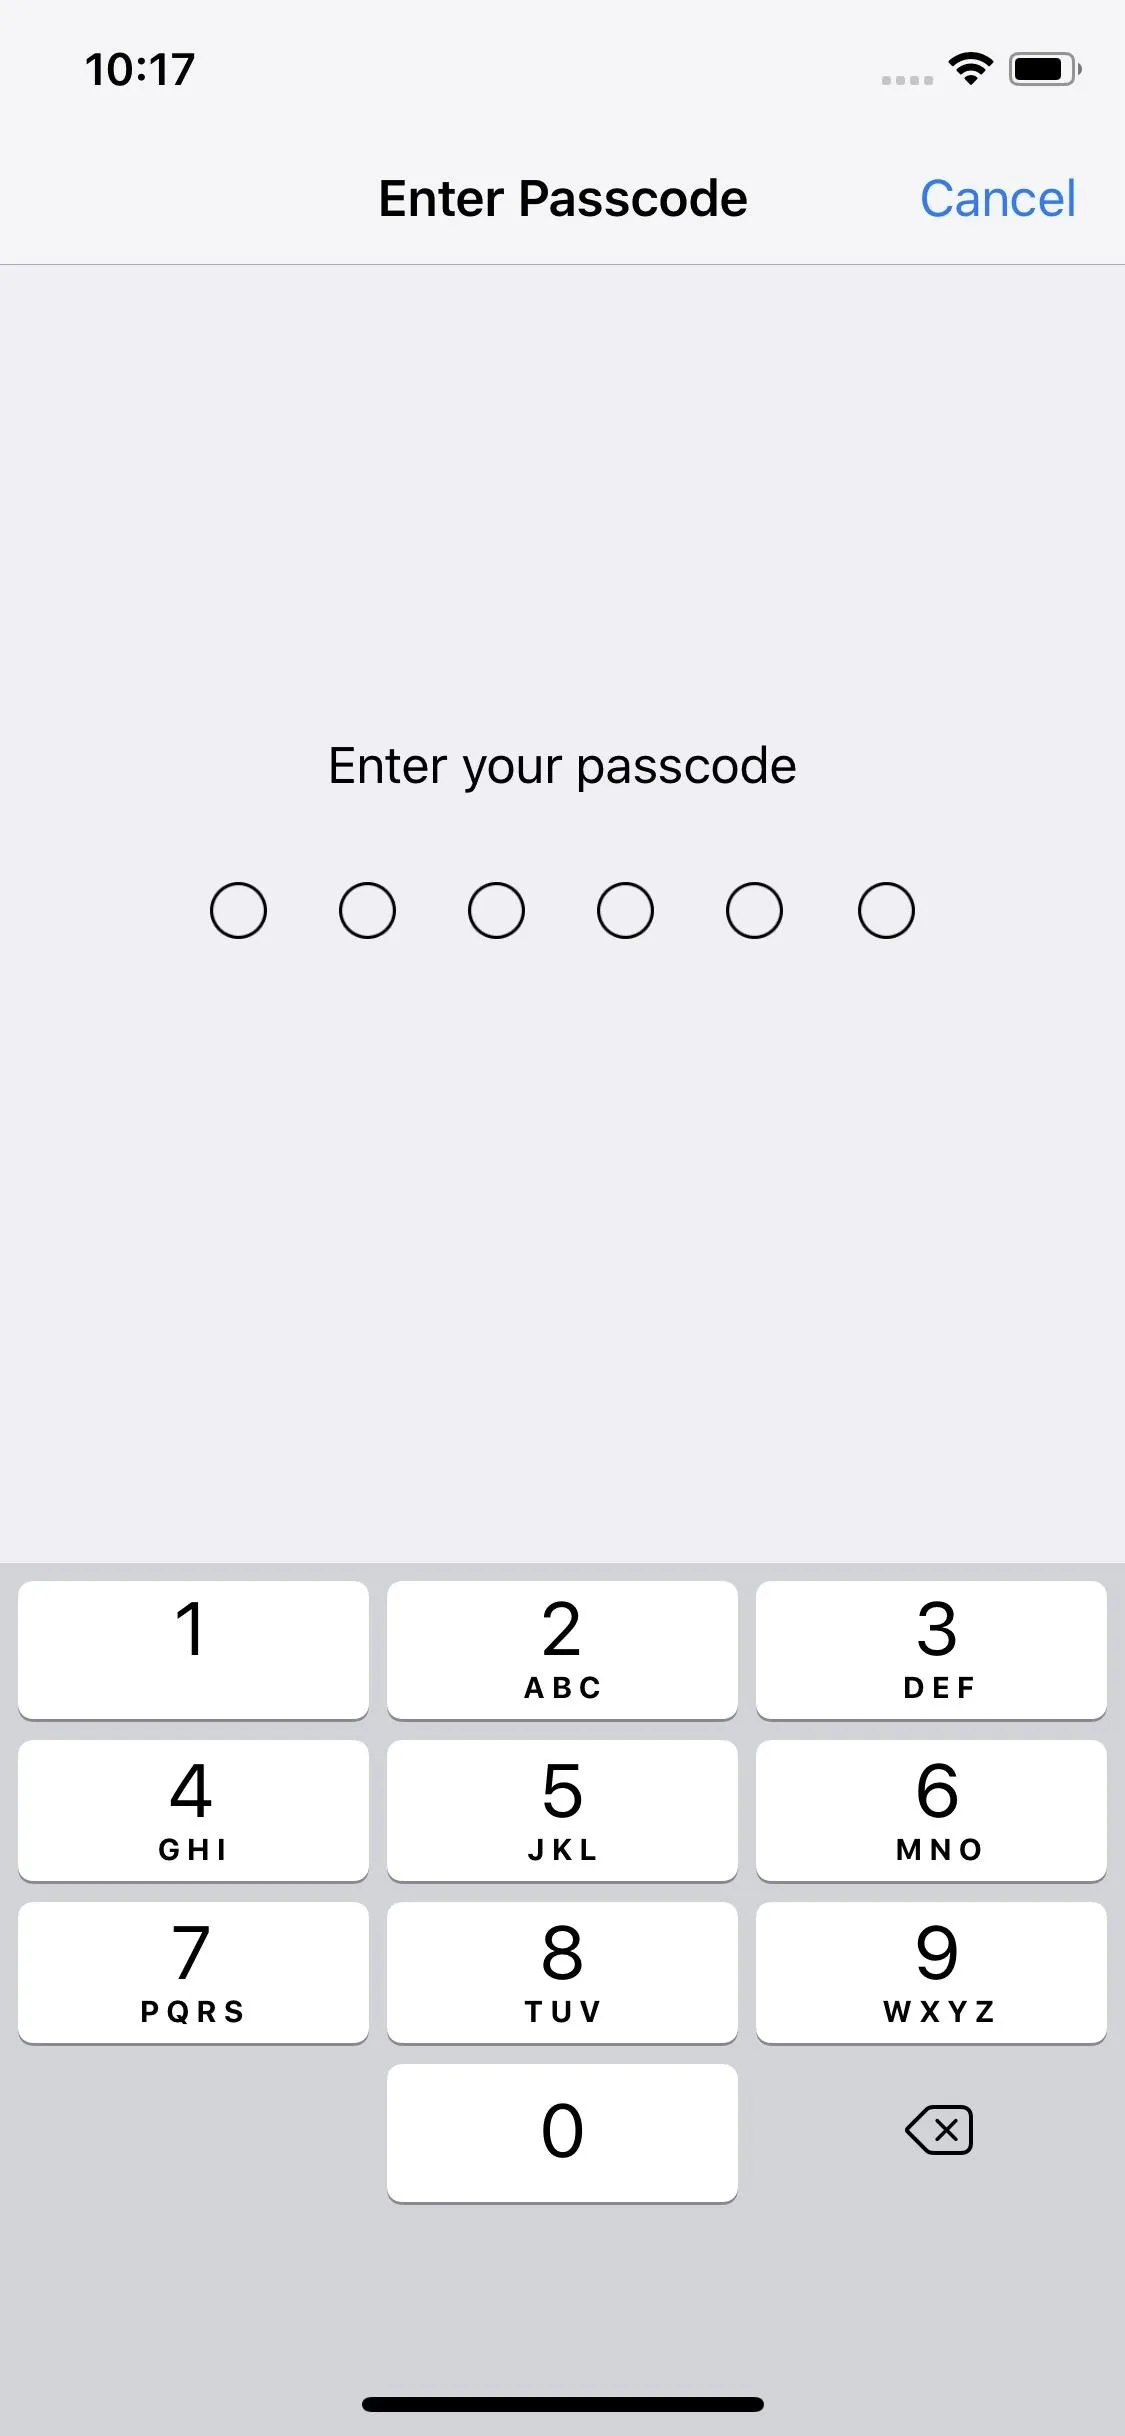
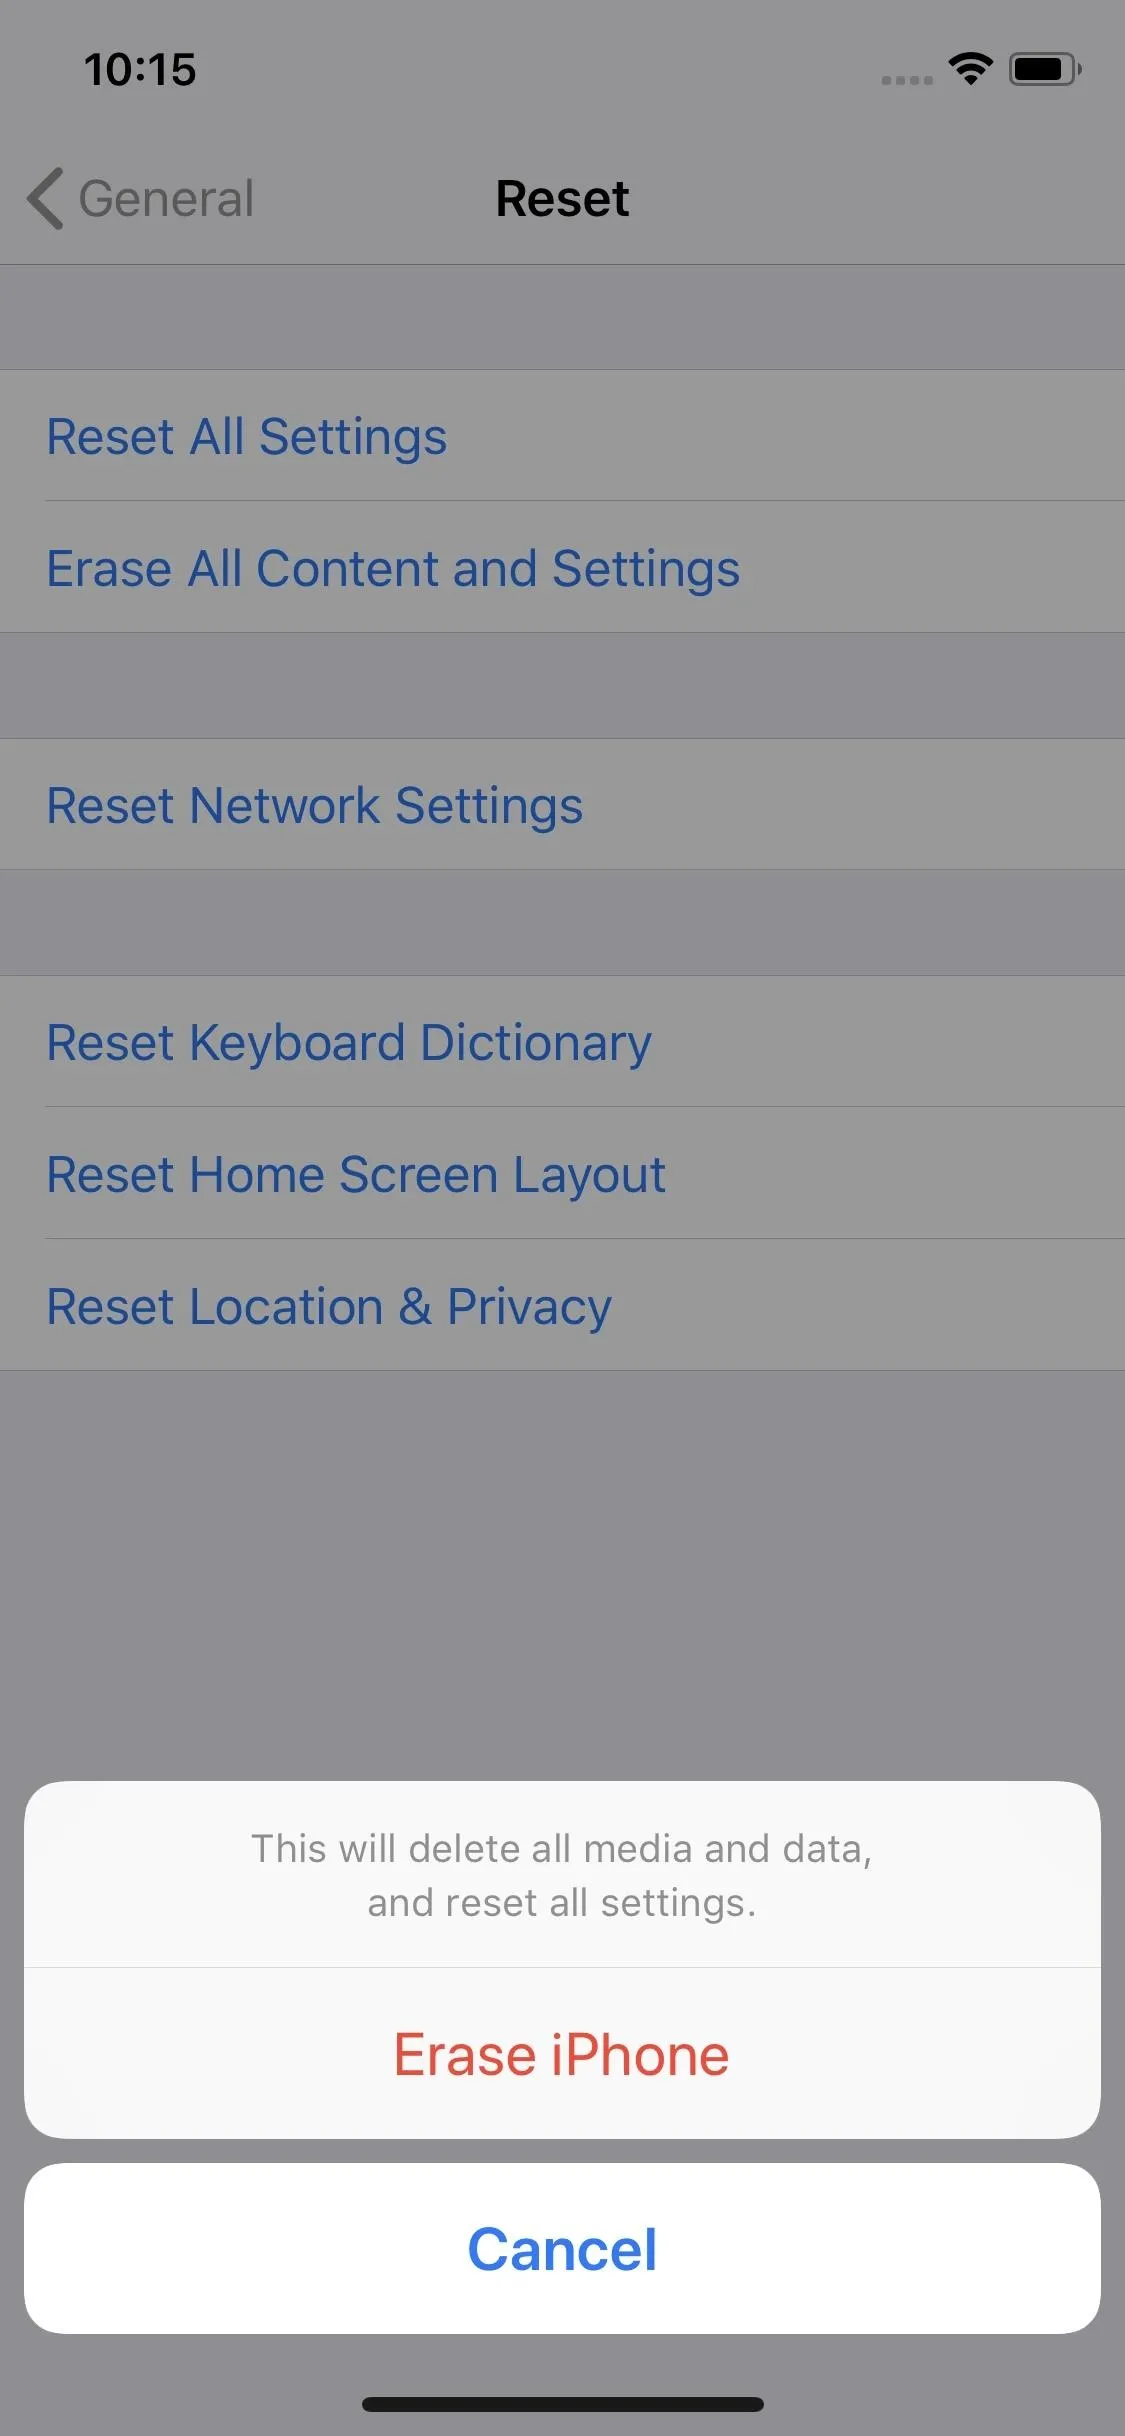


Let your iPhone completely erase. When it boots up again, go through the initial setup, but again, make sure to select "Set Up as New" when prompted. That way, you can ensure that if the problem is related to your iPhone's software, it won't be present.
Cover image and screenshots by Jake Peterson/Gadget Hacks


Comments
No Comments Exist
Be the first, drop a comment!