Apple just upped its sticker game on iPhone and iPad. We've already had stickers available for Memoji, Fitness activities, and third-party iMessage apps, but only some could be used outside the Messages app. Now we can use stickers practically anywhere from the new stickers drawer, with fun emoji stickers to boot. Even better, we can stickerize the subjects of our own photos and videos, including animations.
You can create custom Live Stickers for almost anything seen in your regular pictures, videos, and Live Photos. Anything that works with Apple's cutout tool, which lifts a subject from a photo to create a static image of it without the background, can be turned into a Live Sticker for your personal sticker collection. You just need iOS 17 or iPadOS 17 on your iPhone or iPad.
- Don't Miss: Instantly Crop Photos and Videos on Your iPhone Using iOS 17's Hidden Quick-Cropping Tool
The Types of Custom Stickers Available
Before, you could use the cutout tool on an object in a photo or video to create a sticker-like image without a background. This type of sticker would not be accessible from your keyboard and merely acted as a static image file. You can still do this on iOS 17 and iPadOS 17, but there's a better option.
With the new software updates, you can add people, animals, and objects from your regular photos and videos to the stickers drawer, accessible via the keyboard or Markup tools. By adding to the stickers drawer, they can act and behave as stickers do, so you can quickly send one as a reaction in an email or drop one on top of text in an iMessage conversation.
You can also turn the subjects in your Live Photos into animated Live Stickers. These types of stickers work just like regular Live Stickers created from your own photos and videos, but they're also animated, adding a whole new dynamic to messages, emails, notes, and more. Live Photos capture 1.5 seconds of video before and after taking a picture, and the stickers use that movement for the looping Live Sticker.
How to Create Custom Live Stickers
While the general process for creating custom Live Stickers from your own media is pretty much the same, there are a few ways to start a sticker. First, you can choose them from the Photos app or anywhere you can preview the image or video. Second, you can do so straight from the keyboard's new stickers drawer.
Method 1: Directly from a Photo or Video
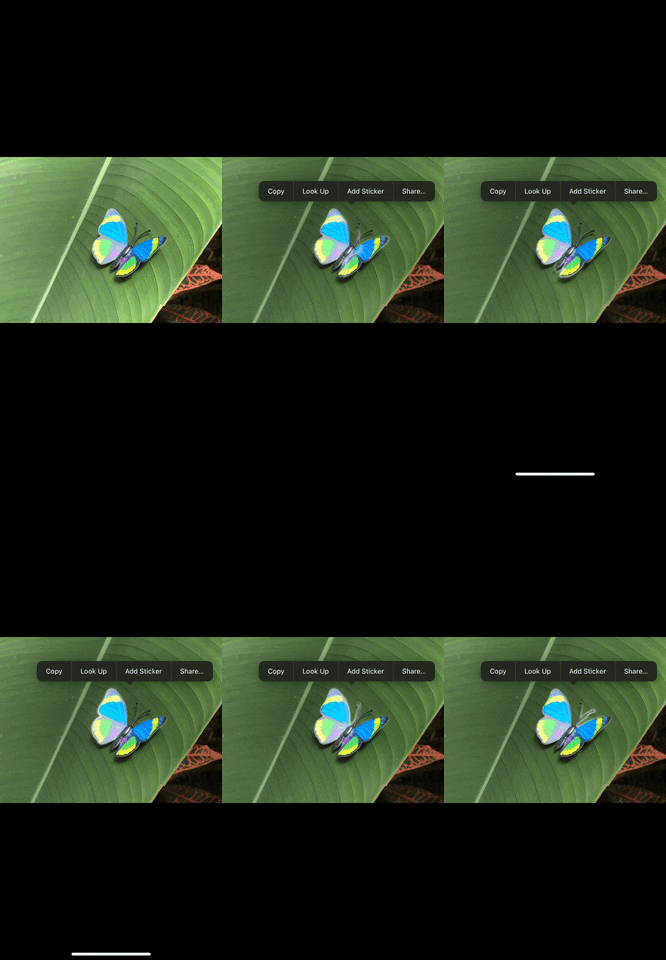
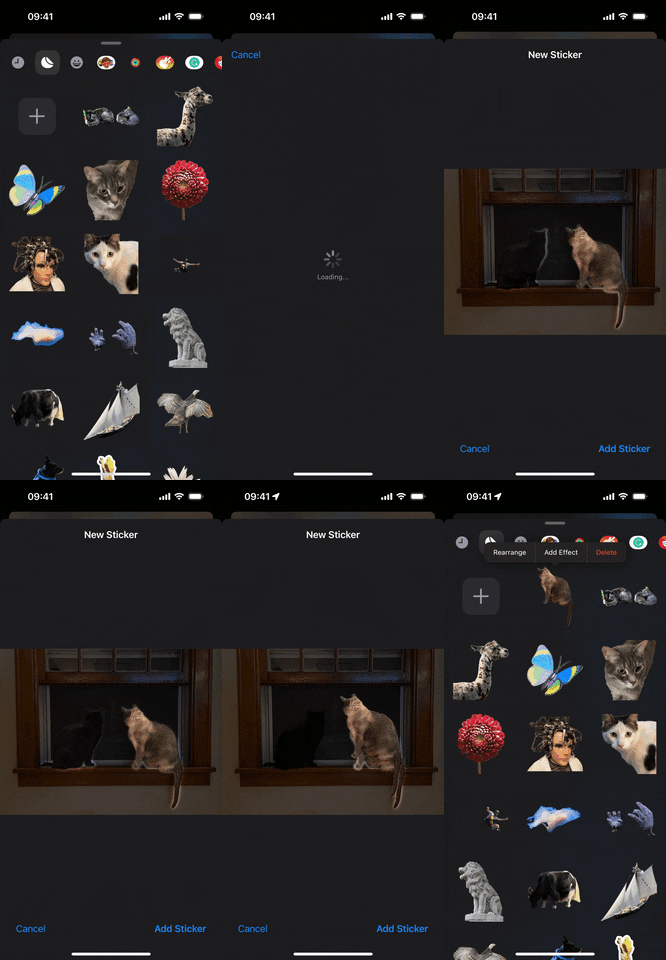
If you're viewing a photo or video in the Photos app or even in a different app, you can isolate the subject from the background to make it a Live Sticker. With the photo or video expanded:
- Press the subject until it pops away from the background. A bright outline will move around the subject to indicate that it's isolated, and you should see a contextual menu appear.
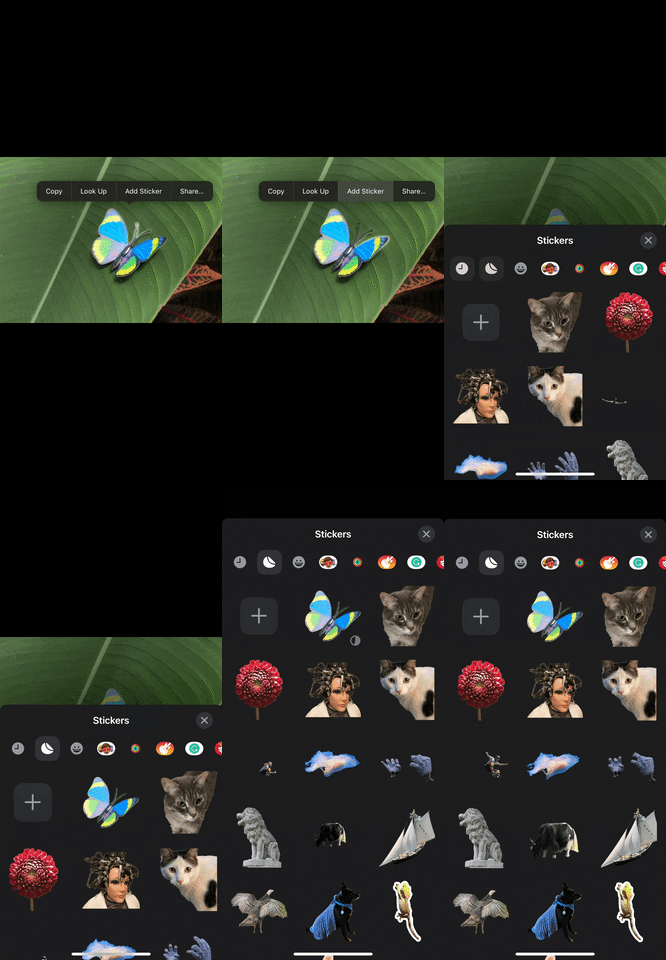
- Tap "Add Sticker" from the contextual menu.
This will automatically open the stickers drawer and move your new custom Live Sticker to it. If the subject came from a regular photo, video, or Live Photo with the Live effect disabled, it should appear as a static symbol. But if it came from an active Live Photo, you should see it as an animated Live Sticker.


Method 2: Directly from the Stickers Drawer
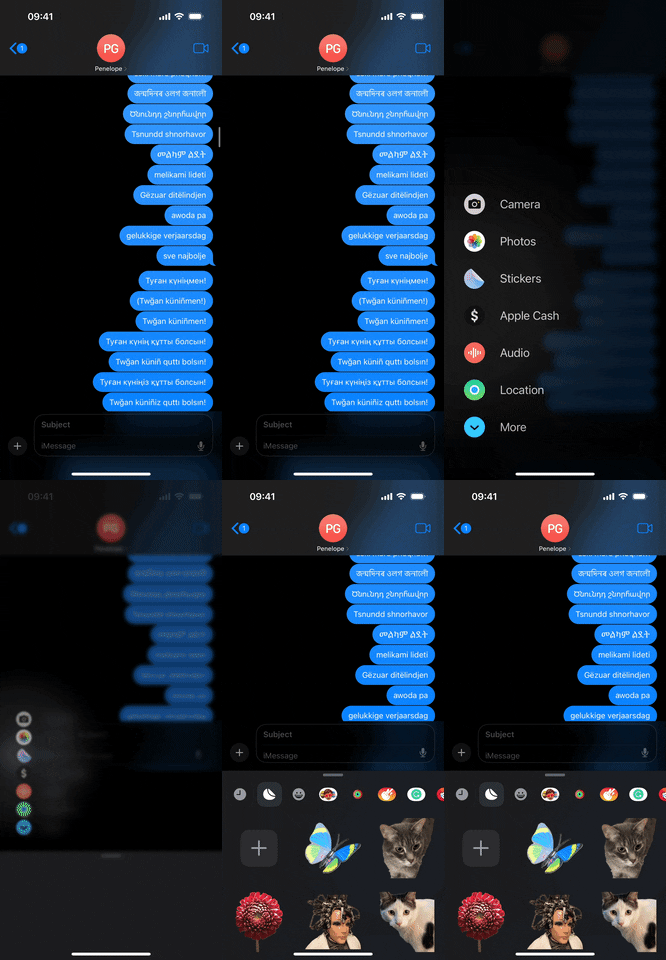
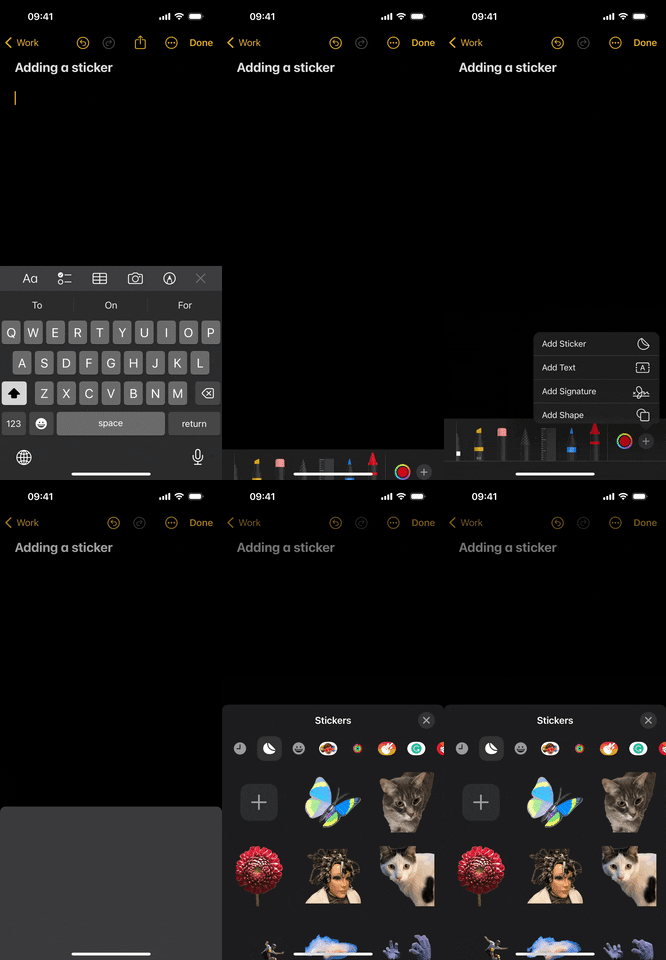
If you're chatting with someone or a group in the Messages app, you can open the stickers drawer first, then select a photo with a subject that would make a good sticker. You can also open the stickers drawer in other apps. Here are a few places you can find the stickers drawer:
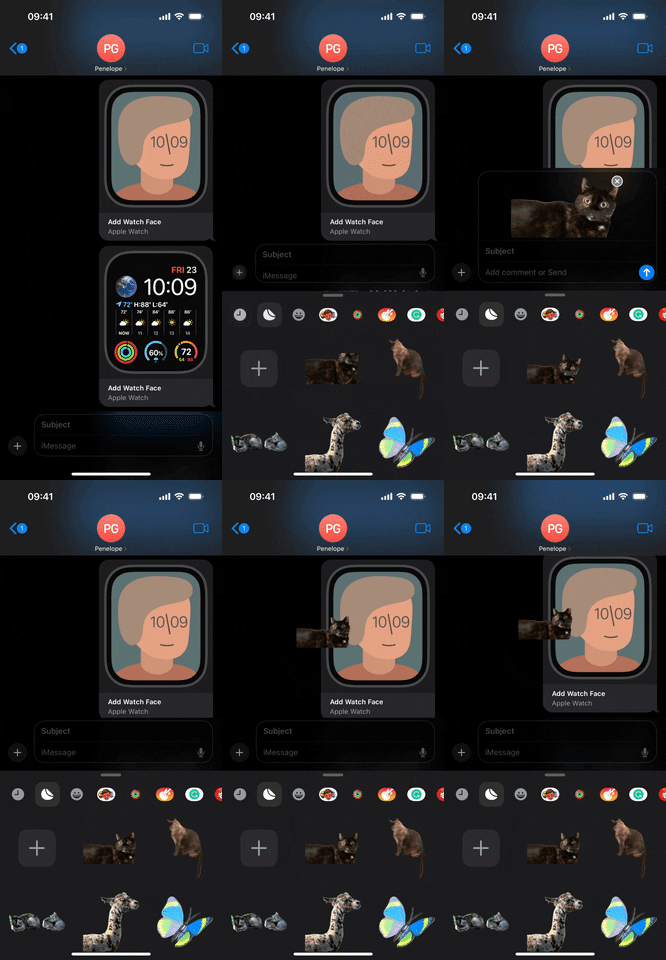
- Messages: Tap the plus (+) icon next to the text field in a conversation, then select "Stickers" from the list that appears. (Pictured below.)
- Freeform: Tap the pictures icon, then select "Stickers" from the list that appears.
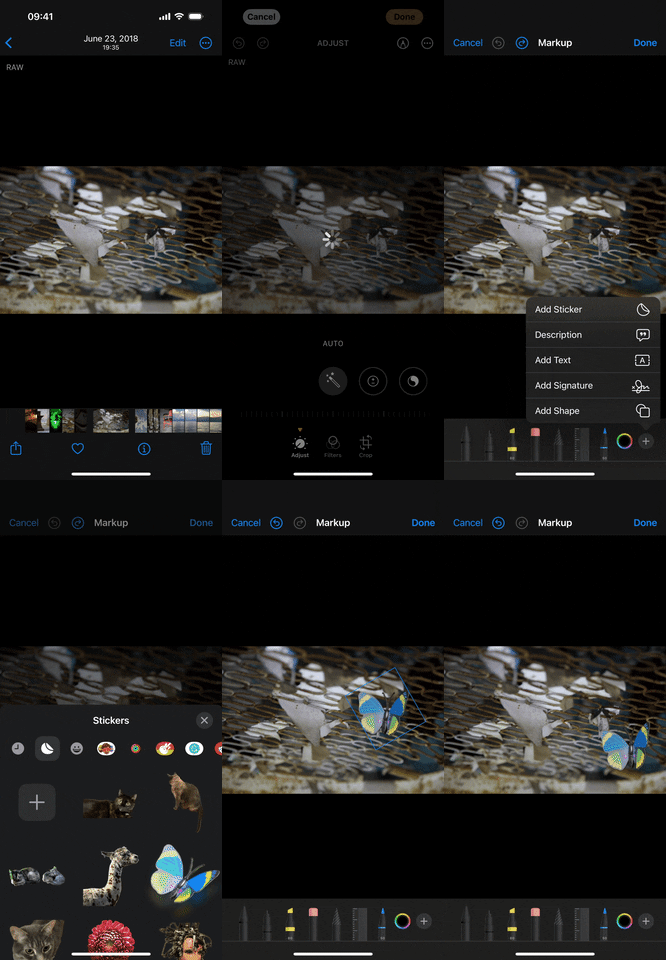
- Notes: Open the Markup tool, tap the plus (+) icon next to the chosen color, and select "Add Sticker." (Pictured below.)
- Mail: Open the Markup tool, tap the plus (+) icon next to the chosen color, and select "Add Sticker."
- Photos: Open the image or video in the editor, tap the Markup tool, tap the plus (+) icon next to the chosen color, and select "Add Sticker."
- Files: Open an image, video, or PDF, tap the Markup tool, tap the plus (+) icon next to the chosen color, and select "Add Sticker."


When the sticker drawer opens:
- Ensure you're on the Live Stickers tab, which looks like a peeling sticker.
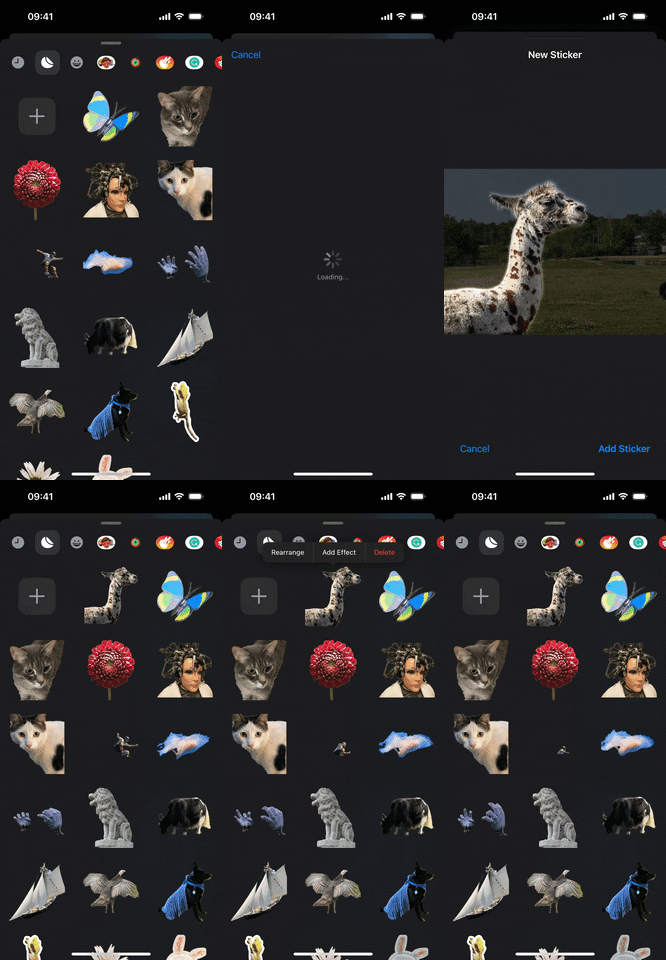
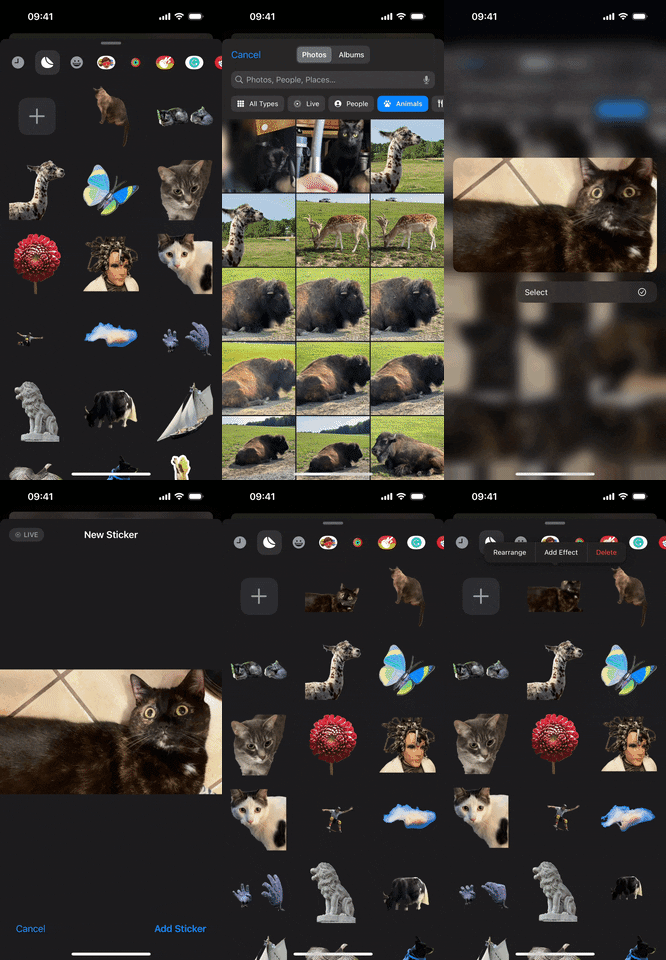
- Tap the large plus (+) button below the row of sticker options.
- Choose a photo from the photo picker that appears. To create an animated Live Sticker, tap "Live" at the top to filter the results to just Live Photos.
- You'll see a preview of the new sticker, with the background darkened so you can focus on the subject it chose. If there is more than one subject, you can select one or the other or both in some cases to change the selection it chose.
- Tap "Add Sticker" if satisfied or "Cancel" to try another photo or video.
This will automatically open the stickers drawer and move your new custom Live Sticker to it. If the subject came from a regular photo or Live Photo with the Live effect disabled, it should appear as a static symbol. But if it came from an active Live Photo, you should see it as an animated Live Sticker.


How to Add Effects to Custom Live Stickers
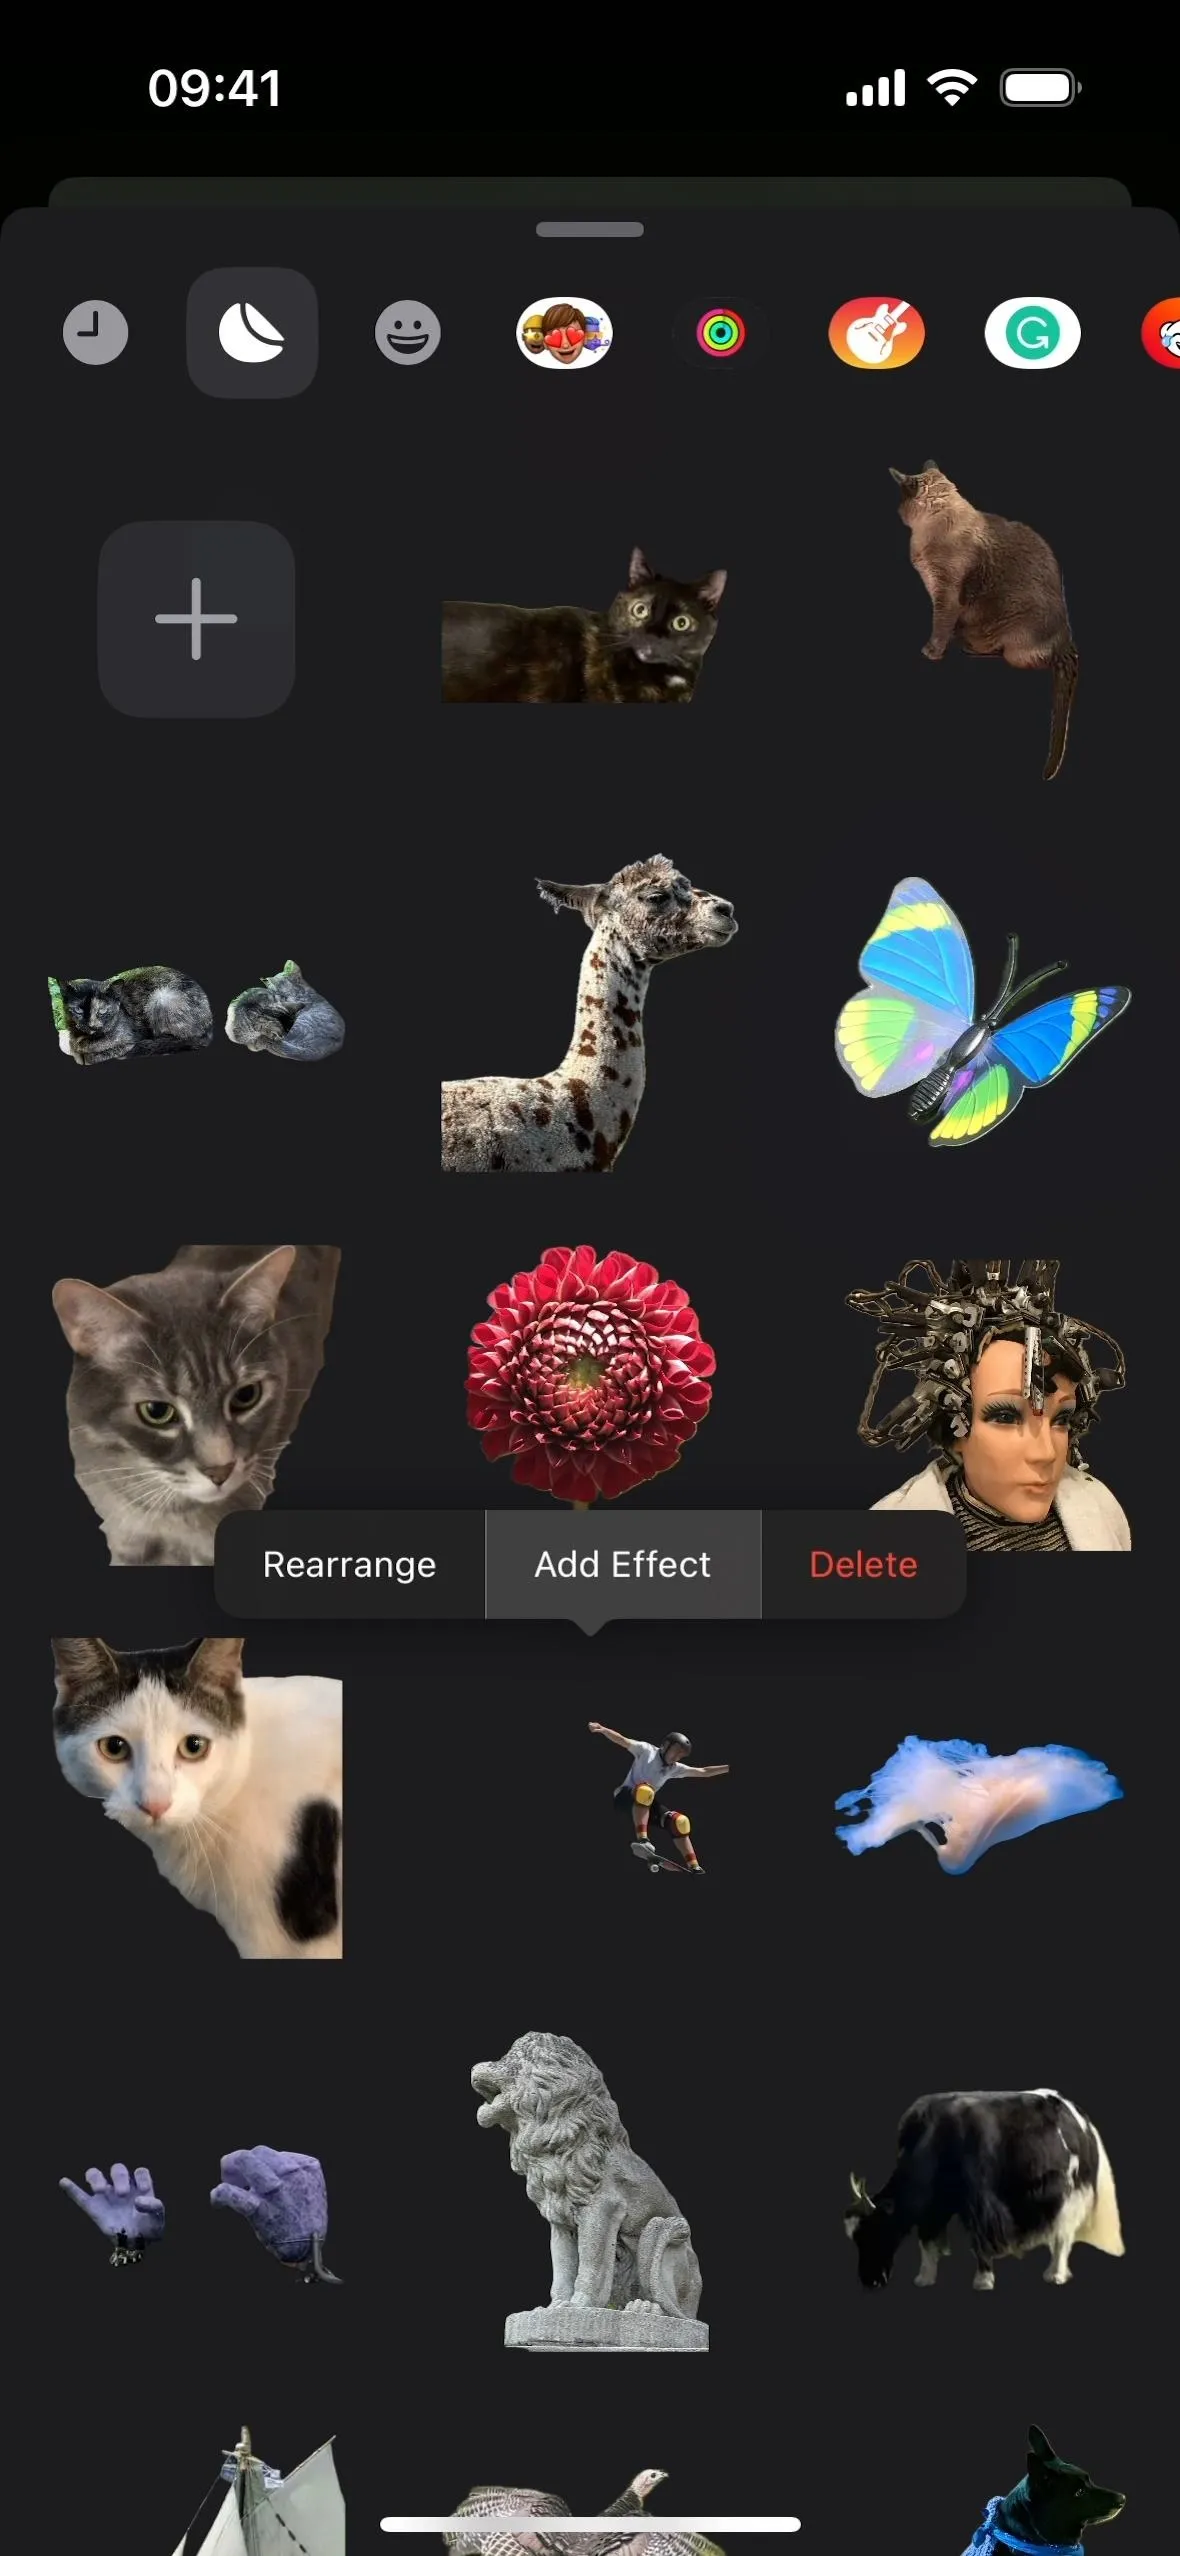
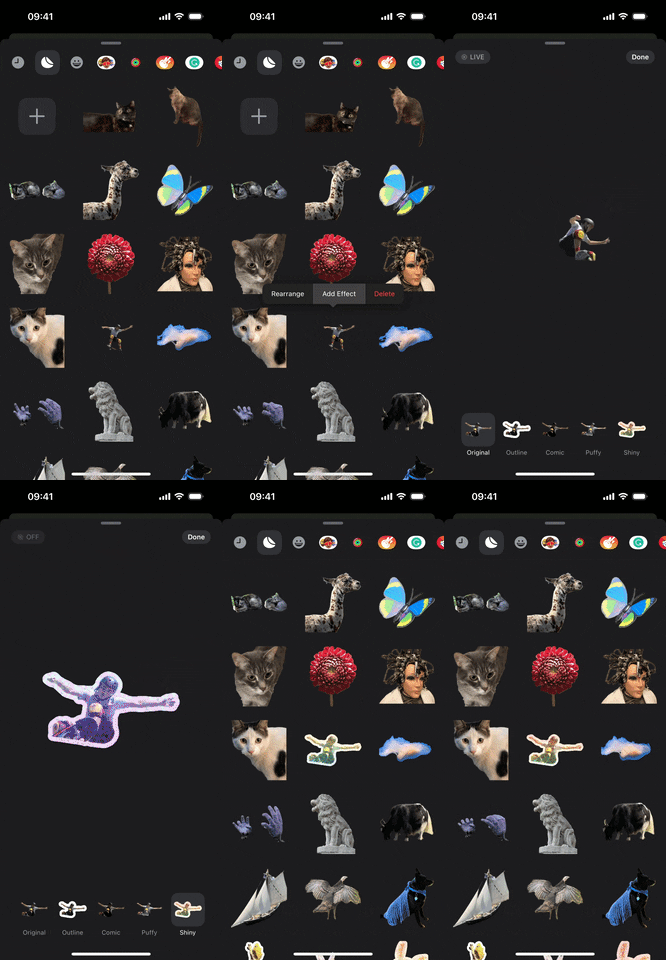
After you add a new custom Live Sticker to the stickers drawer, you can add an effect to it. When it first lands in the stickers drawer, you may see the contextual menu pop up for it. If not, tap and hold the Live Sticker to force it to appear.
From the popover menu, tap "Add Effect." You can keep it as the original or add an Outline, Comic, Puffy, or Shiny effect. If you're adding an effect to an animated Live Sticker, it will disable the animation, effectively turning it into a regular static sticker.
These effects react with the gyroscope in your iPhone or iPad when in Messages, so you'll see the applied effects change as you tilt your device, which adds another level of awesomeness to Live Stickers.


How to Turn Stickers with Effects Back to Animated Live Stickers
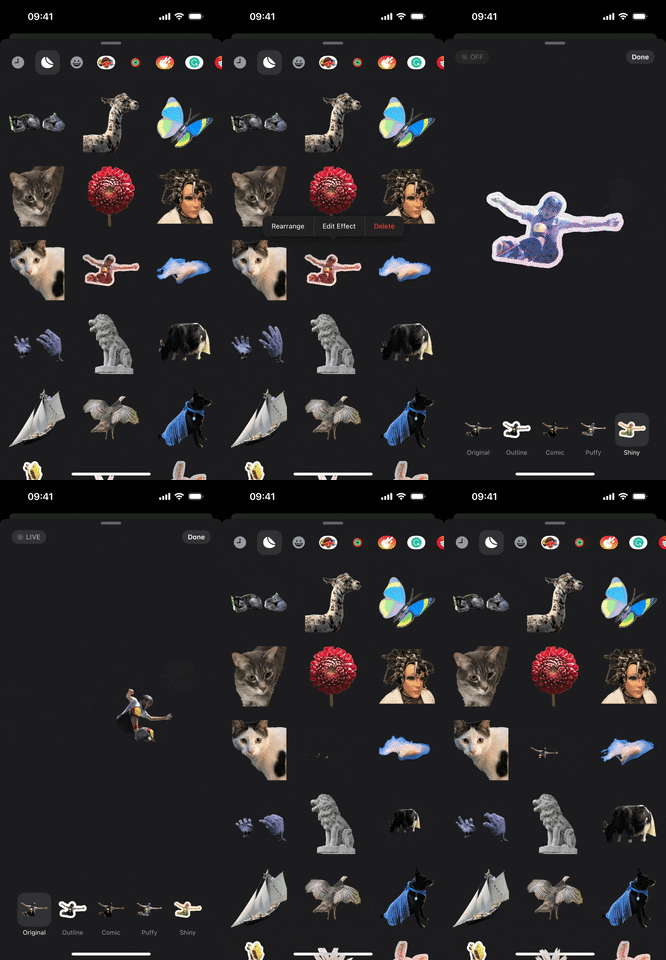
If you add an effect to an animated Live Sticker, turning it into a regular Live Sticker, you can revert to the animated version at any time. From the stickers drawer:
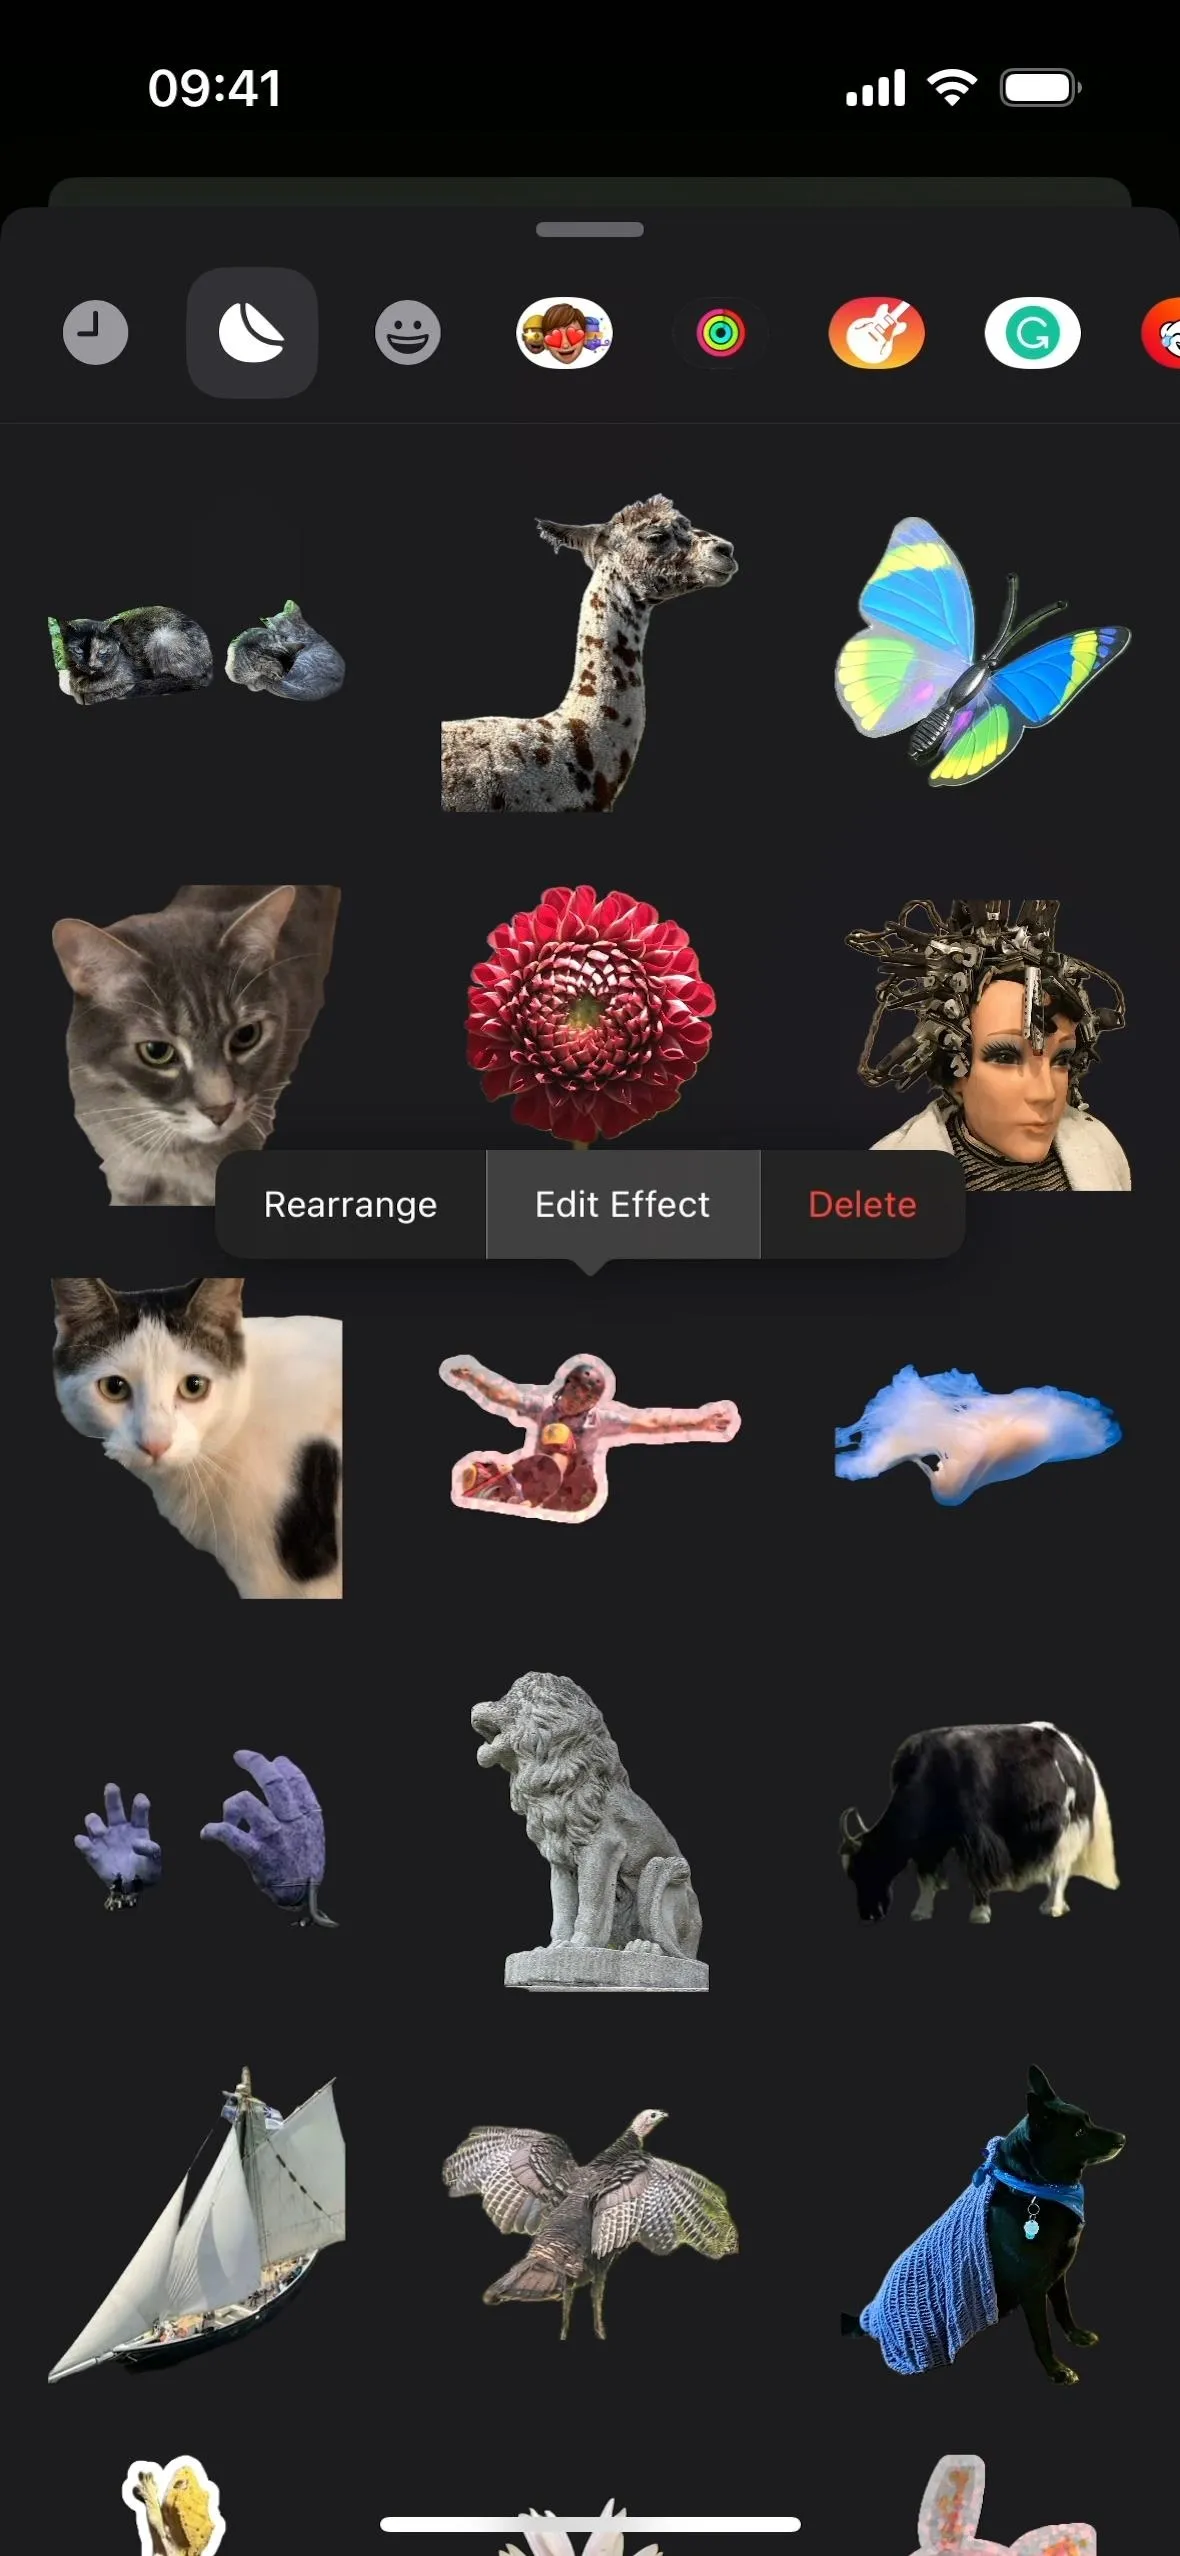
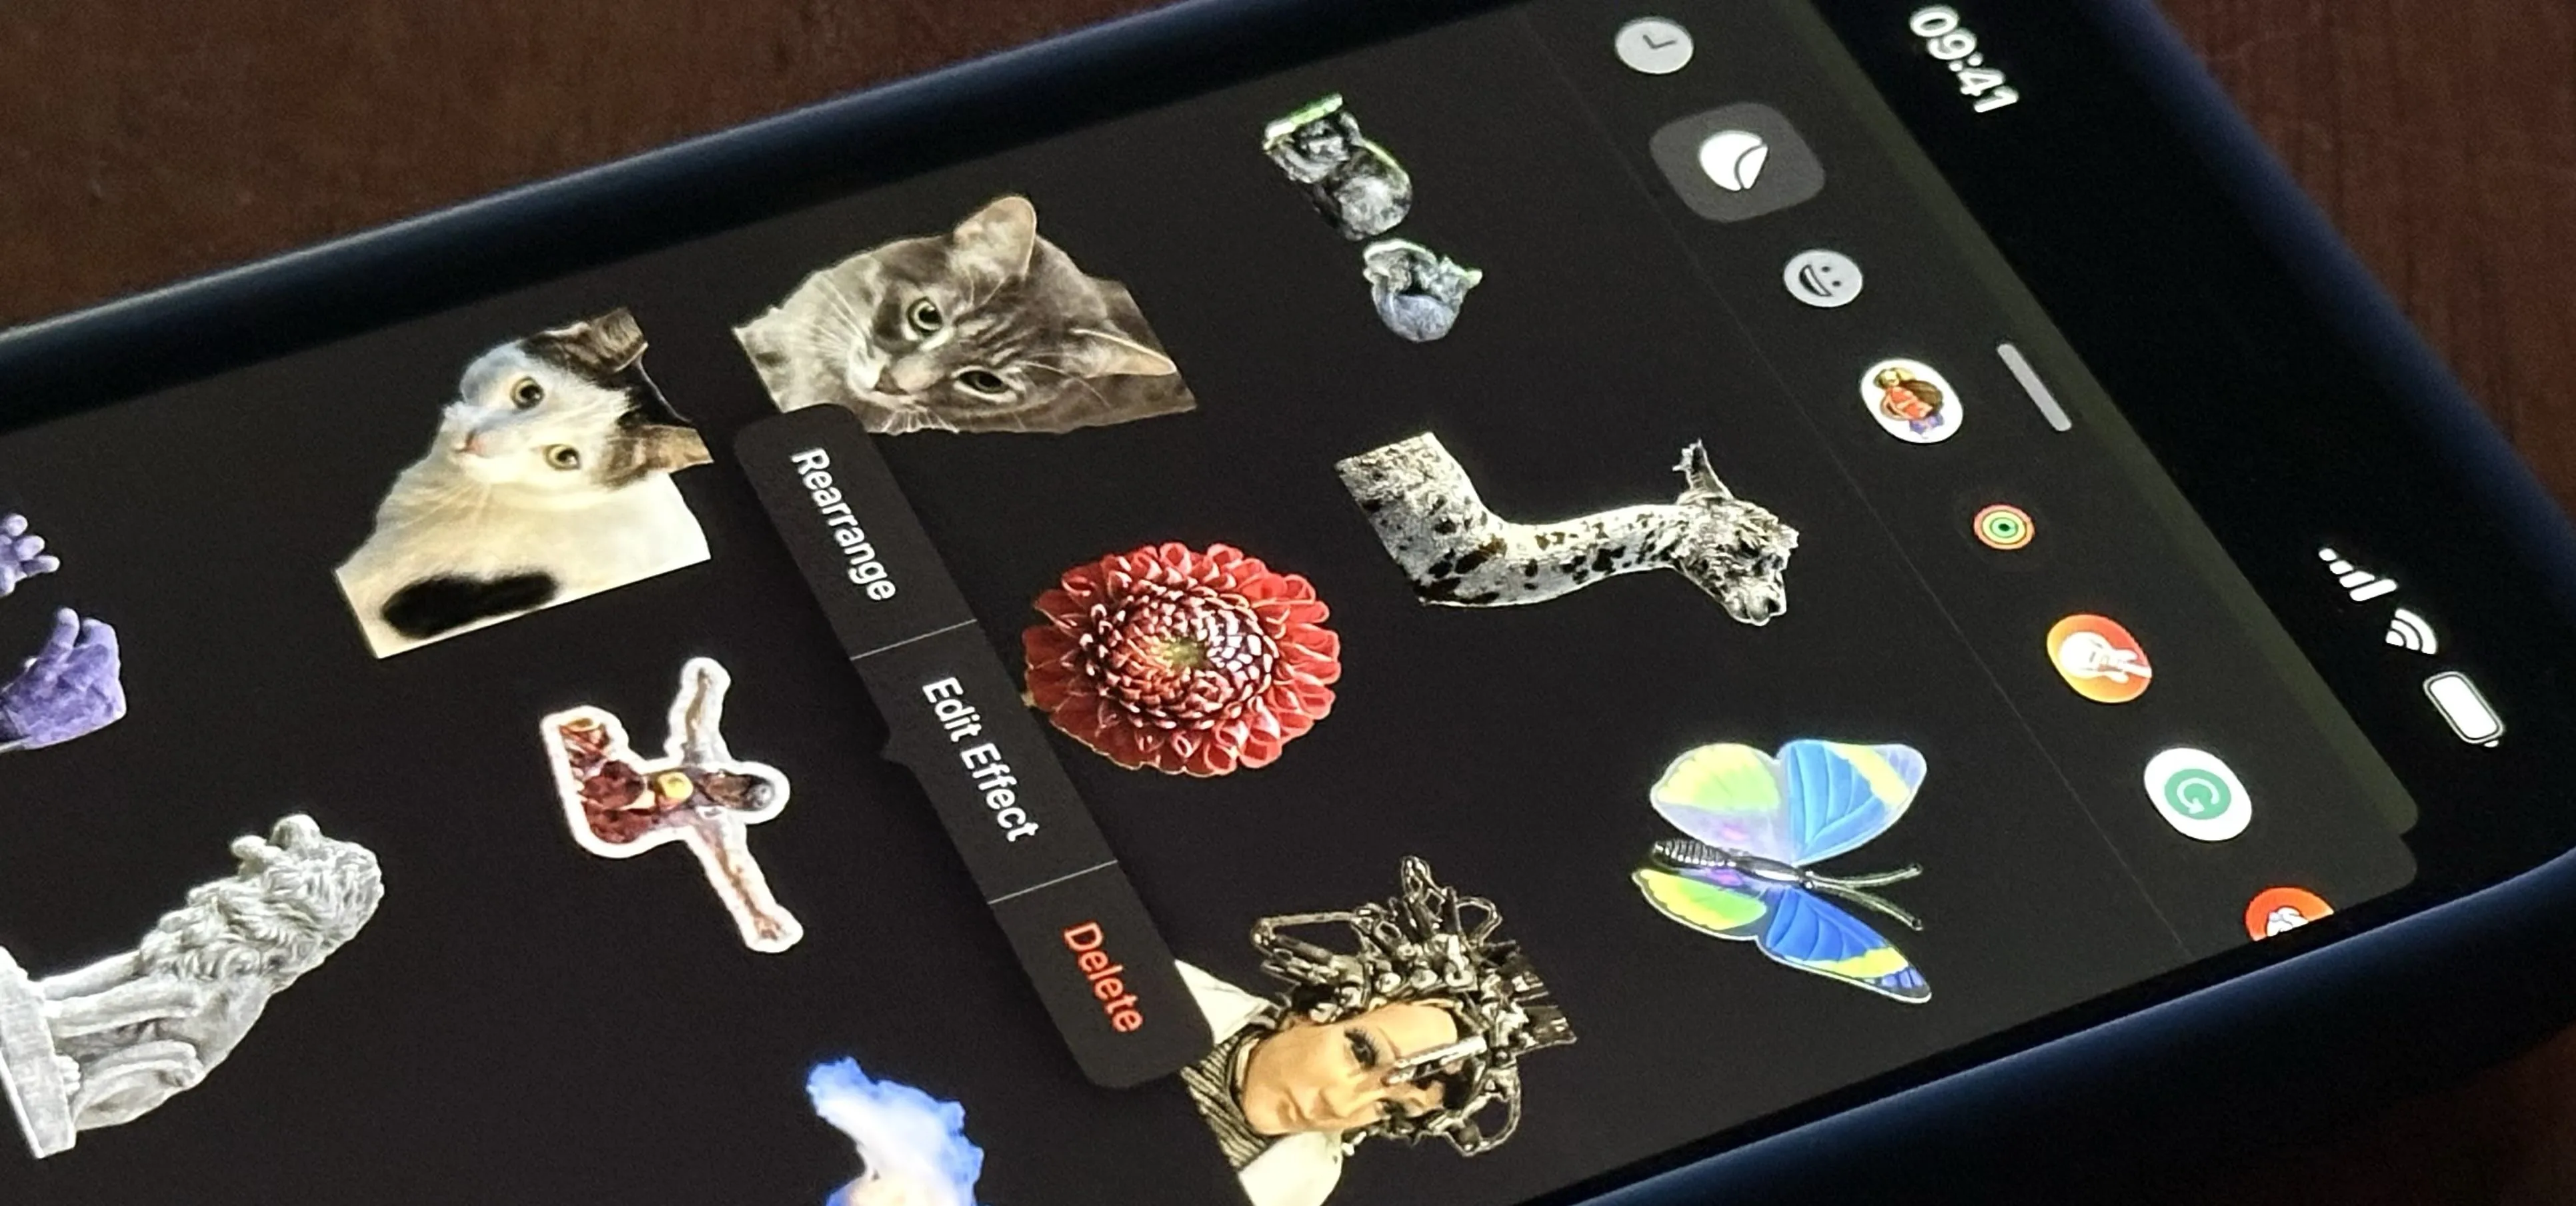
- Tap and hold the Live Sticker to make the contextual menu appear.
- Select "Edit Effect."
- Choose the "Original" option.
- If it's not moving in the preview, ensure "Live" is enabled; if it says "Off" next to the Live Photos icon, tap it to turn it back on.
- Tap "Done" to save your changes.


How to Use Live Stickers in Apps
Your Live Stickers sync with iCloud, so all of your Live Stickers will be available across your iOS 17, iPadOS 17, and macOS 14 Sonoma devices. They can be used in many different iOS, iPadOS, and macOS apps.
Messages is the most obvious place to use Live Stickers, but they also work in Freeform, Notes, and Mail, to name just a few, as well as in many third-party apps and Markup for PDFs, photos, screenshots, drawings, etc. To reiterate from above, here are a few examples:
- Messages: Tap the plus (+) icon next to the text field in a conversation, then select "Stickers" from the list that appears.
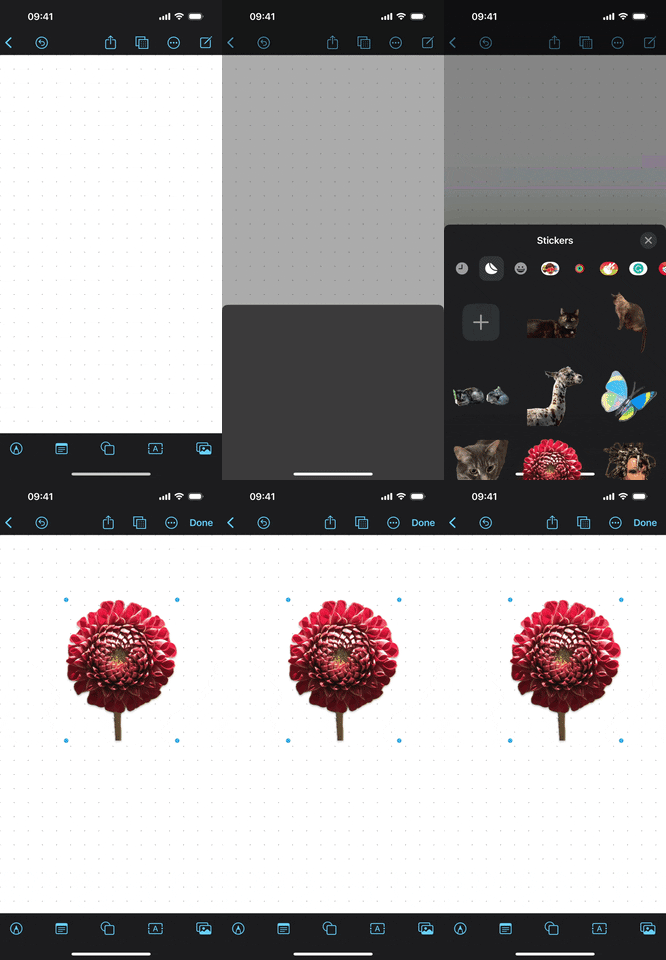
- Freeform: Tap the pictures icon, then select "Stickers" from the list that appears.
- Notes: Open the Markup tool, tap the plus (+) icon next to the chosen color, and select "Add Sticker."
- Mail: Open the Markup tool, tap the plus (+) icon next to the chosen color, and select "Add Sticker."
- Photos: Open the image or video in the editor, tap the Markup tool, tap the plus (+) icon next to the chosen color, and select "Add Sticker."
- Files: Open an image, video, or PDF, tap the Markup tool, tap the plus (+) icon next to the chosen color, and select "Add Sticker."
With the stickers drawer open and on the Live Stickers tab, you can either:
- Tap the Live Sticker you want to insert it.
- Tap and hold the Live Sticker you want, then drag and drop it where you want.
Sometimes, the Live Sticker may appear within a bounding box that you can shrink or expand to change the sticker size. Also, animated Live Stickers may not animate in certain apps or documents.


Cover photo, screenshots, and GIFs by Justin Meyers/Gadget Hacks



Comments
No Comments Exist
Be the first, drop a comment!