Apple Music's Replay feature sucks. Aside from not being very accessible, it offers a fraction of your history compared to Spotify Wrapped, which does a deep dive into what you listened to over the last year. Not only that but Spotify packages data into visuals you can share on social media. While you could share Replay screenshots, there are better options out there for Apple Music users.
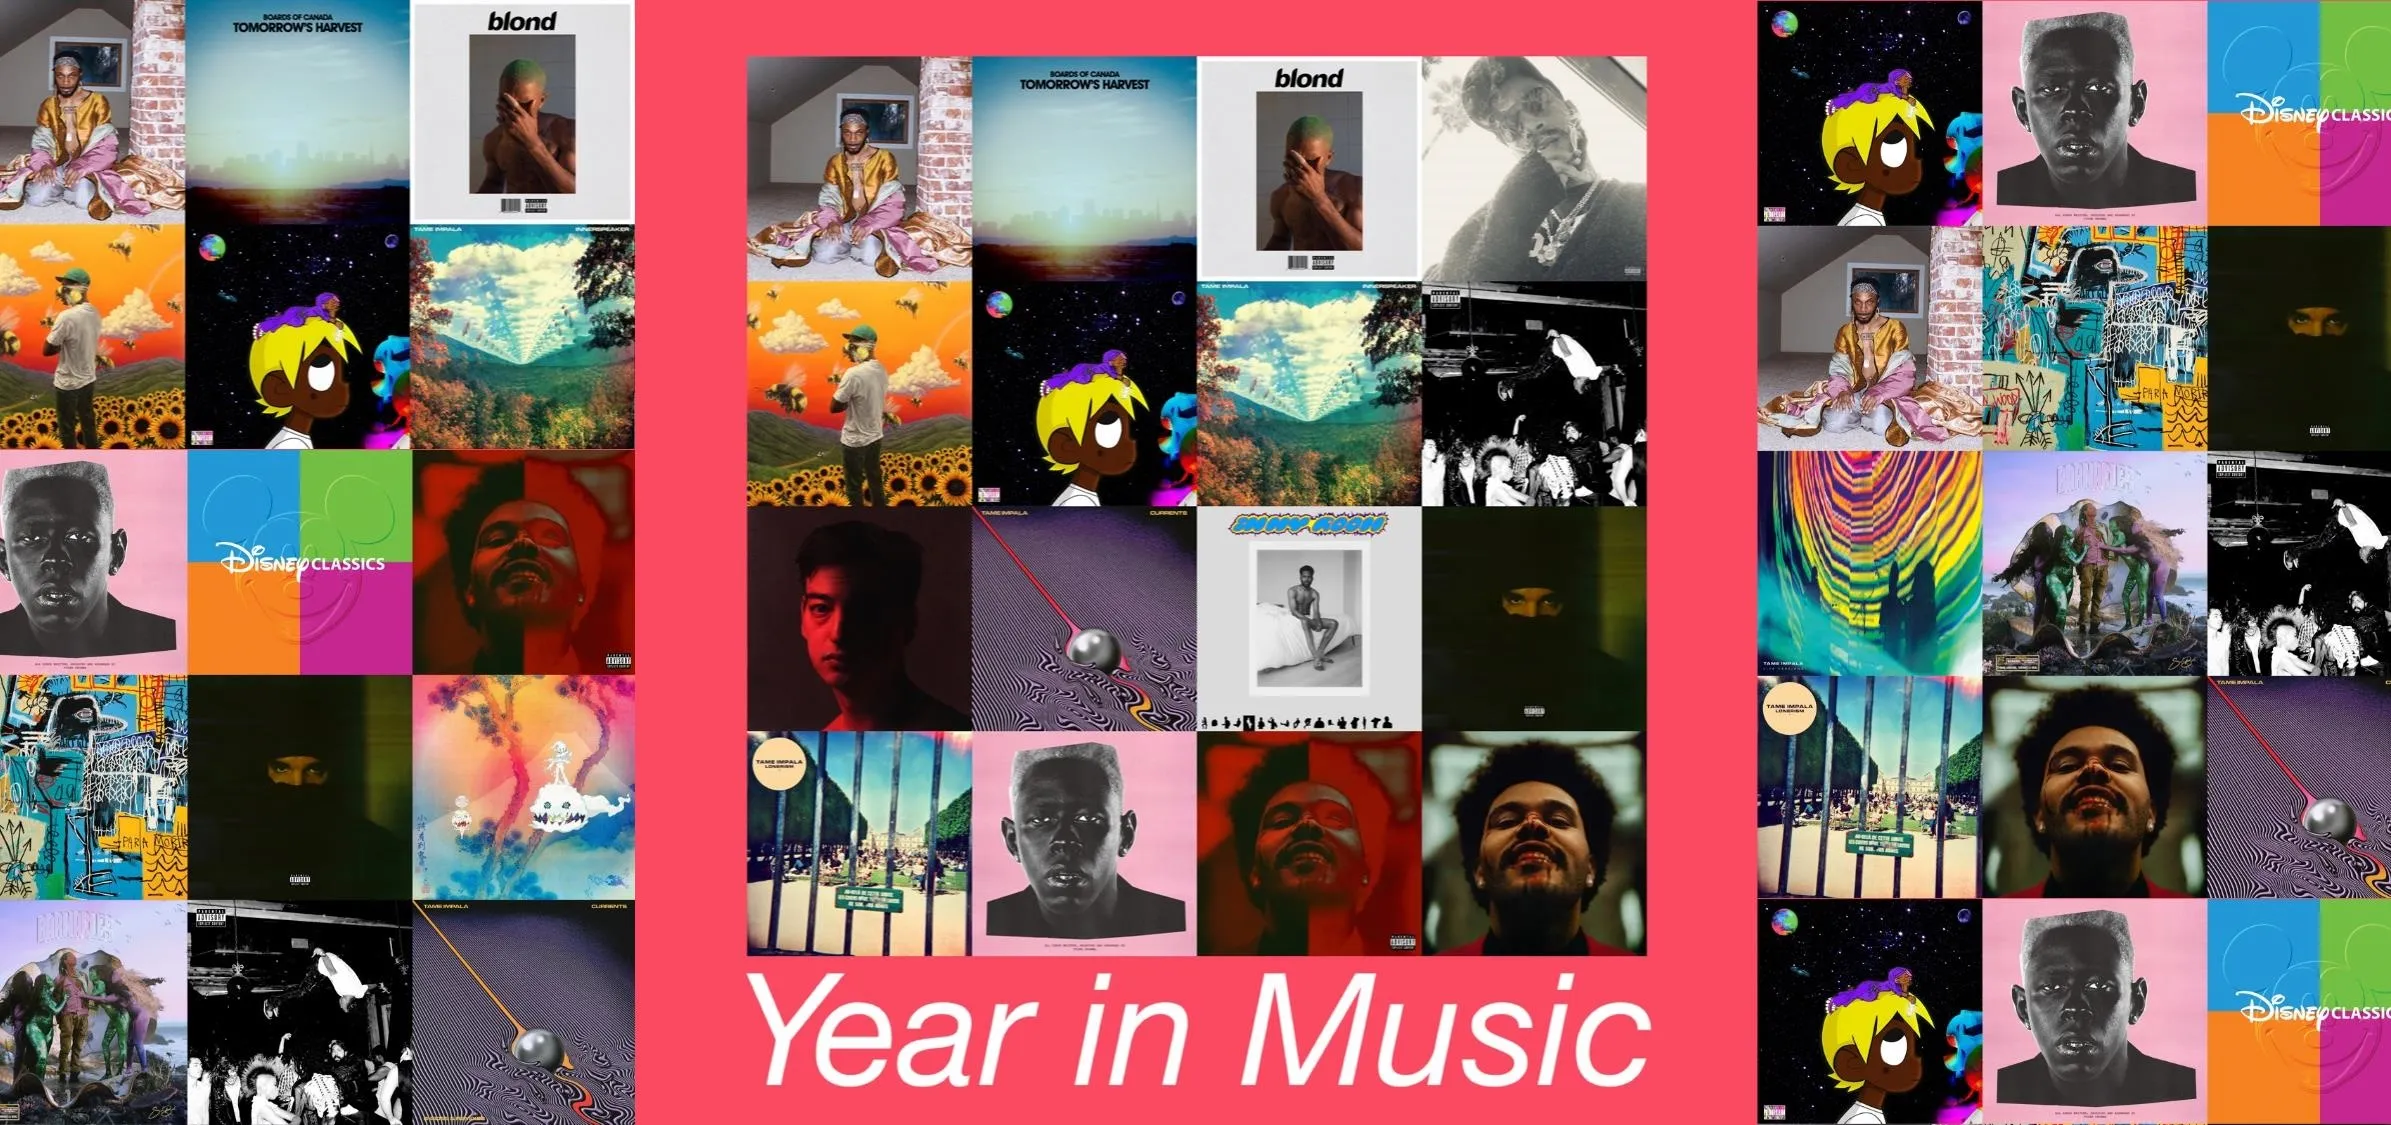
One such option is the "My Year in Music" shortcut, created by RoutineHub user mmd1080. This shortcut looks at all of the music in your library that you've played in the last year, then randomly selects albums and makes a simple yet alluring collage using the cover artwork. You can then save the image to your Photos app, share it with people and apps, or even create a personalized playlist.
It may not be as accurate as the Replay feature, due to limitations in scraping information from Music, but it looks at both your personal music library and any Apple Music tracks you've added to your library. Replay only looks at your Apple Music subscription (which you may not even have), which means not everyone can use it without paying or using a free trial if one's left.
Prerequisites
Although it's not technically required, the "My Year in Music" shortcut is optimized for iOS 14. If you're still running iOS 13, you might have some issues. You'll also need the Shortcuts app (if you've deleted it for some reason, you can always reinstall it from the App Store). To make sure you can open the shortcut link below, make sure that "Allow Untrusted Shortcuts" is toggled on in Settings –> Shortcuts.
- Don't Miss: The Top 200+ New iOS 14 Features for iPhone
You don't need an Apple Music subscription to use this shortcut, but if you do pay or are on a free trial, you'll only get results from the music you've added to your library since that's where it grabs the cover art from. Likewise, if you own the tracks in your Music library, they must have cover art as well.
Step 1: Add the 'My Year in Music' Shortcut
You can download the "My Year in Music" shortcut directly from the link below or from RoutineHub. Although the direct link will work fine, RoutineHub offers the most up-to-date version, which may fix issues or add new features. As of this writing, version 1.1.2 is the newest.
- iCloud Link: My Year in Music v1.1.2 (free)
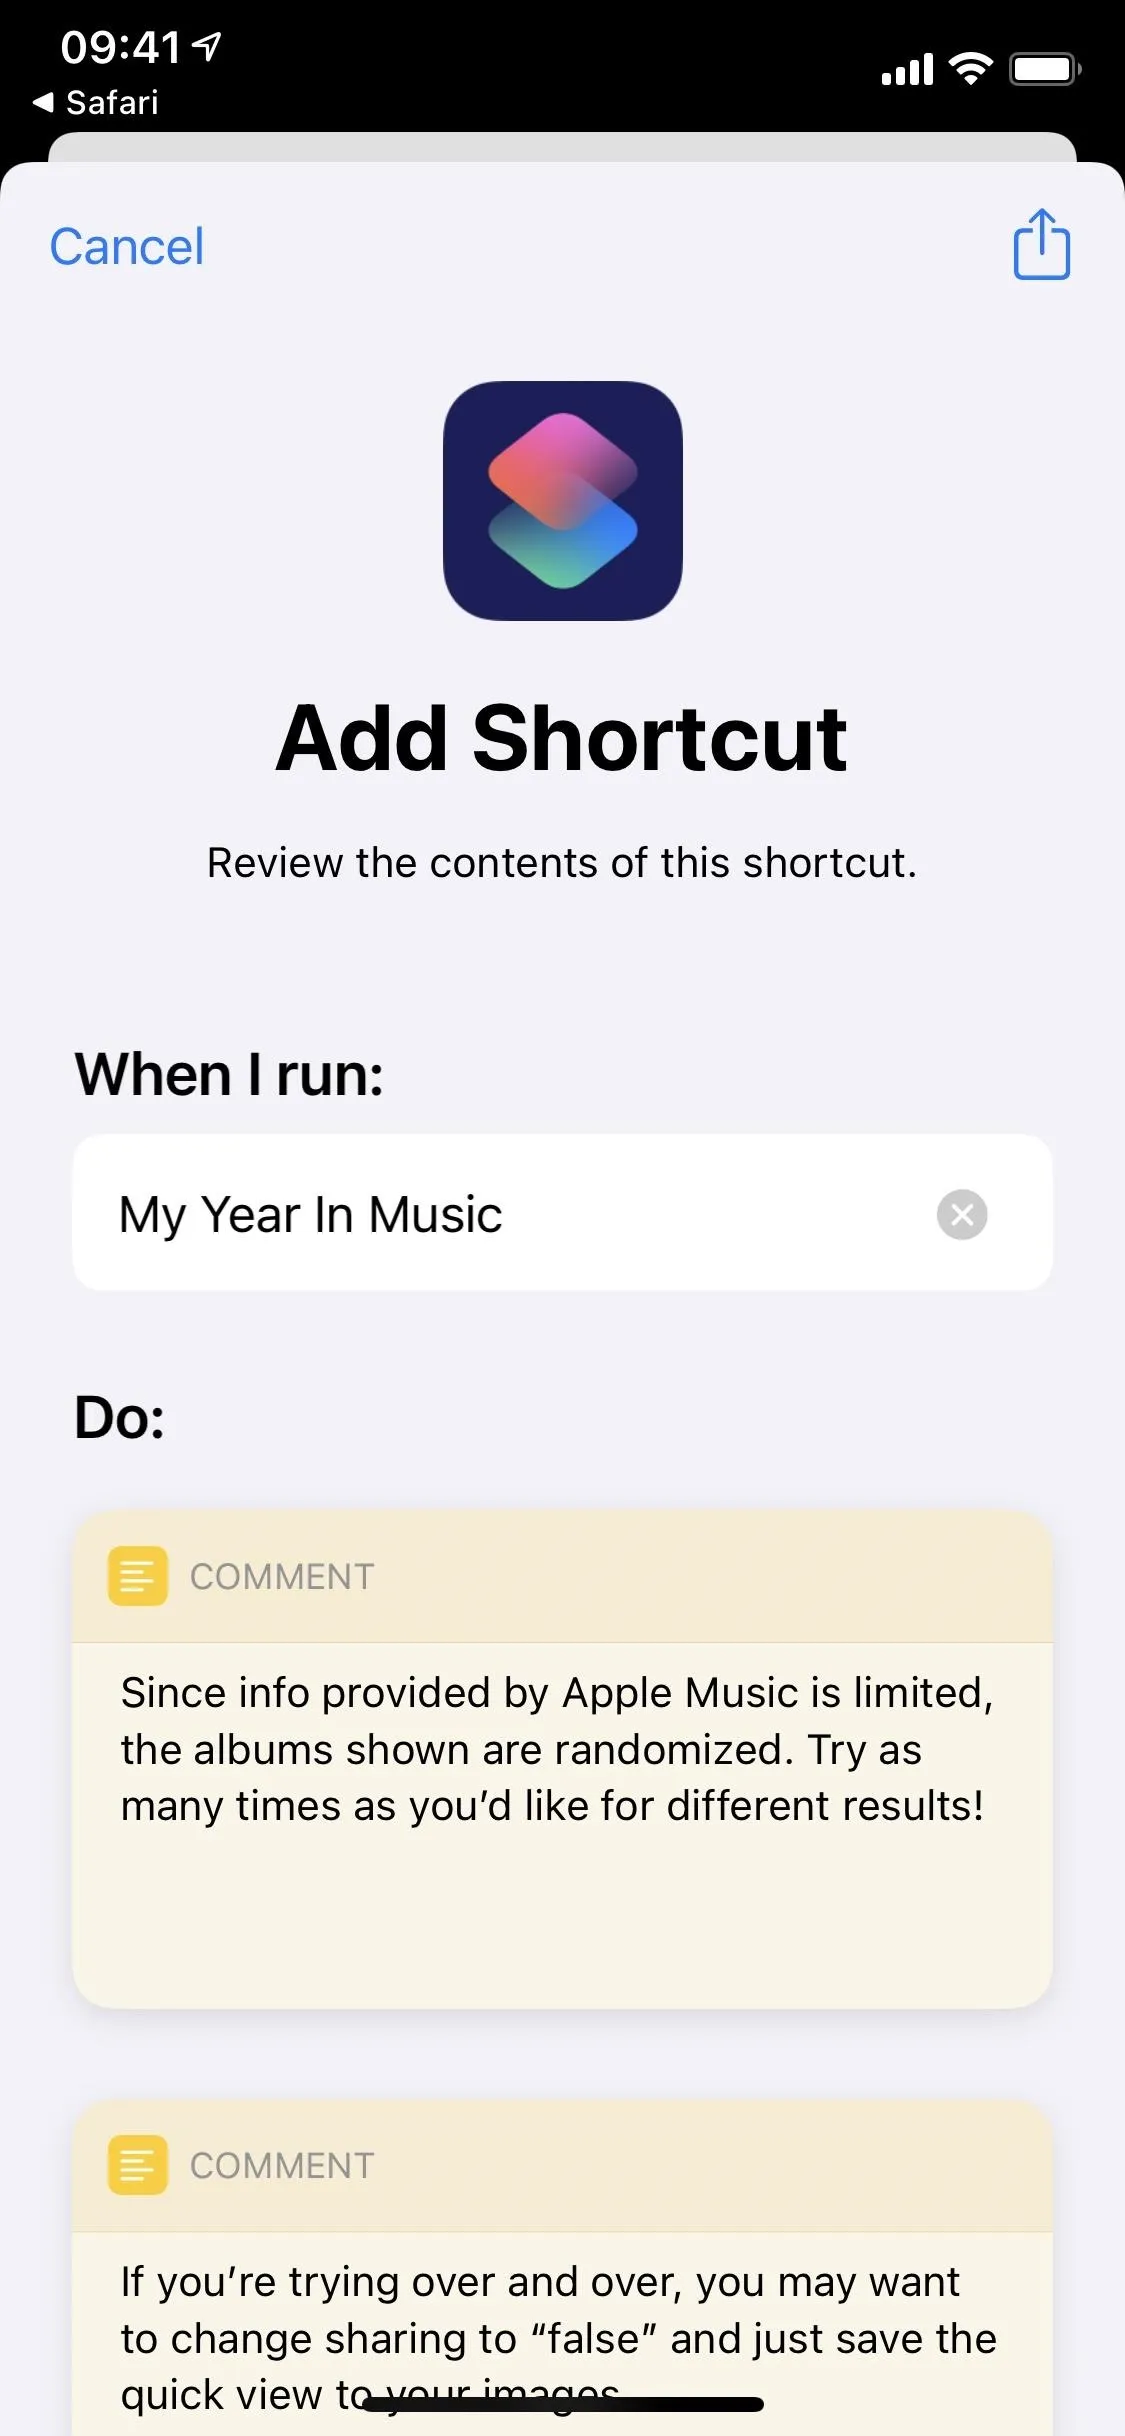
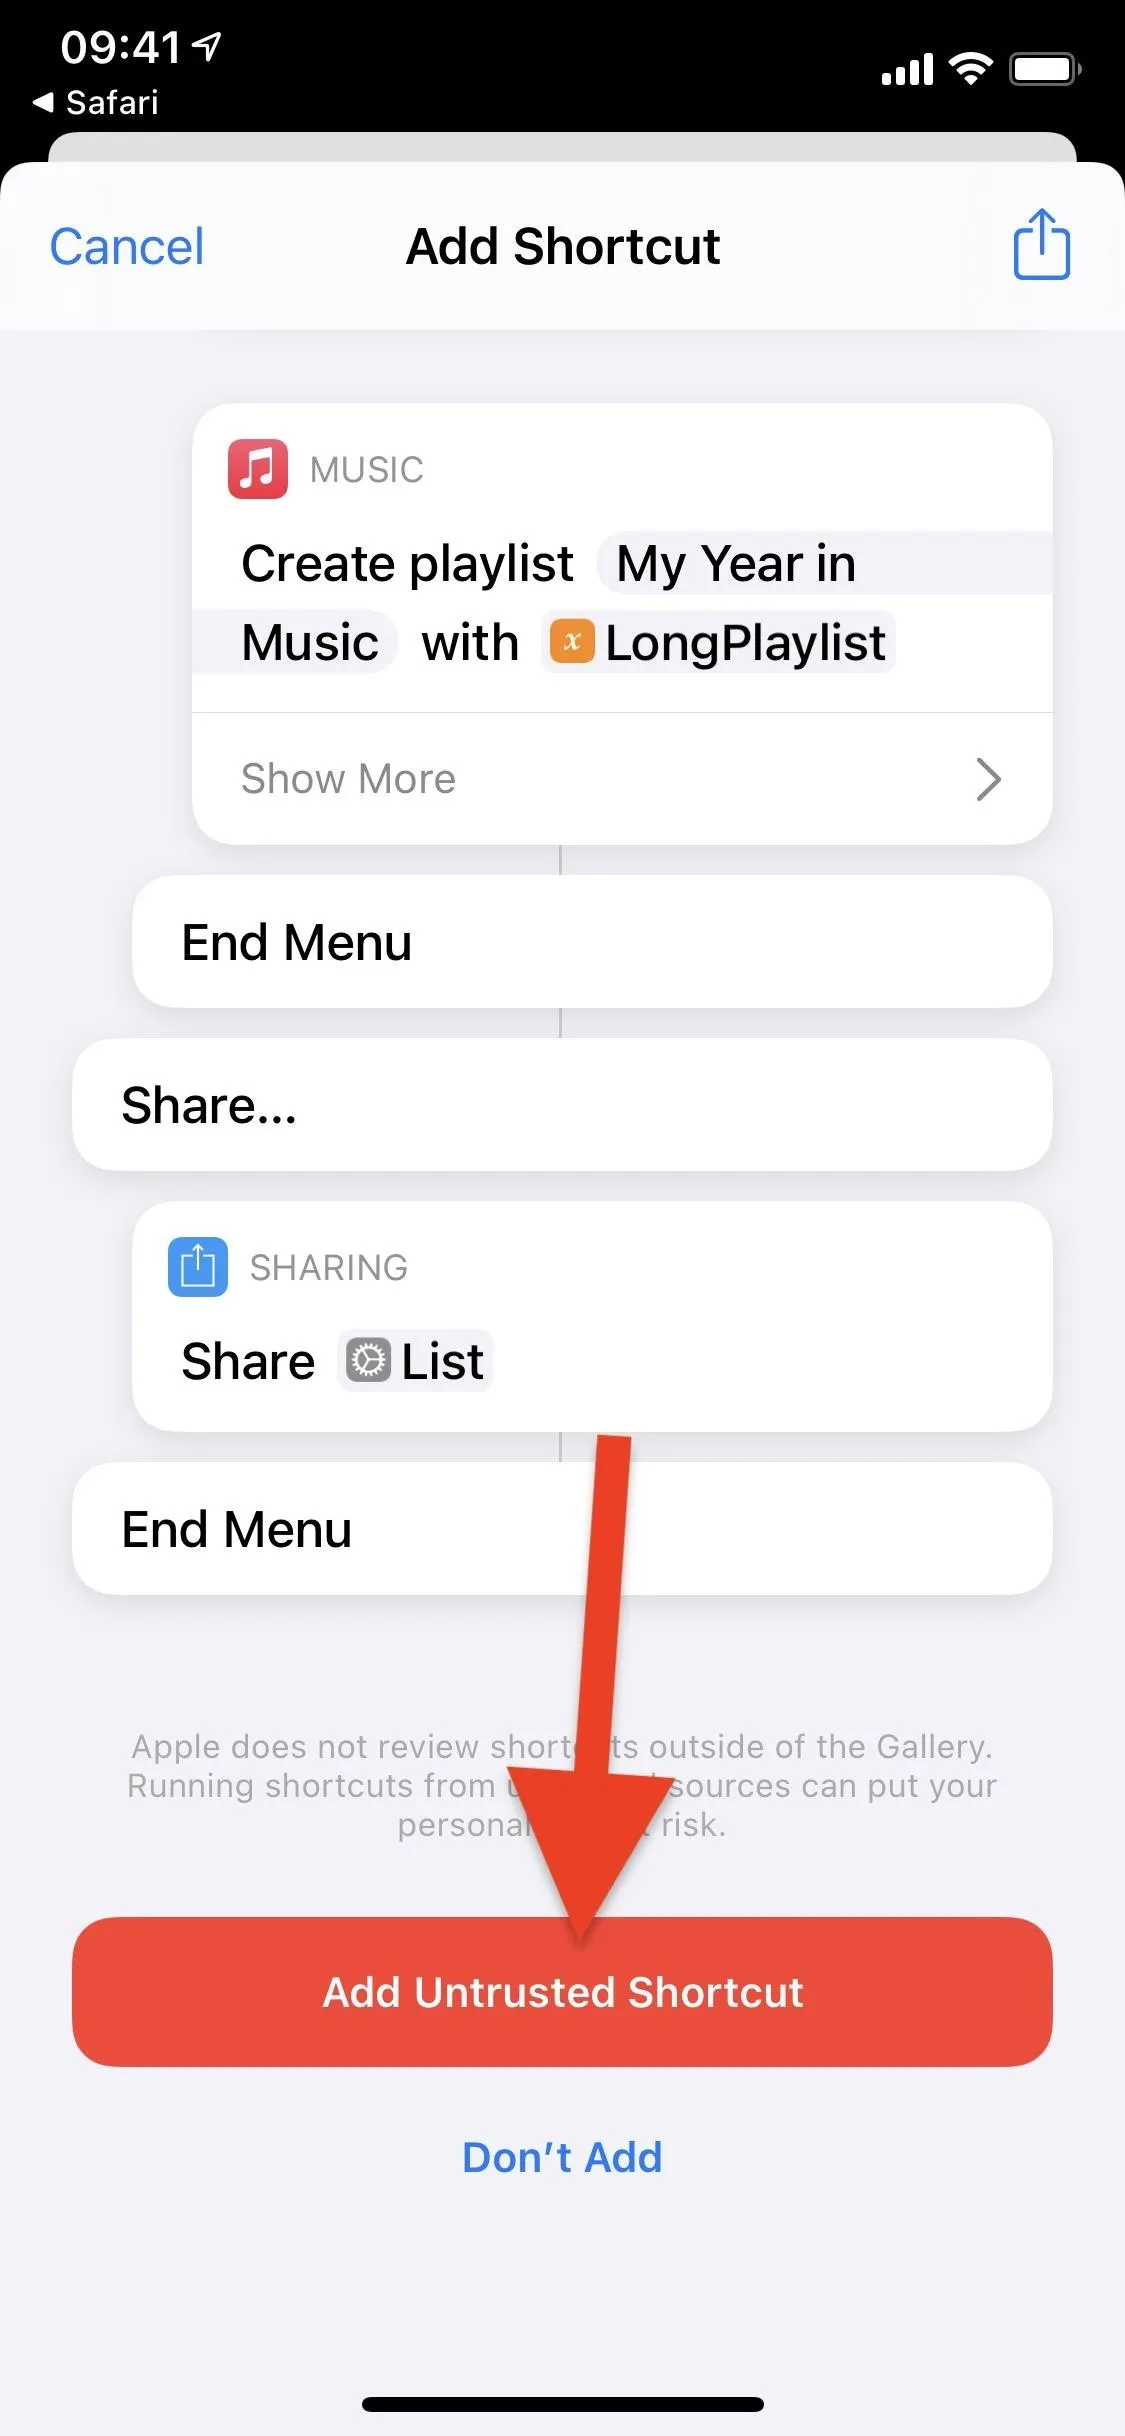
Once you select "Get Shortcut," you'll be redirected to the Shortcuts app. When that happens, review the workflow and tap "Add Untrusted Shortcut" at the bottom, which will add the shortcut to your library.


Step 2: Give the Shortcut Access to Your Library
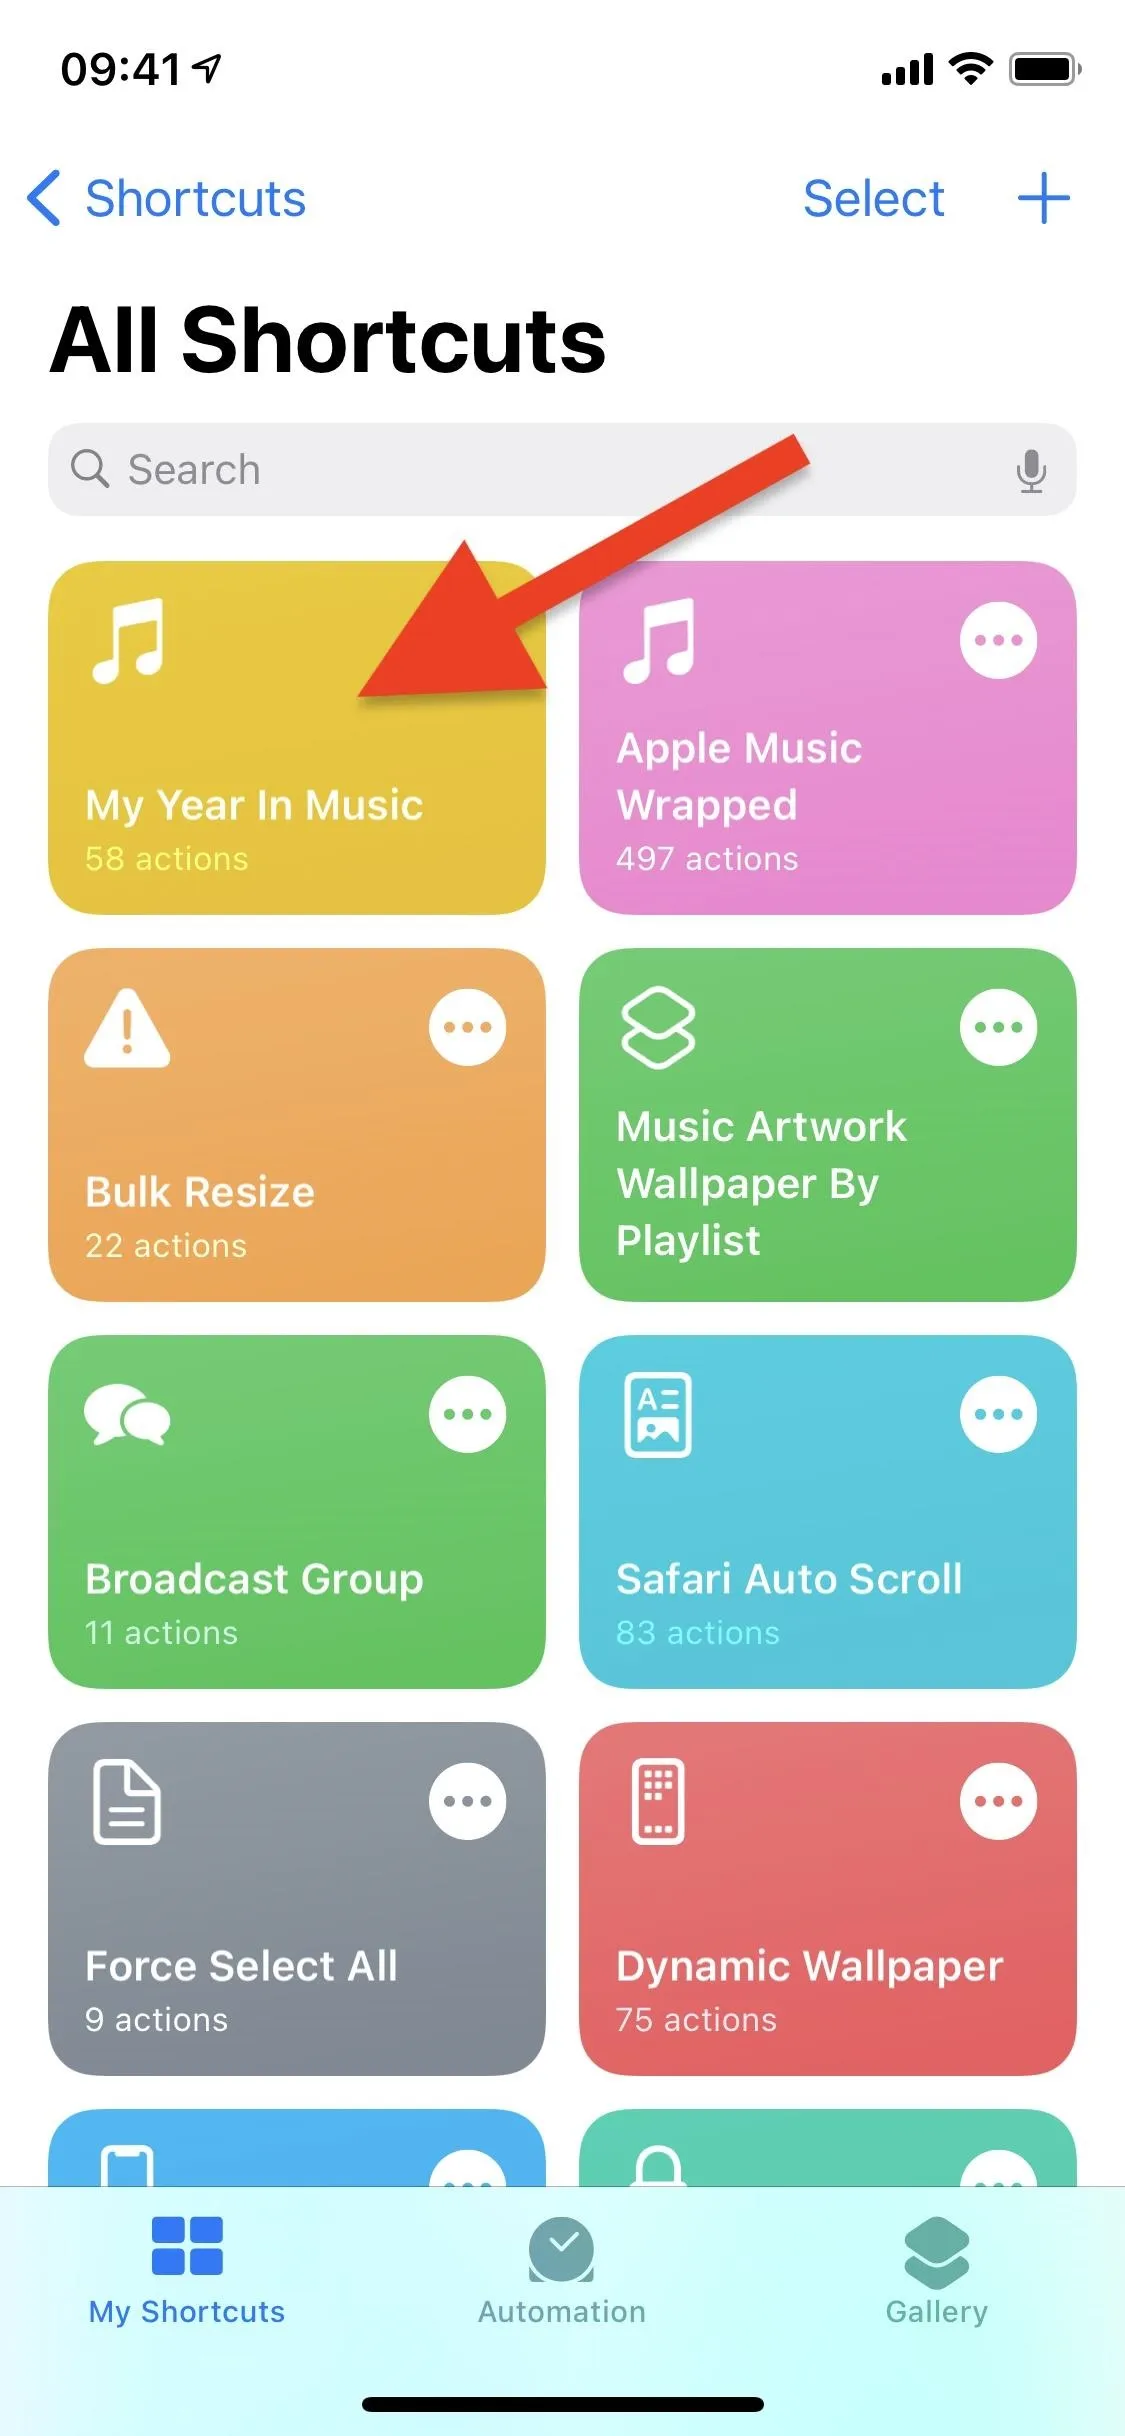
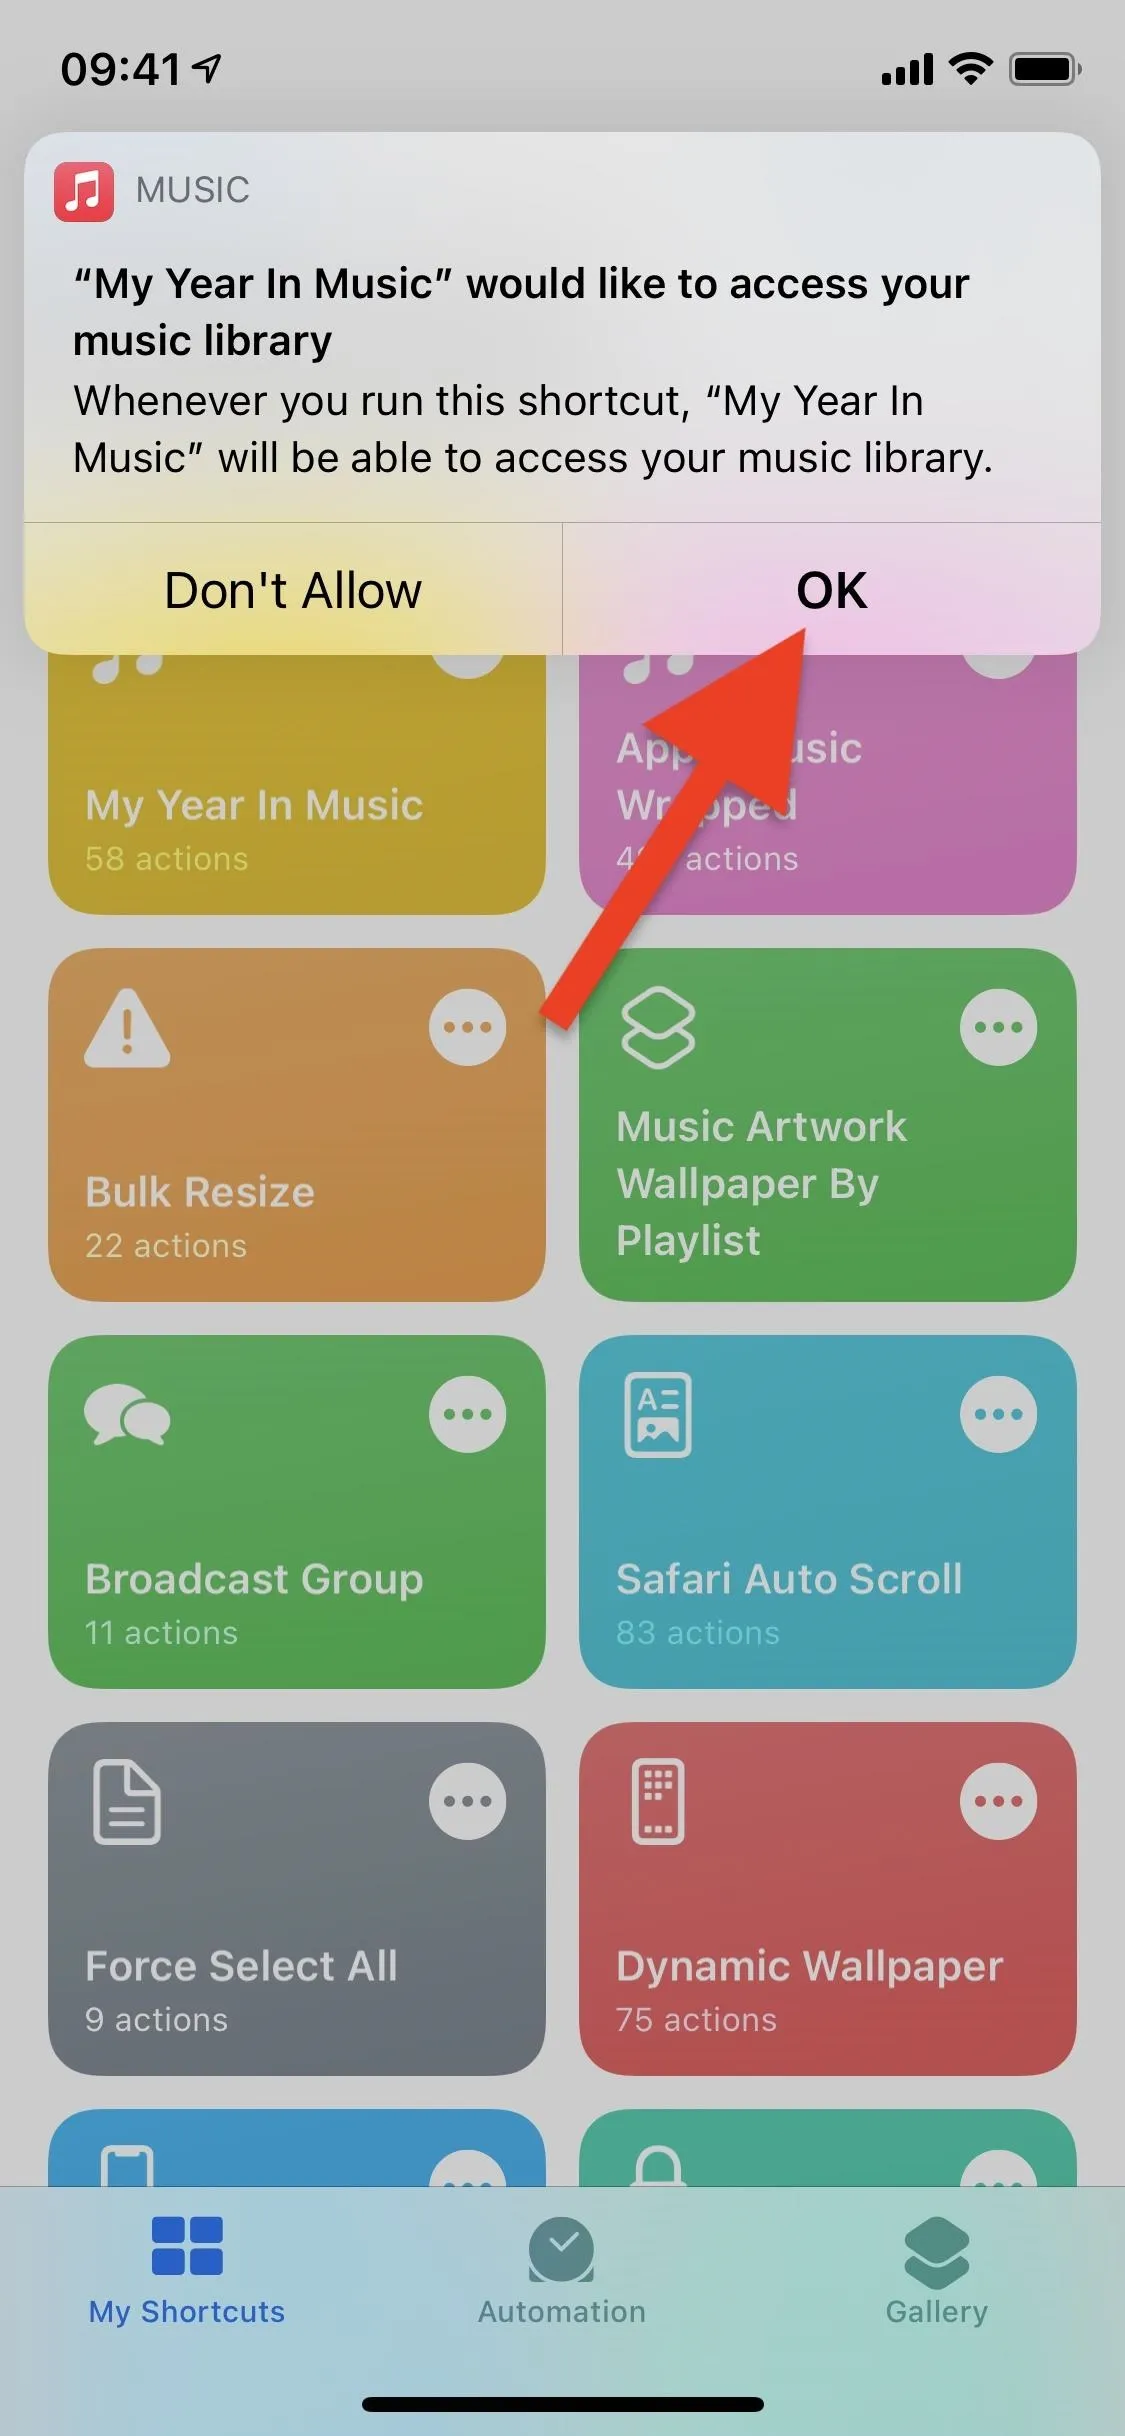
Now it's time to run the "My Year in Music" shortcut and create your cover artwork collage. In the Shortcuts app, in the "My Shortcuts" tab, find and tap on the shortcut to run it. The first time you do, it will ask you for access to your music library. Tap on "OK" to proceed. It is not accessing your Apple Music account — just everything in the Music app's library.


Step 3: Create a Visual for Your Last Year of Music
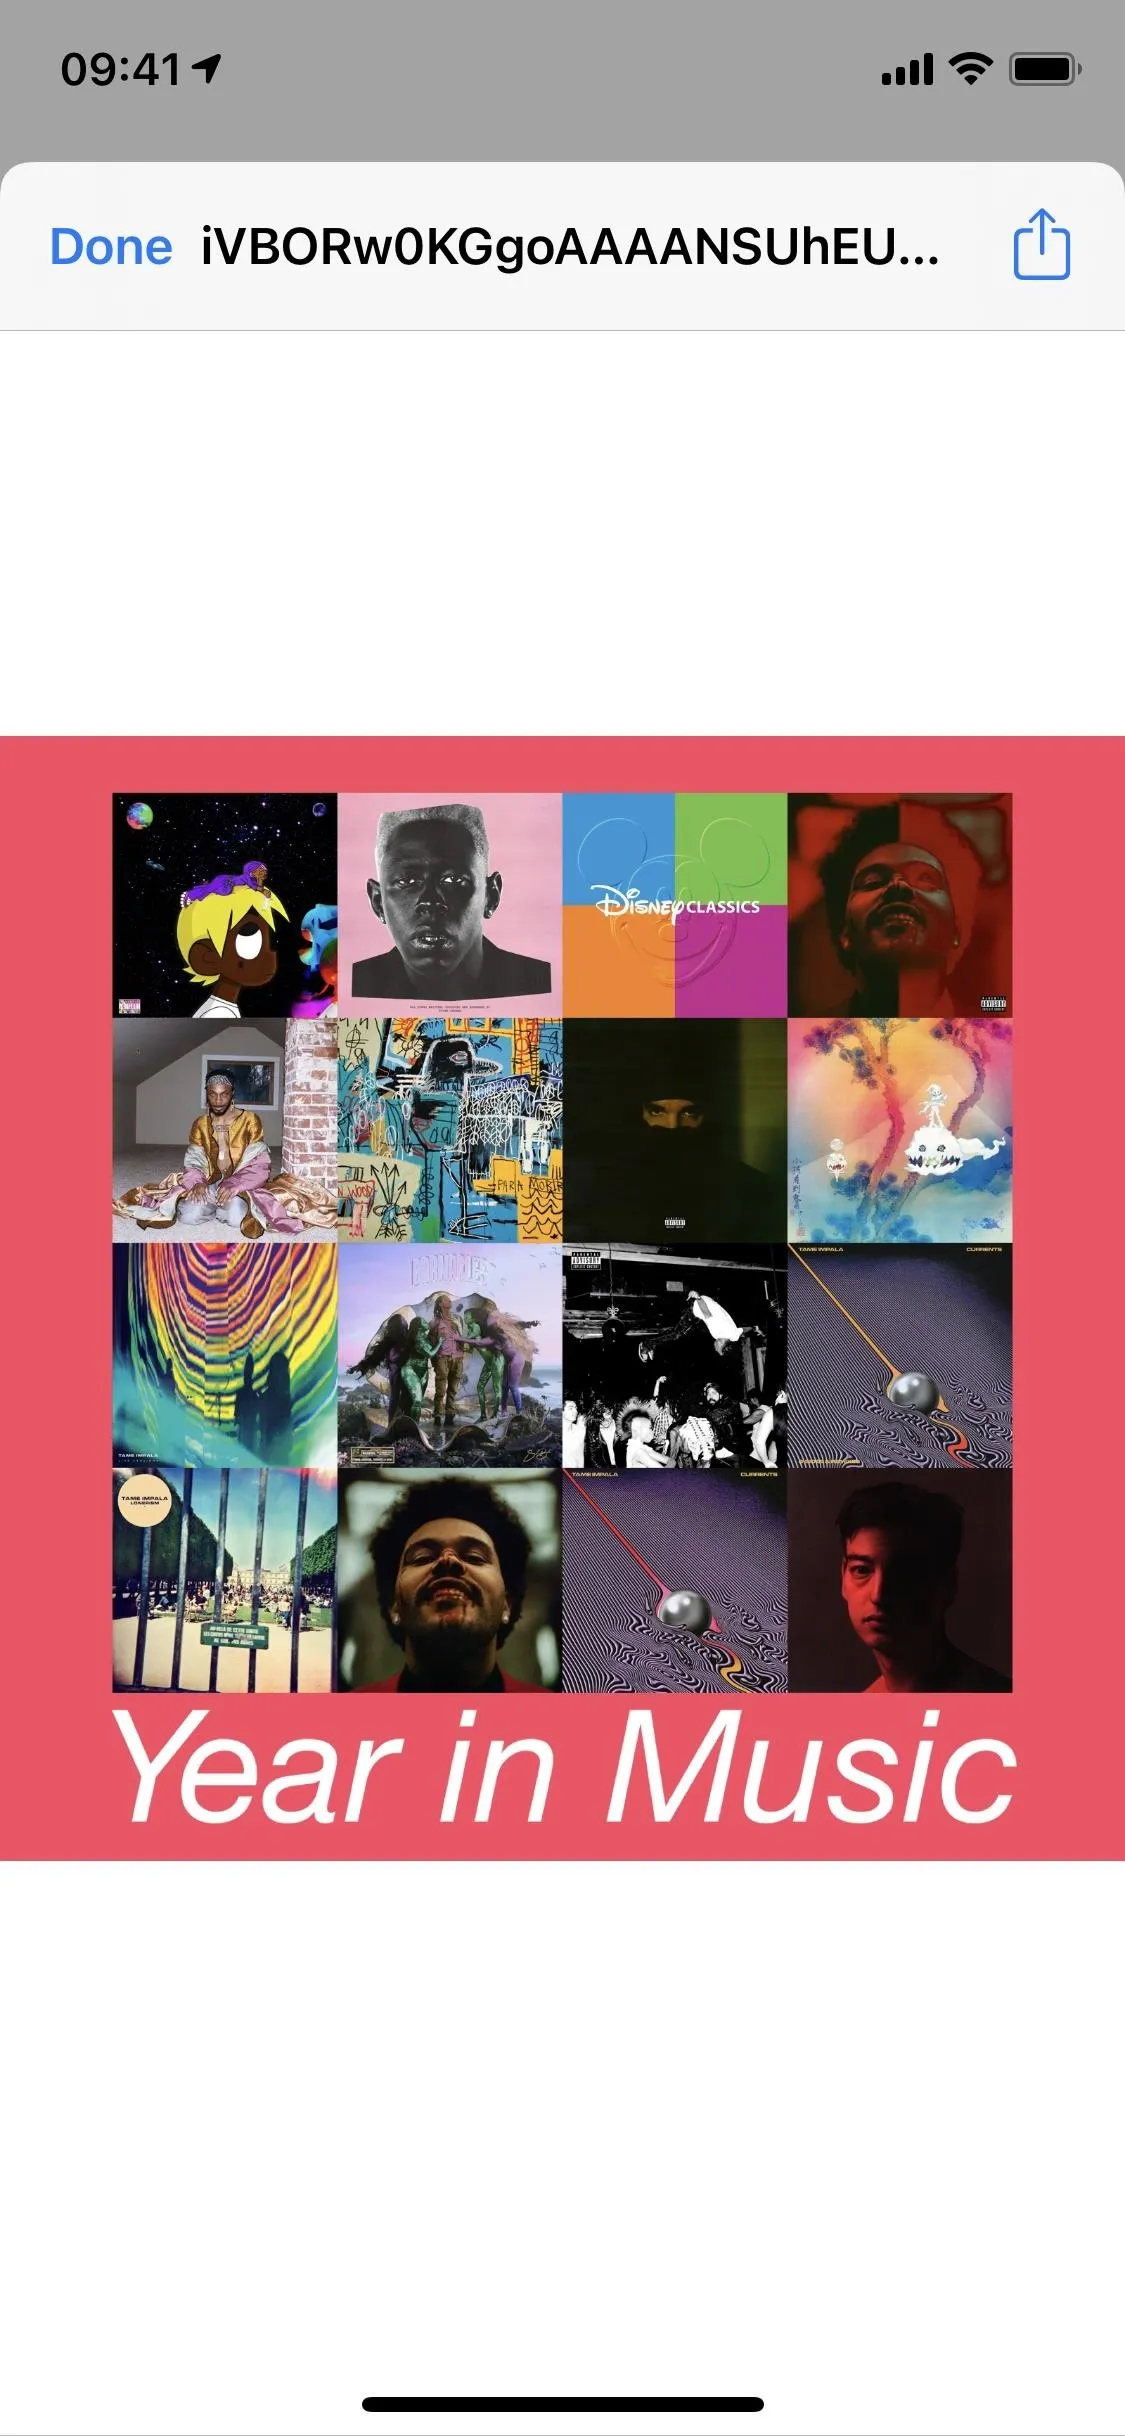
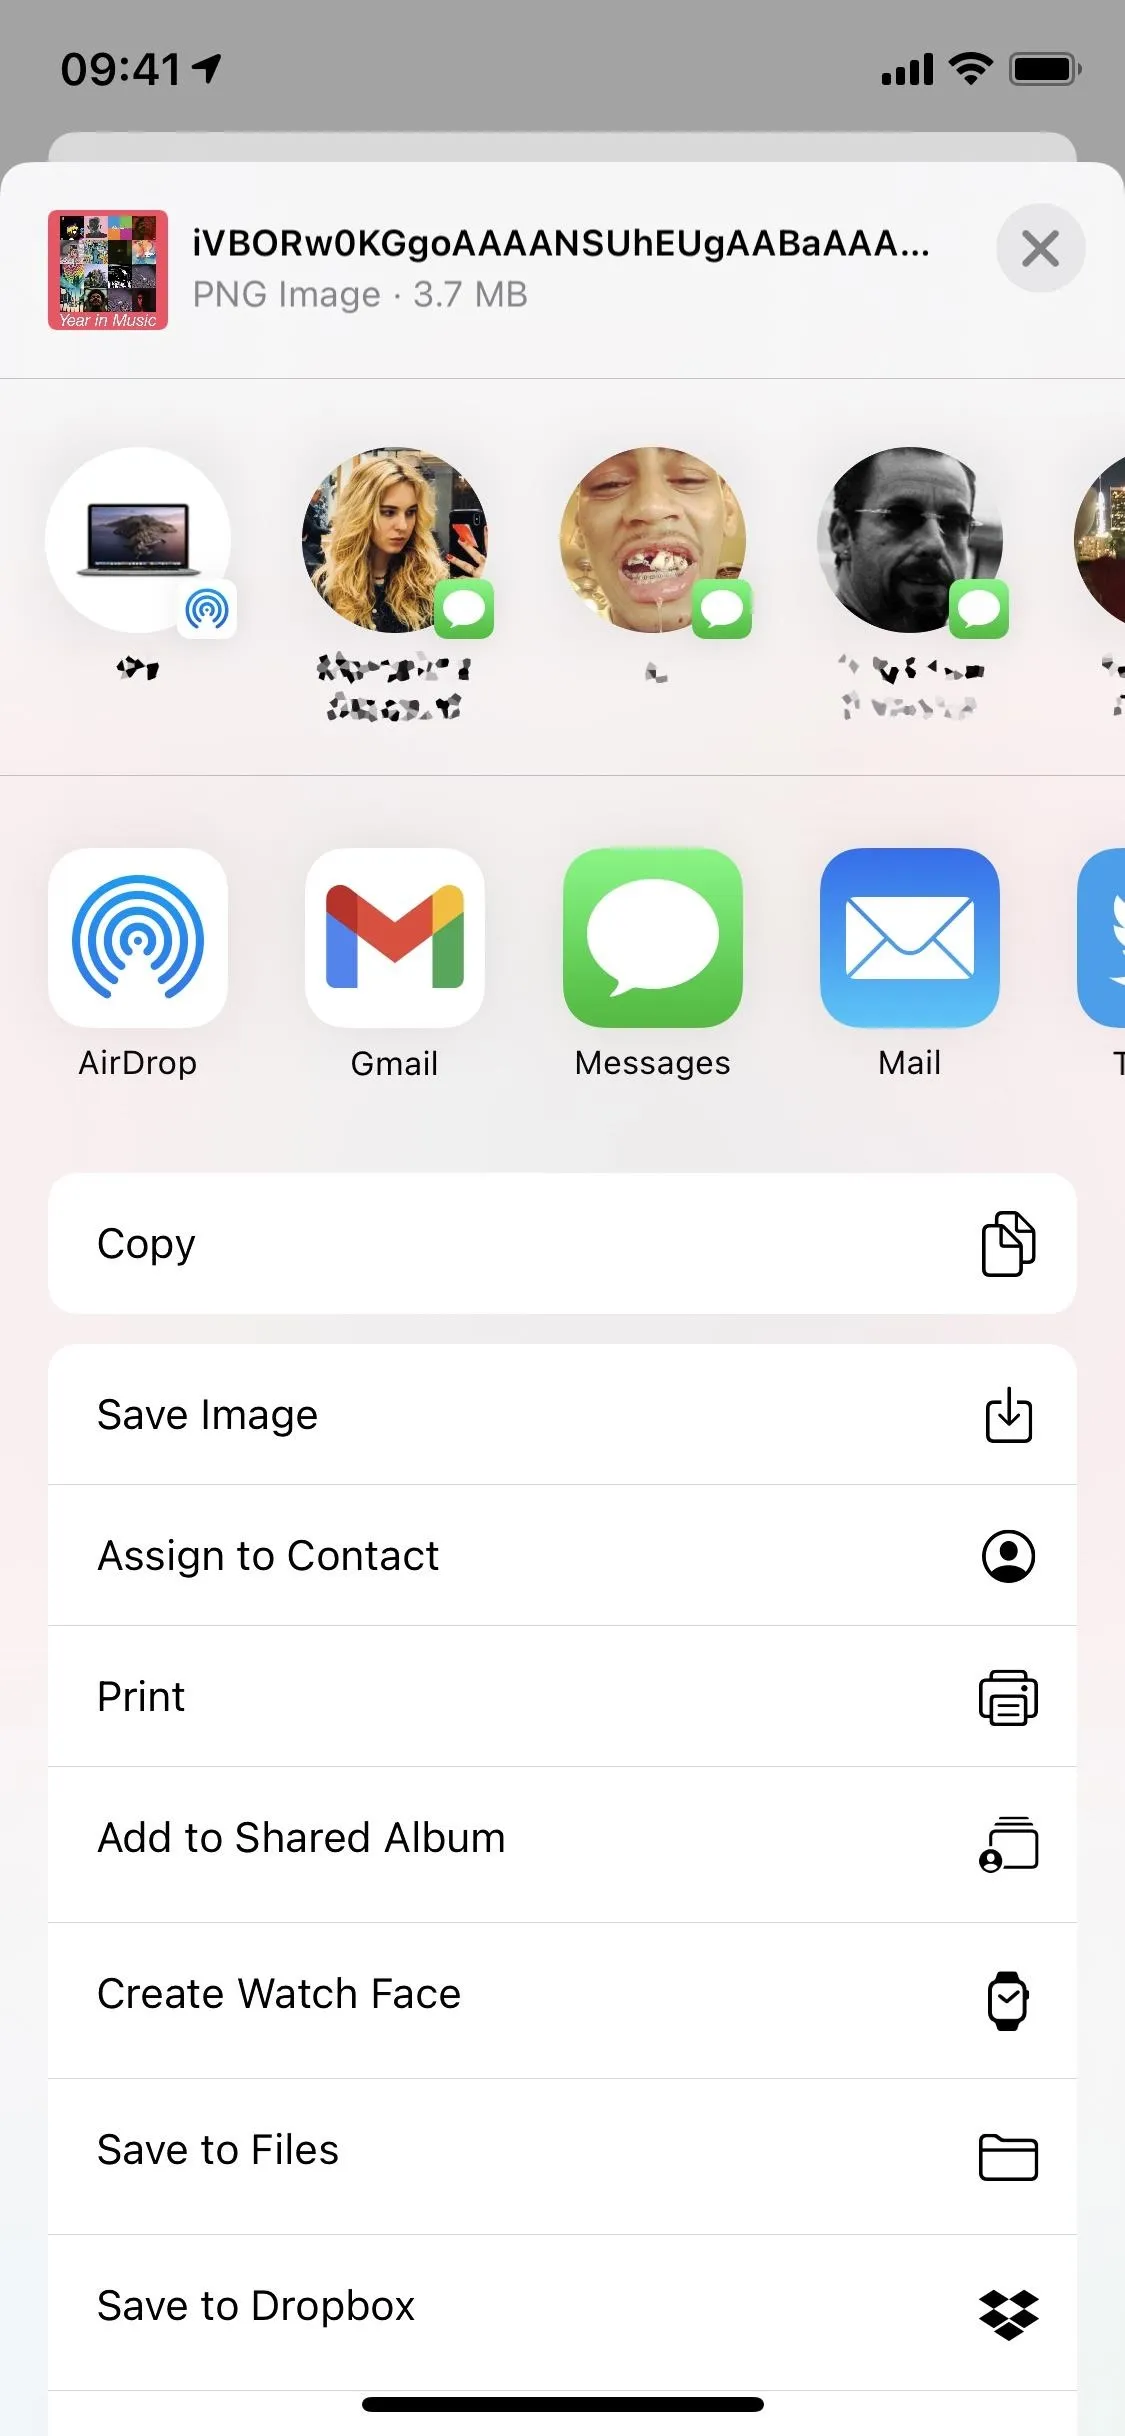
After giving it library access, give the shortcut a few seconds to analyze your listening habits and create your collage. Once it's finished, your graphic will appear as a four-by-four grid of albums that contain your most-listened-to songs, along with the text "Year in Music." If you tap on the Share button, you'll have the option to share the picture, "Save Image," and more. Hit "Done" to continue.


Step 4: Share the Image or Create a Playlist
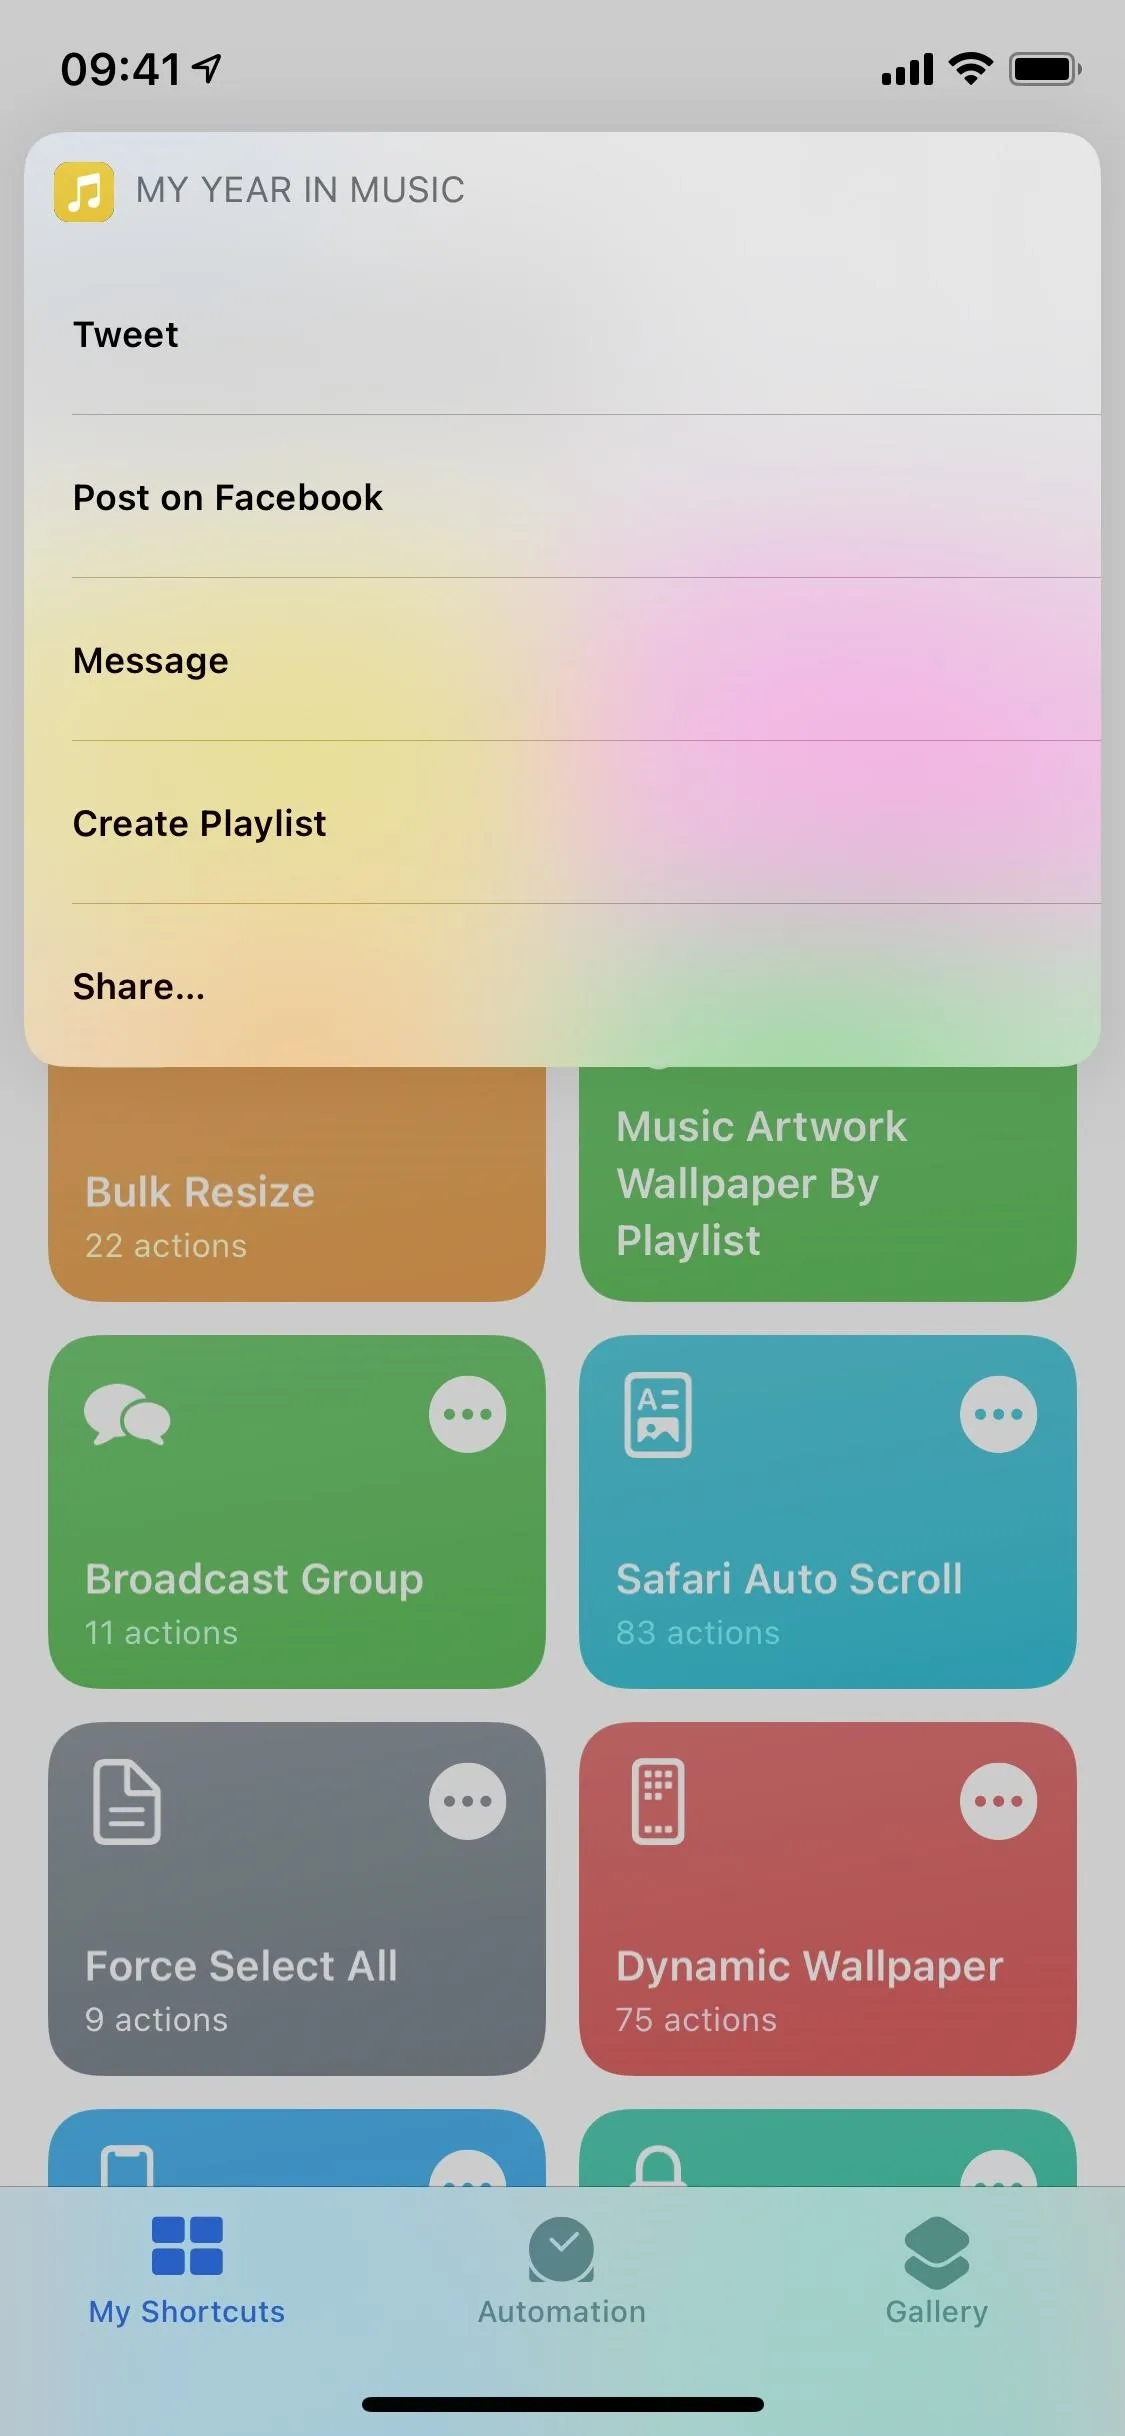
Even though it might seem like you're finished, there are a few other options left for you to choose from, if you want. A menu will appear after you hit "Done," where you can tweet the image, post it on Facebook, send it via Messages, or share it elsewhere (like in the previous screenshot).
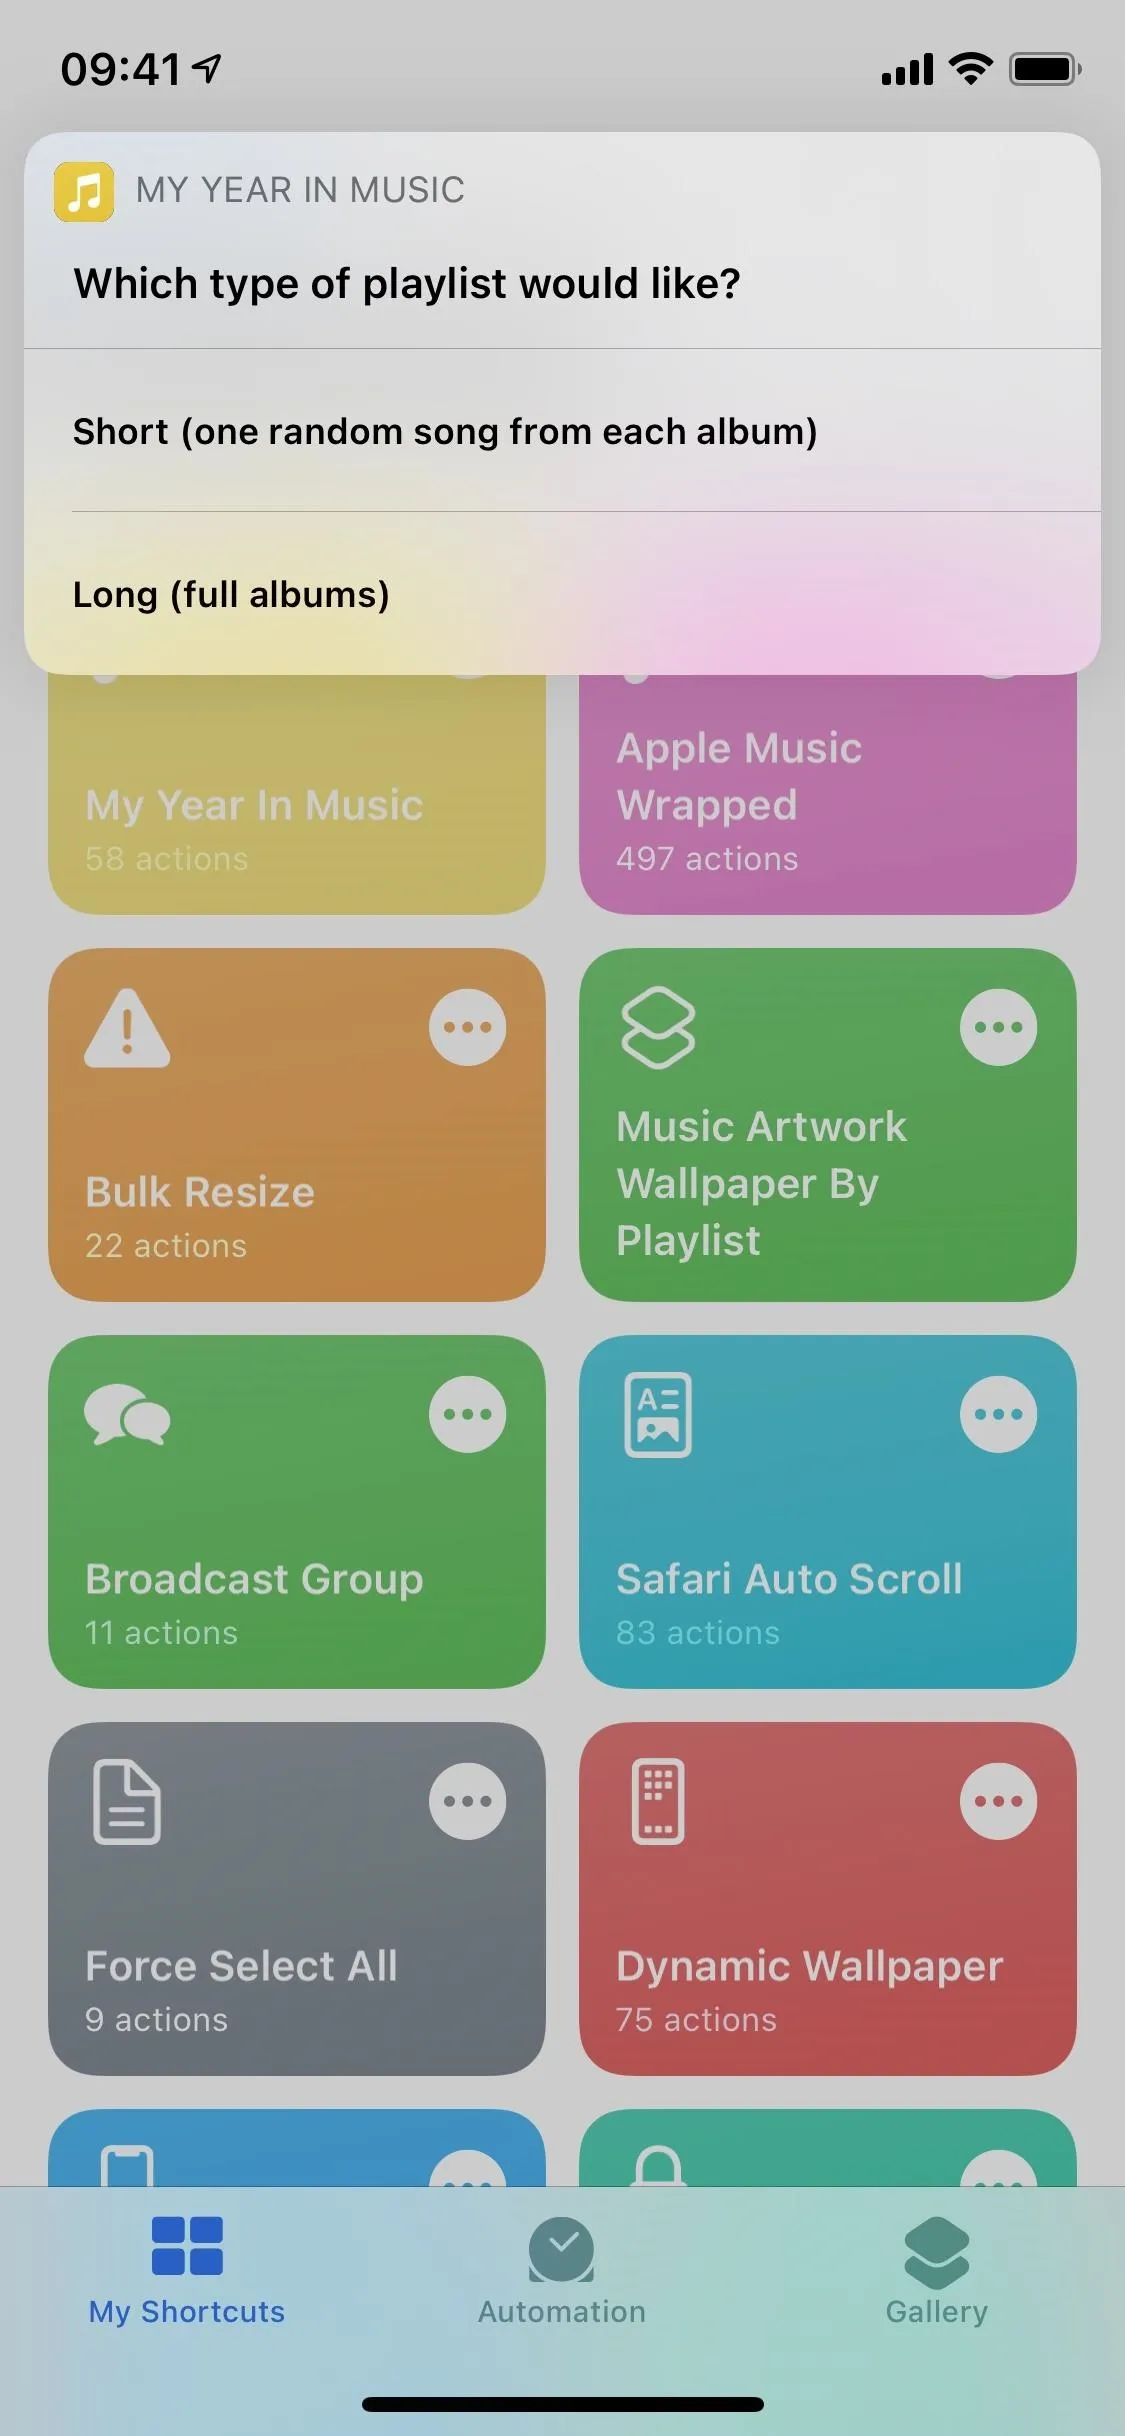
However, there is one option that stands out: "Create Playlist." If you tap on it, you can create a playlist in the Music app with either one random song from each album in the collage or the entirety of each album.


Step 5: View Your Year in Music Playlist
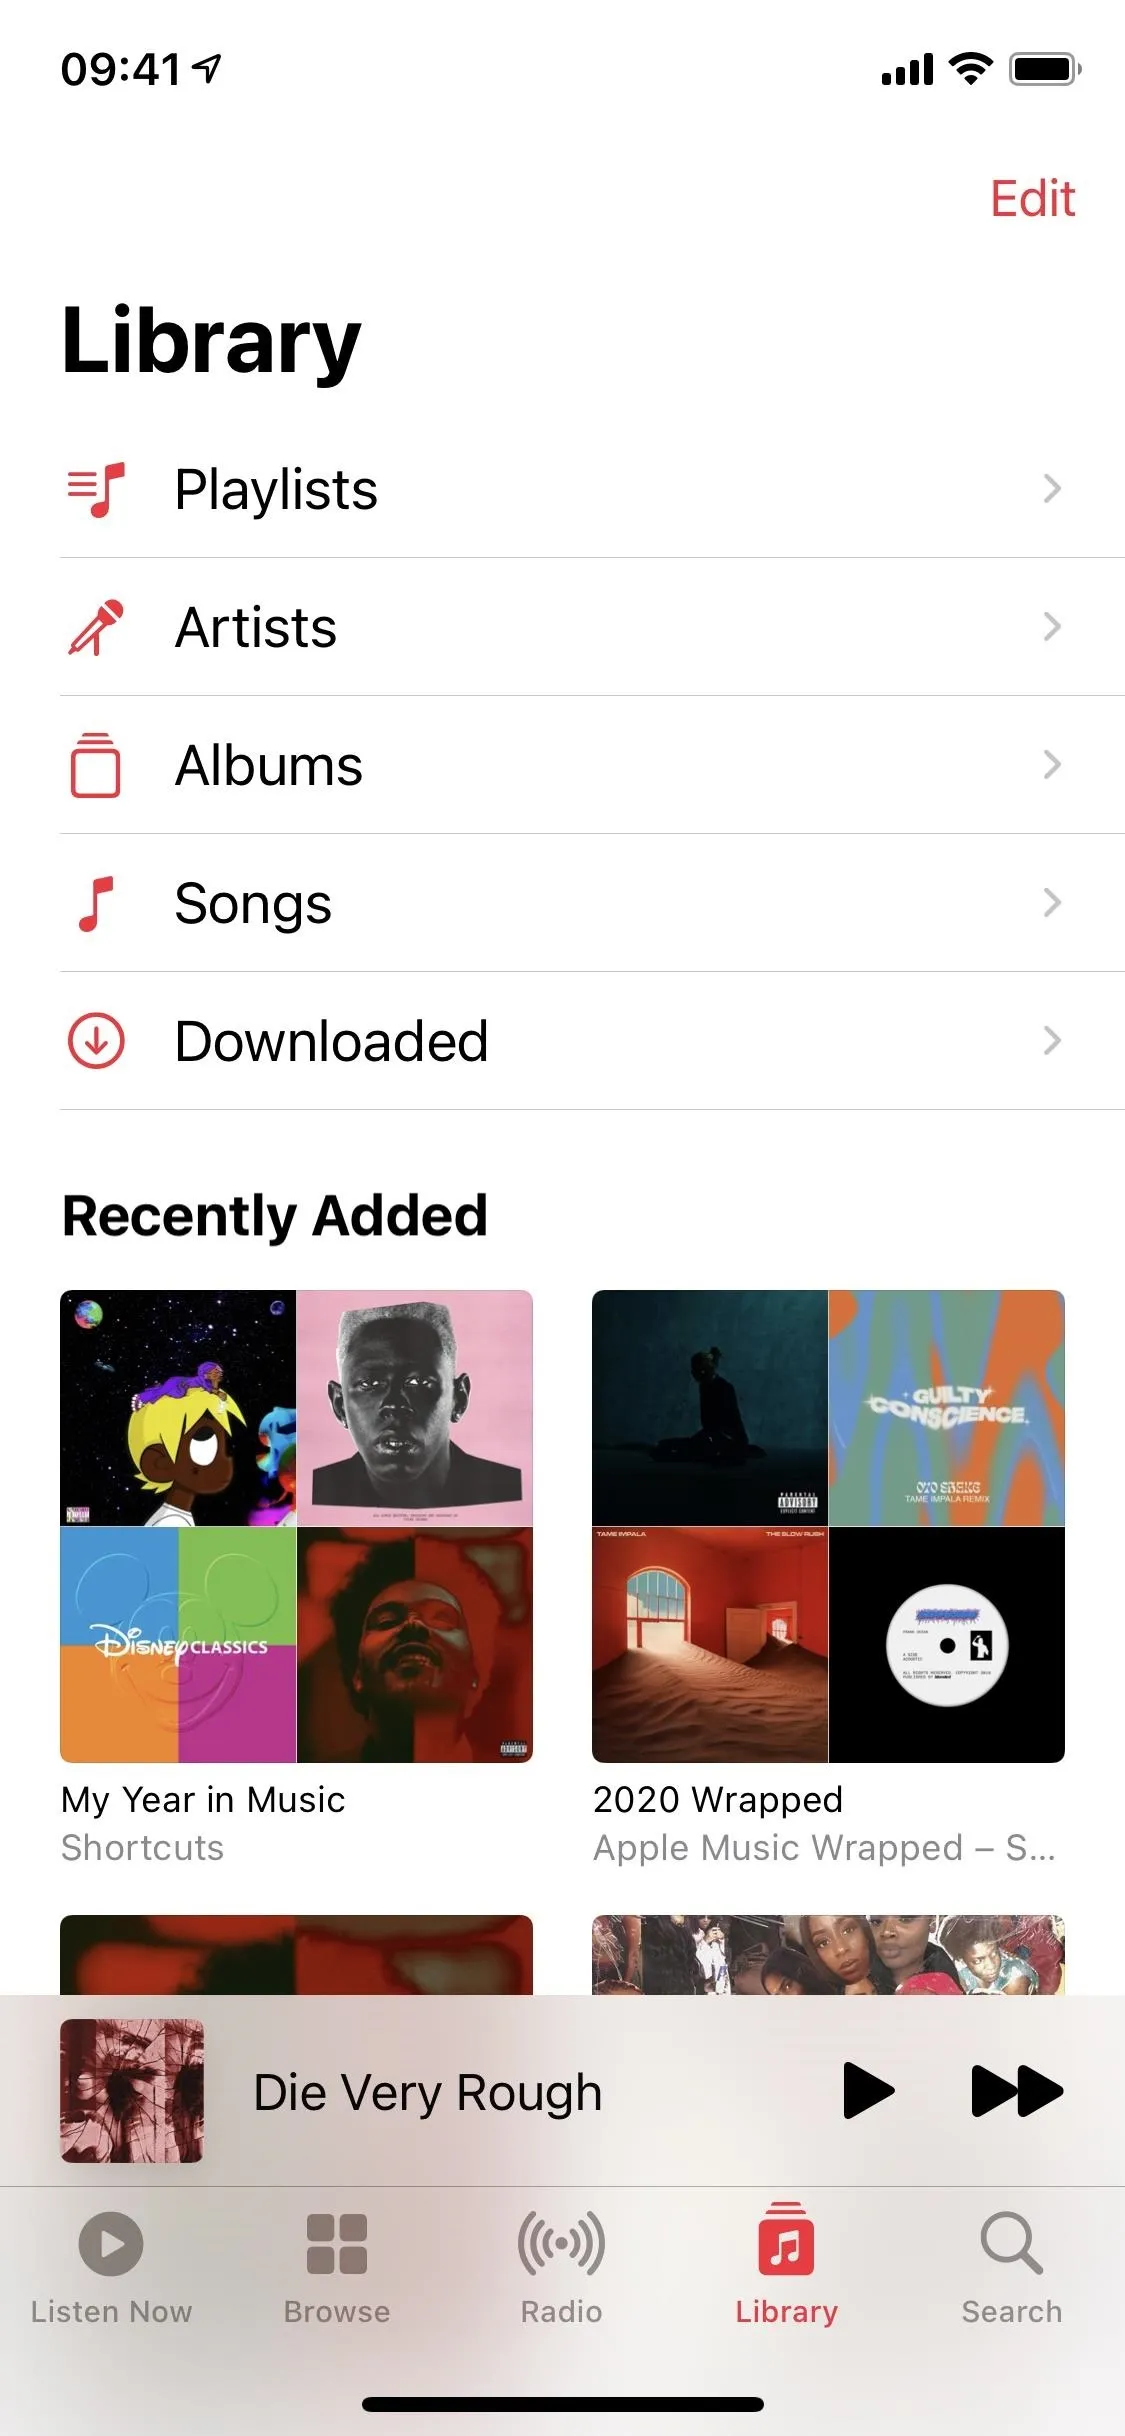
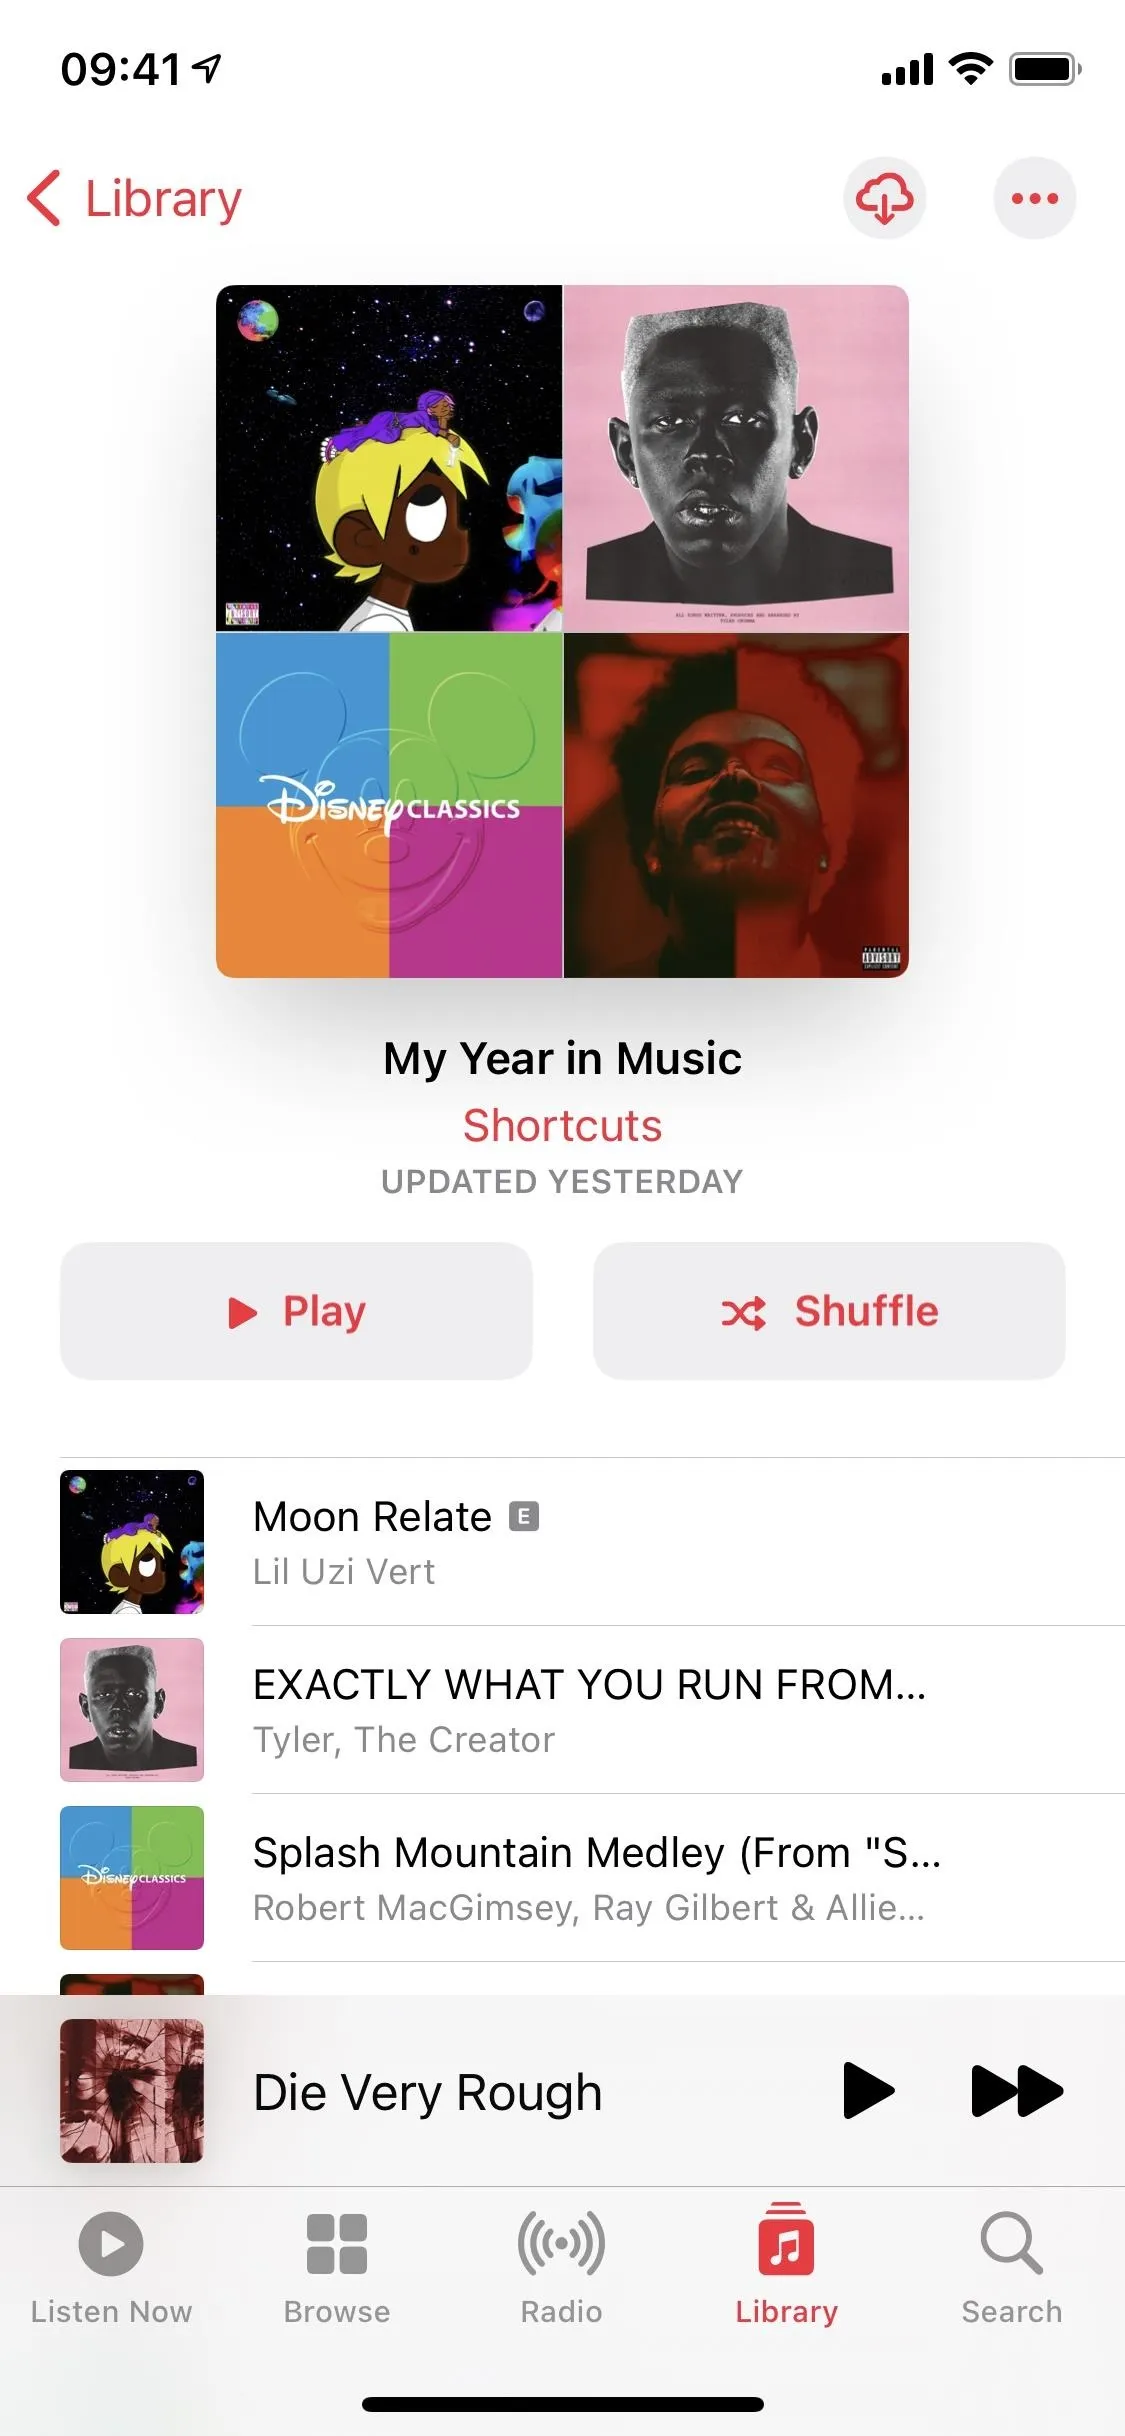
If you create a playlist from your Year in Music graphic, you can easily check it out in the Music app. Head over to the "Library" tab and select the "My Year in Music" playlist under Recently Added or from the "Playlists" folder.


Customizing the Shortcut (Optional)
Like any shortcut you add to your iPhone, it can be further customized if you know what you want and how to tweak the workflow's actions. For example, you can fine-tune which artwork appears in the graphic, and you can remove or add a "quit" option to the menu that appears after hitting "Done" on the image.
Adjust the Shortcut for Different Artwork
Not happy with your Year in Music artwork? Running the shortcut a second or third time will generate different artwork since it pulls things randomly. If you want it to be a bit more customized, you can also go into the shortcut and adjust it to use artwork from your most recently played albums.
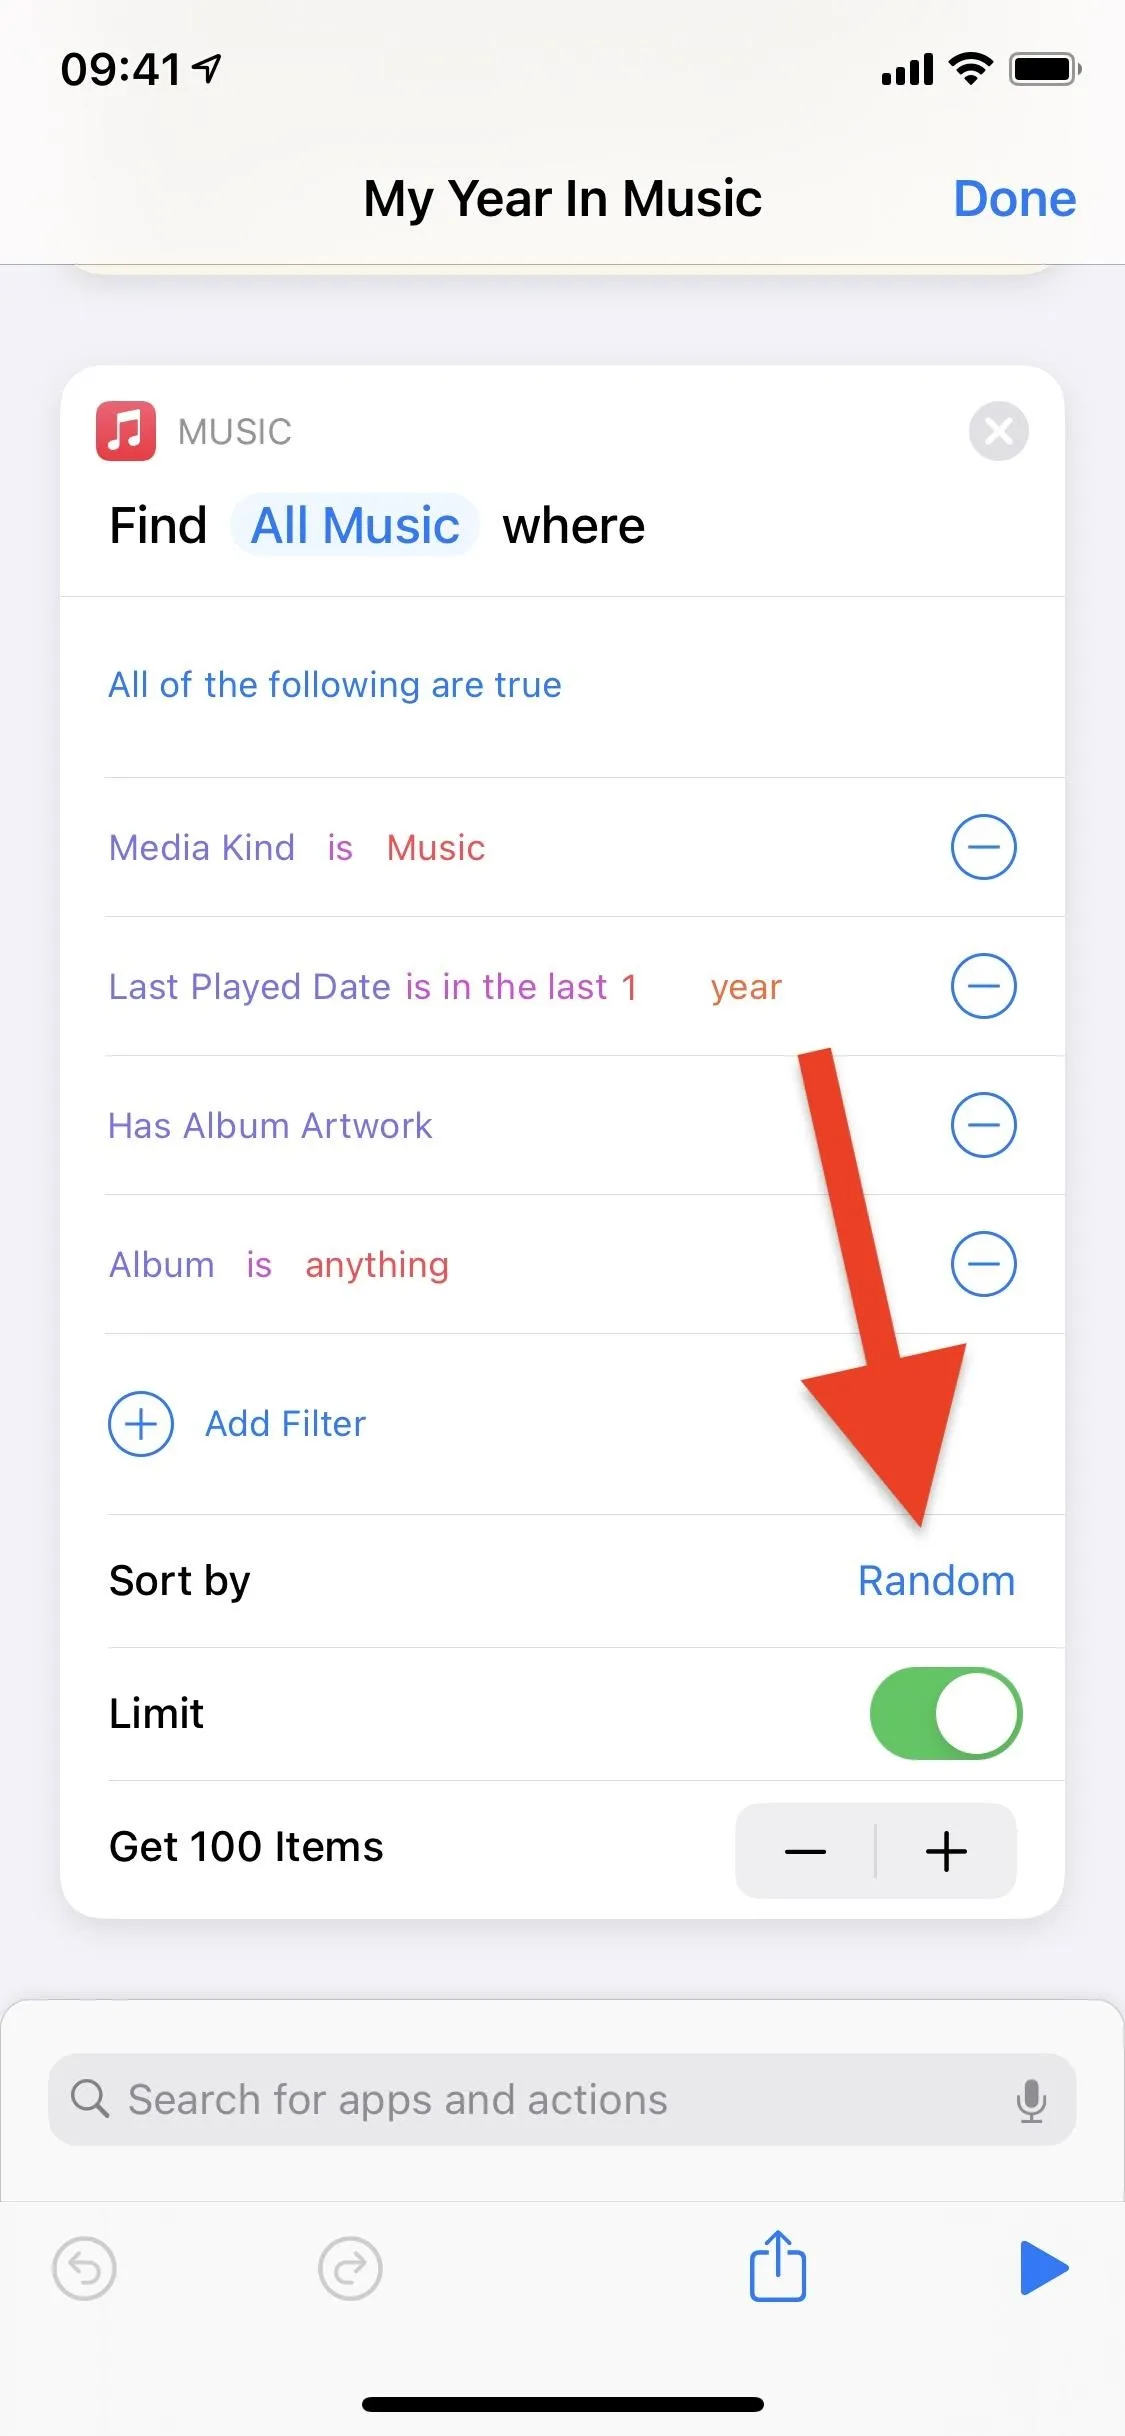
To do so, tap on the ellipsis (•••) button in the top right of the "My Year in Music" card. Next, scroll down until you find the Music action, which says "Find All Music where" at the top. Next, tap "Random" next to Sort by and choose "Last Played Date." Back in the Music action, tap on "Latest First" next to Order, then hit "Done" in the top right.
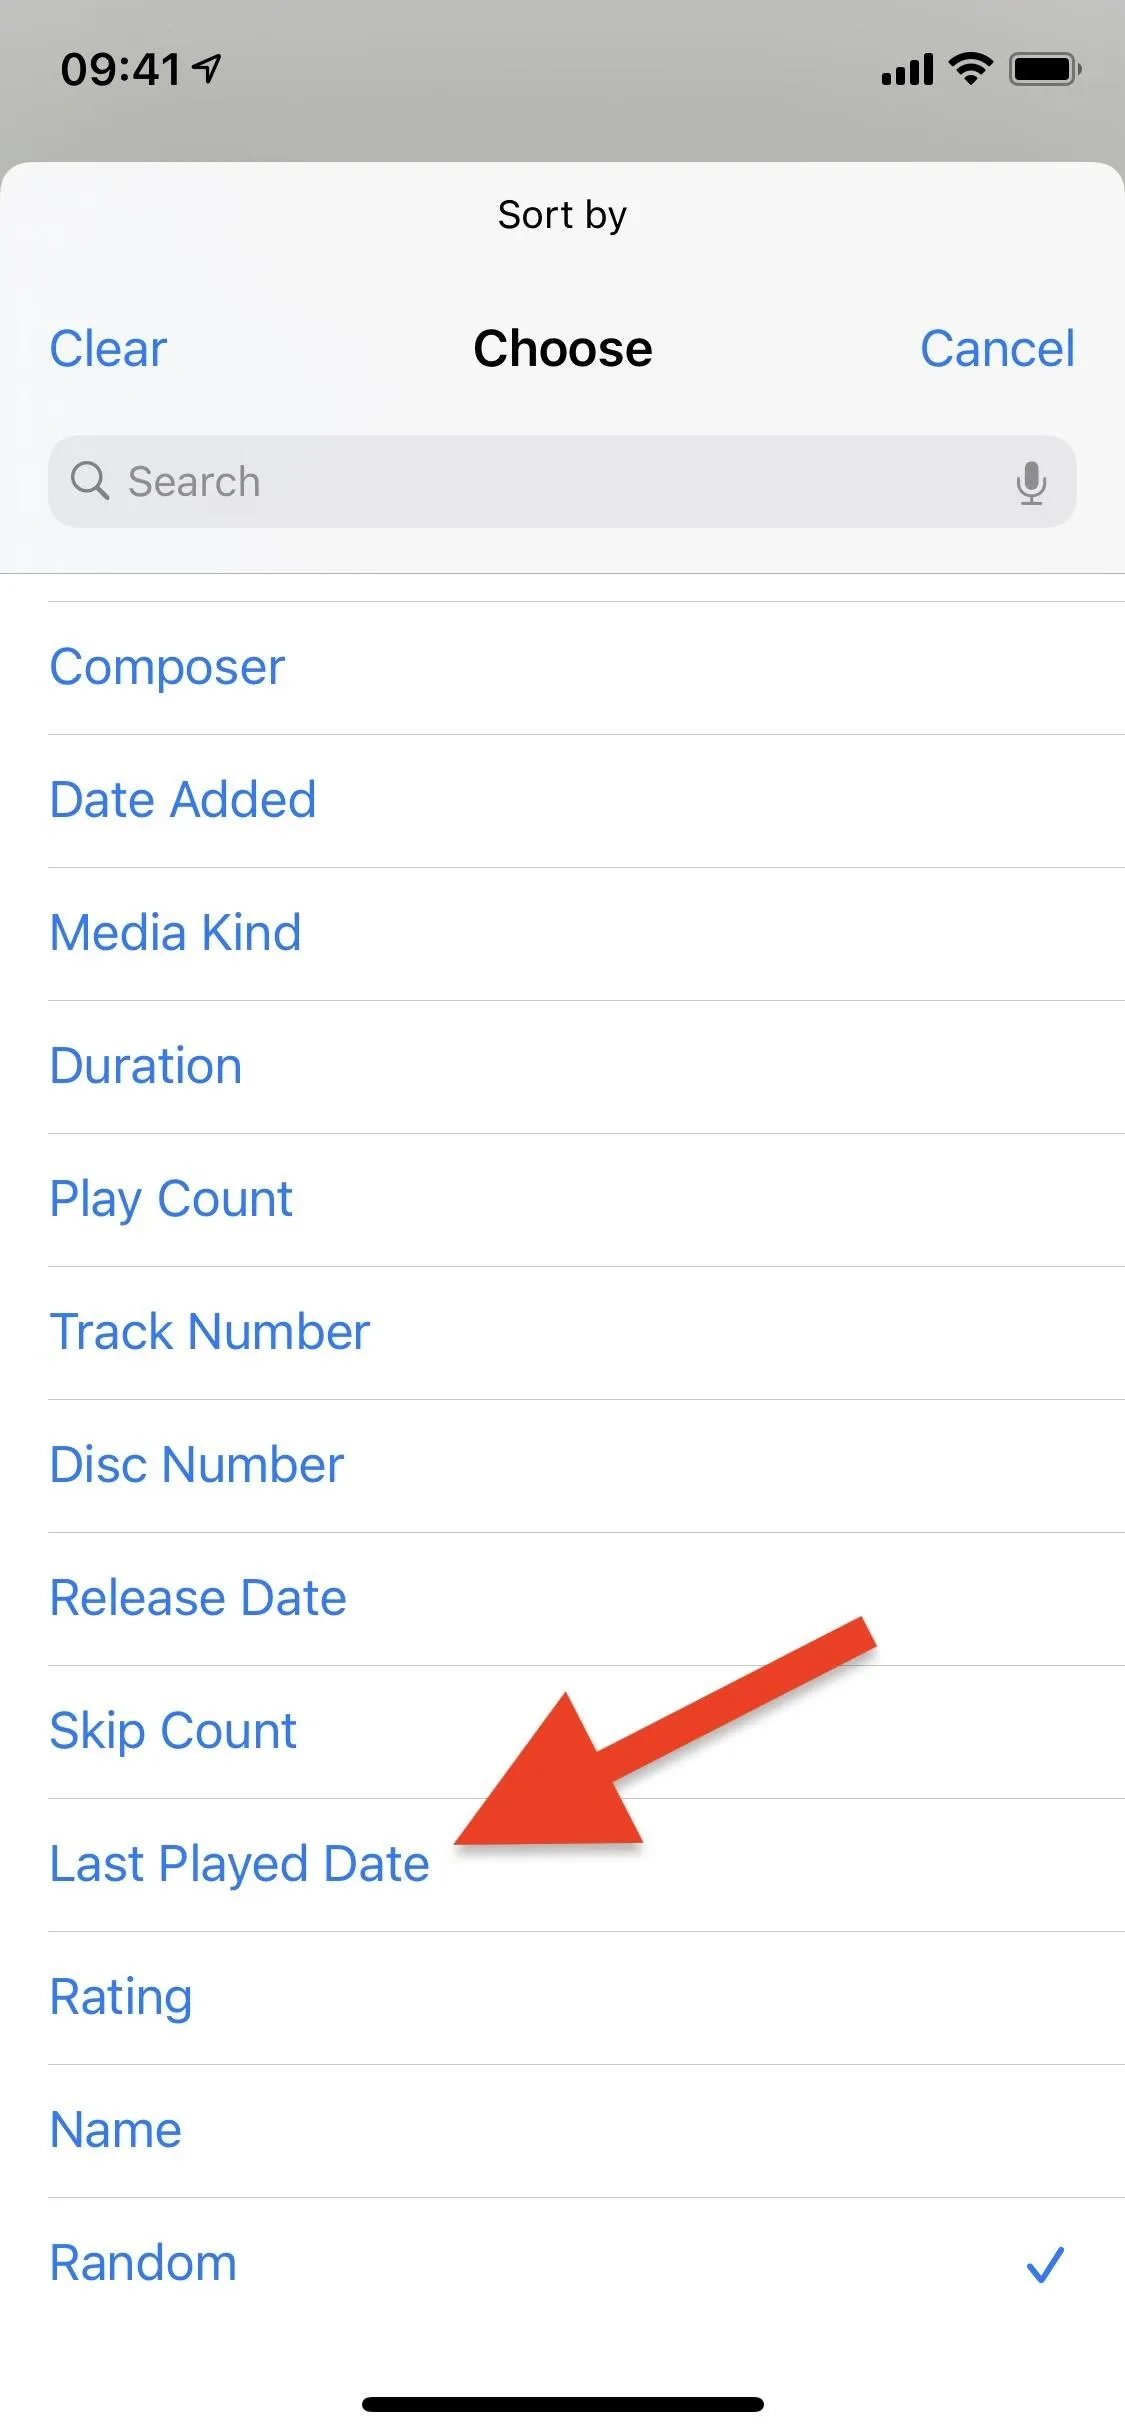
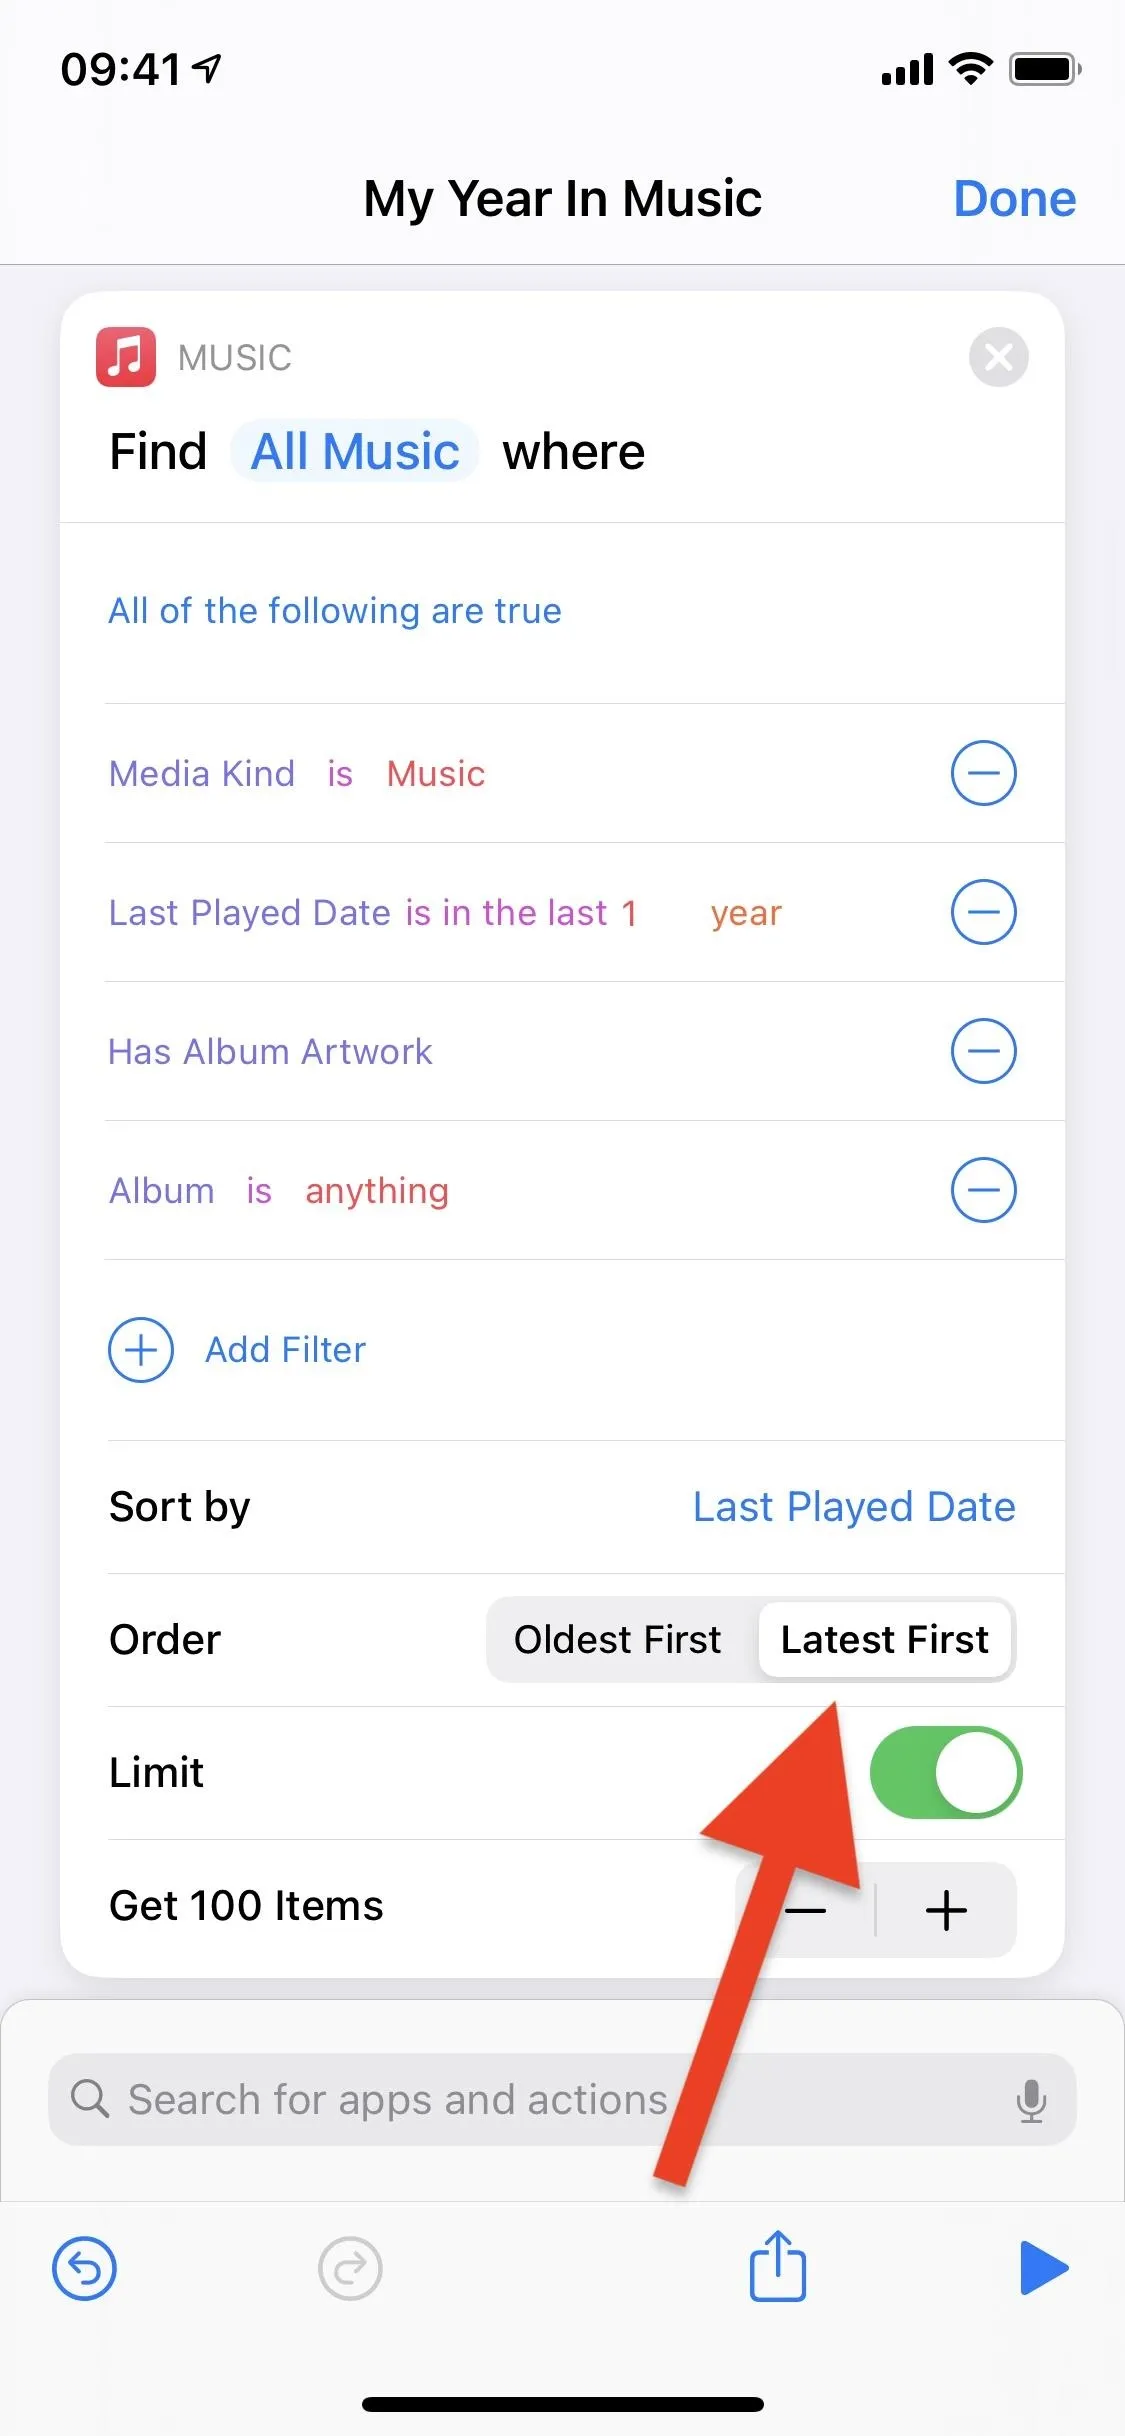


You can also play with the options above and choose something like "Name" or "Release Date" to get different versions of your Year in Music.
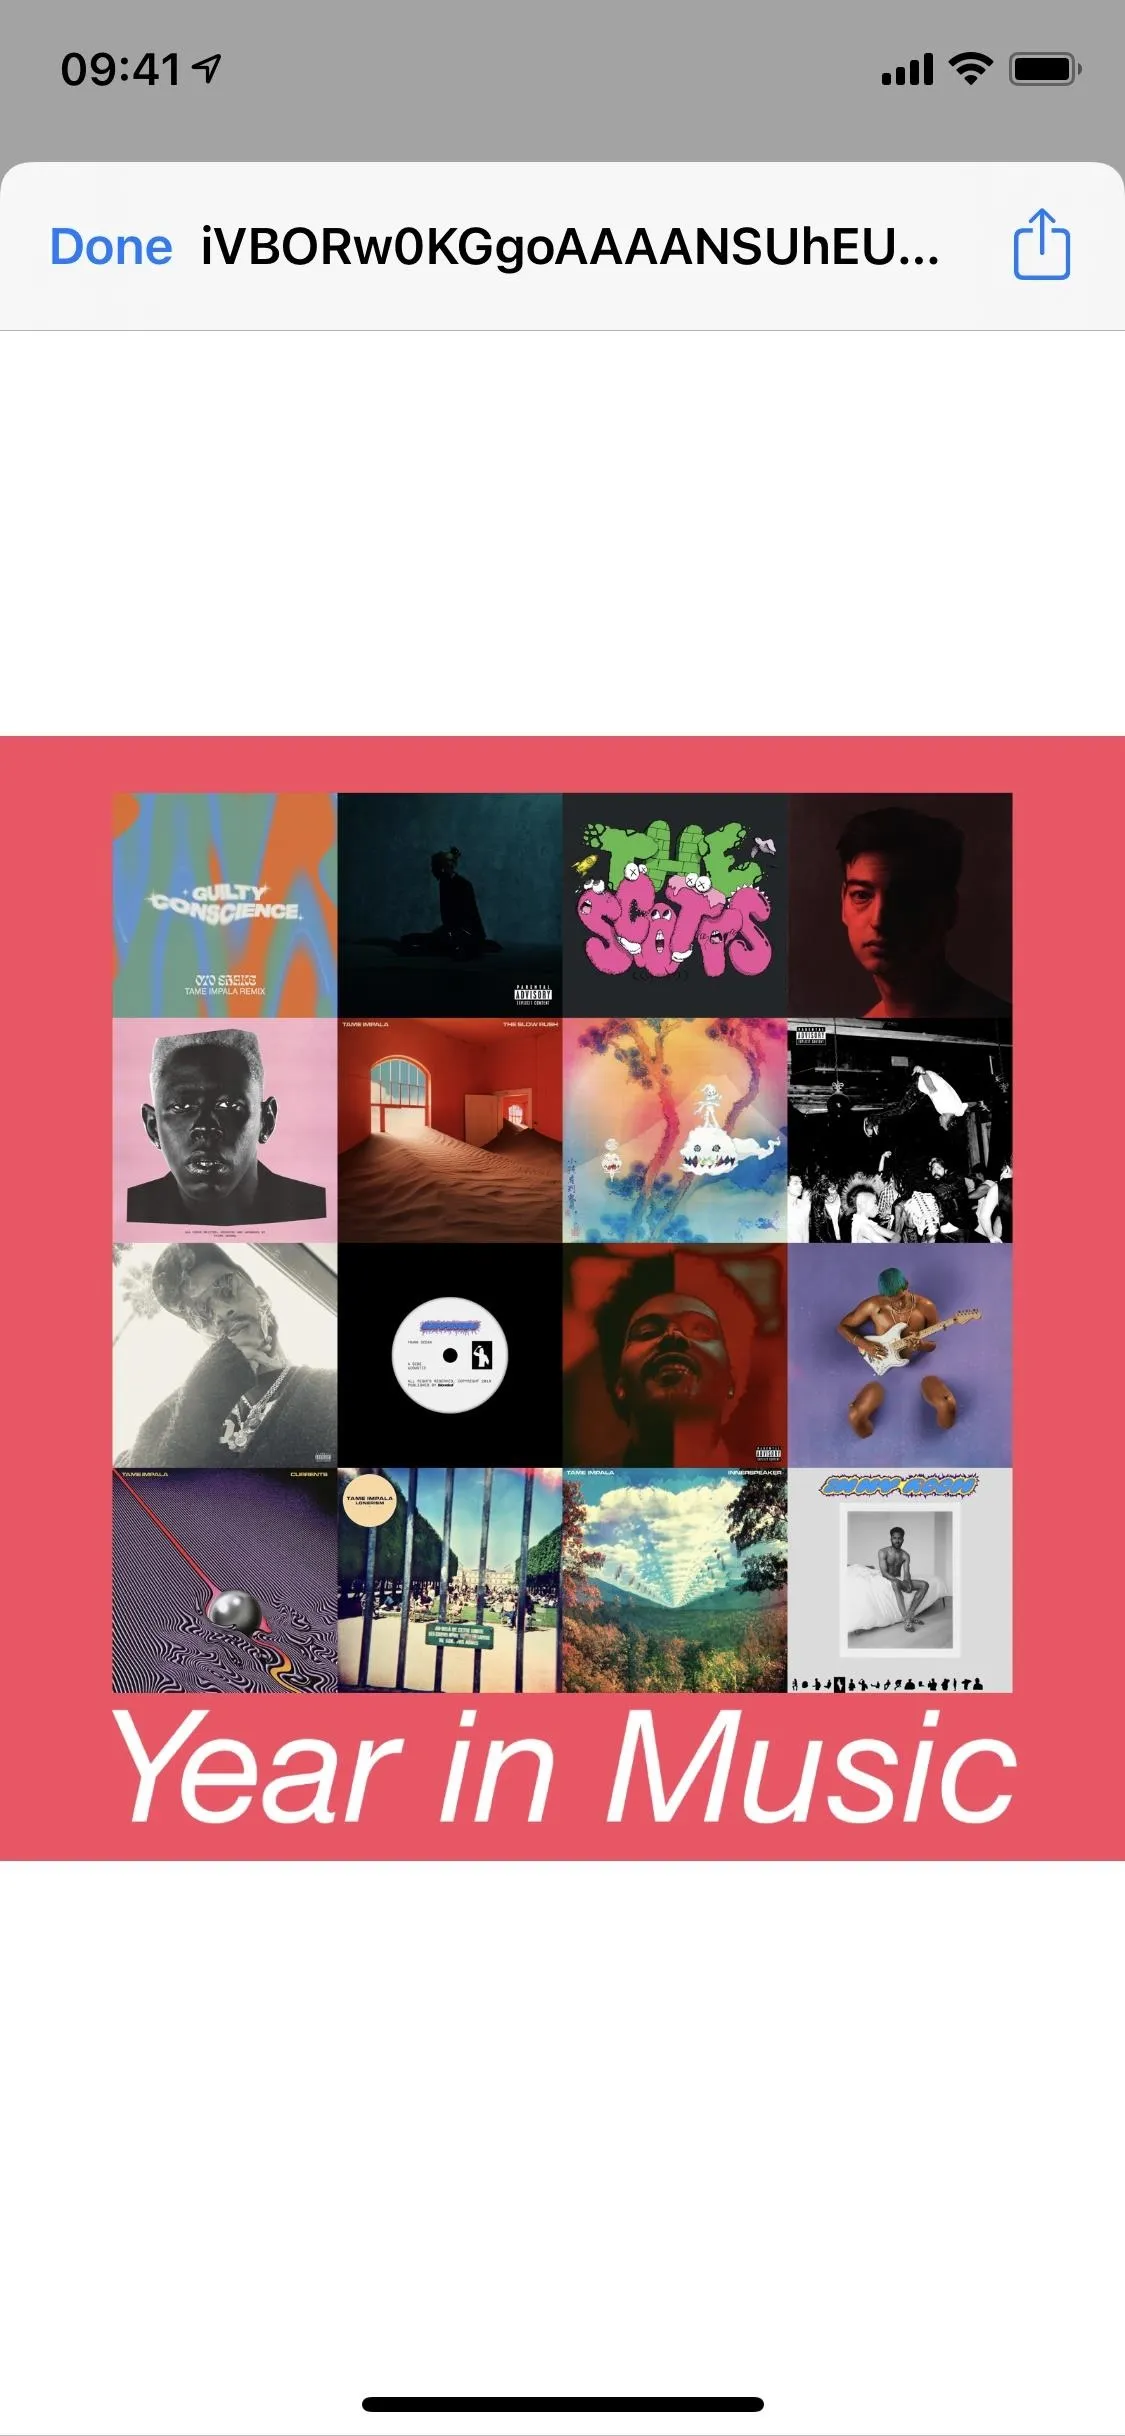
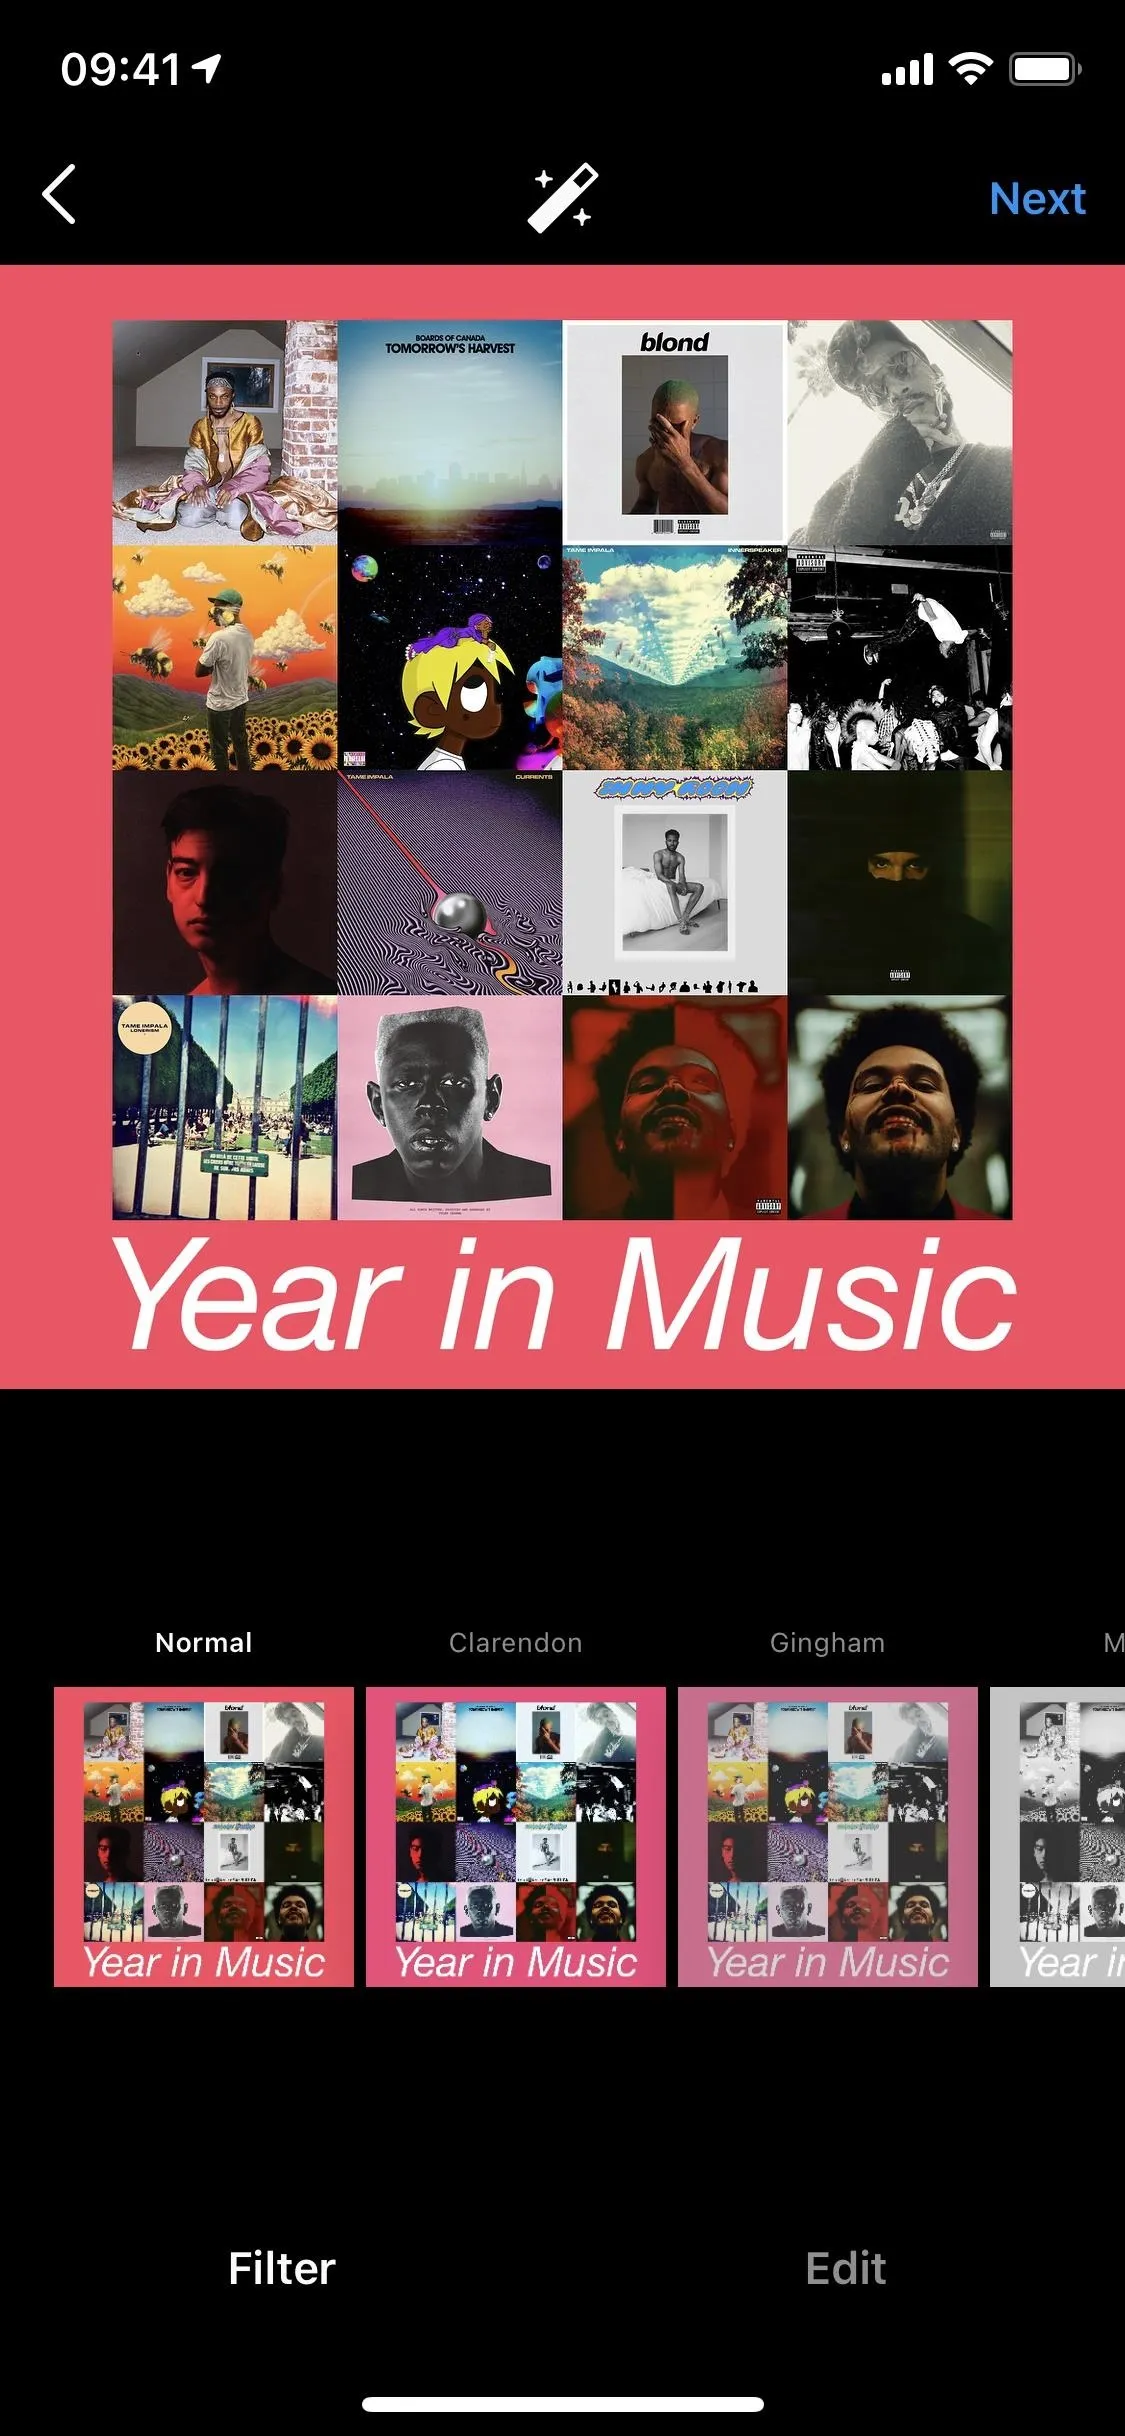


Remove or Edit the Menu
If the Share button on the image is enough for you, and you have no plans or use for the menu that appears afterward, you can remove it entirely or add an option to quit the menu in case you might want to use it later. In the shortcut's actions, to delete the menu, look for the only List action box, then delete it and everything that appears after it and hit "Done."
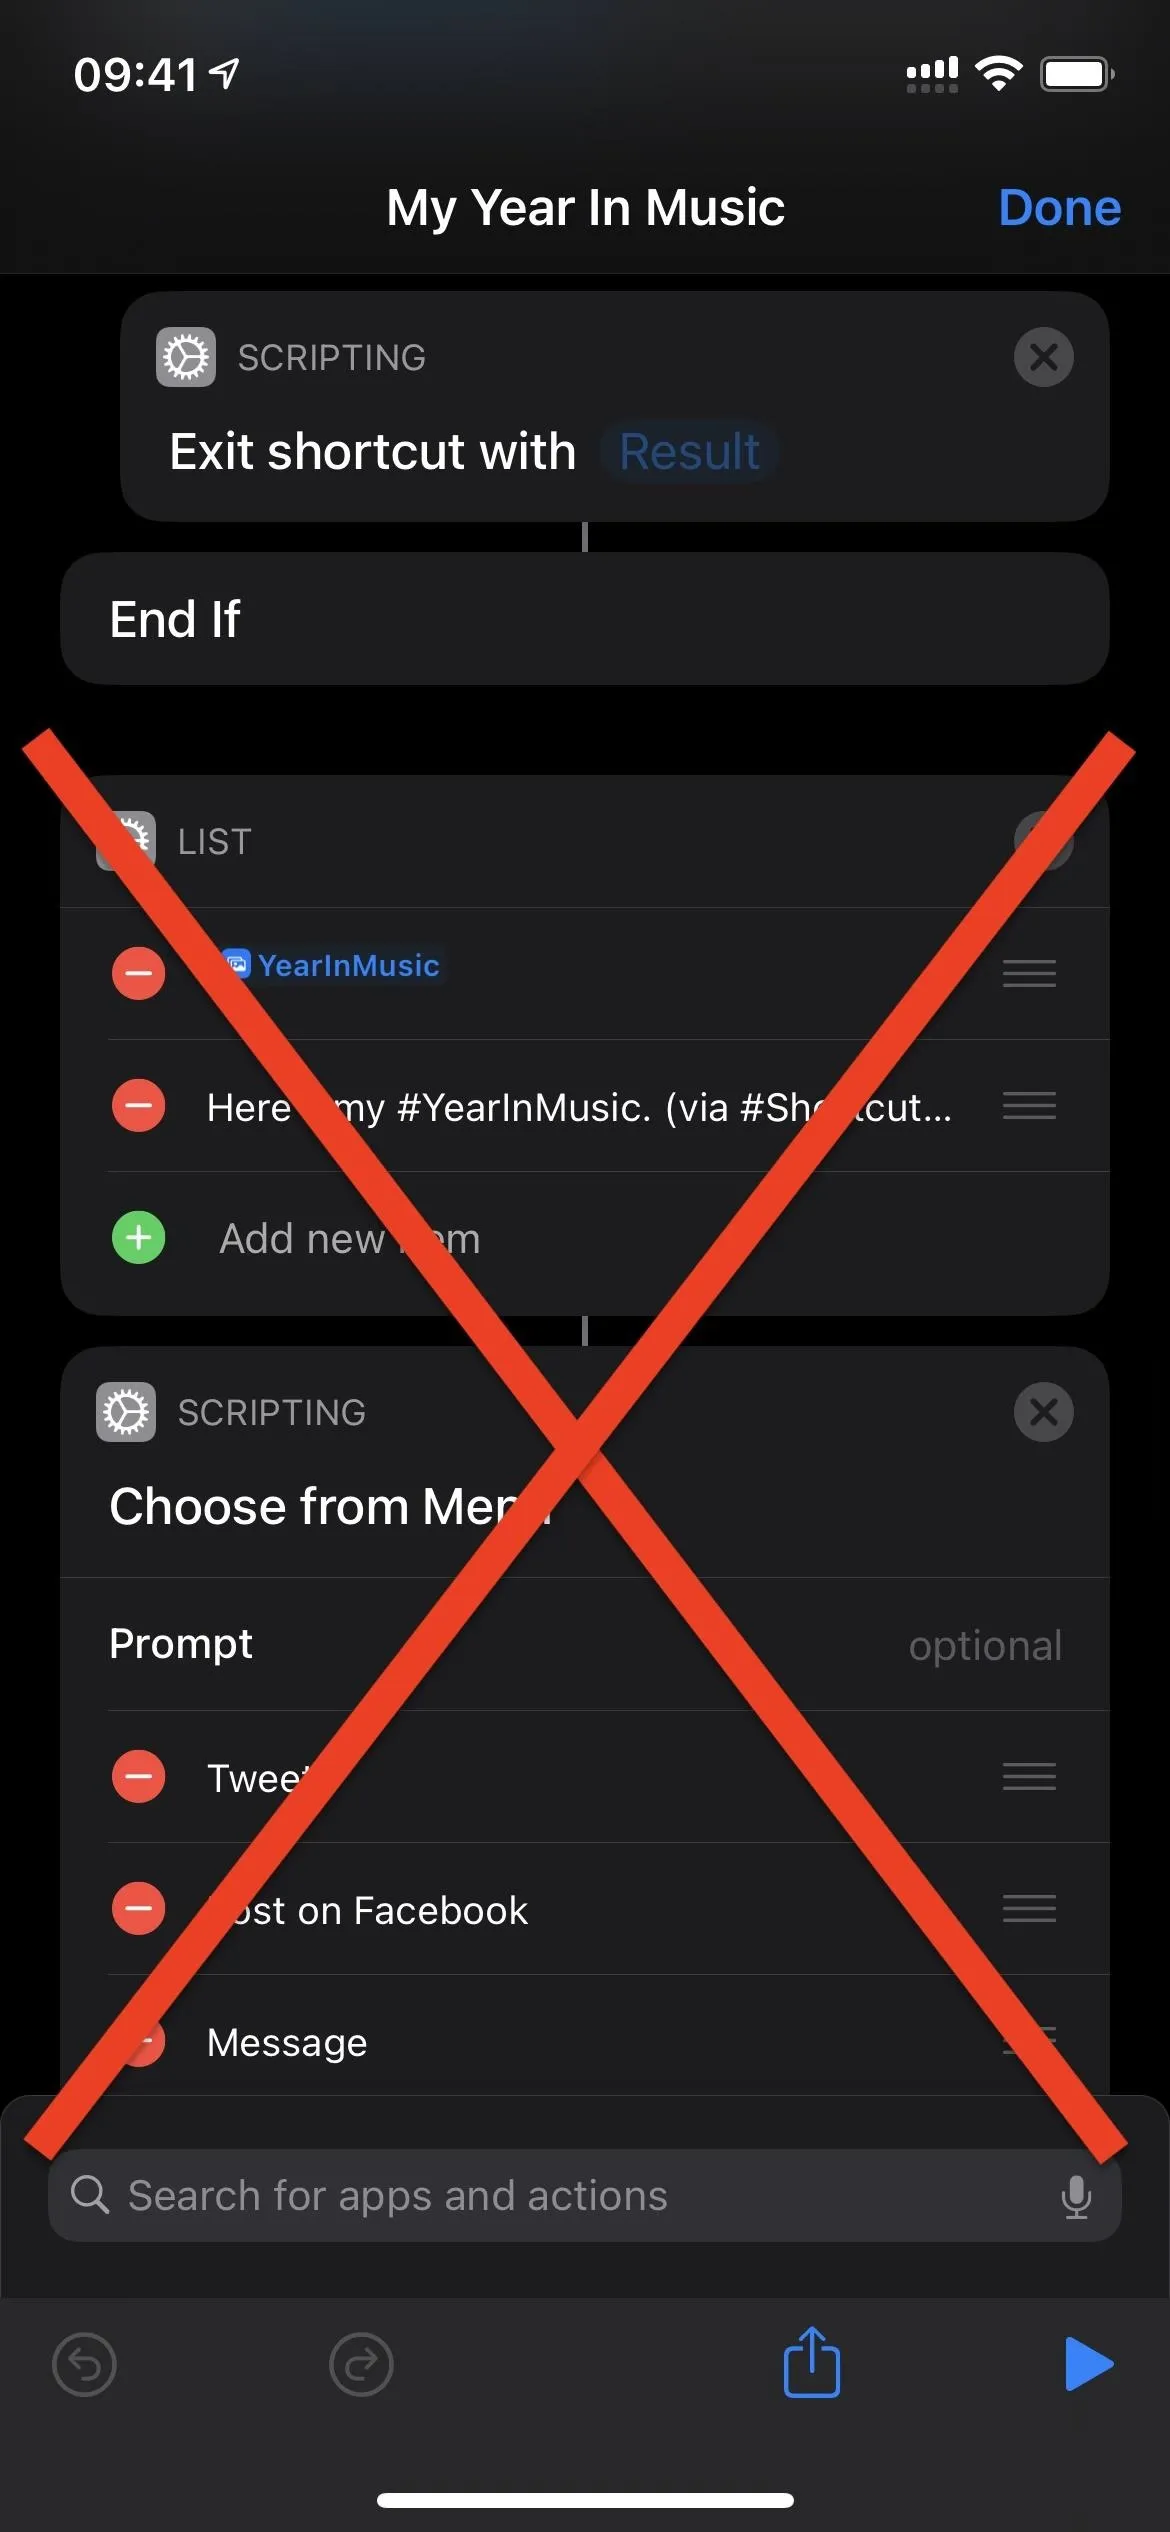
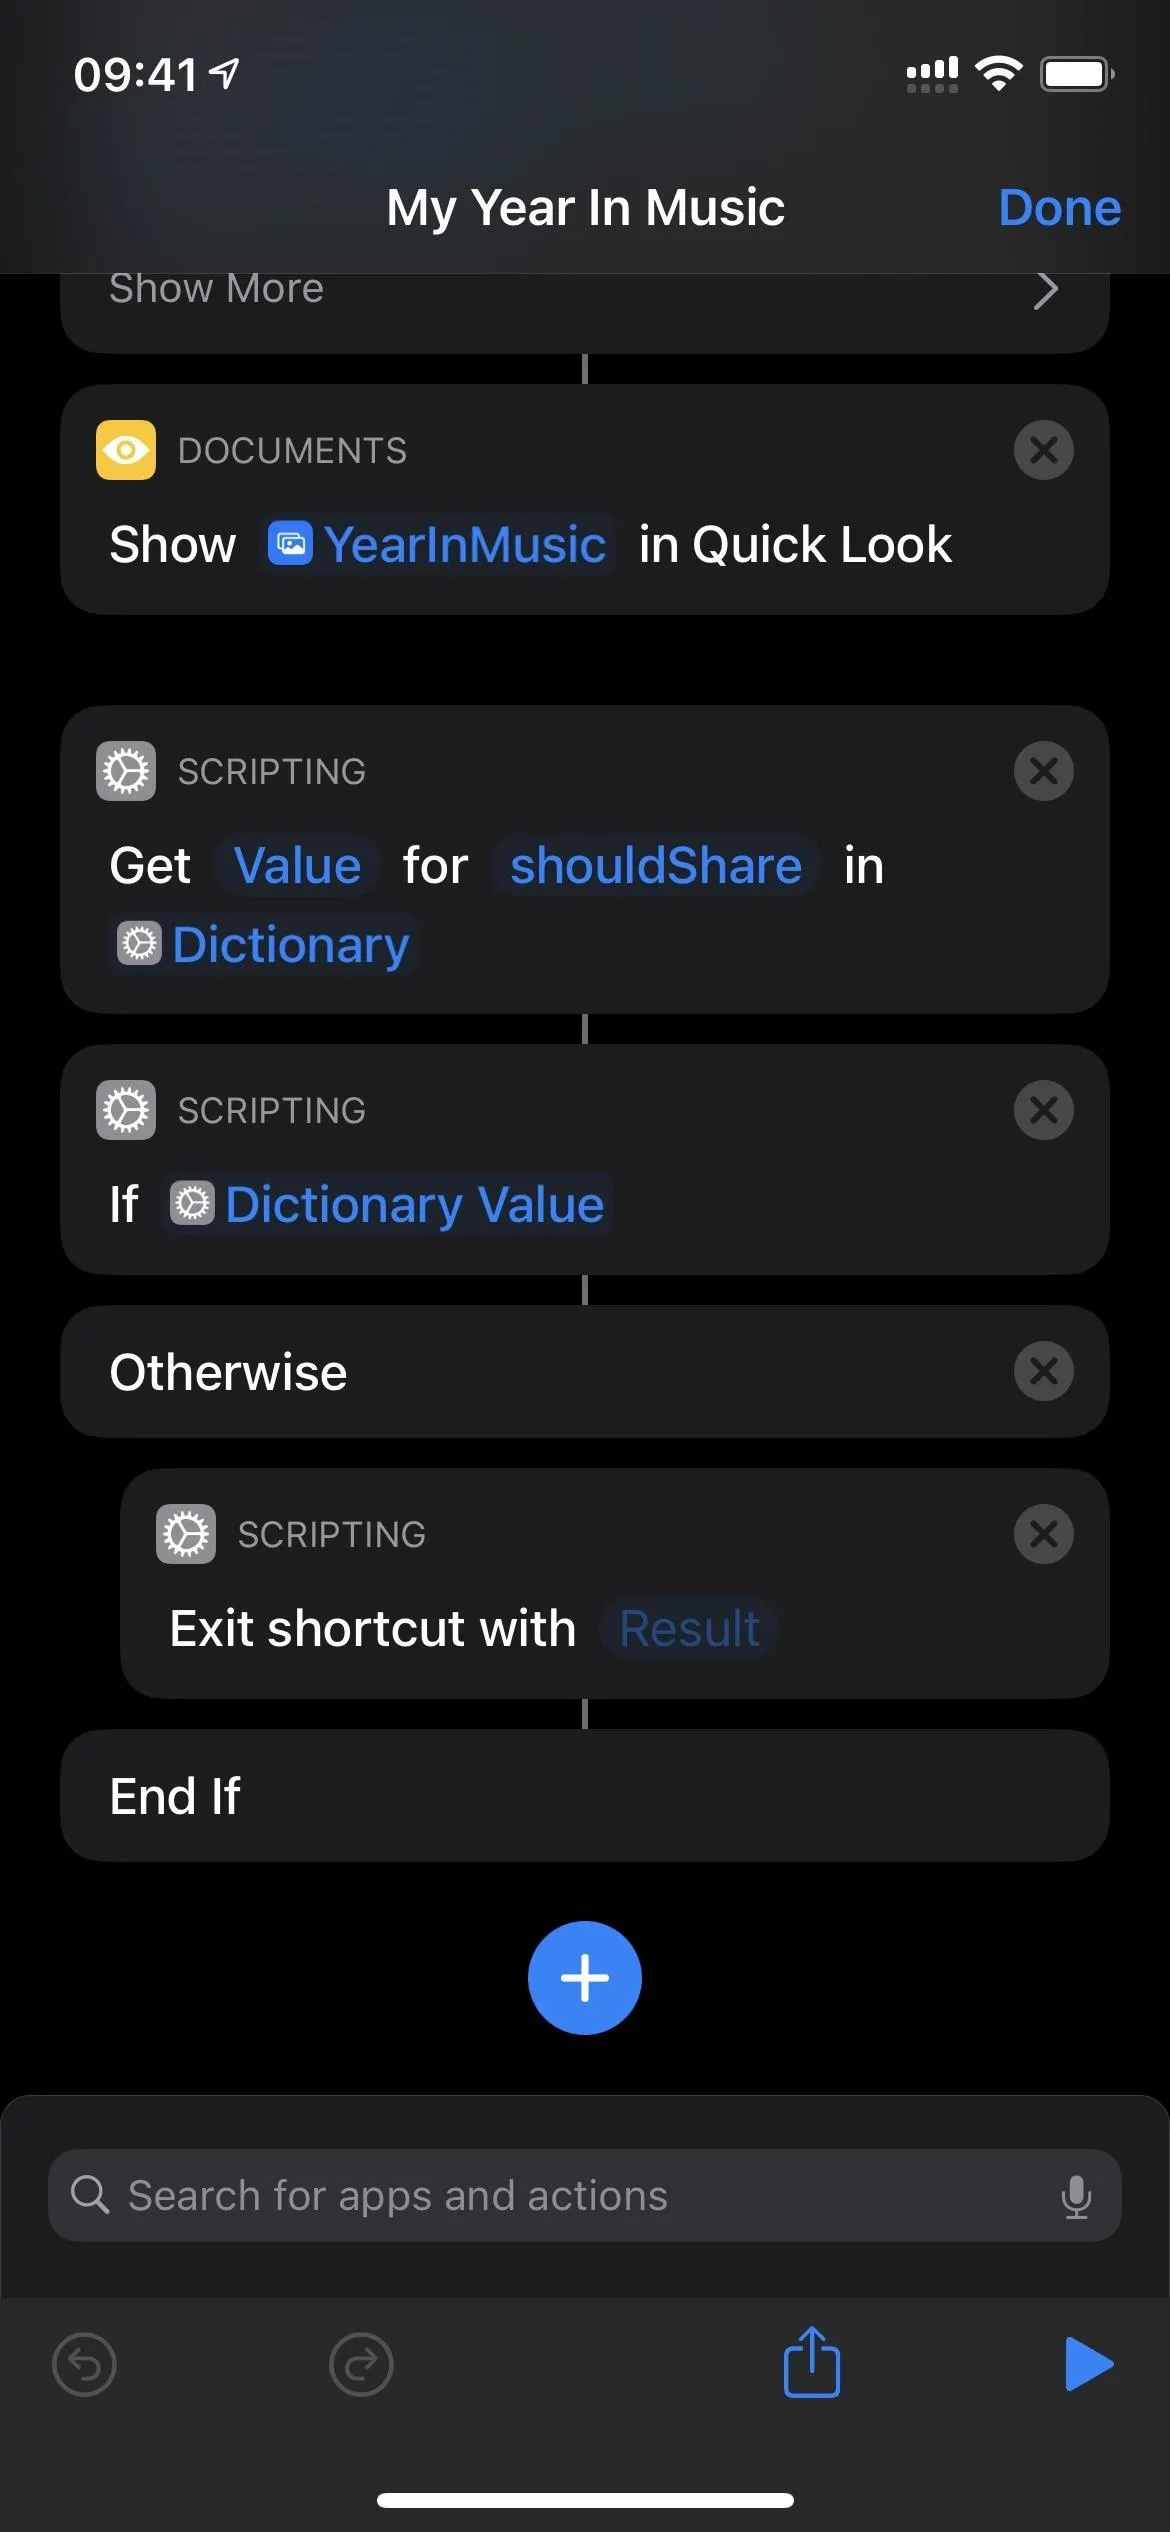


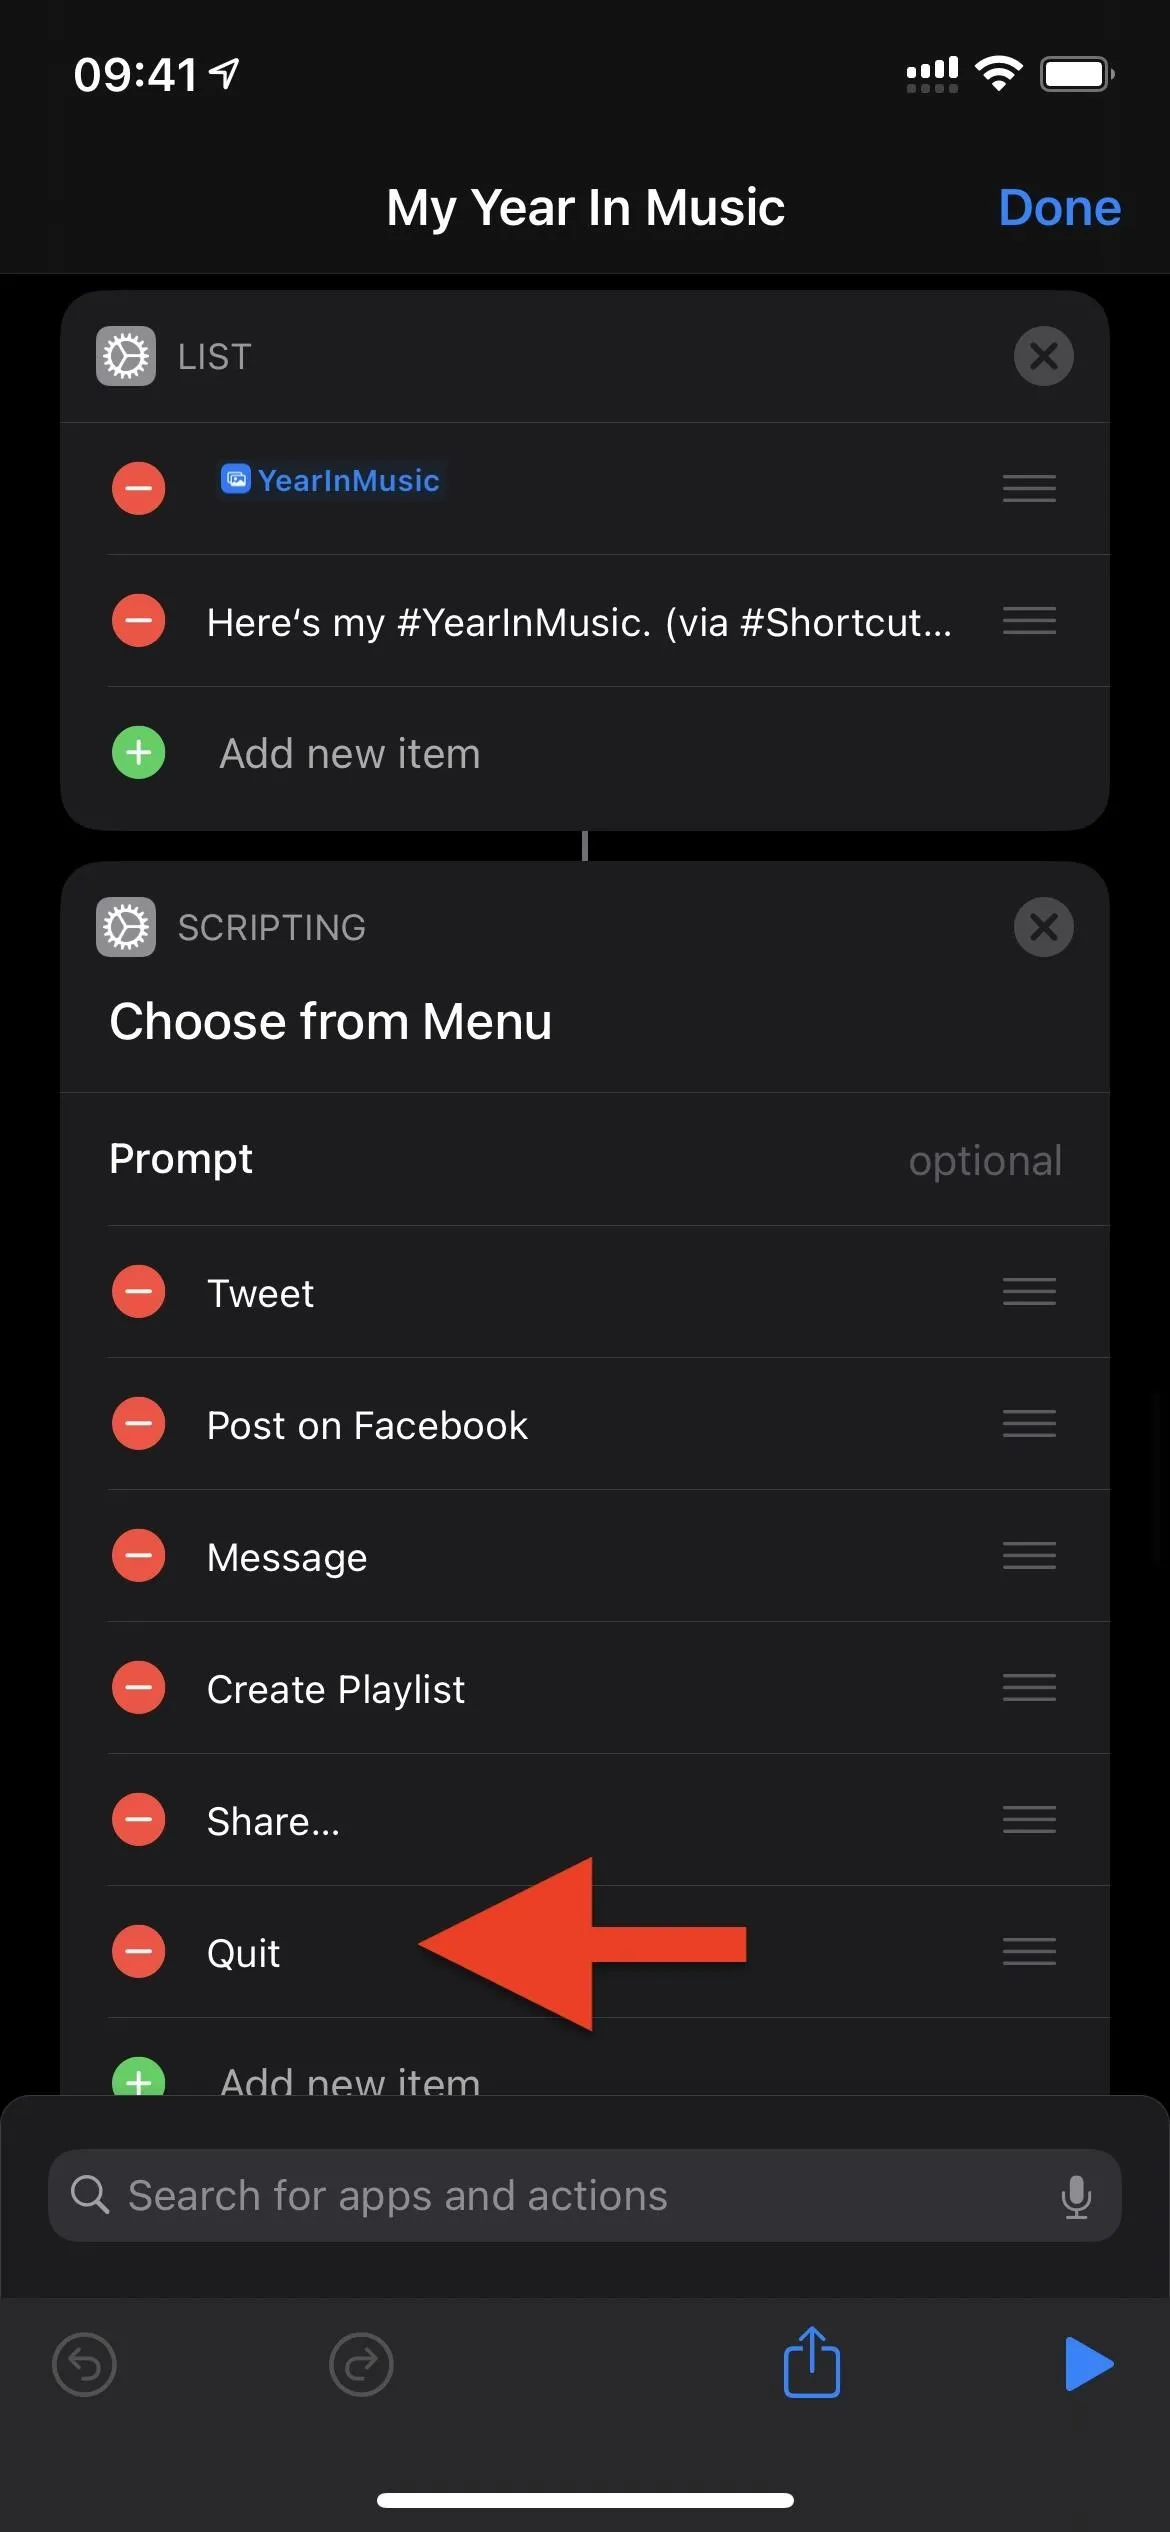
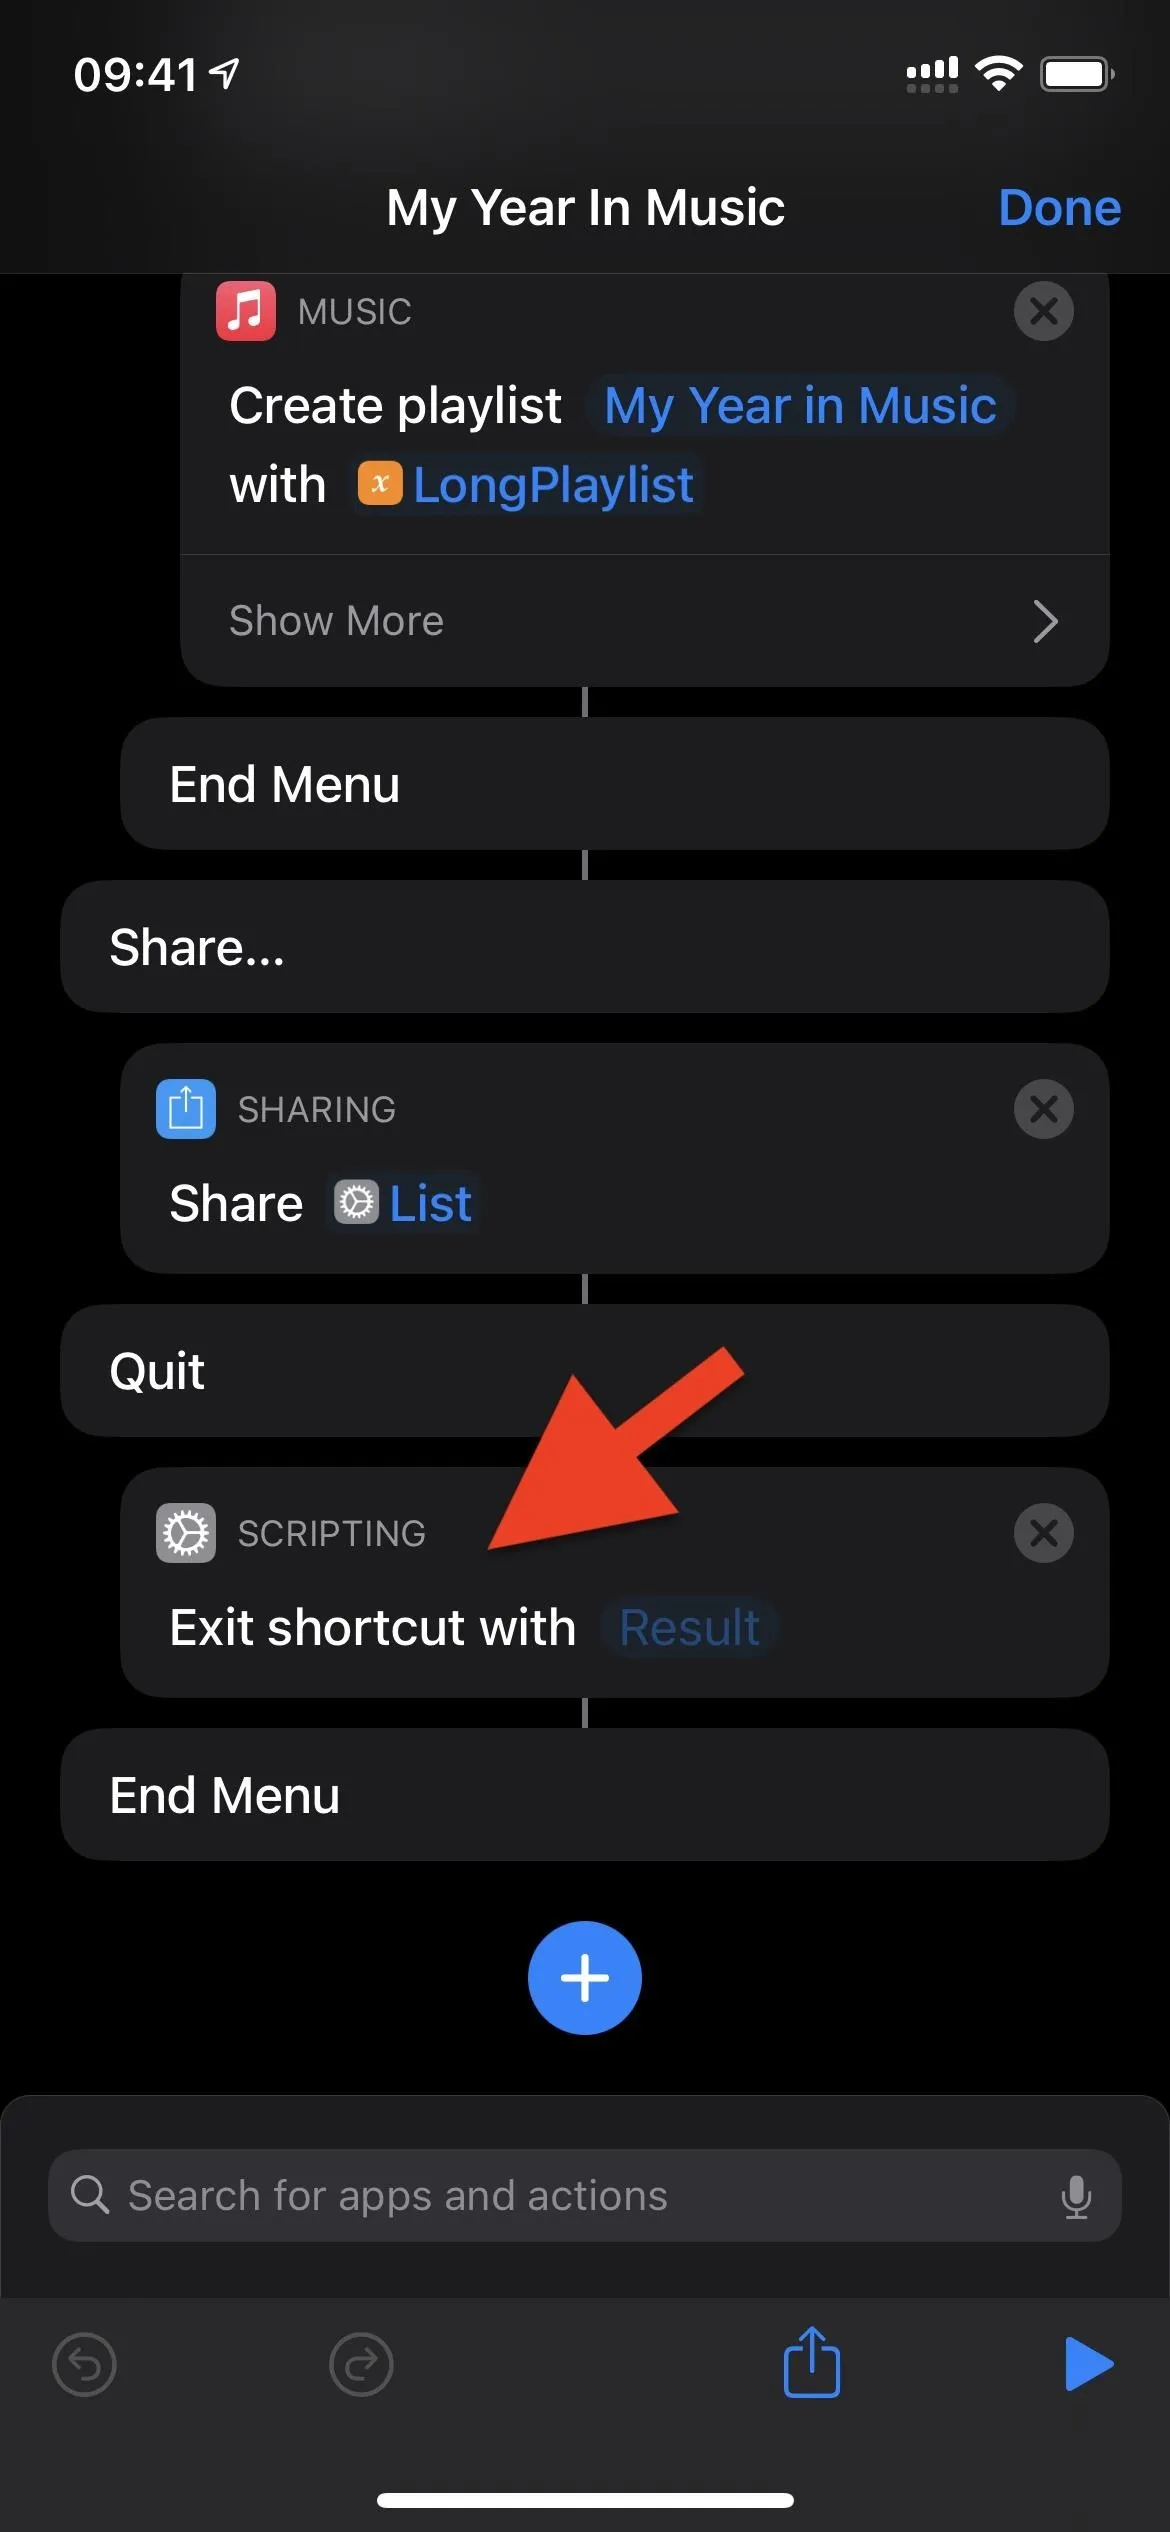
If you want to add a "quit" option, go into the Scripting box for "Choose from Menu" that's directly below the List action. Then, tap "Add new item," name it something like "Quit," and scroll to the bottom of the workflow. You should see "Quit" down there. Now, search for and add the "Exit Shortcut" action, then drag it right under the "Quit" box. Tap "Done" to save. Then, when the menu pops up next time, tapping "Quit" will exit the shortcut.


Cover photo and screenshots by Nelson Aguilar/Gadget Hacks



Comments
No Comments Exist
Be the first, drop a comment!