You don't need an obsessive ex stalking you to benefit from the ability to record calls on your iPhone in a pinch. Besides protecting yourself from nefarious intent, recording important conversations like verbal contracts and agreements can help you cover all your bases and ensure you're insulated from any potential liabilities that may appear down the road.
Unfortunately, Apple didn't add the ability to record phone calls into iOS, so you'll need to rely instead on third-party apps to get the job done. However, almost all of these apps require payment in the form of monthly or annual subscriptions, making them out of reach for many with a tight budget. That said, there is a workaround to this issue which costs significantly less, provided your device is jailbroken.
If you have a jailbroken iPhone, you can purchase a tweak from Cydia to record phone calls automatically. The aptly named Call Recorder tweak by hAcx costs $2.99 total and is far cheaper and simpler to use than regular subscription-based call recording apps. The app isn't available in Cydia by default, which means you'll have to install an external repo before you can get your hands on it.
Warning: Check Your State's Consent Laws First
Federal law permits recording telephone calls and in-person conversations with the consent of at least one of the parties (e.g., you), but your state may have a different consent law. California, for example, has a two-party consent law, which means you have to obtain permission from the other person(s) before you can initiate recording. Know your state laws before attempting to record a conversation.
Step 1: Install hAcx Repo
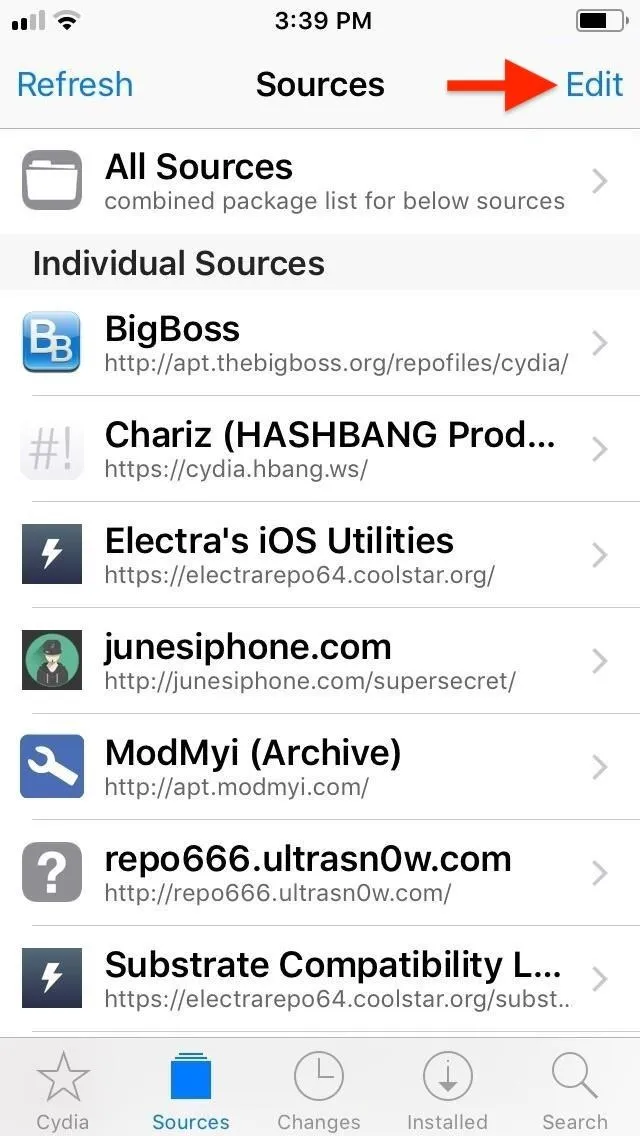
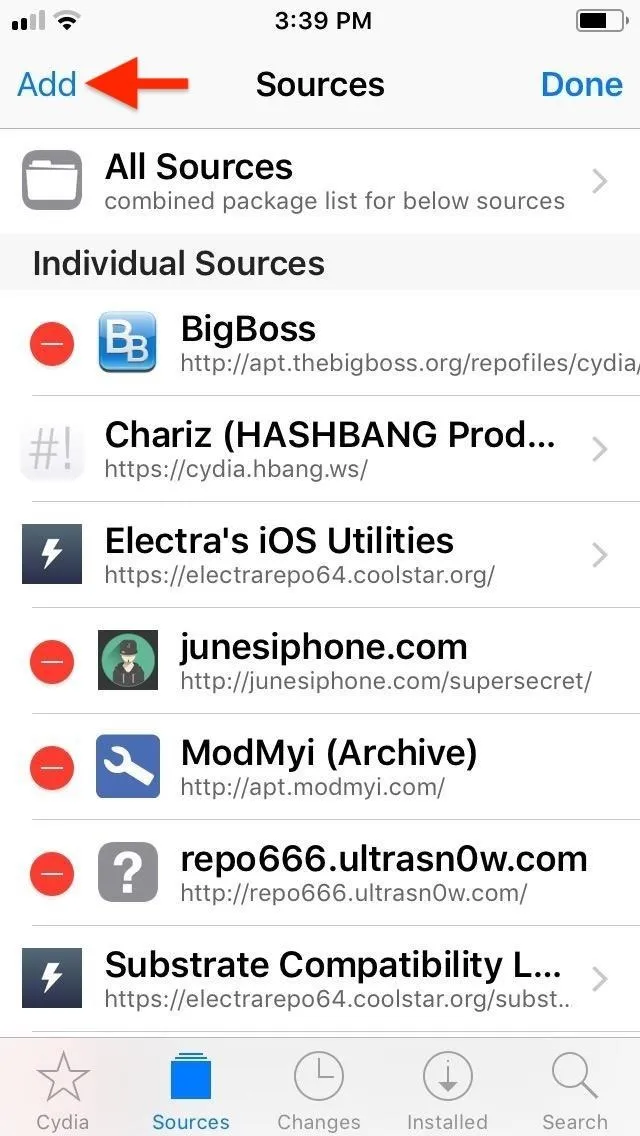
To get started, open the "Sources" tab in Cydia, then tap "Edit" in the upper-right corner, followed by "Add" in the upper-left, to commence with adding a new repo.
- Full Rundown: How to Add Repos in Cydia to Find More Jailbreak Tweaks


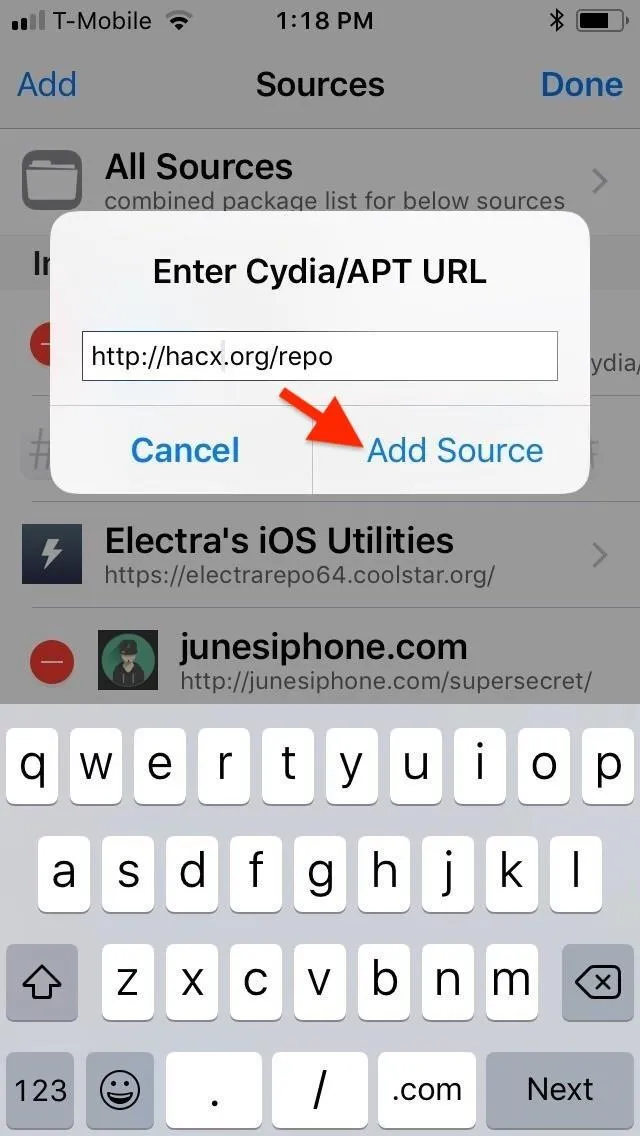
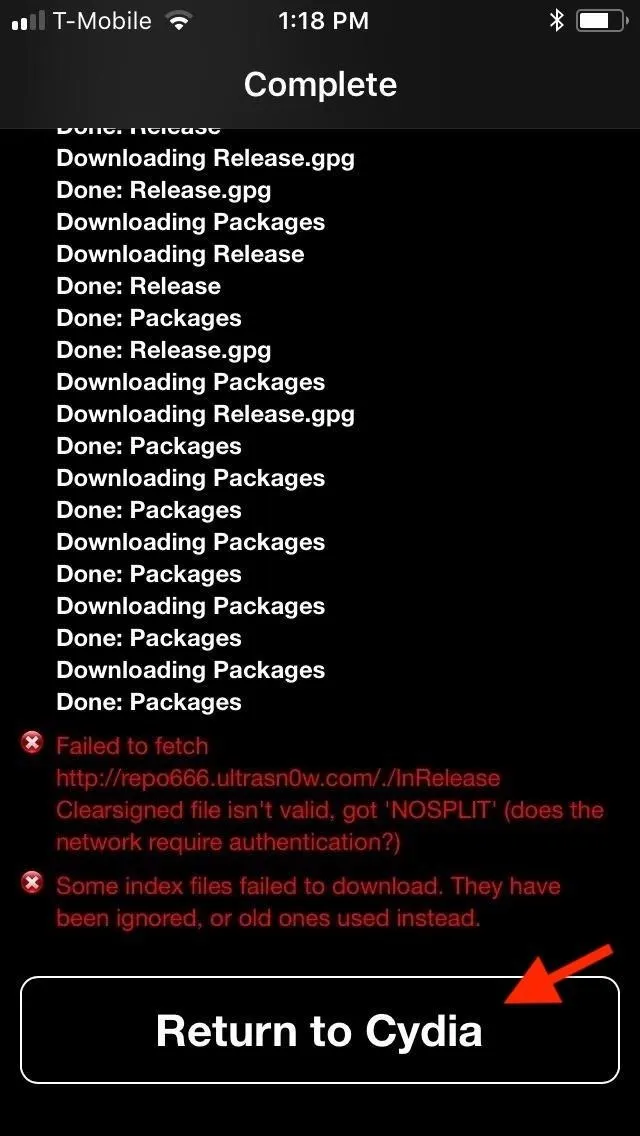
A prompt will appear in the center of the screen asking for a URL. Enter hacx.org/repo into the empty field, then tap on "Add Source." The repo will now be automatically added to Cydia, so sit back and wait for the process to finish. Hit "Return to Cydia" once the repo has been installed, and go to the next step.


Step 2: Install Call Recorder
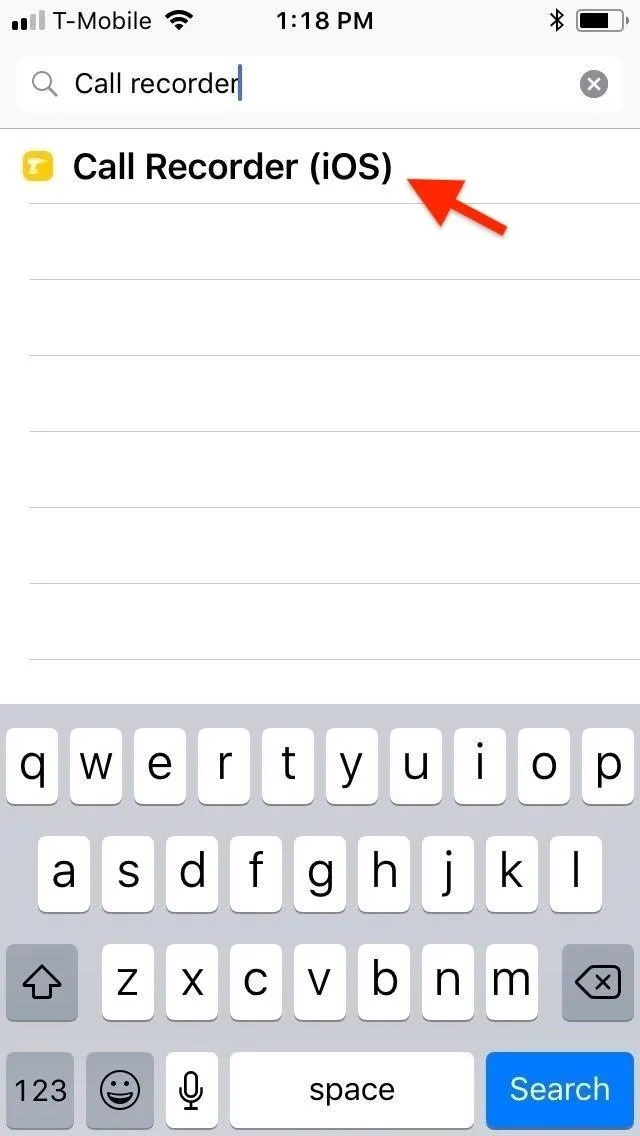
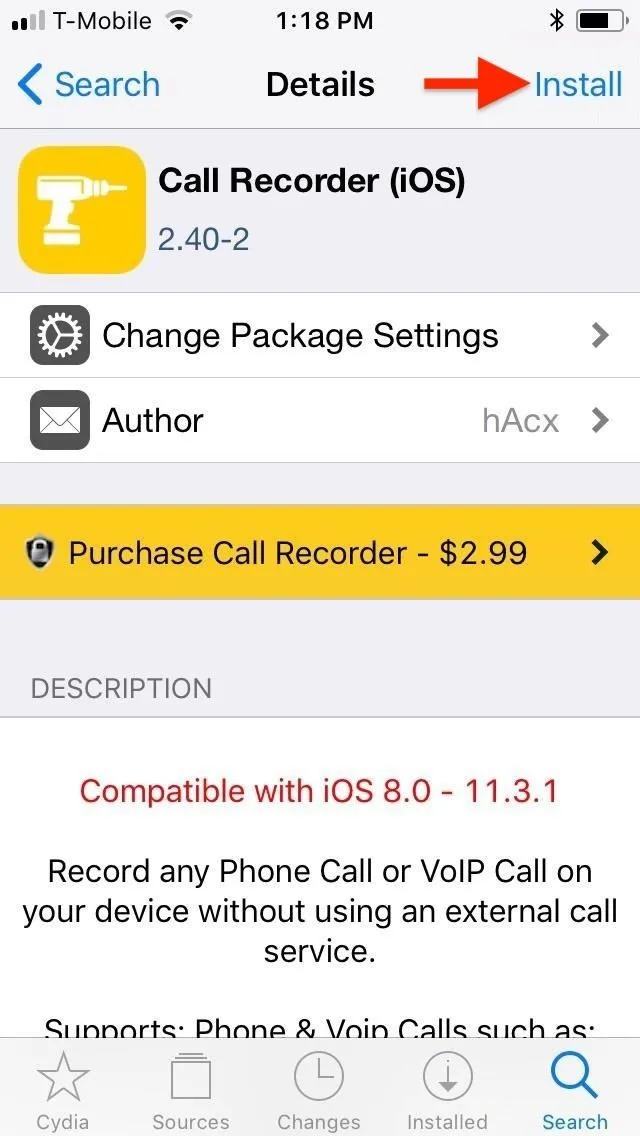
With the repo successfully added on, head to the "Search" tab in Cydia. There, type "call recorder" in the search bar, and select "Call Recorder (iOS)" from the list of results that appear. Next, tap "Install" in the upper-right of the Details screen to begin the installation.


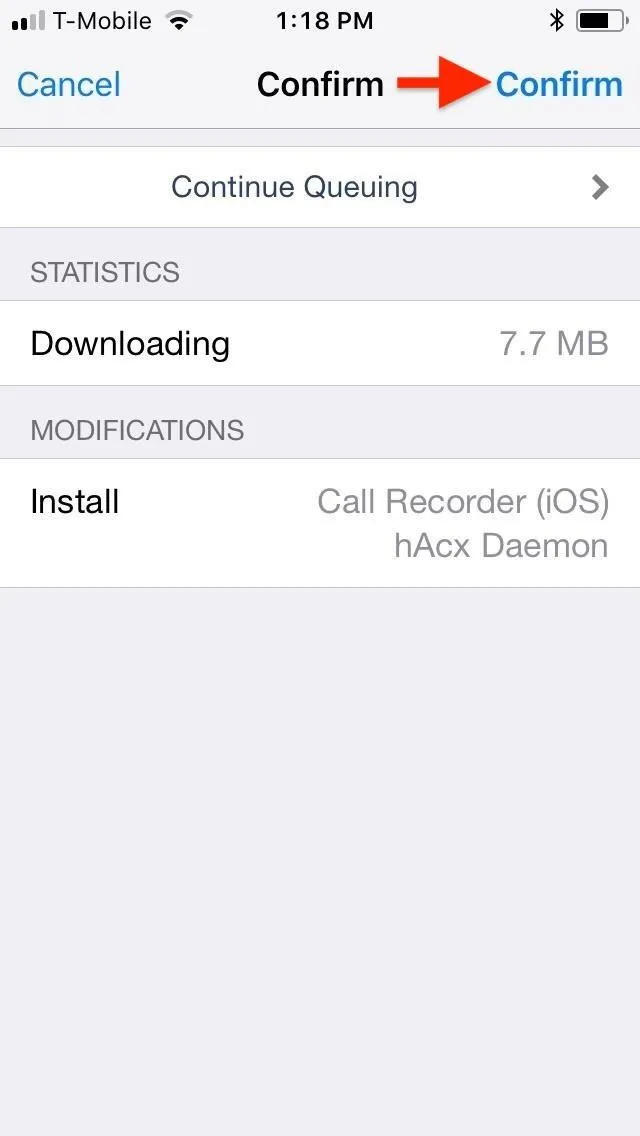
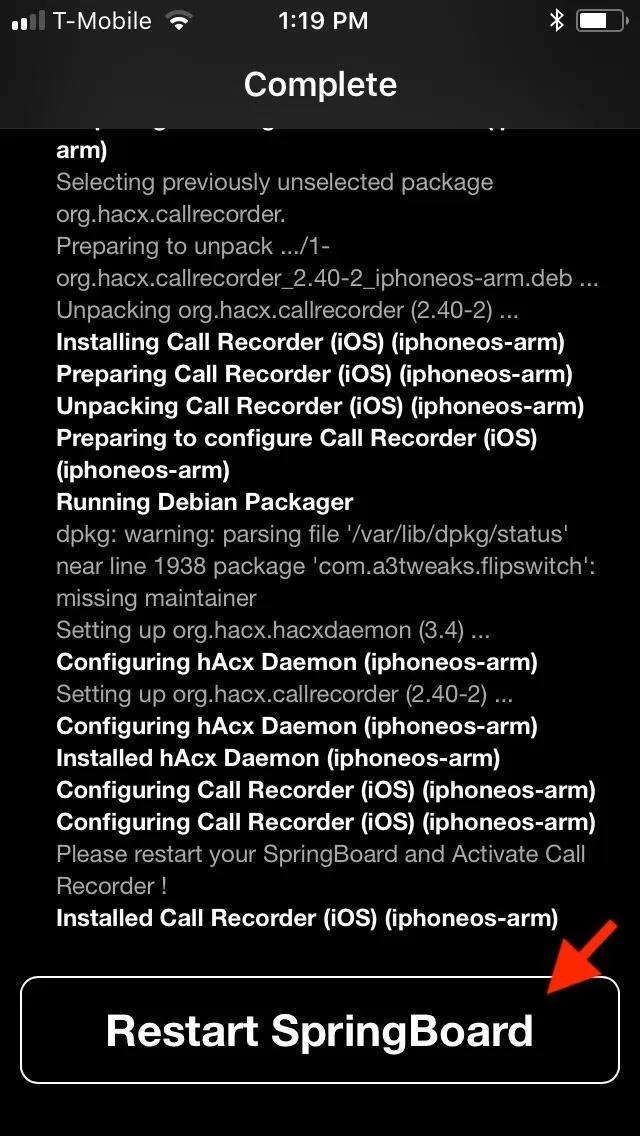
Tap "Confirm" in the upper-right of the following screen to finalize your selection. The tweak will start installing, so wait a few moments for the process to complete. Once it's done, tap on "Restart SpringBoard" to respring your iPhone and finish installing Call Recorder.


Step 3: Purchase & Activate Call Recorder
Upon respringing, an icon for Call Recorder will appear on your home screen. Before you can fully access the app, however, you'll still need to purchase an activation code for Call Recorder to enable its features. Open the app, then tap on "Express/Secure Purchase" to proceed. You'll automatically be transferred to a PayPal page, so enter your login credentials and follow the prompts to pay for the code. When you see your activation code on the screen, tap "Activation" in the top left.
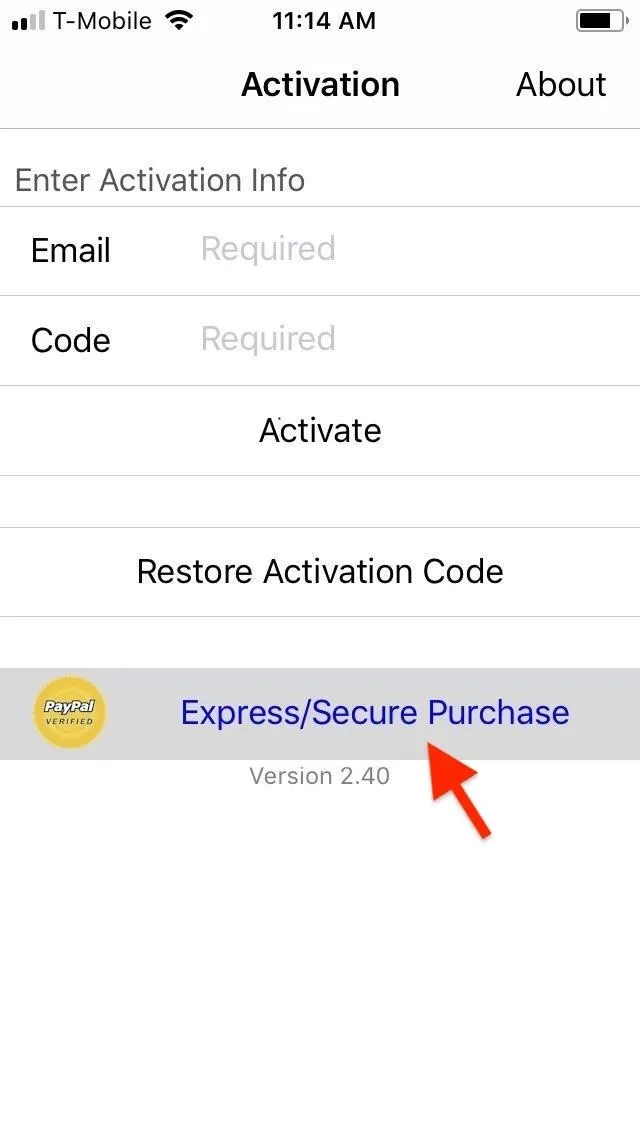
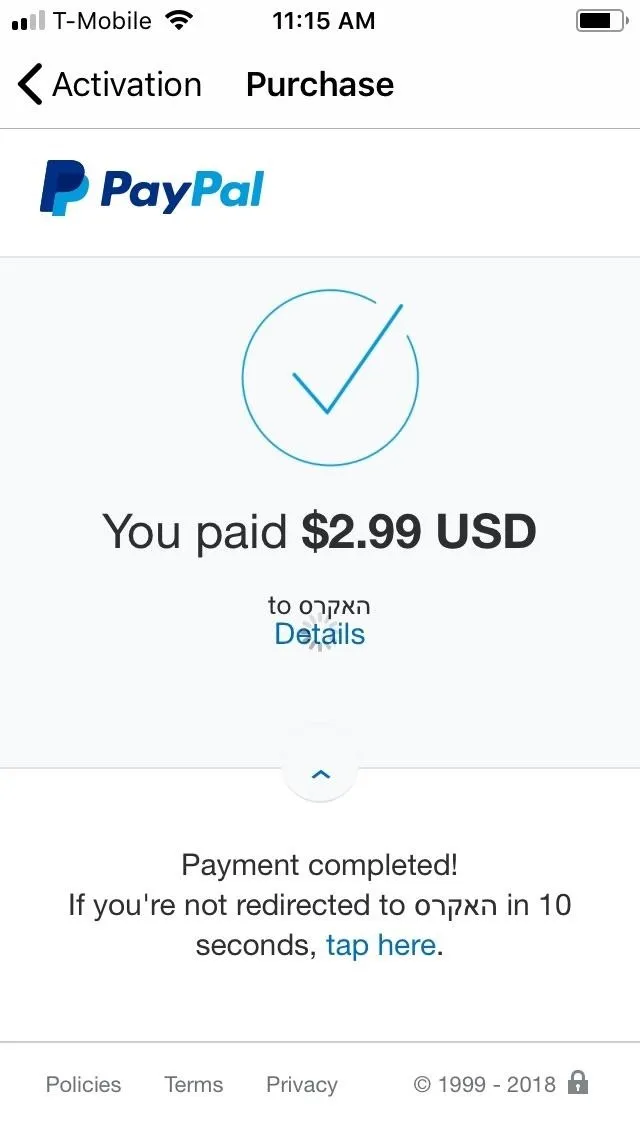
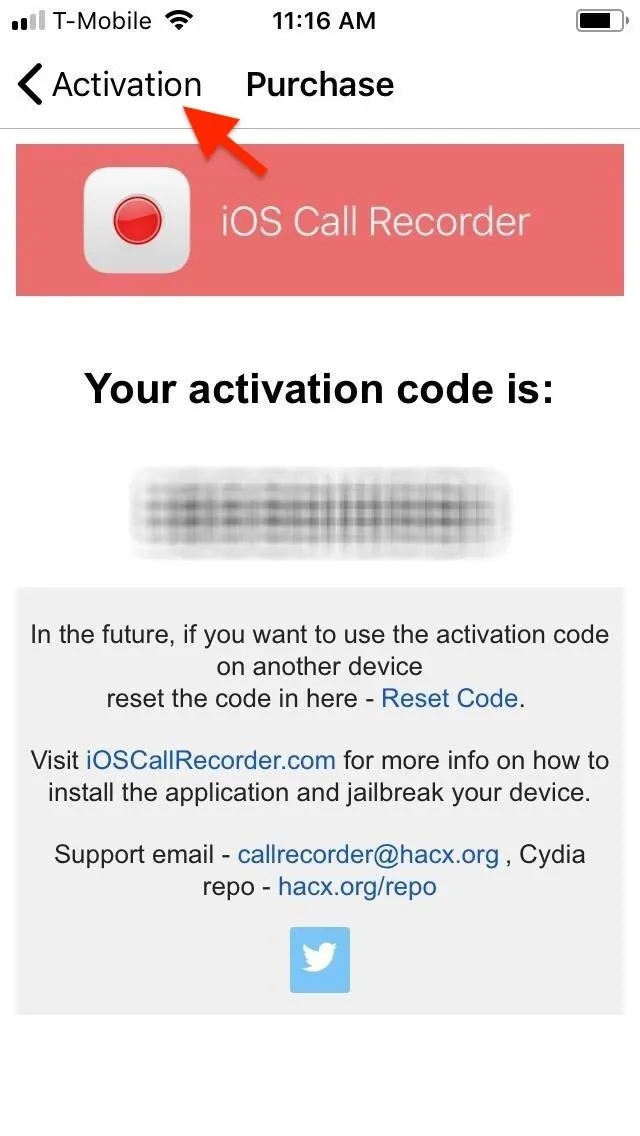


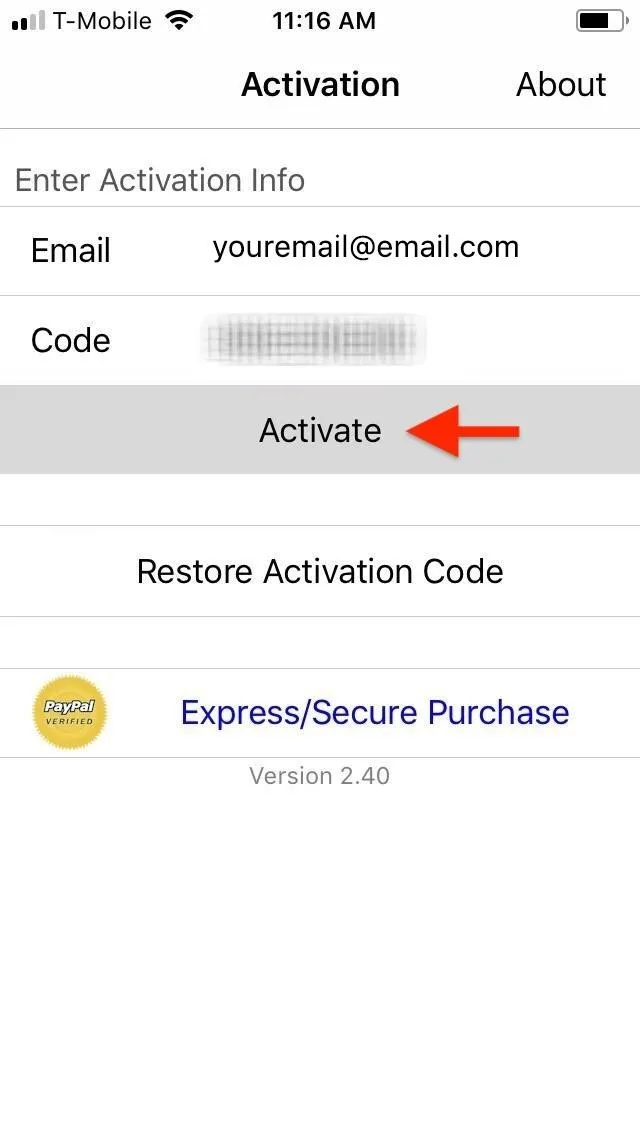
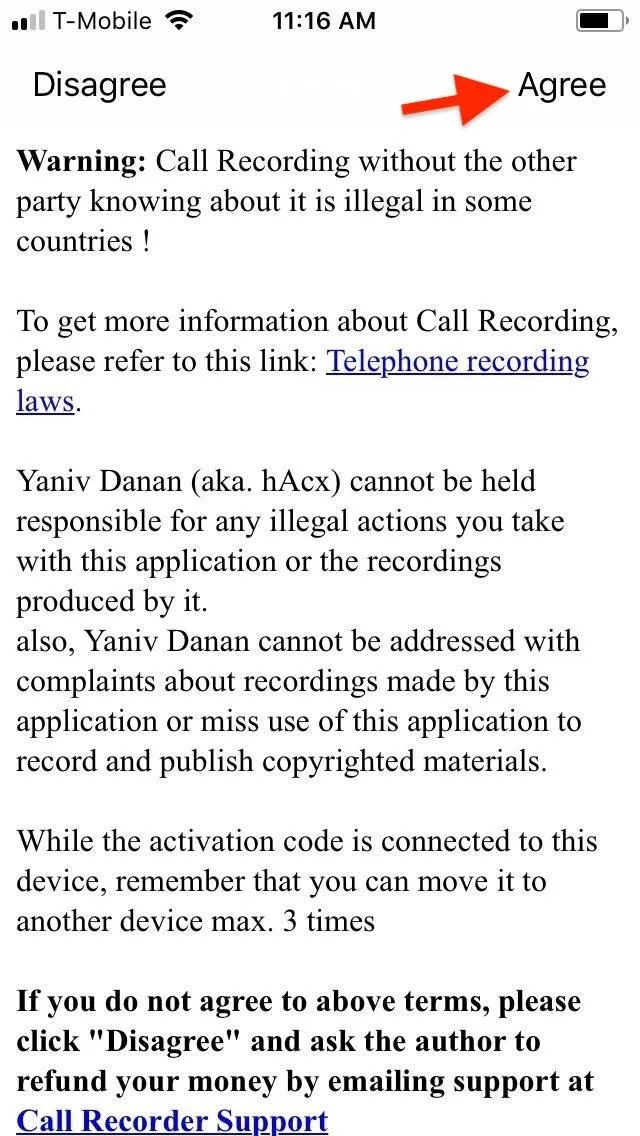
The activation code will automatically populate the "Code" box within the app's Activation page. Input your email address in the field provided, then tap on "Activate" to finalize your purchase. Tap on "Agree" on the following disclaimer page to start using Call Recorder.


Step 4: Set Up Call Recorder
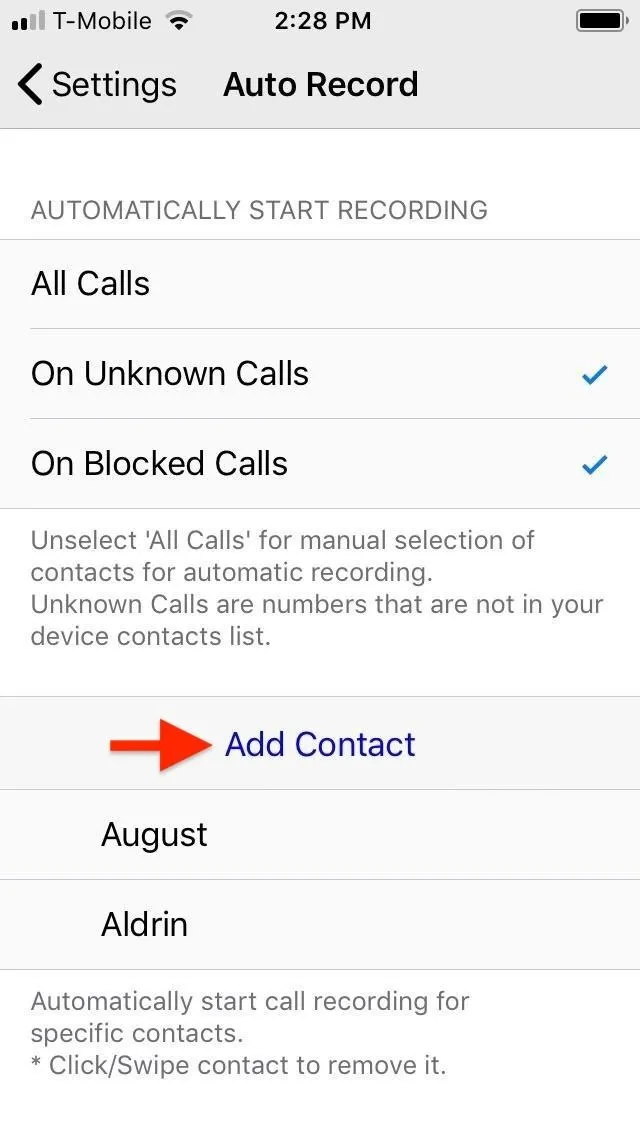
By default, Call Recorder is set to automatically record all phone calls — both incoming and outgoing. Though you can't set to record calls on either an incoming- or outgoing-only basis, you can set the feature to work for specific contacts, in addition to phone calls that originate from either unknown or blocked numbers.
To set which contacts and numbers to set automatic call recording for, in Call Recorder, tap on the hamburger menu icon in the upper-left. Next, select "Settings" from the menu prompt that appears, then hit "Auto Record" on the following page.
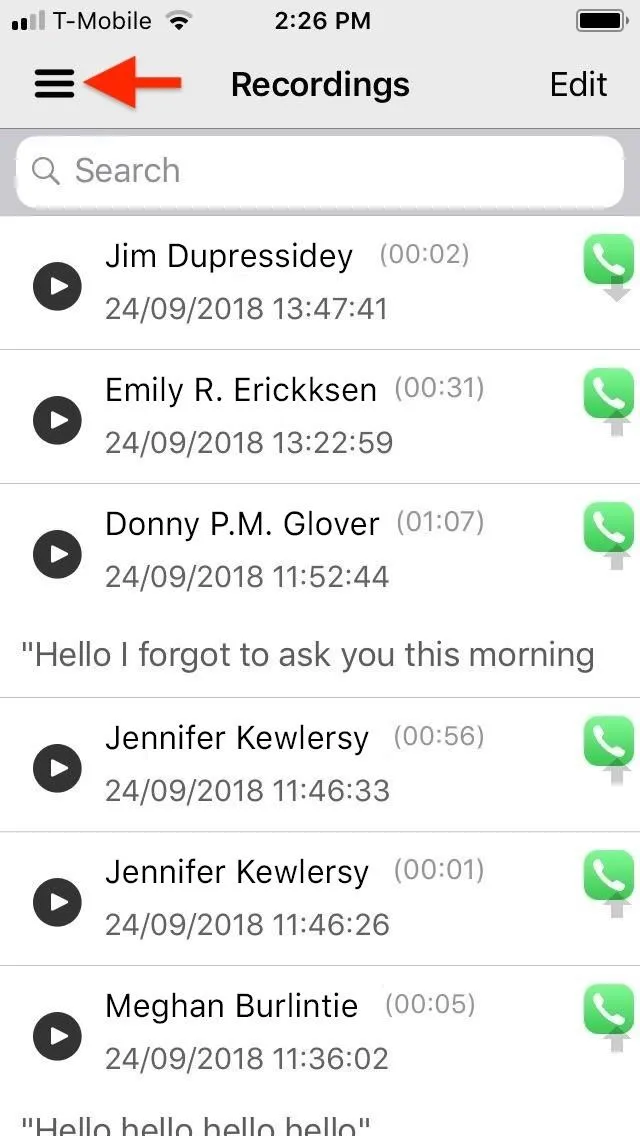
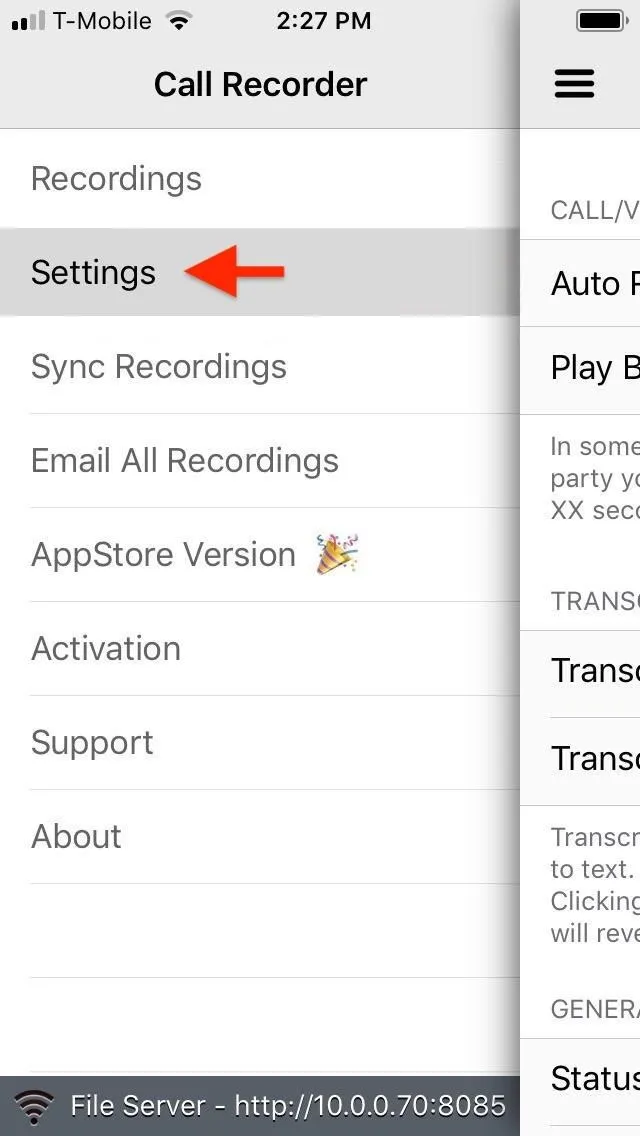
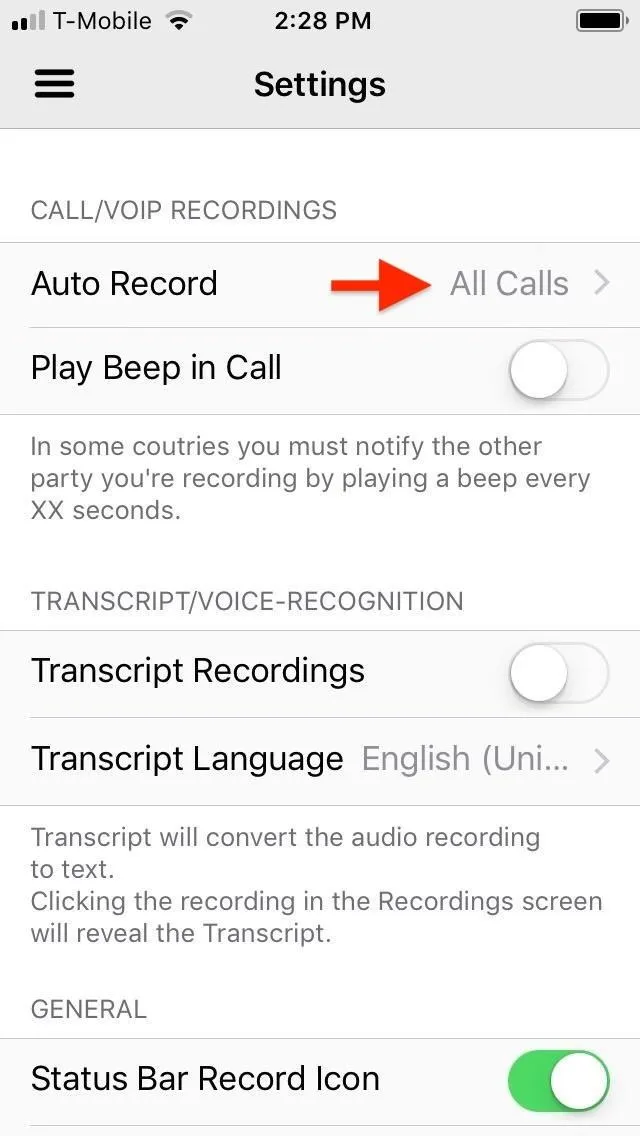


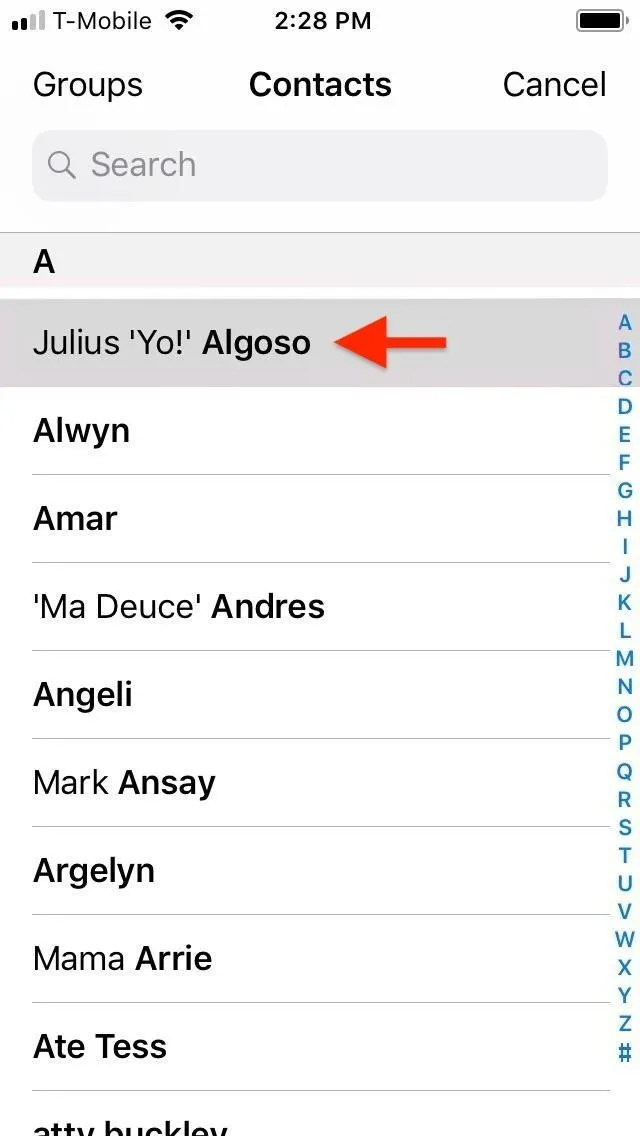
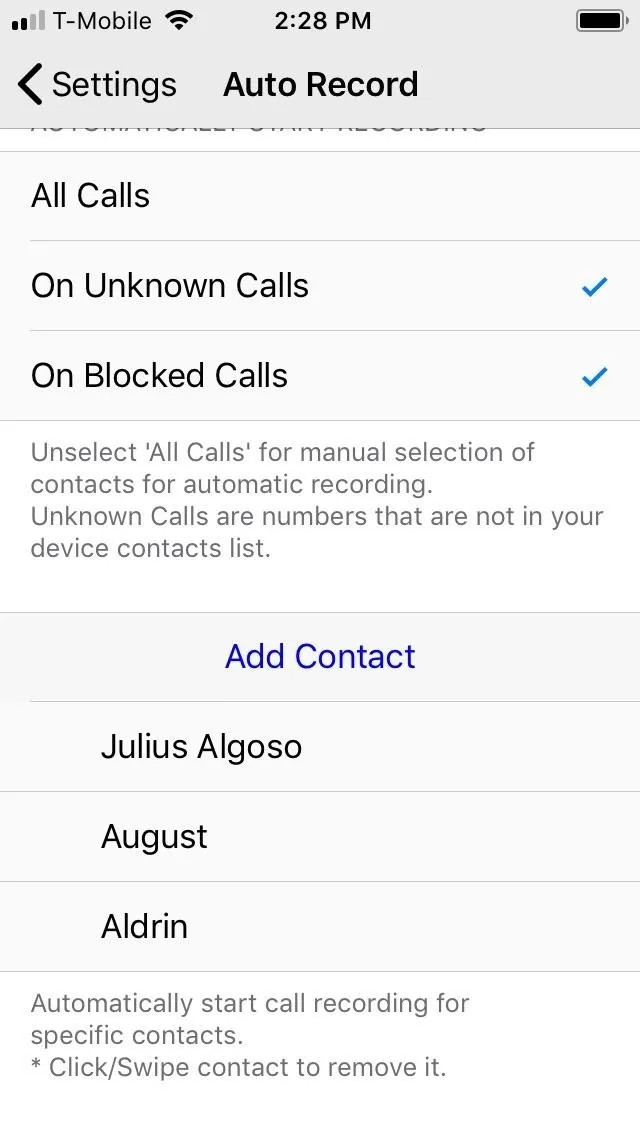
Now, tap on both "On Unknown Calls" and "On Blocked Calls" to set recording only for phone calls within those categories. Once you've done so, tap on "Add Contact," and select a contact on the following page to add it to your record list. You can only add one contact at a time, so repeat the process over again until you've added all the contacts you want to set automatic call recording for.


Step 5: Record Both Incoming & Outgoing Calls
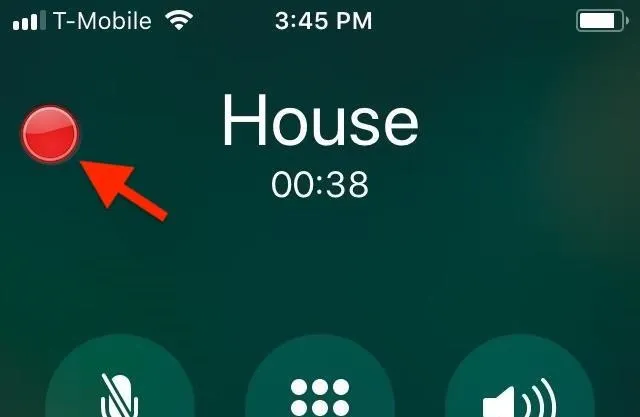
Once you've finished setting up the Call Recorder tweak, any phone calls you make or receive from designated contacts, unknown, and blocked numbers will automatically trigger call recording. To stop recording at any time during the conversation, tap on the blinking red record button in the upper-left. Otherwise, the recording will stop as soon as the call ends.
It's worth noting that Call Recorder's red record button stays embedded in your iPhone's in-call screen for all phone calls, and it gives you the ability to manually record any conversation on the fly by hitting the record button. So if it's not blinking red, you know it's not recording, but you can tap it to start recording, in which case it would be blinking red.
Step 6: Listen to the Call Recordings
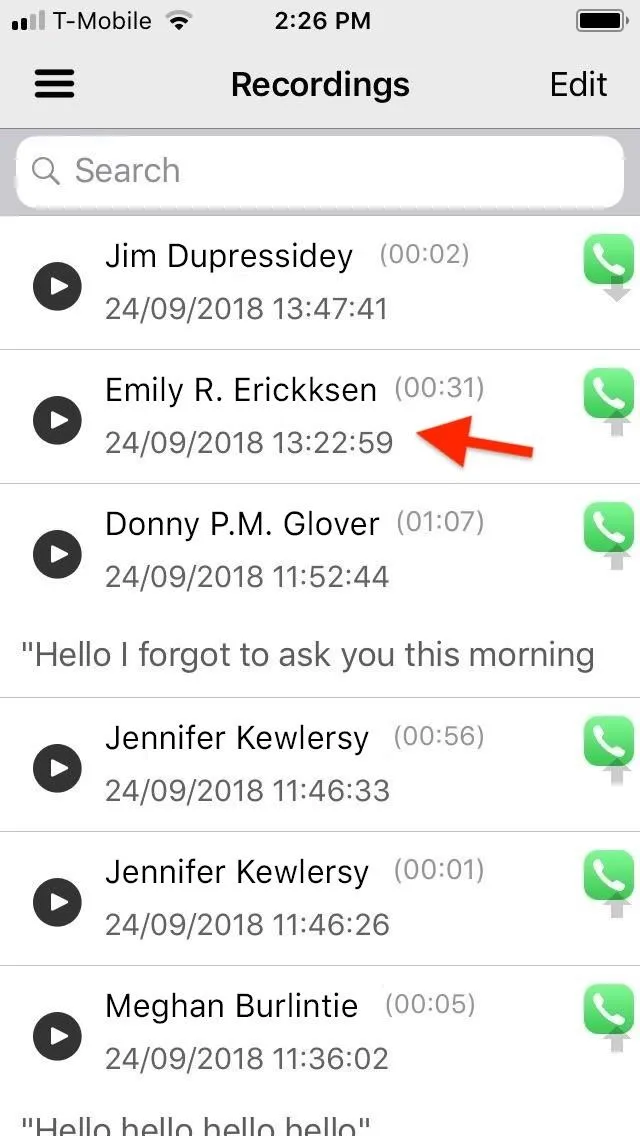
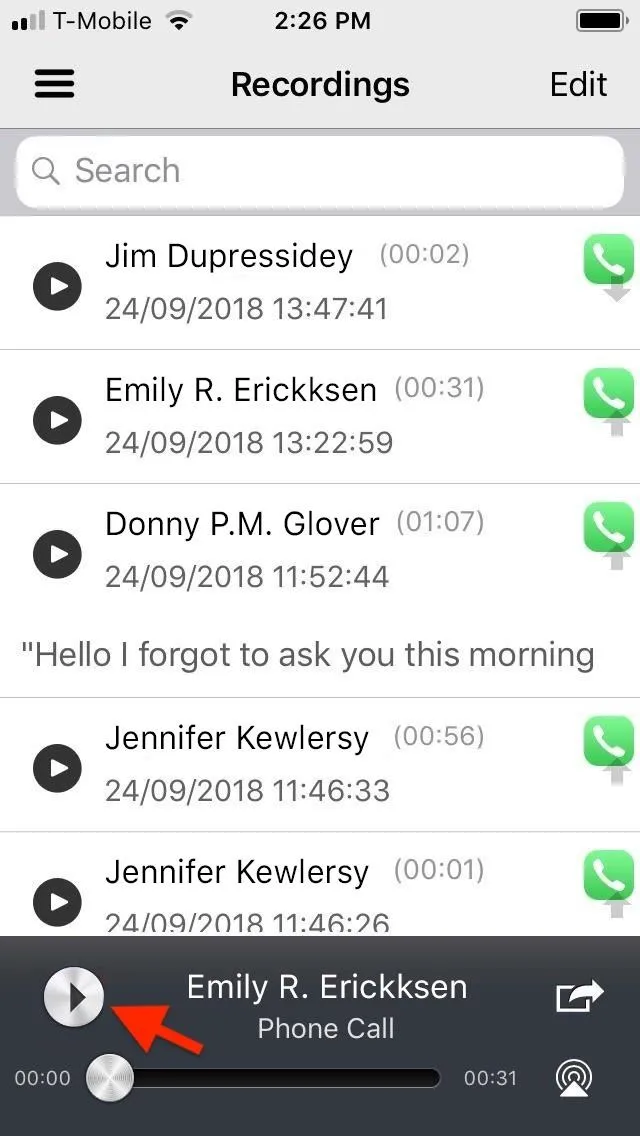
To listen to your recordings, simply open the app, tap on a target recording, and hit the silver play button on the bottom of the page to listen to the conversation.


Step 7: Share or Transcribe Recordings
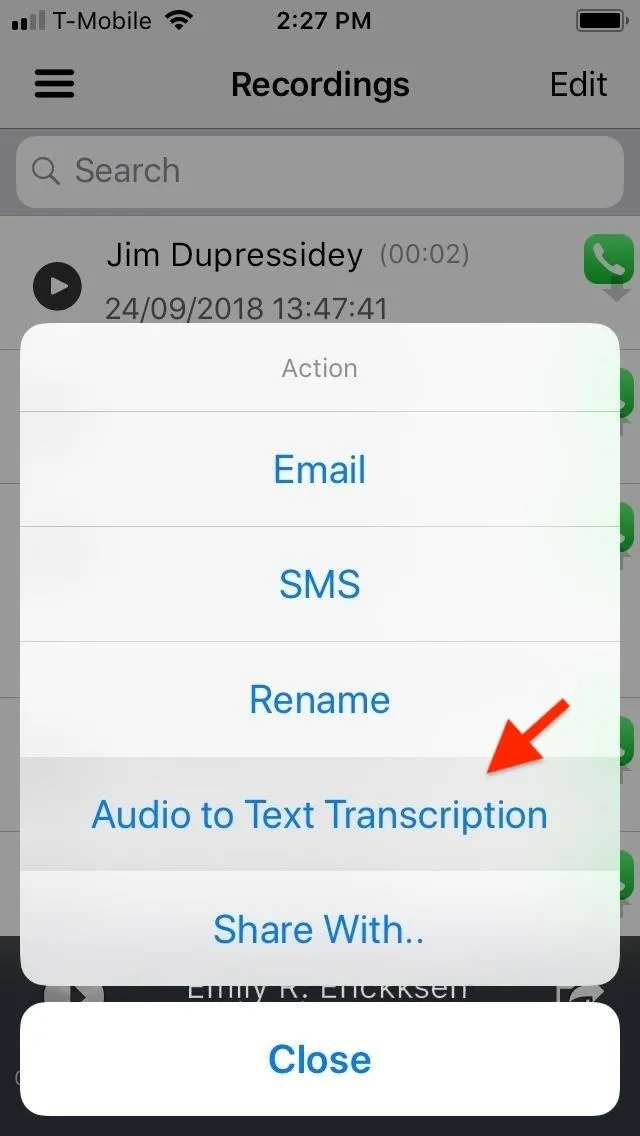
Call Recorder also provides you with numerous options such as sharing via either email or text, renaming a recording to make sorting easier, etc. To access the Action menu, perform a long-press on the target recording and choose the action you want to perform from the prompt that appears.
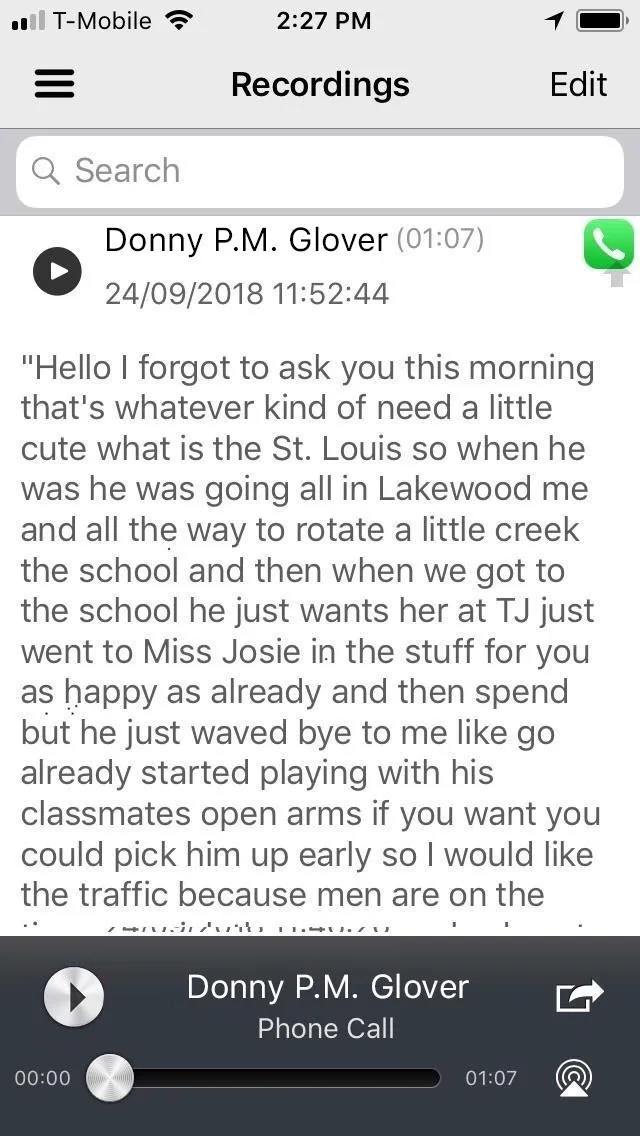
For example, tapping "Audio to Text Transcription" will automatically transcribe your recording, though the process can be hit or miss as seen from the screenshot below.


This is not the only way to record phone calls on your iPhone. If you're not jailbroken, you can use paid subscription services found in the App Store, and there's a Google Voice hack you can also try out. For more info on those and other ways, see our roundup of call recording possibilities.
- Follow Gadget Hacks on Pinterest, Twitter, YouTube, and Flipboard
- Sign up for Gadget Hacks' daily newsletter or weekly Android and iOS updates
- Follow WonderHowTo on Facebook, Twitter, Pinterest, and Flipboard
Cover image and screenshots by Amboy Manalo/Gadget Hacks


Comments
No Comments Exist
Be the first, drop a comment!